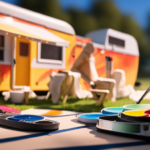
Imagine this: you’re cruising down the highway, the breeze blowing through your hair, with endless possibilities of adventure ahead. However, there’s a problem – your camper’s outer appearance lacks vibrancy. Don’t worry, I am here to help you navigate through the steps of revitalizing your camper with a new paint job.
In this article, I’ll share my expertise on how to transform your camper into a rolling work of art.
Before diving into the painting process, it’s crucial to assess the condition of your camper’s exterior. From there, we’ll clean and prep the surface, ensuring a smooth canvas for your masterpiece.
Choosing the right paint type and color scheme is essential, as it sets the tone for your camper’s new look. Then, armed with the necessary supplies and equipment, we’ll prime the surface, apply the base coat, and let it dry.
But we won’t stop there. Feel free to unleash your creativity with unique designs and patterns that reflect your personality.
Finally, we’ll seal and protect the paint with a clear coat finish, ensuring your camper is ready to withstand the elements.
So, let’s get started on this exciting journey of transforming your camper into a vibrant and eye-catching mobile home.
Key Takeaways
- Assess the condition of the camper’s exterior before painting
- Clean and prepare the surface properly for better adhesion and durability
- Choose the right type of paint and color scheme for a personalized design
- Seal and protect the paint with a clear coat finish for long-lasting vibrancy and protection.
Assess the Condition of Your Camper’s Exterior
Now, before we dive into the exciting world of camper painting, let’s take a moment to assess the condition of your trusty outdoor companion’s exterior. Evaluating the damage and determining necessary repairs is crucial to ensure a successful and long-lasting paint job.
Start by thoroughly inspecting the camper’s exterior for any signs of wear and tear. Look out for dents, scratches, rust, or any other damage that might require attention before painting. Take note of the areas that need repair and make a list of the necessary materials and tools. It’s essential to address these issues before moving forward with the painting process to achieve a smooth and flawless finish.
Once you have evaluated the damage and identified the necessary repairs, it’s time to clean and prep the surface. This step is crucial as it ensures the paint adheres properly and lasts for years to come. Begin by washing the camper thoroughly to remove dirt, dust, and any other debris. Use a mild detergent and a soft sponge or brush to avoid scratching the surface. After rinsing off the soap, let the camper dry completely before moving on to the next step.
By thoroughly assessing the condition of your camper’s exterior and taking the necessary steps to repair and prepare the surface, you’ll be well on your way to a successful camper painting project.
Clean and Prep the Surface
First, you’ll want to make sure you’ve thoroughly cleaned and prepped the surface of your recreational vehicle to ensure a smooth and long-lasting finish. Did you know that research shows that proper surface preparation can increase the lifespan of the paint job by up to 50%? Before diving into painting your camper, it’s essential to give it a good cleaning. Start by removing any dirt, grime, or grease using a mild detergent and water solution. Scrub the surface gently with a soft-bristle brush, paying extra attention to areas prone to buildup, such as the roof and wheel wells. Rinse thoroughly and allow it to dry completely before moving on to the next step.
Once the camper is clean, it’s time to prepare the surface for painting. This step is crucial as it ensures the paint adheres properly and provides a smooth, professional-looking finish. Begin by inspecting the entire surface for any imperfections, such as scratches, dents, or rust spots. Use sandpaper or a wire brush to smooth out these areas and create a uniform surface. Fill any holes or gaps with a suitable filler and sand it down until it’s flush with the surrounding area.
To engage the audience further, here’s a helpful table outlining some common cleaning techniques and surface preparation methods:
| Cleaning Techniques | Surface Preparation Methods |
|---|---|
| Pressure Washing | Sanding |
| Chemical Cleaners | Priming |
| Abrasive Scrubbing | Filling and Smoothing |
With the surface now clean and prepped, you can move on to the next step: choosing the right paint type for your camper.
Choose the Right Paint Type for Your Camper
Once you’ve thoroughly cleaned and prepped the surface, it’s time to select the perfect paint type for your RV. Choosing the right paint type for your camper is crucial to ensure a long-lasting and durable finish.
When evaluating the durability of different paint options, consider factors such as weather resistance, UV protection, and resistance to chipping and peeling.
One popular choice for painting campers is acrylic enamel paint. This type of paint is known for its durability and long-lasting finish. It provides excellent protection against the elements and is resistant to fading, cracking, and peeling. Additionally, acrylic enamel paint is easy to apply and dries quickly, allowing you to complete the project in a timely manner.
Another option to consider is automotive paint. This type of paint is designed to withstand harsh conditions and provides a high-gloss finish. Automotive paint is known for its durability and resistance to chipping and scratching. It is also available in a wide range of colors, allowing you to customize your camper’s appearance to your liking.
When selecting a paint type for your camper, it’s essential to choose one that suits your specific needs and preferences. Once you’ve chosen the right paint type, you can move on to the next step, which is selecting a color scheme and planning your design for a truly personalized look.
Select a Color Scheme and Plan Your Design
To achieve a truly personalized look, envision the color scheme and carefully plan your design for a camper that reflects your unique style and personality. When selecting colors, consider the overall theme and mood you want to create. Whether you prefer a vibrant and bold palette or a more subdued and calming one, the color selection will set the tone for your camper’s interior and exterior.
Look for design inspiration in various sources such as magazines, websites, or even nature itself. Take note of color combinations and patterns that catch your eye and incorporate them into your design.
To help you in the planning process, here are four key considerations:
-
Cohesion: Ensure that the colors you choose for different areas of your camper blend harmoniously together.
-
Contrast: Add interest by incorporating contrasting colors that create visual impact.
-
Balance: Achieve a balanced look by distributing colors evenly throughout your camper’s interior and exterior.
-
Personal Touch: Infuse your own personal style by incorporating unique design elements or patterns that resonate with you.
Now that you have a clear vision of your color scheme and design, it’s time to gather the necessary supplies and equipment to bring your camper transformation to life.
Gather the Necessary Supplies and Equipment
Gather all the essential supplies and equipment needed to bring your camper transformation to life and hit the road in style. The first step is choosing the right paint color for your camper. Consider the overall aesthetic you want to achieve and the colors that’ll complement your design. Whether you prefer a vibrant color or a more subtle tone, make sure it reflects your personality and enhances the overall look of your camper.
Once you’ve selected the perfect paint color, it’s crucial to properly prep the surface before painting. This involves thoroughly cleaning the camper to remove any dirt, grime, or residue. Use a mild detergent and water solution to wash the exterior, and be sure to dry it completely before moving on to the next step. Additionally, inspect the surface for any imperfections, such as rust or chipped paint, and address them accordingly.
In terms of supplies and equipment, you’ll need paint brushes, rollers, and paint trays to apply the paint. Depending on the size of your camper, you may also need a paint sprayer for a more efficient and even coverage. Don’t forget to gather other essentials like painter’s tape, drop cloths, and sandpaper for any necessary touch-ups or smoothing of the surface.
Now that you’ve gathered all the necessary supplies and equipment, it’s time to move on to the next step: masking off and protecting areas you don’t want to paint. This’ll ensure a clean and professional-looking finish for your camper transformation.
Mask Off and Protect Areas You Don’t Want to Paint
Make sure to carefully cover and tape off windows, doors, and any other areas you want to keep clean and free from paint. One of the most important steps in painting a camper is properly masking off and protecting the areas you don’t want to paint. This will ensure clean lines and a professional finish.
When it comes to masking techniques, there are a few options to consider. One popular method is using painter’s tape to create clean edges and protect surfaces. Make sure to press the tape down firmly to prevent any paint from seeping underneath. Another option is using plastic sheeting or drop cloths to cover larger areas such as the floor or furniture inside the camper.
To protect delicate surfaces like windows or trim, consider using products specifically designed for this purpose. There are various types of masking films and tapes available that provide excellent protection while still allowing for easy removal. It’s important to choose the right products for the job to ensure the best results.
Now that you’ve masked off and protected the areas you don’t want to paint, it’s time to move on to priming the surface for better adhesion.
Prime the Surface for Better Adhesion
Once the delicate areas are secure and protected, it’s time to lay down a foundation for optimal paint adherence. Priming the surface is a crucial step in the painting process that can greatly improve paint durability and troubleshoot common painting problems. Here’s how to do it right:
-
Choose the right primer: Select a primer that’s specifically designed for the material of your camper’s surface. This ensures maximum adhesion and a long-lasting finish.
-
Prepare the surface: Clean the surface thoroughly, removing any dirt, grease, or loose paint. Sand down any rough areas or old paint that’s peeling to create a smooth surface for the primer to adhere to.
-
Apply the primer: Use a high-quality brush or roller to apply the primer evenly over the entire surface. Make sure to follow the manufacturer’s instructions for drying time and number of coats.
By priming the surface, you create a strong bond between the paint and the camper’s surface, preventing peeling, cracking, and other issues. Once the primer’s dried completely, you’re ready to move on to the next step of applying the base coat and allowing it to dry.
Now, it’s time to apply the base coat and allow it to dry, which’ll serve as the foundation for your final paint job.
Apply the Base Coat and Allow it to Dry
Get ready to see your camper transform as you apply the smooth and flawless base coat and watch it dry into a stunning foundation for your dream paint job.
To achieve a smooth base coat finish, there are a few tips you should keep in mind. First, make sure to thoroughly clean and dry the surface before applying the base coat. This’ll ensure proper adhesion and prevent any imperfections. Additionally, lightly sanding the surface will help create a smooth and even texture for the paint to adhere to.
When applying the base coat, use even strokes and apply thin layers. This’ll prevent drips and allow for better control over the final result.
One common mistake to avoid when applying the base coat is using too much paint. Applying thick layers can lead to uneven drying and a less professional finish. Instead, opt for multiple thin coats, allowing each layer to dry before applying the next.
Finally, be patient and allow the base coat to fully dry before moving on to the next step of adding any desired designs or patterns. This’ll ensure that the base coat is fully set and ready for the next stage of your camper painting project.
Add any Desired Designs or Patterns
Let your creativity take the wheel and bring your camper to life with an array of eye-catching designs and patterns. Design inspiration can come from anywhere – nature, art, or even your favorite travel destinations.
Consider incorporating elements like waves, mountains, or palm trees to create a beachy vibe, or opt for geometric shapes and bold colors for a modern look. Painting techniques such as stenciling, freehand, or using painter’s tape can help you achieve precise and professional-looking designs.
Before you begin, make sure to clean the surface of the camper thoroughly and let it dry completely. This will ensure that the paint adheres properly. Use high-quality acrylic or enamel paints that are suitable for outdoor use and can withstand various weather conditions.
Start by sketching your design lightly with a pencil on the camper’s surface. This will serve as a guide while painting.
When applying the designs and patterns, take your time and work in small sections. Use thin layers of paint and allow each layer to dry before adding additional details. This will prevent smudging and ensure clean lines.
Remember to have fun and experiment with different colors and techniques to create a unique look for your camper.
Once you have finished adding the designs and patterns, you can seal and protect the paint with a clear coat finish. This will provide an extra layer of protection against the elements and help your design last longer.
Seal and Protect the Paint with a Clear Coat Finish
Enhance the longevity of your stunning designs and patterns by sealing them with a clear coat finish, ensuring their protection against the elements while adding a glossy sheen to your creation.
Applying a clear coat finish to your painted camper has several benefits. Firstly, it provides a protective layer that shields the underlying paint from UV rays, moisture, and other environmental factors that can cause fading or damage over time. This not only preserves the vibrancy of your designs but also extends the lifespan of your camper’s paint job.
To apply the clear coat finish effectively, there are a few tips to keep in mind. First and foremost, make sure to thoroughly clean and dry the painted surface before application. Any dirt or moisture left on the surface can affect the adhesion and smoothness of the clear coat. Additionally, it’s essential to apply the clear coat in thin, even layers to avoid drips or unevenness. Using a high-quality brush or spray gun can help achieve a professional finish.
Another tip is to allow sufficient drying time between each coat. This ensures that each layer has enough time to cure properly and prevents any bubbling or wrinkling of the clear coat. Lastly, consider applying multiple coats for added durability and protection. The more coats you apply, the thicker the protective layer will be.
By following these tips and using a clear coat finish, you can seal and protect your painted camper effectively, ensuring that your designs remain vibrant and beautiful for years to come.
Frequently Asked Questions
How can I determine if my camper’s exterior needs to be painted?
To determine if my camper’s exterior needs a fresh coat of paint, I carefully assess its condition.
First, I inspect for any signs of peeling, cracking, or fading paint.
Then, I check for any rust or corrosion on the metal surfaces.
Additionally, I look for any water damage or soft spots on the walls.
Finally, I evaluate the overall appearance and consider if a new paint job would enhance its aesthetic appeal.
What are the steps to properly cleaning and prepping the surface before painting?
To properly prepare the surface for painting, it’s essential to focus on surface preparation and cleaning techniques.
First, remove any dirt, grime, or loose paint by scrubbing the surface with a mild detergent and water. Rinse thoroughly and allow it to dry completely.
Next, inspect for any cracks or damages and repair them accordingly.
Finally, sand the surface to create a smooth and even base for the paint to adhere to.
What factors should I consider when choosing the right paint type for my camper?
When choosing the right paint type for my camper, I consider several factors. First, I think about whether I want an oil-based or water-based paint. Oil-based paints offer durability and a smooth finish, while water-based paints are easier to clean up.
Next, I consider whether I prefer a matte or glossy finish. Matte finishes have a more understated look, while glossy finishes provide a sleek and shiny appearance.
Additionally, I take into account my personal style and the potential resale value when selecting the color scheme for my camper.
How do I go about selecting a color scheme and planning my design for the camper?
When planning a color scheme and design for your camper, there are numerous options to consider. Start by brainstorming colors that resonate with your personal style and the overall vibe you want to create.
Consider using color palettes that complement each other and evoke a specific theme or mood. To create a unique design, think about incorporating patterns, textures, or even decals.
Don’t be afraid to get creative and experiment with different combinations to make your camper truly stand out.
What are the necessary supplies and equipment needed for painting a camper?
To prepare and clean a camper for painting, you’ll need several supplies and equipment. Start by gathering masking tape, plastic sheeting, and drop cloths to protect the surrounding areas.
You’ll also need sandpaper or a sander to smooth the surfaces, as well as a degreaser or cleaner to remove any dirt or grime.
For the actual painting process, you’ll need a high-quality paint sprayer or brushes and rollers, along with the appropriate paint and primer for the camper’s exterior.
Can I use the same painting techniques for painting the interior of a camper as painting the exterior of a camper?
When it comes to painting a camper interior versus painting the exterior, different techniques may be required. While both involve preparing and priming the surfaces, the materials used may vary. Interior painting may involve more focus on durability and resistance to moisture, while exterior painting may prioritize weatherproofing and protection against UV rays. Therefore, it is important to consider the specific requirements for each project when painting a camper interior versus its exterior.
Conclusion
In conclusion, painting a camper can be a fun and rewarding project that allows you to personalize your home away from home. By following the steps outlined in this article, you can transform the exterior of your camper and give it a fresh new look.
Remember to assess the condition of your camper, properly clean and prep the surface, choose the right paint type, and plan your design carefully. With the right supplies and a little creativity, you can create a masterpiece on wheels.
So go ahead and get started, and soon you’ll be cruising in style with your uniquely painted camper! And remember, as the saying goes, "A journey of a thousand miles begins with a single brushstroke." Happy painting!

