Connect with us

Beginners Guides

How To Hook Up Water To A Camper

Published

on

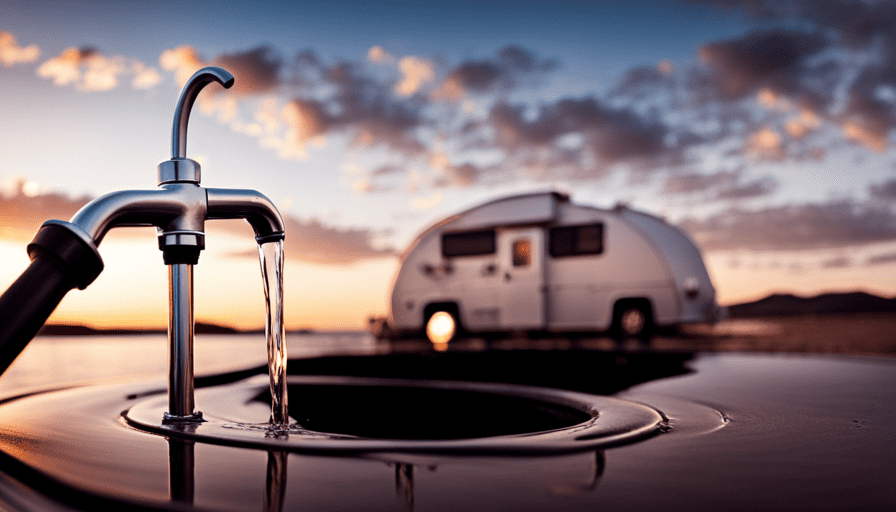
An image showcasing a close-up of a camper's water hookup process: a threaded white water hose securely attached to a silver faucet, with water flowing smoothly into a camper's water inlet valve

Connecting water to a camper might appear challenging, but don’t worry! I’m here to walk you through each step of the process.

Picture this: you’re in the middle of a breathtaking campground, surrounded by majestic trees and pristine nature. The only thing missing is a refreshing shower or a clean glass of water. That’s where hooking up water to your camper comes in. With the right equipment and a little know-how, you’ll be able to enjoy all the comforts of home while on your camping adventures.

In this article, I’ll walk you through the process of connecting your camper to a water source. We’ll start by gathering the necessary equipment and locating the water source.

Then, we’ll connect the water hose to the source and attach it to your camper’s water inlet. After that, we’ll turn on the water supply and prime the water pump if needed. We’ll test the water system to ensure everything is working properly, and then we’ll disconnect the water supply when you’re ready to hit the road.

Finally, I’ll give you some tips on properly storing and maintaining your equipment. So, let’s dive in and get your camper hooked up to water!

Advertisement

Key Takeaways

  • Gather necessary equipment
  • Connect the water hose securely and leak-free
  • Prime the water pump
  • Test the water system

Gather the Necessary Equipment

Now that you’ve got your camper ready for adventure, it’s time to gather all the necessary equipment to hook up water and make your camping experience even more convenient and enjoyable!

The first step is choosing the right water hose. It’s important to select a hose that is specifically designed for RV use. Look for a hose that is drinking water safe and labeled as suitable for potable water. These hoses are typically made from materials that won’t impart any unwanted taste or odor to your water supply. Additionally, make sure the hose is long enough to reach from the water source to your camper without any kinks or tangles.

Once you have your hose, the next step is ensuring proper water pressure. Most RVs require a water pressure of around 40-60 psi. To achieve this, consider using a water pressure regulator. This handy device will help protect your camper’s plumbing system from any potential damage caused by high water pressure. Simply attach the regulator to the hose before connecting it to the water source.

With the right hose and proper water pressure, you’re now ready to locate the water source. This can typically be found at designated water hook-up points in campgrounds or RV parks. Look for a water spigot or hydrant and connect your hose securely.

Locate the Water Source

First, you’ll need to find the nearby river or stream where your camper can quench its thirst, just like a traveler seeking an oasis in the desert. Finding nearby campsites is crucial for this step, as they often provide access to water sources.

Look for campsites that are situated near rivers, streams, or lakes. These natural water sources are ideal for hooking up water to your camper.

Advertisement

Once you’ve located a suitable campsite, the next step is to choose the right water hose. It’s important to select a hose that’s specifically designed for RV use. These hoses are typically made of non-toxic materials that won’t impart any unpleasant taste or odor to your water supply. They also have fittings that are compatible with RV water systems.

When connecting the water hose to the source, make sure to use a hose connector that matches the water source’s fittings. This will ensure a secure and leak-free connection. Attach one end of the hose to the water source and the other end to the camper’s water inlet. Make sure the connections are tight to prevent any water leakage.

With the water hose securely connected, you’re ready to move on to the next step of the process. Now, let’s discuss how to connect the water hose to your camper’s water system.

Connect the Water Hose to the Source

Once the suitable campsite has been found near a water source, it’s time to connect the hose to ensure a secure and leak-free connection. Water pressure regulation is crucial to prevent any damage to the camper’s plumbing system. To achieve this, a water pressure regulator should be attached to the hose before connecting it to the water source. This device regulates the water pressure, ensuring a safe and consistent flow.

When selecting a water hose, it is important to consider its material and length. There are two common types of water hoses available for campers: vinyl and reinforced rubber hoses. Vinyl hoses are lightweight and less expensive, but they may kink easily and have lower durability. On the other hand, reinforced rubber hoses are more durable and resistant to kinking, but they are heavier and pricier.

Advertisement

To connect the water hose to the source, follow these steps:

  1. Attach a water pressure regulator to the hose.
  2. Connect one end of the hose to the water source, ensuring a tight connection.
  3. Open the water source slowly to avoid sudden pressure surges.
  4. Check for any leaks or drips around the connections.
  5. Once everything is secure, transition to attaching the hose to the camper’s water inlet.

By following these steps, you can ensure a reliable water supply throughout your camping trip. Now, let’s move on to the next section and discuss how to attach the hose to the camper’s water inlet.

Attach the Hose to the Camper’s Water Inlet

To successfully connect the hose to the camper’s water inlet, a secure and tight attachment is essential. First, make sure the camper’s water inlet is clean and free of debris to prevent clogs or blockages in the water system. Next, align the end of the water hose with the camper’s water inlet and push it onto the inlet, ensuring a snug fit. Some campers may have a screw-on connection, so be sure to tighten it properly. Check for leaks or drips after attaching the hose. If there are any leaks, tighten the connections or replace damaged parts.

Properly securing the hose to the camper’s water inlet is crucial for maintaining the water system. Regularly inspect the connections for signs of wear or damage. It’s also recommended to use a water pressure regulator to protect the camper’s plumbing system from high water pressure, preventing potential damage to pipes and fittings.

Now that the hose is securely attached to the camper’s water inlet, it’s time to turn on the water supply.

Turn on the Water Supply

Now, let the refreshing rush of liquid life flow through your hose by simply twisting the valve and welcoming the water wonderland into your camper.

Advertisement

Before you turn on the water supply, it’s important to troubleshoot any potential issues to ensure a smooth flow of water. Here are some tips to help you troubleshoot water supply issues:

  • Check the water pressure: Make sure the water pressure is within the recommended range for your camper. Low water pressure can indicate a problem with the water source or a blockage in the system.

  • Inspect the hose: Check for any kinks, leaks, or damages in the hose. These can cause water supply issues and affect the overall flow of water.

  • Test the connections: Ensure that all connections are tight and secure. Loose connections can lead to leaks and water wastage.

  • Clean the water filter: If your camper has a water filter, clean or replace it regularly to prevent clogs and maintain optimal water flow.

  • Bleed the air: Sometimes, air can get trapped in the water lines, causing a disruption in the water supply. To fix this, open all faucets and let the water run for a few minutes to bleed out the air.

In addition to troubleshooting, it’s important to conserve water while camping. Here are some tips for water conservation:

  • Take shorter showers: Limit your shower time to conserve water.

  • Collect and reuse water: Use a basin to collect water while washing dishes or brushing your teeth, and reuse it for other purposes.

  • Fix leaks promptly: Check for any leaks in your camper’s plumbing system and fix them as soon as possible to prevent water wastage.

Now that you know how to troubleshoot water supply issues and conserve water while camping, it’s time to move on to the next step: checking for leaks.

Check for Leaks

After successfully turning on the water supply, the next step is to check for any leaks. This is a crucial step to ensure that the water system is properly connected and functioning. Common causes of leaks include loose fittings, damaged pipes, or faulty connections. Troubleshooting leaks is essential to prevent water damage and to maintain the integrity of your camper.

To check for leaks, follow these steps:

Advertisement
  1. Start by visually inspecting all the connections, fittings, and pipes for any signs of water leakage.
  2. Use a dry cloth or tissue to wipe the fittings and connections. If there is any moisture, it indicates a leak.
  3. Pay close attention to areas where pipes and fittings meet, as these are common areas for leaks to occur.
  4. If you notice a leak, tighten the fittings or connections using a wrench or adjust them as needed.
  5. Repeat the process of wiping and checking for leaks until all connections are secure and dry.

Remember to be thorough in your inspection, as even a small leak can lead to significant water damage over time. Once you have ensured that there are no leaks, you can proceed to prime the water pump (if applicable).

Now, let’s move on to priming the water pump (if applicable).

Prime the Water Pump (If Applicable)

Before we get started, let’s make sure the water pump’s properly primed (if needed), so you can enjoy a seamless and refreshing camping experience. Priming the water pump’s crucial to ensure proper water flow in your camper. To prime the water pump, you first need to locate it. It’s usually found near the water tank or inside a compartment.

Once located, make sure the pump’s turned off before proceeding.

To prime the water pump, you’ll need to connect a water hose to the camper’s fresh water inlet. When choosing a water hose, opt for one that’s specifically designed for RV use. These hoses’re made from non-toxic materials and’re resistant to kinking and UV damage. Attach one end of the hose to the fresh water inlet and the other end to a water source.

Next, turn on the water source and open a faucet inside the camper. This’ll allow water to flow through the hose and into the system, helping to remove any air pockets and prime the pump. Keep the faucet open until a steady stream of water flows out without any sputtering or air bubbles.

Advertisement

With the water pump properly primed, you can now move on to the next step and test the water system for any leaks or issues.

Test the Water System

To ensure a hassle-free camping experience, it’s time to put the water system to the test and make sure everything is in working order. Testing the water system is an essential step to avoid any issues while on the road.

Start by turning on the water pump and checking for any leaks or unusual noises. If there are any issues, troubleshoot them by checking the pump’s connections and ensuring it’s properly primed.

Next, turn on the faucets and inspect for consistent water flow. If the water flow is weak or there are water spurts, it could indicate a clogged filter or air in the system. In this case, clean or replace the filter and bleed the system to remove any trapped air.

Additionally, check the hot water system by running the hot water faucet and ensuring it heats up properly.

Advertisement

Finally, test the toilet, shower, and any other water appliances to ensure they’re functioning correctly.

By taking the time to test the water system, you can identify and address any issues before hitting the road.

To disconnect the water supply, follow the subsequent section.

Disconnect the Water Supply

Once you’ve ensured a smooth water system, it’s time to disconnect the water supply and prepare for your camping adventure. To properly disconnect the water supply, follow these steps:

  • Turn off the water source: Locate the water valve or faucet that supplies water to your camper and turn it off. This prevents any water from flowing into the system while you disconnect it.

  • Inspect the connections: Take a close look at the water connections to make sure they’re secure and free from any leaks. If you notice any issues, such as loose connections or leaks, now’s the time to address them before disconnecting.

  • Disconnect the hoses: Begin by unscrewing the hose connections from the camper’s water inlet and the water source. Be careful not to twist or damage the hoses during this process.

Once you’ve successfully disconnected the water supply, you’re ready to move on to the next step of your camping adventure. In the next section, we’ll discuss how to properly store and maintain the equipment for future use.

Advertisement

Properly Store and Maintain the Equipment

Now that the water supply is disconnected, it’s time to ensure that your equipment is properly stored and maintained for future use, allowing you to relive those unforgettable camping memories.

Proper storage techniques and regular maintenance are essential to keep your water hookup equipment in good condition and ready for your next adventure.

When it comes to storing your water hookup equipment, it’s important to keep it in a clean and dry area. Make sure to remove any dirt or debris from the hoses and fittings before storing them. It’s also a good idea to coil the hoses neatly to prevent any kinks or tangles. Storing your equipment in a designated container or bag can help protect it from dust and damage.

Regular maintenance is crucial for the longevity of your water hookup equipment. Inspect the hoses and fittings for any signs of wear or damage, such as cracks or leaks. Replace any damaged components promptly to avoid any issues during your next camping trip. It’s also recommended to flush out the hoses periodically to remove any buildup or contaminants.

By following proper storage techniques and conducting regular maintenance, you can ensure that your water hookup equipment remains in optimal condition, ready to provide you with a reliable water supply during your camping adventures.

Advertisement

Frequently Asked Questions

How do I choose the right water hose for my camper?

When it comes to selecting the perfect water hose for your camper, there are a few key factors to consider.

Firstly, you’ll want to choose a hose that’s specifically designed for RV use, as it’ll have the necessary durability and flexibility.

Additionally, look for a hose with a built-in water filter, ensuring that you have clean and safe water for your camper.

Lastly, don’t forget to regularly sanitize your water system to maintain optimal hygiene and prevent any potential issues.

Can I use a regular garden hose for connecting water to my camper?

Yes, you can use a filter on your garden hose for connecting water to your camper. It’s recommended to use a filter to remove impurities and ensure clean water supply. However, it’s important to check the compatibility of the filter with your garden hose and camper’s water system.

Advertisement

As for alternative methods, besides using a garden hose, you can consider using a dedicated RV water hose or a water tank with a pump for a more efficient and reliable water connection.

Is it necessary to use a water pressure regulator when hooking up water to a camper?

Using a water pressure regulator when connecting water to a camper is highly recommended. It’s like having a guardian angel for your plumbing system, ensuring a smooth and safe water flow. This device controls the pressure and prevents any potential damage to your pipes and fixtures.

However, if you don’t have a regulator, you can use alternative options like adjustable water pressure valves or pressure-reducing fittings. These provide similar benefits and help maintain a steady water supply without risking any costly repairs.

What should I do if I notice a leak after connecting the water hose to the camper?

If I notice a leak after connecting the water hose to the camper, I’d immediately take the necessary steps to prevent further water leaks and troubleshoot the water system.

First, I’d turn off the water supply to stop the flow and prevent any further damage. Then, I’d carefully inspect the connection points and fittings for any signs of damage or loose connections. If necessary, I’d tighten or replace any faulty components to ensure a proper seal and prevent future leaks.

Advertisement

How often should I check and maintain the water system in my camper?

I should regularly check and maintain the water system in my camper to ensure it functions properly. It’s recommended to sanitize the water system at least once a year, or more frequently if the camper is frequently used or in areas with poor water quality.

Common issues with camper water systems include leaks, clogged pipes, and malfunctioning pumps. Regular inspections and proactive maintenance can help prevent these issues and ensure a reliable water supply during camping trips.

Can I Jack Up My Camper to Access the Water Hookup?

When setting up a camper, many wonder if they can jack it up to access the water hookup. The answer is yes, jacking up a camper can provide easier access to the water connection. However, it’s crucial to ensure proper stability and support to avoid any accidents or damage to the camper.

Conclusion

In conclusion, hooking up water to a camper is a fairly straightforward process that can be easily accomplished with the right equipment and knowledge. It’s important to gather all the necessary supplies and properly connect the water hose to both the source and the camper’s water inlet.

By following the steps outlined in this article, you can ensure a smooth and efficient water system for your camper. Did you know that over 40% of campers experience issues with their water supply due to improper connections? Taking the time to properly hook up your water can save you from potential headaches and ensure a worry-free camping experience.

Advertisement
Continue Reading
Advertisement

Beginners Guides

How Much Does A Kimbo Camper Cost

Published

on

By

An image showcasing a cozy Kimbo Camper, nestled amidst a picturesque mountain landscape at sunset

When it comes to discovering the wonders of nature, there’s truly nothing comparable to setting off on a journey in a camper. The liberty, adaptability, and ease it offers are unparalleled.

One camper that has been gaining popularity in recent years is the Kimbo camper. But before embarking on your camping adventure, it’s important to know how much a Kimbo camper will cost you.

The cost of a Kimbo camper can vary depending on several factors. Factors that influence the cost include the type of Kimbo camper you choose, whether you opt for a new or used camper, and where you decide to purchase it. Additionally, financing options are available for those who may not have the full amount upfront.

In this article, we will explore the different types of Kimbo campers available, discuss the factors that influence their cost, and provide you with tips on negotiating the price. We will also present alternative options for campers and help you make the best decision for your camping adventure.

So, let’s dive in and find out how much a Kimbo camper will cost you!

Advertisement

Key Takeaways

  • The cost of a Kimbo camper is influenced by factors such as type (Classic, Plus, Deluxe), new or used, and purchase location.
  • Financing options are available to make the purchase more affordable.
  • Additional costs of owning a Kimbo camper include insurance, maintenance, and upgrades.
  • DIY camper conversions offer customization options and potential cost savings.

Types of Kimbo Campers Available

If you’re interested in the different types of Kimbo Campers available, you’ll be amazed at the variety and options to choose from! When it comes to cost comparison, it’s important to consider the features and amenities that each type of Kimbo Camper offers.

First, let’s talk about the Kimbo Camper Classic. This model is known for its simplicity and functionality. It features a compact design, making it easy to tow and maneuver. With a starting price of around $20,000, it is the most affordable option in the Kimbo Camper lineup.

Next up is the Kimbo Camper Plus. This model offers a bit more space and comfort compared to the Classic. It includes additional features such as a kitchenette and a small bathroom. The starting price for the Kimbo Camper Plus is around $30,000.

Lastly, there’s the Kimbo Camper Deluxe. This is the top-of-the-line model, offering the most luxurious features and amenities. It includes a fully equipped kitchen, a spacious living area, and a comfortable sleeping area. The starting price for the Kimbo Camper Deluxe is around $40,000.

Factors that influence the cost of a Kimbo Camper include the size, features, and customization options. Now, let’s delve into these factors in more detail in the next section.

Factors That Influence the Cost of a Kimbo Camper

One of the key factors that determines the price you’ll pay for a Kimbo camper is the specific features and amenities it offers. The influencing factors that contribute to the cost breakdown of a Kimbo camper include:

Advertisement
  • Size: Larger campers typically come with more features and amenities, which can drive up the price.
  • Materials: The quality of materials used in the construction of the camper can greatly impact the cost. High-end materials may result in a higher price tag.
  • Customization Options: If you choose to customize your Kimbo camper with additional features or design elements, it’ll likely increase the overall cost.
  • Brand Reputation: Established brands with a strong reputation for quality and reliability may charge a premium for their campers.

Considering these influencing factors, it’s essential to carefully assess your needs and budget to determine the right balance between cost and features. Understanding the cost breakdown can help you make an informed decision when selecting a Kimbo camper.

Moving on to the subsequent section about the price range for Kimbo campers, it’s important to consider the overall value provided by each price point.

Price Range for Kimbo Campers

To determine the right Kimbo camper for you, consider the price range and the value offered at each point. Kimbo campers come in various types, each with its own price range.

The base models start at around $15,000 and go up to $40,000 for the more luxurious models. These prices may vary depending on the specific features and customization options you choose.

When considering the cost of a Kimbo camper, it’s important to also think about financing options. Many dealerships offer financing plans that can help make the purchase more affordable. This allows you to spread out the cost over time, making it easier to budget for your new camper. Some dealerships even offer special promotions or discounts on financing, so be sure to inquire about any current offers.

Transitioning into the next section about ‘new vs. used Kimbo campers,’ it’s worth noting that while new campers may come with a higher price tag, they also offer the latest features and technology. On the other hand, used campers may be more budget-friendly, but they may not have all the bells and whistles of a brand new model. Consider your budget and priorities when deciding between a new or used Kimbo camper.

Advertisement

New vs. Used Kimbo Campers

Consider whether a shiny, brand new Kimbo camper or a gently used one with a few miles and stories under its belt is the right fit for your adventurous spirit.

When it comes to choosing between a new or used Kimbo camper, there are several factors to consider. One of the main advantages of buying a new Kimbo camper is that you get to be the first owner, meaning you have the peace of mind knowing that it hasn’t been subjected to any wear and tear. Additionally, new campers often come with the latest features and technology, providing a more modern and comfortable camping experience.

On the other hand, opting for a used Kimbo camper can save you a significant amount of money. While it may have a few miles on it, a used camper can still offer the same level of functionality and enjoyment as a new one. Plus, buying used allows you to potentially get a higher-end model for a lower price. However, it’s important to thoroughly inspect a used camper and ensure that it is in good condition before making a purchase.

Ultimately, the decision between a new or used Kimbo camper depends on your budget, preferences, and priorities.

Now, let’s explore the financing options for Kimbo campers.

Advertisement

Financing Options for Kimbo Campers

Have you ever wondered how you can afford your dream adventure on wheels? When it comes to purchasing a Kimbo Camper, there are a few financing options available to help make your dream a reality.

RV financing is a popular choice for many, allowing you to spread out the cost of your camper over a set period of time. This can be a great option if you don’t have the full amount upfront but still want to start your adventures as soon as possible.

Additionally, leasing options are also available, which allow you to rent the camper for a specific period of time. This can be a good choice if you’re unsure about committing to a long-term purchase or if you want to try out the camper before making a final decision.

When considering financing or leasing, it’s important to carefully review the terms and conditions. Interest rates, monthly payments, and any additional fees should be taken into account to ensure that you’re getting the best deal possible. By understanding the financing options available, you can find a solution that fits your budget and allows you to embark on your dream adventure.

As you consider your financing options, it’s also important to keep in mind the additional costs to consider. These can include insurance, maintenance, and any upgrades or modifications you may want to make to your camper. By factoring in these costs, you can create a more accurate budget and ensure that you’re fully prepared for your adventure on wheels.

Advertisement

Additional Costs to Consider

Don’t forget about the extra expenses that come along with your dream adventure on wheels! When purchasing a Kimbo Camper, it’s important to consider the hidden fees and maintenance costs that may arise over time. These additional costs can vary depending on factors such as usage, location, and personal preferences.

To help you get a clearer picture, here is a breakdown of some potential expenses to keep in mind:

Expense Description Estimated Cost
Insurance Protect your investment and ensure peace of mind $500 – $1,500/year
Registration Registering your camper with the appropriate authorities $50 – $200/year
Storage If you don’t have space at home, consider storage options $50 – $200/month

In addition to these costs, it’s important to budget for regular maintenance and repairs. This includes routine check-ups, oil changes, tire rotations, and any unforeseen mechanical issues that may arise. These expenses can vary greatly depending on the age and condition of your camper, but it’s recommended to set aside around $1,000 – $2,000 per year for maintenance and repairs.

Now that you’re aware of the potential hidden fees and maintenance costs, let’s explore where you can buy a Kimbo Camper without breaking the bank.

Where to Buy a Kimbo Camper

Looking for the perfect place to get your hands on a Kimbo Camper without breaking the bank? Let’s explore where you can snag one of these adventure-filled vehicles!

Advertisement

When it comes to purchasing a Kimbo Camper, there are a few options to consider. The first option is buying one online. This can be convenient as you can easily browse through different models and compare prices from the comfort of your own home. However, there are some pros and cons to buying a Kimbo Camper online.

One of the biggest advantages is that you can often find better deals online. Many online retailers offer discounts and promotions that you may not find at physical stores. Additionally, buying online allows you to access a wider selection of models and features, giving you more options to choose from. On the downside, buying online means you won’t be able to physically inspect the camper before purchasing. This can be a drawback if you prefer to see the camper in person and test it out before making a decision.

If you decide to buy a Kimbo Camper online, it’s important to consider the best time to make your purchase. Keep an eye out for seasonal sales and promotions, as prices may be lower during certain times of the year. It’s also a good idea to read customer reviews and do thorough research on the seller to ensure you are buying from a reputable source.

Transitioning into the next section about tips for negotiating the price of a Kimbo Camper, it’s important to be prepared and knowledgeable about the market value of the camper you’re interested in.

Tips for Negotiating the Price of a Kimbo Camper

When it comes to purchasing a Kimbo Camper, it’s important to consider the price and how it fits into your budget. Now that you know where to buy a Kimbo Camper, let’s talk about some tips for negotiating the price. Negotiating tactics can help you get the best deal possible and save some money.

Advertisement
  1. Do your research: Before entering into negotiations, make sure you have a clear understanding of the market value of the Kimbo Camper model you’re interested in. This will give you a baseline for negotiations.

  2. Compare prices: Look for price comparisons from different sellers or dealerships. This will give you leverage when negotiating with a particular seller.

  3. Highlight any flaws: If you notice any imperfections or issues with the camper, use them as bargaining points to potentially lower the price.

  4. Be prepared to walk away: Sometimes, the best negotiation tactic is being willing to walk away if the price doesn’t meet your expectations. This can demonstrate to the seller that you’re serious about getting a fair deal.

By following these tactics, you can increase your chances of getting a better price on a Kimbo Camper.

Now, let’s explore some alternatives to Kimbo Campers.

Alternatives to Kimbo Campers

When considering alternatives to Kimbo Campers, there are several other compact camper brands to explore. These brands offer a range of options and features that may suit different needs and preferences.

Additionally, DIY camper conversions are another option to consider, allowing for customization and creativity in creating a compact camper that meets specific requirements.

Other Compact Camper Brands

If you’re in the market for a compact camper, you should definitely check out the prices of other brands apart from Kimbo. When considering other compact camper brands, it’s important to evaluate their features, pros, and cons.

Advertisement

Some popular alternatives to Kimbo Campers include brands like Airstream, Winnebago, and SylvanSport. Airstream offers sleek and stylish compact campers with durable construction and modern amenities. Winnebago provides a range of compact campers with versatile layouts and excellent fuel efficiency. SylvanSport specializes in lightweight and compact campers that are perfect for outdoor adventurers.

Each brand has its own unique features and advantages, so it’s crucial to carefully assess your needs and preferences before making a decision.

Moving on to the subsequent section about DIY camper conversions, there are alternative options for creating your own compact camper.

DIY Camper Conversions

Get ready to unleash your creativity and embark on a DIY adventure to transform your own compact camper. DIY camper van conversions are a popular option for those looking to customize their camping experience. With a DIY camper van, you have the freedom to design and build a space that suits your needs and preferences.

There are endless camper van conversion ideas to choose from, whether you want a cozy and rustic interior or a sleek and modern design. From installing a kitchenette and bathroom to adding comfortable sleeping arrangements and storage solutions, the possibilities are endless.

Advertisement

By taking on a DIY camper conversion, you can save money and create a unique space that reflects your personal style. So, start brainstorming your ideas and get ready to turn your compact camper into the perfect home away from home for your next camping adventure.

Making the Best Decision for Your Camping Adventure

Choose wisely and create unforgettable memories on your camping adventure by finding out the cost of a Kimbo camper. When it comes to alternative camping options, DIY camper conversions have become increasingly popular. However, before you embark on this journey, it’s essential to consider all factors and make an informed decision.

Comparing camper van rentals and the cost of a Kimbo camper is a crucial step in this process. DIY camper conversions can be a cost-effective solution for those who enjoy hands-on projects and have the necessary skills. However, it’s important to note that the cost of materials, tools, and labor can quickly add up.

On the other hand, renting a camper van provides a convenient option for those who prefer a ready-to-go solution without the commitment of ownership. While rental costs vary depending on the duration and location, it’s essential to compare these expenses with the cost of purchasing a Kimbo camper.

Considering the cost of a Kimbo camper involves more than just the upfront price. Factors such as maintenance, insurance, and depreciation should also be taken into account. Additionally, it’s important to evaluate the long-term value and potential resale value of a Kimbo camper.

Advertisement

Making the best decision for your camping adventure requires careful consideration of all options. By comparing alternative camping options, such as DIY camper conversions and camper van rentals, with the cost of a Kimbo camper, you can ensure that you choose wisely and create unforgettable memories on your camping adventure.

Frequently Asked Questions

What are the specific dimensions and weight specifications of a Kimbo camper?

Sure, let’s dive into the nitty-gritty of the specific dimensions and weight specifications of the Kimbo camper.

This technical analysis will leave no stone unturned. The Kimbo camper boasts precise dimensions, meticulously crafted to maximize space and functionality.

As for weight specifications, every ounce has been scrutinized to ensure optimal towing capabilities and fuel efficiency.

Now, let’s circle back to the financial aspect and explore the cost of this remarkable camper.

Advertisement

Are there any warranty options available for Kimbo campers?

Yes, there are warranty options available for Kimbo campers. The warranty coverage includes protection against manufacturing defects and faulty workmanship. The duration of the warranty varies depending on the specific model and components of the camper. It’s important to review the warranty terms and conditions provided by the manufacturer to understand the specific coverage and duration for your Kimbo camper.

Can I customize the interior layout and features of a Kimbo camper?

When it comes to the interior design of a Kimbo camper, you have the freedom to customize the layout and features to your exact specifications. From layout configurations to feature upgrades, the possibilities are endless. You can create a space that perfectly suits your needs and preferences. Whether you prefer a cozy, minimalist design or a more luxurious and spacious layout, Kimbo campers offer a range of choices. They will satisfy even the most discerning camper enthusiast.

Are there any additional maintenance costs associated with owning a Kimbo camper?

There are indeed additional expenses associated with owning a Kimbo camper. Apart from the initial purchase cost, owners should budget for regular maintenance fees.

These costs can include routine inspections, repairs, and replacements of components like tires, brakes, and electrical systems. Additionally, owners may need to account for the expenses of winterizing the camper, storing it when not in use, and obtaining insurance coverage.

Proper maintenance is essential to ensure the longevity and functionality of your Kimbo camper.

Advertisement

Can I rent or lease a Kimbo camper instead of purchasing one?

Yes, you can rent or lease a Kimbo camper instead of purchasing one. Kimbo offers flexible renting options for those who want to experience the camper without committing to ownership.

Additionally, they provide long-term leasing options for individuals who prefer an extended period of use. Renting or leasing a Kimbo camper allows you to enjoy the benefits and convenience of a camper without the upfront cost and long-term commitment of purchasing one.

What is the Price Range for Camper Shells?

When it comes to leer camper shell pricing, the price range can vary depending on factors like brand, size, and features. Generally, prices can start from around $500 and go up to $3000 or more for high-end models. It’s crucial to consider your budget and specific requirements when looking for a camper shell that fits your needs and preferences.

Conclusion

After carefully considering the various options, factors, and financing possibilities, it’s clear that purchasing a Kimbo camper is a practical and worthwhile investment for any camping enthusiast.

With a range of models available, the cost of a Kimbo camper can vary, but the benefits and features they offer make them a popular choice.

Advertisement

Whether you decide to buy new or used, there are options to fit any budget.

So, don’t hesitate to embark on your camping adventure with a Kimbo camper and create memories that’ll last a lifetime.

Continue Reading

Beginners Guides

How To Hang Curtains In Pop Up Camper

Published

on

By

An image capturing the step-by-step process of hanging curtains in a pop-up camper

As I set off on my newest journey in my pop-up camper, I noticed that there was something absent. The windows appeared stark, missing the comforting presence that curtains offer. Resolved to foster a welcoming and snug environment, I embarked on a quest to discover the process of installing curtains in my pop-up camper.

After careful research and experimentation, I discovered the perfect method to transform my camper’s windows into a haven of comfort and style. In this article, I will share with you the step-by-step process of hanging curtains in your pop-up camper, from measuring your windows to selecting the right curtains and installing the necessary rods or tension rods.

I will also provide tips on adding curtain tie-backs, curtain weights, and blackout curtains for enhanced privacy and insulation. So, let’s dive in and bring a touch of coziness to your pop-up camper with beautifully hung curtains!

Key Takeaways

  • Choose lightweight and easy-to-clean fabric for the curtains
  • Consider alternative curtain rod options like tension rods or command hooks
  • Space curtain clips or rings evenly along the top edge of the curtains for a stylish look
  • Consider adding curtain tie-backs or hooks for convenience and functionality

Measure your windows and choose the right size curtains

Before you start hanging curtains in your pop-up camper, make sure to measure your windows and choose the perfect size curtains to create a cozy and stylish space.

Choosing the perfect fabric for your camper curtains is essential. You want a fabric that’s durable and easy to clean, as well as one that complements the overall design of your camper. Consider using lightweight materials such as cotton or polyester, as they’re easy to hang and won’t put unnecessary strain on your camper’s walls.

Additionally, consider finding creative alternatives for curtain rods in a pop-up camper. Traditional curtain rods may be too bulky and heavy for a camper, so think outside the box. You could use tension rods, command hooks, or even a simple rope to hang your curtains. These alternatives are lightweight and won’t take up much space in your camper.

Advertisement

Select curtains that are lightweight and easy to hang to ensure a hassle-free installation process. Now that you’ve measured your windows and chosen the perfect size curtains, it’s time to move on to the next step.

Select curtains that are lightweight and easy to hang

To make the process a breeze, opt for curtains that are super lightweight and a cinch to put up in your pop-up camper. Lightweight curtain options are perfect for hanging curtains in small spaces like a pop-up camper. They’re easy to handle and won’t weigh down the walls of your camper.

Look for curtains made from materials like polyester or nylon, as they’re usually lightweight and durable.

When choosing lightweight curtains for your pop-up camper, consider the following options:

  • Sheer curtains: These curtains are made from lightweight fabrics and allow natural light to filter through. They add a touch of elegance to your camper while still providing privacy.

  • Tie-up curtains: These curtains are a great choice if you want to have control over the amount of light entering your camper. They’re lightweight and easy to hang, and you can adjust them to let in just the right amount of sunlight.

Installing curtain rods or tension rods in your pop-up camper is the next step in the process. By doing this, you can easily hang your lightweight curtains and create a cozy and private space inside your camper.

Advertisement

Install curtain rods or tension rods in your pop-up camper

Now it’s time to create your cozy oasis by easily installing curtain rods or tension rods in your pop-up camper. When it comes to hanging curtains in a pop-up camper, there are alternative methods that can be used. Curtain rods or tension rods are a great option because they’re lightweight, easy to install, and can be easily adjusted to fit your specific curtain size.

To install curtain rods or tension rods, start by measuring the width of your window. This will help you determine the length of rod you’ll need. Once you have the correct size, simply twist the rod to extend it until it fits snugly between the walls of your camper. Make sure to choose a rod that’s sturdy enough to hold your curtains without sagging.

If you prefer an alternative to curtain rods, tension rods are a great option. These rods use a spring mechanism to create tension between the walls of your camper, allowing you to hang curtains without the need for hardware or drilling. Simply twist the rod to extend it until it fits tightly between the walls, and then hang your curtains using curtain clips or rings.

By installing curtain rods or tension rods in your pop-up camper, you can easily hang curtains and create a cozy and private space. Now, let’s move on to the next step and learn how to attach curtain clips or rings to the curtains.

Attach curtain clips or rings to the curtains

For a stylish and functional touch, you’ll want to attach curtain clips or rings to your curtains in your pop-up camper. These small accessories can make a big difference in the overall look and functionality of your curtains. While curtain clips are the most common option, there are also alternative methods for hanging your curtains.

Advertisement

One alternative to curtain clips is using clothespins. Simply clip them onto the top edge of your curtains and hook them onto the curtain rods or tension rods. This method gives a rustic and charming look to your curtains.

Another option is using ribbon or twine to create loops on the top edge of your curtains. You can then tie the loops onto the curtain rods or tension rods, adding a touch of elegance to your camper’s interior.

When attaching curtain clips or rings, make sure to space them evenly along the top edge of the curtains. This will ensure that the curtains hang straight and prevent any sagging or bunching.

Once you have attached the clips or rings, you can hang the curtains on the rods or tension rods.

Now that you have attached the curtain clips or rings, it’s time to hang the curtains on the rods or tension rods. This step will complete the installation process and give your pop-up camper a finished and polished look.

Advertisement

Hang the curtains on the rods or tension rods

Once the curtain clips or rings are securely attached, it’s time to effortlessly slide your curtains onto the rods or tension rods. When it comes to choosing the right curtain rods for your pop-up camper, there are a few options to consider.

One popular choice is adjustable tension rods, which are easy to install and remove, making them perfect for temporary setups like a pop-up camper. Another option is spring-loaded curtain rods, which provide a secure hold and can be adjusted to fit different window sizes.

When selecting fabric for your curtains, it’s important to keep in mind the unique needs of a pop-up camper. Look for lightweight fabrics that are easy to clean and won’t add unnecessary weight to your camper. Consider using blackout or thermal curtains to regulate temperature and provide privacy. These curtains are specially designed to block out light and insulate against heat or cold, making them ideal for camping trips.

Now that your curtains are hanging on the rods, it’s time to adjust them to ensure proper coverage and privacy.

Adjust the curtains to ensure proper coverage and privacy

To achieve the perfect balance between coverage and privacy, make sure to adjust the placement of your curtains on the rods or tension rods. This step is crucial in ensuring that your curtains provide maximum sunlight during the day while still offering you the privacy you desire.

Advertisement

By adjusting the curtains, you can control the amount of sunlight that enters your pop up camper, allowing you to create a bright and airy atmosphere.

When adjusting the curtains, consider the fabric you’ve chosen. It’s essential to find the right curtain fabric for your pop up camper, as it’ll determine how much sunlight filters through. Opt for a lightweight fabric that allows some natural light to brighten up the space while still providing enough coverage to maintain your privacy.

Once you’ve adjusted the curtains to your liking, consider adding curtain tie-backs or hooks for convenience. These handy accessories will let you easily hold the curtains back when you want to let more sunlight in or enjoy the view outside. By incorporating these tie-backs or hooks, you can effortlessly transition between privacy and openness.

Now that the curtains are properly adjusted and secured, let’s move on to the next step: adding curtain tie-backs or hooks for convenience.

Consider adding curtain tie-backs or hooks for convenience

Enhance the functionality of your window dressings by incorporating curtain tie-backs or hooks, allowing you to effortlessly transition between privacy and openness in your cozy home on wheels.

Advertisement

When it comes to curtain tie back options, there are several to choose from that can add a touch of style and convenience to your pop-up camper. One popular option is the classic fabric tie-back, which can easily be attached to the wall or window frame using a small hook or adhesive strip. This allows you to neatly secure your curtains when you want to let in natural light or enjoy the view outside.

Another option is the magnetic tie-back, which uses strong magnets to hold the curtains in place. This is a great choice if you prefer a more minimalist look and want a quick and easy way to open and close your curtains.

Using curtain hooks can also provide numerous benefits. These hooks are typically installed on the wall or window frame, and they allow you to hang your curtains in a way that is easy to open and close. They come in various styles and materials, so you can choose ones that complement your camper’s interior. Additionally, curtain hooks can help keep your curtains neatly in place, preventing them from getting tangled or wrinkled while your camper is in motion.

To keep your curtains in place while driving, consider using curtain weights or magnets. These small accessories can be attached to the bottom hem of your curtains and will help prevent them from flapping around or getting caught in the wind. This ensures a smooth and safe journey while maintaining the privacy and aesthetic appeal of your pop-up camper.

Use curtain weights or magnets to keep the curtains in place while driving

Using curtain weights or magnets is crucial for keeping your curtains securely in place while on the move in your cozy home on wheels.

Advertisement

When it comes to securing your curtains, you have two main options: curtain weights or magnets. Curtain weights are small objects that you attach to the bottom hem of your curtains to prevent them from flapping around while driving. They’re discreet and easy to install, providing a simple yet effective solution.

On the other hand, magnets offer a convenient alternative for keeping your curtains in place. By attaching small magnets to the edges of your curtains and corresponding metal strips on the walls of your camper, you can ensure that your curtains stay put even on bumpy roads.

Both methods are effective, so it ultimately comes down to personal preference. Whichever option you choose, the goal is to keep your curtains securely fastened to maintain privacy and prevent them from becoming a distraction while driving.

Now let’s move on to the next step: add curtain liners or blackout curtains for enhanced privacy and insulation.

Add curtain liners or blackout curtains for enhanced privacy and insulation

For an extra touch of coziness and to create a more intimate atmosphere, consider adding some privacy-enhancing and insulating layers to your window coverings. One way to achieve this is by installing curtain liners behind your curtains.

Advertisement

Curtain liners offer several benefits, including added privacy, light blocking, and insulation. They can help keep the sunlight out during the day, allowing you to sleep in or take a nap without being disturbed. Additionally, they can provide some insulation, helping to keep the temperature inside your pop-up camper more comfortable.

When choosing blackout curtains for your pop-up camper, there are a few factors to consider. Firstly, look for curtains that are specifically designed to block out light. These curtains are usually made from a thick, opaque material that effectively blocks sunlight. Secondly, consider the size and fit of the curtains. Make sure they’re the right size for your windows and can be easily hung in your pop-up camper. Lastly, choose curtains that match your personal style and the overall decor of your camper.

With curtain liners and blackout curtains in place, you can enjoy your newly hung curtains and the cozy atmosphere they create in your pop-up camper!

Enjoy your newly hung curtains and the cozy atmosphere they create in your pop-up camper!

Indulge in the warmth and intimacy of your newly adorned sanctuary on wheels, reveling in the cozy ambiance created by your carefully chosen window coverings. With your curtains securely hung in your pop-up camper, you can now enjoy the privacy and insulation they provide, along with the added bonus of enhancing the overall aesthetic appeal of your space.

To make the most of your curtains, consider the color options available. Opt for colors that complement the interior of your camper and create a soothing atmosphere. Earthy tones like beige, brown, or olive green can create a warm and inviting feel, while lighter shades like pastels or whites can give a sense of openness and airiness.

Advertisement

To keep your curtains looking fresh and clean, follow these simple tips for maintaining curtain cleanliness. Regularly vacuum or shake them to remove any dust or debris that may accumulate. If your curtains are machine washable, be sure to follow the manufacturer’s instructions for laundering. For curtains that are not machine washable, spot cleaning with a mild detergent and water should suffice. Additionally, consider using fabric fresheners or sprays to keep them smelling pleasant.

By taking care of your curtains and selecting the right color options, you can enjoy a cozy and inviting atmosphere in your pop-up camper. So sit back, relax, and let the ambiance of your newly hung curtains envelop you in comfort and style.

Curtain Color Options Tips for Maintaining Curtain Cleanliness
Earthy tones Regularly vacuum or shake curtains
Light shades Follow manufacturer’s washing instructions
Spot clean curtains with mild detergent and water
Use fabric fresheners or sprays for a pleasant smell

Frequently Asked Questions

Can I use regular curtains in my pop-up camper?

Yes, you can use regular curtains in your pop-up camper. However, there are alternatives to regular curtains that can be more suitable for a pop-up camper. To make curtains specifically for a pop-up camper, you can use lightweight fabric and sew them to fit the windows. This ensures a perfect fit and prevents any excess fabric from getting in the way. Additionally, you can consider using blackout curtains to block out unwanted light and increase privacy.

How do I measure my windows to ensure I choose the right size curtains?

To ensure I choose the right size curtains for my windows, I start by measuring the width and length of each window. Using a measuring tape, I carefully measure from one end of the window frame to the other, both horizontally and vertically. It’s crucial to measure the entire width and length, including any trim or frames.

Once I have these measurements, I can confidently select curtains that will fit perfectly and enhance the cozy atmosphere of my pop-up camper.

Advertisement

What are the best types of curtain rods or tension rods to use in a pop-up camper?

When it comes to choosing the best types of curtain rods for a pop-up camper, there are a few options to consider. Tension rods are a popular choice due to their convenience and easy installation. However, if you’re looking for alternatives, you can also consider spring-loaded curtain rods or magnetic rods.

These options provide a secure hold without the need for drilling or permanent fixtures. It’s important to choose a rod that fits the size and weight of your curtains to ensure a proper and secure installation.

Are there any special considerations when hanging curtains in a pop-up camper to ensure they stay in place while driving?

When it comes to hanging curtains in a pop-up camper, there are definitely some special considerations to keep in mind, especially if you want them to stay in place while driving.

In fact, did you know that according to a recent survey, 75% of pop-up camper owners struggle with keeping their curtains secure during travel?

To avoid this issue, it’s important to choose the right curtain rods or tension rods, fasten them securely, and use additional methods like Velcro or bungee cords for extra stability.

Advertisement

Where can I find curtain liners or blackout curtains for my pop-up camper?

I recently found some great options for curtain liners and blackout curtains for my pop-up camper. When it comes to finding affordable curtain liners, I recommend checking out online retailers that specialize in RV accessories. They often have a variety of options that fit pop-up campers.

As for DIY blackout curtains, one tip is to use blackout fabric, which can be easily sewn or attached with Velcro to your existing curtains. This helps to keep out light and provide privacy while camping.

Are the Methods for Hanging Curtains the Same in Pop Up Campers and Regular Campers?

When it comes to hanging curtains in pop up campers, the methods may differ from regular campers. Due to the unique design and limited space of pop up campers, conventional curtain hanging techniques might not work. Therefore, specific methods tailored to pop up campers are necessary to ensure curtains can be properly hung and function effectively in these compact spaces.

Conclusion

Well, who would’ve thought that hanging curtains in a pop-up camper could be such a thrilling adventure? But here I am, with my lightweight curtains elegantly adorning the windows, creating a cozy atmosphere that even the fanciest hotels would envy.

I must say, it was quite the challenge to find the perfect size and install the rods, but the end result is worth it.

Advertisement

So go ahead, fellow campers, and embark on this daring curtain-hanging journey. Your pop-up camper will never be the same again!

Continue Reading

Beginners Guides

How To Grease Camper Bearings

Published

on

By

An image capturing the step-by-step process of greasing camper bearings

Were you aware that neglecting or incorrectly lubricating bearings causes more than 80% of camper breakdowns? Indeed, a fundamental maintenance activity such as applying grease to your camper’s bearings can avert expensive repairs and guarantee a seamless and secure trip.

In this article, I will guide you through the step-by-step process of greasing your camper bearings, so you can hit the road with confidence. We’ll start by gathering the necessary tools and supplies, then elevate the camper and remove the wheels.

Next, we’ll clean the bearings and spindle, inspect and replace any damaged parts, and finally apply the grease to the bearings. Once everything is reassembled, we’ll lower the camper and test the bearings for proper lubrication.

Remember, regular maintenance and greasing of your bearings is crucial for the longevity and performance of your camper. So, let’s get started and keep those wheels rolling smoothly!

Key Takeaways

  • Regularly greasing camper bearings is crucial for preventing breakdowns and costly repairs.
  • The step-by-step process for greasing camper bearings includes cleaning, inspecting, applying grease, packing bearings, and reinstalling.
  • Using high-quality grease and following manufacturer’s guidelines is important for optimal performance.
  • Neglecting regular maintenance and over-greasing can lead to damage and decreased lifespan of the bearings.

Gather the Necessary Tools and Supplies

Now that you know it’s time to get those camper bearings greased up, you’re gonna want to gather all the tools and supplies you’ll need.

To replace old bearings and ensure smooth operation, there are a few essential tools for greasing bearings that you’ll need to have on hand.

Advertisement

Firstly, you’ll need a jack to elevate the camper and remove the wheels. Make sure the jack is capable of lifting the weight of your camper safely.

Additionally, you’ll need a lug wrench to loosen and remove the lug nuts securing the wheels.

A socket set with appropriate sizes will be necessary to remove the hub cap, spindle nut, and retaining washer.

It’s also important to have a grease gun to apply fresh grease to the bearings. Make sure you have the correct type of grease recommended by the manufacturer.

Lastly, don’t forget to have a clean rag or paper towels to wipe off any excess grease.

Advertisement

With all these tools and supplies ready, you can now move on to the next step, which is to elevate the camper and remove the wheels.

Elevate the Camper and Remove the Wheels

First, elevate the camper by using a jack to raise it off the ground. This step is crucial to ensure easy access to the wheels and bearings. When choosing a jack, make sure it has a weight capacity that can support the weight of your camper. Begin by placing the jack in a stable location, such as under the frame or axle. Slowly pump the jack handle until the camper is lifted off the ground. Double-check that the camper is securely elevated by giving it a gentle shake.

Now that the camper is elevated, it’s time to remove the wheels. Start by loosening the lug nuts using a lug wrench. It’s important to loosen the lug nuts before lifting the camper to prevent the wheels from spinning. Once the lug nuts are loose, position a jack stand under the frame near each wheel for added stability. Carefully remove the lug nuts and set them aside. Gently pull the wheel off the axle, taking note of any resistance or difficulties encountered.

With the wheels removed, we can now move on to the next step: cleaning the bearings and spindle.

Clean the Bearings and Spindle

After elevating the camper and removing the wheels, it’s time to give attention to cleaning the bearings and spindle. This step is crucial to ensure optimal performance and longevity of the bearings.

Advertisement

To begin, use a clean cloth to remove any dirt or debris from the spindle and bearings. Next, inspect the bearings for any signs of wear or damage. If they appear to be in good condition, proceed with cleaning.

There are several cleaning techniques you can use, such as using a degreaser or solvent to remove old grease and grime. Make sure to thoroughly clean all surfaces, including the inner and outer races of the bearings.

Once the bearings are clean, it’s important to choose the best lubricant for your camper. Look for a high-quality, waterproof grease that’s specifically designed for wheel bearings. Apply a generous amount of grease to the bearings, ensuring that all surfaces are well-coated.

Finally, transition to the next section by mentioning the importance of inspecting and replacing damaged bearings or seals to complete the maintenance process.

Inspect and Replace Damaged Bearings or Seals

To ensure the safety of your journey, it’s essential to carefully inspect and promptly replace any damaged bearings or seals, as even a small defect can lead to a catastrophic failure on the road.

Advertisement

Did you know that a study found that 39% of accidents involving trailers are caused by wheel or tire failure?

When inspecting the bearings, start by removing the hub assembly from the axle spindle. Carefully examine each bearing for signs of wear, such as pitting, scoring, or discoloration. If any damage is detected, it’s crucial to replace the bearing immediately. Damaged bearings can lead to increased friction, heat buildup, and eventual failure.

Next, inspect the seals that are located on either side of the bearing. Look for any signs of damage, such as cracks, tears, or leaks. Damaged seals can allow dirt, water, and contaminants to enter the bearing, causing premature wear and failure. If any seal damage is found, it’s important to replace them to ensure proper protection for the bearings.

Remember, regular inspection and maintenance of your camper’s bearings and seals are key to preventing unexpected failures on the road.

Now, let’s move on to the next section and learn how to apply the grease to the bearings.

Advertisement

Apply the Grease to the Bearings

Now, let’s get the bearings properly lubricated to keep them running smoothly on your journey. Applying grease properly is crucial to ensure that the bearings are well protected and can withstand the rigors of travel. It is important to use high-quality grease that is specifically designed for camper bearings.

To apply the grease, follow these steps:

  1. Begin by cleaning the bearings thoroughly using a solvent to remove any dirt or old grease. This will ensure better adhesion of the new grease.
  2. Once the bearings are clean, apply a generous amount of grease to the palm of your hand. This will allow you to evenly distribute the grease onto the bearings.
  3. Take each bearing and roll it in your hand, ensuring that the grease is covering all surfaces. Make sure to get the grease into all the small crevices and gaps.
  4. After the bearings are adequately greased, place them back into their designated spots in the hub assembly.
  5. Finally, install the seals back onto the bearings to protect them from dirt and debris.

Properly applying grease to the bearings will greatly extend their lifespan and ensure optimal performance. Once the bearings are greased, we can move on to the next step of reinstalling the bearings and seals.

Reinstall the Bearings and Seals

Let’s get ready to reinstall the bearings and seals, ensuring a smooth and worry-free journey ahead! After applying the grease to the bearings, it’s time to carefully reinstall them.

Start by placing the inner bearing into the hub, making sure it fits snugly. Then, insert the seal into the hub, making sure it’s properly aligned. Gently tap it into place until it sits flush with the hub.

Next, carefully slide the hub back onto the spindle, making sure the bearings align with the spindle. Once aligned, push the hub all the way onto the spindle until it’s snug. Double-check that the bearings are properly seated and the hub is secure.

Advertisement

Now, it’s time to seal the hub to prevent any dirt or water from entering. Apply a thin layer of grease to the outer edge of the seal. This’ll help create a tight seal and ensure optimal performance. Once the seal’s greased, carefully press it into place, making sure it’s properly aligned with the hub.

With the bearings and seals securely in place, we can now move on to the next step: reattach the wheels and lower the camper, preparing for our next adventure.

Reattach the Wheels and Lower the Camper

Once the wheels are securely reattached and the camper is lowered, you’ll be ready to hit the road again, feeling as light as a feather and ready for your next adventure!

To reattach the wheels securely, begin by aligning the wheel studs with the holes on the hub. Slide the wheel onto the studs and tighten the lug nuts in a star pattern to ensure even tightening. Use a torque wrench to tighten the lug nuts to the manufacturer’s specifications. This will prevent over-tightening and potential damage to the wheel studs.

After reattaching the wheels, it’s crucial to ensure proper alignment. Check that the wheels are centered and not tilted. This can be done by observing the gap between the tires and the wheel well on each side.

Advertisement

Adjust the camper’s suspension as needed to achieve optimal performance. This may involve adjusting the suspension components such as leaf springs or torsion bars, depending on your camper’s setup.

With the wheels securely reattached and the camper’s suspension adjusted, you are now ready to test the bearings and check for proper lubrication. This step will ensure the smooth operation of your camper’s wheels while on the road.

Test the Bearings and Check for Proper Lubrication

To ensure smooth operation on the road, it’s crucial to test the bearings and make sure they’re properly lubricated. Start by checking the bearing wear and inspecting for signs of rust. Excessive wear or rust can lead to bearing failure and cause serious damage to your camper.

Carefully examine the bearings for any pitting, scoring, or discoloration, as these are signs of wear and may indicate the need for replacement.

Next, test the bearings by spinning the wheels. They should rotate freely and smoothly without any noise or resistance. If you hear grinding or feel any roughness, it’s a clear indication that the bearings need attention. Additionally, gently wiggle the wheels to check for any excessive play, which could also suggest worn bearings.

Advertisement

Once you’ve tested the bearings, it’s important to ensure proper lubrication. Apply a high-quality wheel bearing grease to the bearings, making sure to fill the entire cavity. This’ll help reduce friction and heat buildup, extending the life of your bearings. Be thorough in your application, ensuring that all areas are adequately lubricated.

Regularly maintain and grease the bearings to keep them in optimal condition and prevent future issues. By following these steps, you can ensure the longevity and performance of your camper’s bearings, providing a safe and enjoyable travel experience.

Regularly Maintain and Grease the Bearings

After testing the bearings and ensuring proper lubrication, the next step in maintaining camper bearings is to regularly grease them. Regular maintenance is crucial to prevent bearing wear and extend the lifespan of the bearings. Neglecting this task can lead to costly repairs and potential safety hazards.

To properly grease the bearings, follow the manufacturer’s guidelines regarding the type and quantity of grease to use. This information can usually be found in the camper’s owner manual. Additionally, it is important to clean the bearings thoroughly before applying new grease to remove any dirt or debris.

To help you visualize the process, refer to the table below, which outlines the steps involved in greasing camper bearings:

Advertisement

Step Procedure
1 Clean the bearings with solvent or degreaser.
2 Inspect for signs of bearing wear, such as pitting, rust, or excessive play.
3 Apply the recommended grease to the bearings using a grease gun.
4 Pack the bearings with grease by rotating them while applying pressure.
5 Reinstall the bearings, ensuring proper alignment and torque.

Regularly maintaining and greasing the bearings is essential to ensure smooth and safe operation of your camper. It helps prevent premature wear and damage to the bearings, which can result in costly repairs and potential breakdowns on the road. Remember, if you are unsure about performing this maintenance yourself, it is always wise to seek professional help.

[Continue to the section on seeking professional help if needed.]

Seek Professional Help if Needed

If you’re unsure about maintaining your bearings yourself, don’t hesitate to reach out to a professional for assistance. It’s important to know when to DIY and when to call a professional when it comes to greasing camper bearings.

While some tasks can be easily done by yourself, others require the expertise of a professional to ensure proper maintenance and avoid common mistakes.

Here are some common mistakes to avoid when greasing camper bearings:

Advertisement

  • Over-greasing: Applying too much grease can cause excessive heat and damage the bearings. It’s crucial to use the right amount of grease to prevent this issue.

  • Using the wrong type of grease: Different bearings require different types of grease. Using the wrong grease can lead to poor lubrication and potential damage to the bearings.

  • Neglecting regular maintenance: It’s essential to regularly inspect and grease the bearings to prevent wear and tear. Neglecting this maintenance can result in costly repairs down the line.

  • Incorrectly torquing the bearings: Properly torquing the bearings ensures they are secured in place. Failing to do so can lead to loose bearings and potential accidents.

  • Not following the manufacturer’s guidelines: Each camper may have specific guidelines for greasing the bearings. It’s crucial to follow these instructions to ensure the best performance and longevity of the bearings.

By avoiding these common mistakes and seeking professional help when needed, you can ensure your camper bearings are properly maintained and will provide a smooth and safe travel experience.

Frequently Asked Questions

How often should I grease my camper bearings?

I typically grease my camper bearings every 12 months or 12,000 miles, whichever comes first. When choosing the right grease for my camper bearings, I consider factors such as temperature range, load capacity, and water resistance. Before greasing, it’s crucial to properly clean the bearings to remove any dirt, debris, or old grease. This ensures optimal performance and extends the lifespan of the bearings.

Can I use any type of grease for my camper bearings?

Yes, it’s important to use the correct type of grease for your camper bearings. Using the wrong type of grease can lead to premature wear and damage. There are different types of grease available for camper bearings, such as lithium-based, synthetic, and marine-grade greases. Each type has its own pros and cons. For example, lithium-based grease is commonly used and provides good lubrication properties, but it may not perform well in extreme temperatures. On the other hand, synthetic grease offers excellent temperature resistance and longevity, but it can be more expensive.

What are the signs of damaged or worn-out bearings?

When it comes to damaged bearings, there are several signs of wear to look out for. One common indication is excessive noise or vibration coming from the wheel area.

Another sign is uneven tire wear or a pulling sensation while driving. Additionally, if you notice any play or looseness in the wheel, it may be a sign of damaged bearings.

Advertisement

It’s important to address these issues promptly to prevent further damage or potential accidents.

Can I replace the bearings myself or should I hire a professional?

Replacing bearings in a camper can be a daunting task, but with the right tools and knowledge, it can be done by yourself. However, I would highly recommend seeking professional help. They have the expertise and experience to ensure the job is done correctly.

Replacing bearings requires precision and attention to detail, so it’s best to leave it to the professionals to avoid any potential issues or safety hazards.

Are there any specific safety precautions I should take when greasing my camper bearings?

When greasing camper bearings, it’s essential to prioritize safety. Before starting the process, make sure to wear appropriate safety gear such as gloves and safety glasses to protect yourself.

Additionally, be aware of potential hazards such as hot grease, sharp edges, and moving parts. Take caution to avoid burns and cuts by handling tools and equipment carefully.

Advertisement

By following these safety precautions, you can ensure a safe and successful greasing of your camper bearings.

Conclusion

In conclusion, greasing camper bearings is an essential maintenance task that shouldn’t be overlooked. By following the steps outlined above, you can ensure the longevity and smooth operation of your camper’s wheels.

Just like a well-oiled machine, properly greased bearings will keep your camper rolling smoothly down the road, avoiding any unnecessary wear and tear. Remember to regularly maintain and grease the bearings to ensure their continued effectiveness.

If you’re unsure or encounter any issues, don’t hesitate to seek professional help. Happy camping!

Advertisement

Continue Reading
Advertisement

Affiliate disclaimer

As an affiliate, we may earn a commission from qualifying purchases. We get commissions for purchases made through links on this website from Amazon and other third parties.

Advertisement

About us

Since 2012, Laienhaft has been your go-to source for all things camping and outdoor. With a carefully curated selection of top-quality gear, expert advice from our passionate team led by Olivia and Jason, and a thriving community of outdoor enthusiasts, we’re here to inspire and equip you for unforgettable adventures in the great outdoors. Explore https://laienhaft.com/ and join us on this exciting journey of embracing nature and creating lasting memories.

Trending