Connect with us

Beginners Guides

How Do Camper Toilets Work

Published

on

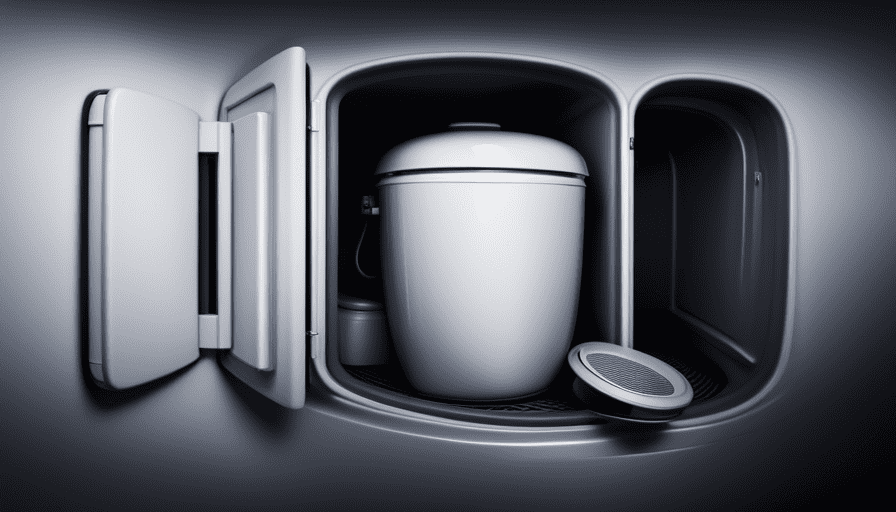
An image showcasing a cross-section of a camper toilet's intricate plumbing system, revealing the water tank, waste tank, flush mechanism, and ventilation pipes

Are you prepared to set out on your upcoming camping journey?

Picture this: you’re deep in the wilderness, surrounded by nature’s beauty, and you suddenly feel the urge to use the restroom. But wait! There’s no need to panic because camper toilets are here to save the day!

These marvels of engineering may seem simple on the surface, but they are actually quite intricate. In this article, I will take you on a journey through the inner workings of camper toilets and unveil their secrets. From flushing mechanisms to waste management systems, we will explore it all.

I’ll also share tips on how to choose the right camper toilet for your needs and provide insights into maintenance and troubleshooting. So get ready to dive into the world of camper toilets and discover how these incredible devices make our outdoor adventures more comfortable and convenient.

Key Takeaways

  • Camper toilets can be gravity-flush or foot pedal flush mechanisms and may have antimicrobial surfaces and odor control systems.
  • There are two main types of camper toilets: composting toilets and chemical toilets. Composting toilets separate urine and solid waste, while chemical toilets use chemicals to control odors and break down waste.
  • Camper toilets typically have a separate water tank for flushing and may have a bidet feature for cleaning. Water conservation is important in camper toilets.
  • Proper waste disposal is crucial in camper toilets, whether it is through black water tanks, composting features, biodegradable bags, or designated dump stations or septic systems. Using biodegradable toilet paper and being mindful of the amount used can also help reduce waste and prevent clogs.

The Basics of Camper Toilets

So, you’re wondering how camper toilets actually work, huh? Well, let’s dive in and uncover the fascinating mechanics behind these essential conveniences on the road.

When it comes to camper toilets, there are various portable options available, but one innovative solution gaining popularity is composting toilets.

Advertisement

Composting toilets are self-contained units that use the natural process of decomposition to turn waste into organic compost. They work by separating solid waste from liquid waste, eliminating the need for water or chemicals. The solid waste is mixed with organic materials like sawdust or coconut coir to promote decomposition and minimize odor. Over time, the waste breaks down into nutrient-rich compost that can be safely disposed of or used as fertilizer.

Composting toilets offer several advantages for campers. They are environmentally friendly, as they conserve water and reduce pollution. They are also convenient, as they don’t require a connection to a water source or a sewage system. Moreover, they are odorless when properly maintained, making them a pleasant option for extended trips.

Now that you understand the basics of camper toilets, let’s move on to the next section and explore their flushing mechanisms.

Flushing Mechanisms

To understand the inner workings of camper toilets, imagine a gentle push on a lever transforming the chaos within into a swift and efficient cleansing cascade. The flushing mechanism of camper toilets is designed to ensure proper toilet cleaning while maintaining the portability of the unit.

Most camper toilets utilize a gravity-flush system. When the lever is pressed, water from the onboard freshwater tank is released into the toilet bowl. This surge of water creates a force that pushes waste down into the holding tank. The water flow also helps to rinse the bowl, leaving it clean and ready for the next use.

Advertisement

Some camper toilets incorporate a foot pedal flush instead of a lever. This pedal operates a valve that releases water into the bowl, achieving the same flushing action as the lever system. This design allows for hands-free operation, which can be beneficial in situations where hygiene is a concern.

In addition to the flushing mechanism, camper toilets often have features like antimicrobial surfaces and odor control systems to maintain cleanliness and freshness.

Transitioning into the subsequent section about waste management systems, it is important to consider how the waste is stored and disposed of in camper toilets.

Waste Management Systems

The waste management system in camper toilets involves storing and disposing of waste in a sanitary and efficient manner. There are two main types of camper toilets: composting toilets and chemical toilets.

Composting toilets use the natural process of decomposition to break down waste into compost. They require little to no water and are eco-friendly. These toilets have separate chambers for urine and solid waste. The urine is diverted to a separate container, while the solid waste is mixed with a composting material, such as sawdust or peat moss, to aid in decomposition. Over time, the waste breaks down into compost that can be safely disposed of or used as fertilizer.

Advertisement

Chemical toilets, on the other hand, use chemicals to control odors and break down waste. These toilets have a holding tank that contains a mixture of water and chemicals. When the toilet is flushed, the waste is mixed with the chemical solution, which helps to break it down and control odors. The waste is stored in the holding tank until it can be properly disposed of at a designated waste disposal site.

Moving on to water supply and usage, camper toilets typically have a separate water tank for flushing. This tank is filled with fresh water and is used to flush the toilet bowl. Some camper toilets also have a bidet feature that uses water for cleaning.

Water Supply and Usage

You might think that water is a limitless resource when using camper toilets, but think again. Water conservation is a crucial aspect of camper toilets, as the water supply is often limited. To ensure sustainable water usage, portable options are available that minimize water consumption. These options include composting toilets and portable chemical toilets.

In composting toilets, water usage is minimal or even eliminated. These toilets separate solid waste from liquid waste, allowing the solid waste to decompose naturally over time. Liquid waste is typically directed to a separate container, which can be emptied and disposed of appropriately. This method not only saves water but also promotes eco-friendly waste management.

On the other hand, portable chemical toilets use a small amount of water mixed with chemicals to break down the waste and control odors. These toilets have a built-in holding tank that can be emptied at designated dumping stations. While water usage is still involved, it is significantly less compared to traditional flush toilets.

Advertisement

By utilizing these portable options and practicing water conservation, camper toilet users can minimize their environmental impact while still maintaining hygienic conditions. Speaking of maintaining cleanliness, let’s now explore the next important aspect of camper toilets: odor control.

Odor Control

With effective odor control, camper toilet users can enjoy a fresh and pleasant environment during their outdoor adventures. To achieve this, various sanitation methods and chemical additives are utilized. Here are four key elements that contribute to effective odor control in camper toilets:

  1. Ventilation: Proper ventilation is essential to remove unpleasant odors from the toilet compartment. Ventilation systems, such as exhaust fans or vents, help to circulate fresh air and eliminate any lingering smells.

  2. Chemical Additives: Many camper toilets use chemical additives in the waste holding tank to neutralize odors. These additives, which often come in liquid or tablet form, break down waste and suppress the growth of bacteria that can cause foul odors.

  3. Waste Disposal: Regular and proper disposal of waste is crucial to prevent odor buildup. Emptying the waste holding tank in designated dump stations or sanitary facilities ensures that waste is removed from the camper and eliminates potential odor sources.

  4. Cleaning and Maintenance: Regular cleaning and maintenance of the toilet system are essential for odor control. This includes emptying and rinsing the waste holding tank, cleaning the toilet bowl, and replacing chemical additives as needed.

With effective odor control measures in place, camper toilets can provide a hygienic and pleasant experience for outdoor enthusiasts. Transitioning to the subsequent section about ‘space and design considerations,’ it’s important to consider these factors to optimize the camper toilet experience.

Space and Design Considerations

Optimizing the camper toilet experience involves carefully considering the spatial layout and design elements. Design limitations and the need for compact solutions make it crucial to maximize the available space while maintaining functionality and comfort.

When it comes to camper toilets, space is a precious commodity. Manufacturers understand this and have come up with innovative designs to address these limitations. One common approach is to use a space-saving, compact toilet bowl that takes up less room without sacrificing comfort. These toilets often feature a smaller footprint and a lower profile, allowing them to fit into tight spaces.

Advertisement

Additionally, camper toilets often incorporate clever design elements to make the most of the available space. For example, some models have built-in storage compartments or shelves for toiletries and other essentials. Others may feature foldable seats or collapsible components that can be easily stowed away when not in use. These design solutions help to maximize the functionality of the toilet while minimizing the impact on the overall space.

Considering the design limitations and the importance of compact solutions, camper toilets are carefully crafted to provide an efficient and comfortable experience in a limited space. By optimizing the layout and incorporating space-saving features, manufacturers ensure that campers can enjoy a functional toilet without compromising on comfort or convenience.

Transitioning into the next section about maintenance and troubleshooting, it’s important to understand how to properly care for and address any potential issues that may arise with your camper toilet.

Maintenance and Troubleshooting

To properly maintain and troubleshoot your camper toilet, it’s important to understand the necessary care and potential issues that may arise.

One common problem with camper toilets is toilet leaks. These leaks can occur in various parts of the toilet, such as the seals or the water supply line. It’s important to regularly inspect these areas for any signs of leakage and address them promptly to prevent further damage.

Advertisement

Another issue that campers may encounter is clogged pipes. This can happen when waste and toilet paper accumulate and block the flow of water through the pipes. To prevent this, it’s essential to use RV-friendly toilet paper that dissolves easily.

When troubleshooting a clogged pipe, you can try using a plunger or a specialized RV toilet auger to remove the obstruction. It’s also a good idea to regularly clean the toilet bowl and tanks to prevent buildup and maintain proper functioning.

Understanding these common maintenance and troubleshooting techniques will help ensure that your camper toilet functions optimally during your trips.

Now, let’s consider the environmental impact of camper toilets without forgetting about our responsibilities as outdoor enthusiasts.

Environmental Impact

Minimize your ecological footprint by considering the environmental impact of your camper toilet and how it affects the natural beauty of the outdoors.

Advertisement

Camper toilets, like any other type of toilet, have a carbon footprint associated with their use. The carbon footprint is the amount of greenhouse gases, mainly carbon dioxide, released into the atmosphere as a result of their operation. This is primarily due to the energy required to treat and transport the water used for flushing, as well as the emissions produced during waste disposal.

When it comes to waste disposal, camper toilets have several options. Some models use a black water tank, which holds the waste until it can be emptied at a designated dump station. Others may have a composting feature, where the waste is broken down naturally over time. This method reduces the need for chemical treatments and eliminates the need for a black water tank. Additionally, there are portable toilets that use biodegradable bags for waste collection, making disposal more convenient and environmentally friendly.

Considering the environmental impact of your camper toilet is important for preserving the natural beauty of the outdoors. By understanding the carbon footprint and waste disposal options, you can make informed decisions to minimize your impact.

Now, let’s move on to some tips for using camper toilets.

Tips for Using Camper Toilets

One easy way to enhance your experience with camper toilets is by following these helpful tips.

Advertisement

When it comes to toilet paper alternatives, consider using biodegradable options such as recycled paper or bamboo. These alternatives are more environmentally friendly and can help reduce waste. Additionally, be mindful of the amount of toilet paper you use to avoid clogs in the system.

Proper waste disposal is crucial when using camper toilets. Always use designated dump stations or septic systems to dispose of waste. Never dump waste in natural bodies of water or on the ground, as this can contaminate the environment. It’s also important to properly empty and clean the waste holding tank of your camper toilet regularly to prevent odors and maintain hygiene.

As you move forward in choosing the right camper toilet, it’s essential to consider factors such as size, weight, and capacity. Additionally, think about the type of toilet that best suits your needs, whether it’s a cassette toilet, composting toilet, or portable chemical toilet. Each type has its own advantages and disadvantages, so it’s important to research and choose accordingly.

By following these tips and considering the right camper toilet for your needs, you can ensure a more enjoyable and hassle-free experience on your camping trips.

Choosing the Right Camper Toilet

When it comes to enhancing your camping experience, finding the perfect camper toilet that suits your needs is essential. There are various portable options available in the market, but one popular choice among campers is composting toilets. These toilets are an eco-friendly alternative that uses the natural process of decomposition to turn waste into compost.

Advertisement

Composting toilets are designed to separate liquids and solids, reducing odor and promoting decomposition. They typically consist of two chambers, one for urine and another for solid waste. The urine is diverted to a separate container, while the solid waste is mixed with organic materials such as sawdust or coconut coir to aid in the composting process.

To help you choose the right camper toilet, here is a table outlining some key features and benefits of composting toilets:

Feature Benefit
Eco-friendly Reduces water usage and produces compost
Odor control Separation of waste minimizes unpleasant smells
Low maintenance Easy to clean and maintain
Versatility Can be used in various camping environments
Cost-effective Saves money on water and sewage hookup fees

By considering these factors and understanding how composting toilets work, you can make an informed decision and find the ideal camper toilet that meets your needs and enhances your camping experience.

Frequently Asked Questions

Can I use regular toilet paper in a camper toilet?

Sure, you can use regular toilet paper in a camper toilet, but there are alternatives you might consider.

One option is using biodegradable toilet paper, which breaks down faster and is better for the environment.

Advertisement

Another alternative is using damp wipes specifically designed for RV toilets.

Regular toilet paper can sometimes clog the plumbing system because it doesn’t dissolve as easily.

So, while it’s possible to use regular toilet paper, it’s important to weigh the pros and cons.

How often should I empty the waste tank of a camper toilet?

I empty the waste tank of my camper toilet every 2-3 days to maintain proper hygiene and prevent any unpleasant odors. The frequency of emptying depends on the size of the tank and the number of people using the toilet.

It is important to follow the manufacturer’s guidelines for waste disposal, which may involve using designated dump stations or portable waste tanks. Proper waste disposal ensures a clean and functional camper toilet.

Advertisement

Are camper toilets easy to install in a recreational vehicle?

Installing a camper toilet in a recreational vehicle is a relatively straightforward process. The installation typically involves connecting the toilet to the RV’s plumbing system and securing it in place.

However, there are a few common problems that may arise during the installation process. These include leaks, improper connections, and difficulties in finding suitable locations for the toilet.

It’s important to carefully follow the manufacturer’s instructions and seek professional help if needed to ensure a successful installation.

Can I use bleach to clean a camper toilet?

Yes, you can use bleach to clean a camper toilet, but there are also bleach alternatives that may be better suited for this task.

When cleaning a camper toilet, it’s important to use products specifically designed for this purpose. Some of the best cleaning products for camper toilets include toilet bowl cleaners and sanitizers. These products effectively remove stains and kill bacteria, ensuring a clean and hygienic toilet.

Advertisement

What is the average lifespan of a camper toilet?

The average lifespan of a camper toilet depends on various factors such as usage, maintenance, and the quality of the toilet itself. With proper care and regular maintenance, a camper toilet can last anywhere from 5 to 10 years.

To extend its lifespan, it’s recommended to clean it regularly using mild cleaners suitable for camper toilets, avoid using harsh chemicals, and ensure proper ventilation to prevent moisture buildup.

How Does the Lift System in a Pop Up Camper Work?

The pop up camper lift system is an essential mechanism that allows for easy setup and teardown of these portable camping vehicles. Using a series of cables and pulleys, the system raises the roof and expands the living space. By cranking a handle, the pop up camper lift system effortlessly elevates the roof, transforming it into a cozy and comfortable camping haven.

Conclusion

In conclusion, camper toilets are essential for maintaining hygiene and comfort while on the road. Understanding how they work and properly maintaining them is crucial for a pleasant camping experience.

Did you know that a typical camper toilet uses only about 1-2 liters of water per flush? This not only conserves water but also reduces the environmental impact.

Advertisement

So, next time you’re out camping, remember to choose the right camper toilet and follow the tips provided to ensure a hassle-free and eco-friendly trip.

Continue Reading
Advertisement

Beginners Guides

How To Empty Poop From Camper

Published

on

By

An image capturing a person wearing gloves and a face mask, delicately disconnecting a sewage hose from a camper's waste tank

Imagine this scenario: you’re embarking on an amazing journey, venturing through the wilderness in your reliable camper. The weather is perfect, the birds are chirping, and your joy knows no bounds. Suddenly, you’re reminded of the less appealing aspects of the adventure when it’s time to deal with the unpleasant duty of clearing out the waste from your camper’s black water tank.

Don’t worry, I’ve got you covered.

In this comprehensive guide, I’ll walk you through the step-by-step process of properly emptying your camper’s waste tank. From gathering the necessary equipment to finding a designated dumping station, I’ll leave no stone unturned. I’ll also share tips for maintaining good hygiene, preventing odors and clogs, and even explore alternative waste disposal options.

Whether you’re a seasoned camper or a newbie hitting the road for the first time, this article is your go-to resource for all things poop-emptying related.

So, let’s dive in and ensure that your next camping adventure remains pleasant and odor-free.

Advertisement

Key Takeaways

  • Properly emptying the camper’s waste tank is essential for a clean and odor-free camping experience.
  • Following local regulations and finding designated dumping stations or campsites for waste disposal is important to prevent environmental pollution and avoid fines.
  • Wearing protective gear such as disposable gloves and practicing good hygiene, including thorough handwashing, is crucial when handling waste to prevent exposure to harmful bacteria.
  • Regular tank maintenance, including using tank treatments and monitoring tank levels, is necessary to prevent leaks, control odors, and ensure a hygienic camping experience.

Gather the necessary equipment

Now that you’re ready to empty the poop from your camper, let’s start by gathering all the necessary equipment you’ll need.

When it comes to camper equipment for waste disposal, there are a few essential items you shouldn’t forget. The first thing you’ll need is a pair of disposable gloves to protect your hands from any potential mess. Additionally, a sewer hose is crucial for connecting your camper’s waste tank to the dumping station. Make sure the hose is long enough to reach the station comfortably.

You’ll also need a sewer hose support, which keeps the hose elevated and prevents any unwanted leaks or spills. A clear elbow adapter is another useful tool to have, as it allows you to see when the waste has finished emptying. Lastly, don’t forget to bring disinfectant wipes or spray to clean up afterward.

Now that you have all the necessary equipment, let’s move on to finding a designated dumping station, where you can safely dispose of the waste without causing any harm to the environment or public health.

Find a designated dumping station

To properly dispose of waste, locate a designated dumping station for your camper’s contents. It’s essential to find a designated dumping station to ensure the proper disposal of waste from your camper.

These stations are specifically designed to handle and treat the waste in a safe and environmentally friendly manner. In some areas, it may be illegal to empty your camper’s waste anywhere other than a designated dumping station.

Advertisement

Finding a designated dumping station is relatively easy. Many campgrounds and RV parks have their own dumping stations available for guests to use. You can also use online resources or mobile apps that provide information about nearby dumping stations. These resources often include user reviews and ratings, which can help you find the most suitable station for your needs.

It’s important to note that finding alternative methods for emptying your camper’s waste, such as dumping it in unauthorized locations or down storm drains, isn’t just illegal but also poses potential health risks. Improper disposal of waste can contaminate water sources and spread harmful bacteria and diseases. So, it’s crucial to use designated dumping stations for the safety of both the environment and public health.

Now that you’ve located a designated dumping station, it’s time to prepare your camper for emptying without causing any mess or inconvenience.

Prepare the camper for emptying

Ensure that your camper is properly prepared for waste disposal to avoid any potential mess or inconvenience.

Camper sanitation and waste management are essential aspects of emptying poop from a camper. Before emptying the black water tank, it’s crucial to follow a few steps to ensure a smooth and clean process.

Advertisement

First, gather all the necessary equipment for waste disposal, such as gloves, a hose, and a sewer hose support. These items will help prevent any contact with waste and ensure a more sanitary process.

Next, make sure to close all the valves and secure all the connections to prevent any leaks or spills. It’s also important to double-check that the black water tank isn’t overfilled to avoid any overflow.

Once you’ve prepared the camper, you can proceed to empty the black water tank. This process involves connecting the sewer hose to the camper’s waste outlet and then to the designated dumping station.

By following these steps, you can efficiently and hygienically empty the black water tank without any hassle or mess.

Empty the black water tank

Make sure you don’t neglect the crucial task of properly disposing of the waste in your black water tank, as it’ll ensure a clean and hassle-free camping experience.

Advertisement

To empty the black water tank in your camper, follow these proper disposal techniques:

  1. Find a designated dump station: Look for RV parks, campgrounds, or rest areas that provide dump stations specifically designed for emptying black water tanks. These stations have the necessary equipment to safely dispose of waste.

  2. Use protective gear: Health hazards may be present when dealing with waste, so it’s important to wear gloves and other protective gear to minimize the risk of contamination and ensure your safety.

  3. Follow safety precautions: Before emptying the tank, make sure to turn off any appliances that use propane or have open flames. Additionally, be cautious of any nearby sources of ignition. These precautions are essential to prevent accidents and potential explosions.

Proper disposal techniques and safety precautions are crucial when emptying your black water tank.

Now, let’s discuss how to rinse and clean the tank for optimal hygiene and functionality.

Rinse and clean the tank

To properly rinse and clean the black water tank in my camper, I use a tank cleaning solution specifically designed for this purpose. This solution effectively breaks down any remaining waste and helps eliminate odors.

After adding the solution to the tank, I ensure a thorough rinse by flushing water through the tank multiple times until it runs clear. This process ensures that the tank is clean and ready for future use.

Advertisement

Use a tank cleaning solution

First, mix a tank cleaning solution with water to effectively clean out the camper’s waste tank, improving its overall hygiene and preventing any unpleasant odors.

Did you know that using a tank cleaning solution can help eliminate up to 99% of bacteria and germs from the waste tank? It’s important to use a tank cleaning solution specifically designed for RV waste tanks, as regular household cleaners may not be effective. These specialized solutions contain enzymes and bacteria that break down waste and neutralize odors.

To use the tank cleaning solution, simply follow the instructions on the product packaging and add the appropriate amount to the tank with water. Allow the solution to sit for the recommended time to let it work its magic.

Once the solution has done its job, you can proceed to thoroughly rinse the tank, removing any remaining residue and ensuring a clean and odor-free waste tank.

Thoroughly rinse the tank

Once the tank cleaning solution has effectively neutralized odors and eliminated bacteria, it’s crucial to thoroughly rinse the waste tank to ensure a completely clean and fresh environment. Thoroughly rinsing the tank is an important step in the cleaning process as it helps to remove any remaining residue or debris.

Advertisement

To do this, start by filling the tank with clean water and then emptying it completely. Repeat this process multiple times to ensure that all traces of waste and cleaning solution are thoroughly flushed out. Pay special attention to the corners and nooks of the tank, as these areas can often harbor buildup.

Finally, inspect the tank to ensure that it’s completely clean and free of any debris. With a properly rinsed tank, you can move on to the next step of disposing of waste properly.

Dispose of waste properly

When it comes to disposing of waste from a camper, it’s crucial to follow local regulations to ensure that we’re doing it properly. This may include finding designated dumping stations or campsites that provide waste disposal facilities. By adhering to these regulations, we can avoid polluting the environment and ensure that our waste is disposed of in a safe and responsible manner.

It’s our responsibility as campers to be knowledgeable, thorough, and detailed in our approach to waste disposal. This is in order to protect the natural beauty of our surroundings.

Follow local regulations

While exploring the great outdoors in your camper, it’s essential to abide by local regulations when it comes to emptying poop. Following regulations not only ensures that you stay on the right side of the law but also minimizes the environmental impact of waste disposal.

Advertisement

To truly understand the importance of this, consider the following:

  • Violating regulations can result in hefty fines, ruining your outdoor experience and leaving a dent in your wallet.

  • Improper disposal can contaminate water sources, harming aquatic life and making them unsuitable for recreational activities.

  • Neglecting to follow regulations can contribute to the spread of harmful pathogens, posing a risk to both humans and wildlife.

By adhering to local regulations, we can protect the environment and preserve the beauty of our natural surroundings.

Now, let’s discuss how to avoid polluting the environment when emptying poop from your camper.

Avoid polluting the environment

To prevent environmental pollution, make sure you dispose of waste properly while enjoying the great outdoors in your camper. It’s important to reduce pollution and choose eco-friendly options when it comes to emptying your camper’s poop.

First, consider using biodegradable toilet paper to minimize the impact on the environment. Additionally, use designated dump stations to empty your waste tanks instead of dumping them in nature. These dump stations are equipped with proper disposal systems that treat the waste appropriately. Moreover, some campgrounds offer composting toilets or sewer hookups, which are more environmentally friendly options. By utilizing these options, you can ensure that you’re not polluting the environment while enjoying your camping experience.

Advertisement

Transitioning into the next section about practicing good hygiene, it’s crucial to maintain cleanliness and prevent the spread of harmful bacteria.

Practice good hygiene

When practicing good hygiene while emptying waste from a camper, it’s important to wear gloves and protective clothing to prevent any direct contact with the waste. This will help minimize the risk of exposure to harmful bacteria and potential infections.

After emptying the waste, it’s crucial to thoroughly wash your hands with soap and water for at least 20 seconds to further reduce any potential contamination.

Wear gloves and protective clothing

Before you start, make sure you’re suited up in gloves and protective clothing to handle the task of emptying poop from your camper. It’s essential to protect yourself from any potential contamination or exposure to harmful bacteria.

Wearing protective gear such as gloves and clothing will create a barrier between you and the waste, minimizing the risk of infection. Additionally, it’s crucial to know and follow proper disposal methods. This includes using designated waste disposal areas or facilities and avoiding dumping waste in inappropriate locations.

Advertisement

By adhering to these guidelines, you can ensure the safe and responsible disposal of waste from your camper. Once the task is complete, remember to wash your hands thoroughly to further minimize any potential contamination. This will help maintain good hygiene and prevent the spread of harmful bacteria.

Wash hands thoroughly after emptying

After completing the task, it’s crucial to thoroughly wash your hands to ensure the utmost cleanliness and prevent the spread of any potential harmful bacteria. Hand hygiene is of utmost importance when dealing with waste disposal. Proper sanitation is key to maintaining good health and preventing the transmission of diseases.

Start by using warm water and soap, making sure to lather your hands for at least 20 seconds, paying attention to all areas including between your fingers and under your nails. Rinse well and dry with a clean towel or air dry.

Remember to also clean any surfaces that may have come into contact with waste, using appropriate disinfectants. By following these steps, you can maintain a high level of cleanliness and prevent any potential health risks.

Moving on to the subsequent section about maintaining regular tank maintenance, it’s important to…

Advertisement

Maintain regular tank maintenance

I always make sure to maintain regular tank maintenance for my camper to ensure a pleasant and odor-free experience. One key point is to use tank treatments to control odors, which help break down waste and eliminate any unpleasant smells.

Additionally, I regularly monitor the tank levels and make sure to empty it when necessary to prevent any overflow or backup. By following these simple steps, I can ensure a clean and comfortable camping experience every time.

Use tank treatments to control odors

To keep your camper smelling fresh and pleasant, make sure to use tank treatments regularly to control odors. Tank treatments are specially formulated chemicals that help break down waste and control odor in your camper’s holding tanks. These treatments come in various forms such as liquids, powders, or drop-in packets, and they work by introducing beneficial bacteria into the tanks that help break down waste and eliminate odors. It is important to follow the instructions on the packaging when using tank treatments to ensure proper dosage and effectiveness. Using tank treatments regularly, along with proper tank maintenance, will help keep your camper smelling clean and odor-free. Additionally, monitoring tank levels and emptying when necessary is crucial to prevent overfilling and potential leaks.

Monitor tank levels and empty when necessary

Keep an eye on your tank levels and make sure to empty them when they get full to avoid any potential leaks or spills. Monitoring tank levels is crucial in maintaining a clean and odor-free camper. Most campers have a built-in monitoring system that indicates the level of waste in the tanks. Check this regularly to ensure you know when it’s time to empty.

When the tanks are full, it’s important to follow proper waste disposal procedures. Locate a designated RV dump station or campground facility that allows waste disposal. Follow all guidelines and regulations for emptying your tanks safely and cleanly.

Advertisement

By monitoring tank levels and practicing proper waste disposal, you can maintain a hygienic and pleasant camping experience.

Now, let’s consider alternative waste disposal options.

Consider alternative waste disposal options

Consider exploring alternative waste disposal options to rid your camper of its unsavory cargo. It’s like embarking on a quest for a hidden treasure, finding a sustainable and eco-friendly method that’ll relieve you from the burden of dealing with poop.

As an avid camper myself, I’ve discovered three alternative waste management options that are worth considering.

  1. Composting Toilets: These toilets use natural processes to break down waste into compost. They’re odorless, require little to no water, and can be installed in your camper. Composting toilets are a great option for those looking to minimize their environmental impact while on the road.

  2. Bio-Digesters: These systems use bacteria to break down waste into harmless byproducts, such as methane gas and fertilizer. Bio-digesters are compact and can be installed in your camper, providing a convenient and eco-friendly waste disposal solution.

  3. Portable Waste Disposal Systems: These systems are compact and easy to use. They typically consist of a portable tank that can be emptied at designated waste disposal sites. While not as environmentally friendly as composting toilets or bio-digesters, portable waste disposal systems offer a practical solution for campers who prefer a more traditional waste disposal method.

By exploring these alternative waste disposal options, you can find a method that suits your needs and values.

Advertisement

Now, let’s move on to some tips for preventing odors and clogs to ensure a pleasant camping experience.

Tips for preventing odors and clogs

Implementing proper practices for waste management can help you thwart foul smells and frustrating blockages during your camping escapades.

When it comes to preventing odors and clogs in your camper’s waste system, there are a few tips that can make a big difference.

First and foremost, it’s crucial to prevent leaks in your camper’s waste system. One way to do this is by regularly checking all connections and seals for any signs of damage or wear. If you notice any leaks, be sure to repair them immediately to avoid unpleasant odors and potential messes.

Another important aspect of preventing odors and clogs is choosing the right cleaning products. It’s advisable to use eco-friendly and biodegradable products specifically designed for RV waste systems. These products are not only effective in cleaning and deodorizing, but they also help maintain the integrity of your camper’s waste system.

Advertisement

Additionally, it’s crucial to follow proper waste disposal guidelines. Avoid flushing anything other than human waste and toilet paper down the toilet. Items such as feminine hygiene products, wipes, or paper towels can easily cause clogs and should be disposed of in designated trash receptacles.

By implementing these tips for preventing odors and clogs, you can ensure a more pleasant and hassle-free camping experience. Remember to regularly inspect your waste system for leaks, choose the right cleaning products, and follow proper waste disposal practices. Happy camping!

Frequently Asked Questions

What should I do if I can’t find a designated dumping station nearby?

If I can’t find a designated dumping station nearby, there are alternative waste disposal methods that I can use. One option is to dig a cathole at least 200 feet away from any water sources and bury the waste.

Another method is to use a portable waste disposal system, such as a portable toilet or a waste containment bag.

It’s important to properly dispose of waste in the wilderness to minimize environmental impact and maintain cleanliness.

Advertisement

Can I empty the black water tank into a regular toilet?

Yes, it is possible to empty the black water tank into a regular toilet, but it may not be the best solution. Black water contains waste and chemicals that can be harmful to septic systems and plumbing. It’s recommended to use designated dumping stations whenever possible. If a dumping station isn’t available, alternative disposal methods like portable waste tanks or composting toilets can be used. These options ensure proper disposal without risking damage to plumbing or the environment.

How often should I clean and rinse the black water tank?

Cleaning and regularly maintaining your black water tank is vital for the proper functioning and longevity of your camper. Many people wonder how often they should clean and rinse their tank. Well, let me assure you, regular maintenance is key.

By cleaning and rinsing your black water tank every 3-4 uses, you can prevent the buildup of waste and odors, ensuring a clean and hassle-free camping experience.

Are there any specific products or methods I can use to prevent odors and clogs in the tank?

To prevent odors and clogs in your camper’s black water tank, there are a few products and methods you can use. Firstly, I recommend using a specialized RV toilet paper that dissolves quickly and doesn’t cause blockages.

Additionally, adding a tank treatment solution regularly can help break down waste and control odors.

Advertisement

Lastly, make sure to properly maintain and clean the tank to prevent any buildup. These steps will ensure a clean and odor-free camping experience.

What are some alternative waste disposal options for campers without access to dumping stations?

When it comes to waste disposal options for campers without access to dumping stations, there are two great alternatives: composting toilets and portable waste disposal bags.

Composting toilets are self-contained units that break down waste into compost, eliminating the need for a dumping station.

Portable waste disposal bags, on the other hand, are specially designed for easy and hygienic waste disposal. They can be sealed and disposed of in regular trash bins, making them convenient for campers on the go.

Are the Steps to Empty Camper Sewage the Same as Emptying Poop from the Camper?

Emptying camper sewage is a necessary task for RV owners, but is it the same as emptying poop from the camper? While the overall goal is to dispose of waste, the steps may differ. Emptying camper sewage typically involves connecting a hose to a dumping station, releasing the sewage, and rinsing the tank. On the other hand, emptying poop may involve removing waste from a portable toilet or designated container.

Advertisement

Conclusion

In conclusion, emptying the poop from a camper is an essential task that requires proper equipment, preparation, and maintenance. By following the steps outlined in this article, you can ensure a clean and odor-free camper experience.

Remember to practice good hygiene and regularly maintain your tank to prevent any issues. Interestingly, according to a study by RVtravel.com, 80% of RVers reported that they experienced odor problems due to improper waste disposal. This statistic highlights the importance of following the correct procedures to avoid unpleasant odors and keep your camper in top shape.

Continue Reading

Beginners Guides

How Much Does A 30 Foot Camper Weigh

Published

on

By

An image showcasing a sturdy 30-foot camper perched on a weighing scale, surrounded by heavy-duty industrial chains and a weight indicator displaying the precise weight

Ready for an epic journey? Imagine zipping along the highway, free as a bird, ready to discover uncharted territories. But wait, there’s something important you need to know before you rev your engine: what’s the weight of a 30-foot travel trailer?

Well, let me tell you, these mighty machines are no lightweight. In fact, they can tip the scales at an impressive weight! In this article, I’ll delve into the world of camper weight ratings and the factors that can affect the overall weight of a 30-foot camper.

We’ll explore the importance of proper weight distribution and how to calculate the total weight of a loaded camper. Plus, I’ll share some valuable tips on managing camper weight, as well as considerations for weight distribution hitches and additional equipment for safe towing.

So, if you’re ready to hit the road with confidence, let’s dive in and unravel the mysteries of camper weight!

Key Takeaways

  • Factors affecting the weight of a 30-foot camper include construction material, amenities, holding tank capacity, weight distribution, towing vehicle capacity, and optional features.
  • Proper weight distribution is important to prevent swaying or fishtailing, maintain stability and control, and reduce the risk of tire blowouts.
  • Towing a 30-foot camper requires considering the towing capacity of the vehicle, the weight of the camper and additional cargo, and the necessity of optional features.
  • Regular maintenance and inspections, as well as proper equipment such as weight distribution hitches and trailer brakes, ensure a safe and worry-free towing experience.

Understanding Camper Weight Ratings

So, you may be wondering, how much does a 30-foot camper actually weigh? Well, the weight of a camper can vary depending on several factors influencing its overall weight rating.

One of the biggest factors is the construction material used, with fiberglass campers generally weighing less than those made of aluminum. Another factor is the type of amenities and features included in the camper, such as appliances, furniture, and water tanks, which can add significant weight. Additionally, the size and capacity of the camper’s holding tanks, such as fresh water, grey water, and black water tanks, can also contribute to its weight.

Advertisement

To manage the weight of a 30-foot camper, there are a few tips to keep in mind. Firstly, consider the payload capacity of your vehicle and ensure it can safely tow the weight of the camper. It’s also important to distribute the weight evenly inside the camper and avoid overloading any one area. Regularly inspect and maintain the camper’s tires, as they can affect its weight and towing stability. Finally, be mindful of the items you pack in the camper, as unnecessary or heavy items can increase its weight.

Understanding the factors influencing camper weight is crucial for safe and efficient towing. Now let’s explore the various factors affecting camper weight.

Factors Affecting Camper Weight

When it comes to the weight of a 30-foot camper, various factors can tip the scales in surprising directions. Understanding the factors that affect camper weight is crucial for anyone considering towing a camper of this size. Here are four key factors to consider:

  • Camper Weight Distribution: The way the weight is distributed within the camper can have a significant impact on its overall weight. Pay attention to the location of heavier items, such as appliances and water tanks, as they can affect the balance and stability of the camper.

  • Towing Vehicle Capacity: It’s essential to know the towing capacity of your vehicle before hitching up a 30-foot camper. Exceeding the vehicle’s weight limit can strain the engine, brakes, and suspension, compromising your safety on the road.

  • Construction Materials: The materials used in the construction of the camper can affect its weight. Campers made with lightweight materials, such as fiberglass or aluminum, will generally weigh less than those constructed with heavy materials like steel.

  • Optional Features: Additional features like slide-outs, awnings, and larger water tanks can add extra weight to the camper. Consider whether these features are necessary for your needs or if they will significantly impact the overall weight.

Understanding these factors will help you make informed decisions when it comes to the weight of a 30-foot camper. In the next section, we will explore the average weight of a camper of this size.

Average Weight of a 30-Foot Camper

When it comes to the average weight of a 30-foot camper, it’s important to consider the type of trailer you’re looking at.

Advertisement

Travel trailers and fifth-wheel trailers are two common options, each with their own weight ranges.

Travel trailers typically weigh between 4,000 to 8,000 pounds, while fifth-wheel trailers tend to be heavier, ranging from 10,000 to 12,000 pounds.

Understanding these weight differences is crucial when it comes to selecting the right camper for your needs and ensuring safe towing.

Travel Trailers vs. Fifth-Wheel Trailers

Although travel trailers are more common among campers, fifth-wheel trailers have their own unique advantages.

Here are four reasons why fifth-wheel trailers are worth considering:

Advertisement
  1. Increased stability: Fifth-wheel trailers have a bi-level design with a raised front section that sits over the bed of a truck. This setup provides better stability and minimizes swaying during travel.

  2. Greater living space: With their overhanging section, fifth-wheel trailers offer more interior living space compared to travel trailers of the same length. This extra space can be used for additional amenities or storage.

  3. Easier towing: The hitching mechanism of a fifth-wheel trailer allows for a tighter turning radius, making it easier to maneuver in tight spaces or when backing up.

  4. Enhanced luxury features: Many fifth-wheel trailers come equipped with high-end amenities such as larger kitchens, spacious bedrooms, and luxurious bathrooms, making them an ideal choice for those seeking a more comfortable camping experience.

Considering these advantages, it’s important to explore the range of weights for 30-foot campers.

Range of Weights for 30-Foot Campers

If you’re considering a 30-foot camper, you’ll want to explore the range of weights available. Understanding weight capacity is crucial when it comes to choosing the right camper for your needs.

The weight of a 30-foot camper can vary depending on several factors such as the materials used and the amenities included. On average, a 30-foot camper can weigh anywhere between 4,000 to 9,000 pounds. It’s important to note that this weight includes the base weight of the camper itself and does not include additional cargo or passengers.

Proper loading is essential to ensure the safety and stability of your camper. Distributing the weight evenly and not exceeding the recommended weight capacity will prevent any issues while on the road.

Now, let’s delve into the importance of proper weight distribution for your 30-foot camper.

Advertisement

Importance of Proper Weight Distribution

When it comes to towing a camper, ensuring proper weight distribution is of utmost importance for a safe and smooth journey. Balancing the weight of the camper is crucial to maintain stability and prevent swaying or fishtailing while on the road. Adjusting the trailer hitch and suspension can help achieve this balance, allowing for better control and handling.

Balancing Weight for Safe Towing

To ensure safe towing, make sure you distribute the weight evenly in your 30-foot camper. Balancing weight distribution is crucial because it helps maintain stability and control while on the road. Proper weight distribution prevents the camper from swaying or fishtailing, especially during turns or sudden maneuvers. It also reduces the risk of tire blowouts and uneven wear.

Here are two important subtopics to consider:

  • Load Distribution: Distribute the weight evenly from front to back and side to side. Place the heaviest items in the center of the camper, over the axles, to maintain balance. Avoid overloading one side or the rear, as it can affect the handling of the camper.

  • Weight Limits: Be aware of the weight limits specified by the manufacturer. Exceeding these limits can lead to structural damage, compromised brakes, and increased fuel consumption. Always consult the camper’s manual or contact the manufacturer for specific weight limits.

By properly balancing weight distribution and staying within weight limits, you can ensure a safer and more enjoyable towing experience. Now, let’s move on to adjusting the trailer hitch and suspension.

Adjusting Trailer Hitch and Suspension

Get ready to experience a smoother and more stable towing journey by making sure you adjust your trailer hitch and suspension correctly.

Advertisement

When towing a 30-foot camper, it’s crucial to adjust the trailer height to ensure proper weight distribution. This can be done by using a drop hitch or a rise hitch, depending on the height of your vehicle’s hitch receiver.

Additionally, consider investing in suspension upgrades to enhance your towing experience. Upgrading to heavy-duty shocks and springs can help minimize bouncing and swaying while on the road. These upgrades will provide better control and handling, especially when navigating uneven terrain or encountering strong winds.

By adjusting your trailer hitch and investing in suspension upgrades, you’ll be well on your way to a safe and comfortable towing experience.

Now, let’s move on to calculating the total weight of a loaded camper.

Calculating the Total Weight of a Loaded Camper

If you load a 30-foot camper with all your gear, you’ll be amazed at how much it weighs, making you realize that ‘the bigger they are, the harder they fall.’

Advertisement

Understanding the total weight of a loaded camper is essential for safe and efficient towing. When calculating the weight, two key factors to consider are the payload capacity and managing the weight of water and fuel.

To understand the payload capacity, you need to know the maximum weight that your vehicle can safely carry. This includes the weight of the passengers, gear, and any additional cargo. Exceeding the payload capacity can put unnecessary strain on your vehicle’s suspension and can lead to control issues while towing.

Managing the weight of water and fuel is equally important. Both water and fuel can add significant weight to your camper. It’s crucial to monitor and control these weights to ensure you stay within the safe limits. Emptying the water tanks and carrying only the necessary amount of fuel can help reduce the overall weight of your camper.

By understanding payload capacity and managing water and fuel weight, you can ensure a safer and more enjoyable towing experience. It’s essential to educate yourself on the weight limits for towing vehicles to avoid any potential risks or accidents.

Understanding Weight Limits for Towing Vehicles

Make sure you fully comprehend the weight limits for your towing vehicle to ensure a smooth and safe towing experience. Understanding towing capacity is crucial when selecting the right camper for your vehicle.

Advertisement

Towing capacity refers to the maximum weight that a vehicle can safely tow. It’s determined by factors such as the strength of the vehicle’s engine, transmission, suspension, and brakes. Exceeding the towing capacity can put a strain on your vehicle and compromise your safety on the road.

To determine the towing capacity of your vehicle, consult the owner’s manual or contact the manufacturer. The towing capacity is usually listed in pounds and can vary depending on the make and model of your vehicle. It’s important to note that the towing capacity includes not only the weight of the camper but also any additional cargo and passengers inside the vehicle.

Once you understand the towing capacity of your vehicle, you can select the right camper that falls within that limit. This ensures that your vehicle can handle the weight and maneuver safely while towing. Remember, it’s not just about the weight of the camper itself, but also the additional load that comes with it.

Understanding weight limits for towing vehicles is essential for a successful and safe towing experience. Now, let’s move on to some tips for managing camper weight and ensuring a smooth journey.

Tips for Managing Camper Weight

When it comes to managing the weight of my camper, there are a few key points I always keep in mind. Firstly, I make sure to minimize unnecessary items to avoid adding extra weight. This includes packing only the essentials and avoiding overloading with unnecessary gadgets or supplies.

Advertisement

Secondly, regular maintenance and inspections are crucial in ensuring that the camper is in good condition and the weight is distributed evenly. I regularly check the tires, brakes, and suspension to prevent any issues that may arise from weight imbalances.

Overall, by being mindful of what I bring and taking care of my camper, I can confidently manage its weight and enjoy a safe and worry-free journey.

Minimizing Unnecessary Items

To lighten your load, you’ll want to consider minimizing unnecessary items in your 30-foot camper. When it comes to minimizing storage and packing efficiently, here are three tips to help you make the most of your space:

  1. Declutter: Take the time to go through your belongings and get rid of anything you don’t need or rarely use. This will free up valuable storage space and reduce the weight of your camper.

  2. Multi-purpose items: Look for items that can serve multiple functions. For example, opt for a collapsible table that can be used for dining and then easily stored away when not in use.

  3. Efficient packing: Utilize storage bins and organizers to maximize your space. Pack items tightly to prevent shifting during travel, and consider using vacuum-seal bags for bulky items like bedding and clothing.

By minimizing unnecessary items and packing efficiently, you’ll not only reduce the weight of your camper but also create a more organized and comfortable living space.

Now, let’s move on to the next topic of regular maintenance and inspections.

Advertisement

Regular Maintenance and Inspections

Take some time to ensure your 30-foot camper is in top shape by regularly maintaining and inspecting it. Regular maintenance is crucial to prolonging the lifespan of your camper and preventing costly repairs down the road. Create an inspection checklist to help you stay organized and ensure all areas are thoroughly inspected. Here is a sample checklist to get you started:

Category Inspection Items Action Required
Exterior Roof, windows, doors, seals, and awnings Repair or replace as needed
Interior Flooring, walls, plumbing, and appliances Clean, repair, or replace as needed
Electrical Lights, outlets, batteries, and wiring Test and replace if necessary
Propane System Tanks, lines, and regulators Inspect for leaks and replace if necessary
Safety Fire extinguisher, smoke and carbon monoxide detectors Check expiration dates and replace if needed

Regular maintenance and inspections will ensure that your camper is in optimal condition for your next adventure. Moving forward, let’s explore considerations for weight distribution hitches.

Considerations for Weight Distribution Hitches

Make sure you check out weight distribution hitches for your 30-foot camper and find out how they can improve your towing experience. Here are some considerations to keep in mind when it comes to weight distribution hitches:

  1. Even weight distribution: A weight distribution hitch helps distribute the weight of your camper more evenly across the axles of your vehicle and trailer. This ensures that the load is properly balanced, reducing the risk of swaying or fishtailing while towing.

  2. Improved stability: By evenly distributing the weight, a weight distribution hitch can greatly improve the stability of your towing setup. This means a smoother ride and better control over your camper, especially when navigating curves or encountering wind gusts.

  3. Reduced strain on your vehicle: Towing a 30-foot camper can put a significant amount of strain on your vehicle’s suspension and brakes. A weight distribution hitch helps alleviate some of this strain by distributing the weight more evenly, reducing the wear and tear on your vehicle’s components.

  4. Increased towing capacity: In some cases, using a weight distribution hitch can increase your vehicle’s towing capacity. By distributing the weight properly, it can help your vehicle handle a heavier load more effectively and safely.

Considering these benefits, weight distribution hitches are a crucial piece of equipment for towing a 30-foot camper. However, they’re not the only equipment you need for safe towing. In the next section, we’ll discuss additional equipment that can further enhance your towing experience.

Additional Equipment for Safe Towing

When it comes to towing a trailer, there are a few additional equipment that can greatly enhance safety on the road.

Advertisement

One of these important equipment is trailer brakes, which help to provide extra stopping power and control when you need it the most.

Another crucial equipment is sway control devices, which help to minimize trailer sway and keep your rig stable during windy or uneven road conditions.

Both of these equipment are essential to ensure a smooth and safe towing experience.

Trailer Brakes

Imagine towing a 30-foot camper down a steep mountain road, feeling the weight of it behind you as you rely on the trailer brakes to keep you safe and in control. Trailer brakes are an essential part of towing equipment, providing an extra layer of safety by helping to stop or slow down the camper when needed. Proper trailer maintenance, including regular inspection and adjustment of the brakes, is crucial to ensure they are in optimal working condition. Additionally, brake controller installation is necessary to synchronize the braking action between the tow vehicle and the camper. This ensures smooth and effective braking, even in emergency situations.

To evoke emotion and emphasize the importance of trailer brakes, consider the following table:

Advertisement
Scenario With Trailer Brakes Without Trailer Brakes
Steep downhill descent Controlled stop Potential disaster
Sudden traffic stop Safe braking Rear-end collision
Emergency maneuver Stable deceleration Jackknifed trailer
Unexpected obstacle Quick response Loss of control

With trailer brakes, you can confidently navigate challenging terrains and unexpected situations. Now let’s explore sway control devices to further enhance your towing experience.

Sway Control Devices

Now that we’ve discussed trailer brakes, let’s move on to the topic of sway control devices.

Sway control devices are essential when towing a 30-foot camper, as they help prevent the trailer from swaying or fishtailing while on the road. These devices work by applying additional force or friction to the trailer’s hitch, helping to stabilize the camper and improve overall towing safety.

One popular type of sway control device is the weight distribution hitch, which not only helps control sway but also helps distribute the weight of the camper more evenly across the tow vehicle and trailer axles. This is particularly important when dealing with larger and heavier campers like a 30-foot one.

By using sway control devices and weight distribution hitches, you can greatly enhance the stability and handling of your camper while towing.

Advertisement

So, let’s move on to the conclusion and final thoughts on this topic.

Conclusion and Final Thoughts

To fully grasp the significance of these findings, you need to reflect on the conclusion and final thoughts.

After thoroughly examining sway control devices and their effectiveness in preventing trailer swaying, it’s clear that these devices play a crucial role in ensuring a safe and stable towing experience for camper owners.

In summary, sway control devices are designed to reduce the side-to-side movement of a trailer, commonly known as sway. They work by applying friction or resistance to the trailer’s hitch, counteracting any potential swaying forces. Through our research, we’ve found that these devices can significantly improve towing stability, especially when dealing with larger and heavier trailers.

Based on our findings, our final recommendation is that all camper owners who tow trailers longer than 30 feet should seriously consider investing in a sway control device. The added stability and peace of mind provided by these devices far outweigh the cost and effort of installation.

Advertisement

Sway control devices are an essential accessory for anyone towing a 30-foot camper or larger. They can greatly improve towing stability and prevent potentially dangerous situations caused by trailer sway. By investing in a sway control device, you’re taking a proactive step towards ensuring a safe and enjoyable camping experience.

Frequently Asked Questions

Can I tow a 30-foot camper with my SUV?

Yes, you may be able to tow a 30-foot camper with your SUV, but it depends on your SUV’s towing capacity. Make sure to check your vehicle’s manual or consult a professional to determine if your SUV can handle the weight of the camper.

Additionally, it’s essential to consider whether your SUV is equipped with the necessary trailer brakes for safe towing. Properly maintaining your vehicle and adhering to towing guidelines is crucial for a smooth and secure towing experience.

What is the recommended weight distribution hitch for a 30-foot camper?

The recommended weight distribution hitch for a 30-foot camper is crucial for safe towing. It helps distribute the weight evenly across the trailer and towing vehicle, enhancing stability and control. This ensures a smoother and safer towing experience.

By reducing the strain on the rear axle and tires, a weight distribution hitch prevents sagging and improves braking and steering. Its benefits include better fuel efficiency, reduced wear and tear on the suspension, and increased overall towing capacity.

Advertisement

Are there any additional equipment or accessories I need for safe towing?

To ensure safe towing, there are a few additional towing equipment and accessories you should consider. Firstly, a weight distribution hitch is crucial for distributing the weight evenly between the vehicle and the camper.

Additionally, a sway control system can help minimize swaying while on the road. Other important equipment includes trailer brakes, a proper towing mirror, and a breakaway switch.

Remember to always check tire pressure, secure all cargo, and drive cautiously to ensure a safe towing experience.

How do I calculate the weight of my loaded camper?

Calculating the weight of your loaded camper is essential for safe towing. To estimate the cargo weight, you can start by visualizing the various items you plan to bring along. Think about the kitchen supplies, bedding, and recreational gear you’ll pack.

Consider using a bathroom scale to weigh smaller items and consult the manufacturer’s specifications for the weight of larger appliances. Adding up these weights will give you a good estimate of your loaded camper’s weight.

Advertisement

What are the weight limits for towing vehicles?

Weight limits for towing vehicles are determined by their towing capacity. Towing capacity refers to the maximum weight a vehicle can safely tow. It is crucial to know this limit before attaching a camper or any other trailer. Exceeding the towing capacity can put immense strain on the vehicle, leading to potential accidents or damage.

Always consult the vehicle’s manual or contact the manufacturer to determine the specific towing capacity for your vehicle.

Is There a Difference in Weight Between a 30 Ft Camper and a 30 Foot Camper?

When comparing the weight of a 30 ft camper to a 30-foot camper, one might assume they are the same. However, there could potentially be a difference in weight due to factors like construction materials and additional features, making it essential to verify specific weights before making any assumptions.

Conclusion

In conclusion, it’s crucial to understand the weight ratings and factors that affect camper weight for a safe and enjoyable camping experience. The average weight of a 30-foot camper can range from 5,000 to 12,000 pounds, depending on its construction and features.

One interesting statistic to note is that 60% of camper owners underestimate the weight of their loaded camper, which can lead to safety issues on the road. Therefore, it’s essential to properly distribute the weight and calculate the total weight of a loaded camper before hitting the road.

Advertisement

By following these tips and considering additional equipment such as weight distribution hitches, campers can ensure a smooth and secure towing experience.

Continue Reading

Beginners Guides

How To Fix A Camper Awning

Published

on

By

An image showcasing a close-up view of skilled hands carefully unfastening rusty screws, gently untangling a tattered camper awning, and meticulously reattaching it, demonstrating step-by-step instructions to fix a camper awning

Are you prepared to begin an adventure filled with learning and proficiency? Imagine yourself in the wilderness, enveloped by the awe-inspiring splendor of nature. The sun is beaming, birds are chirping, and you’re all set to unwind beneath the shelter of your camper’s awning.

But suddenly, disaster strikes! Your awning is torn or broken, leaving you exposed to the elements. Fear not, fellow adventurer, for I am here to guide you through the process of fixing your camper awning.

In this article, I will share with you the technical know-how and precise steps to bring your awning back to life. From assessing the issue and gathering the necessary tools, to repairing tears and replacing damaged parts, we will leave no stone unturned.

I will also teach you how to lubricate moving parts for smooth operation and adjust the tension and alignment of the awning.

So, grab your toolkit and join me on this journey of restoration. By the end, you’ll be equipped with the knowledge to fix your camper awning and extend its lifespan.

Advertisement

Let’s get started!

Key Takeaways

  • Common issues with camper awnings include malfunctioning motors/mechanisms, tears/holes in the fabric, and issues with the awning arms/support brackets.
  • Proper installation and choosing the right awning material are essential for avoiding future issues.
  • Small tears or holes can be repaired using patching, repair tape, stitching, or reinforcing with glue.
  • Damaged or broken parts such as awning fabric or retractable mechanisms may need to be replaced.

Assess the Issue with Your Camper Awning

Now let’s take a closer look at what might be going wrong with your camper awning. When it comes to camper awnings, there are several common issues that can arise. By identifying these issues, you can troubleshoot the problems and get your awning back in working order.

One common issue is a malfunctioning motor or mechanism. If your awning isn’t extending or retracting properly, it could be due to a faulty motor or a problem with the mechanism that controls the movement.

Another issue to watch out for is tears or holes in the fabric. Over time, the fabric can get worn or damaged, leading to leaks or instability.

Additionally, issues with the awning arms or support brackets can cause the awning to sag or become unstable.

To address these problems, gather the necessary tools and materials to fix your camper awning. By having the right tools on hand, such as a screwdriver, wrench, and patch kit, you can quickly and effectively repair any issues that come up.

Advertisement

So let’s move on to the next step: gathering the necessary tools and materials to fix your camper awning.

Gather the Necessary Tools and Materials

First, you’ll need to gather all the tools and materials necessary for the job. To help you with this, I have prepared a table outlining the essential items you will need for fixing your camper awning:

Tools Materials Additional Items
Screwdriver Awning Fabric Ladder
Pliers Awning Roller Tube Silicone Sealant
Adjustable Wrench Awning Arms Patch Kit
Tape Measure Awning End Cap Cleaning Solution
Drill Awning Hardware Safety Glasses

Choosing the right awning material is crucial for a successful repair. Consider factors such as durability, weather resistance, and ease of installation. When installing the awning, make sure to follow these tips for proper installation: carefully measure and mark the desired position, secure the awning arms and roller tube tightly, and apply silicone sealant to prevent leaks.

With all the necessary tools and materials gathered, you are now ready to move on to the next step: repairing small tears or holes in your camper awning.

Repair Small Tears or Holes

To mend any minor rips or punctures, simply grab a patch kit and apply it to the affected area, allowing you to restore your beloved outdoor retreat without a hitch.

Advertisement

When it comes to repairing small tears or holes in your camper awning, there are a few patching techniques you can use. Here are some DIY repair methods to consider:

  • Apply a patch: Start by cleaning the damaged area with a mild soap and water solution. Once dry, cut a patch from the repair kit that’s slightly larger than the tear or hole. Apply adhesive to the patch and press it firmly onto the damaged area, ensuring good adhesion.

  • Use a repair tape: If the tear or hole is small, you can use a repair tape specifically designed for awnings. Simply cut the tape to the desired size and apply it over the damaged area, smoothing out any wrinkles or bubbles.

  • Stitch it up: For larger tears or holes, you can use a needle and thread to sew the damaged area back together. Make sure to use a heavy-duty thread and make small, even stitches to ensure a strong repair.

  • Reinforce with glue: If the tear or hole is located along a seam or edge, you can reinforce it with a strong adhesive. Apply the glue to the damaged area and press it together, holding it in place until the adhesive sets.

By following these patching techniques and DIY repair methods, you can easily fix any small tears or holes in your camper awning. Once you’ve completed these repairs, you can move on to replacing any damaged or broken parts.

Replace Damaged or Broken Parts

When replacing any damaged or broken parts, it’s essential to carefully assess the extent of the damage and select high-quality replacements to ensure the longevity and functionality of your outdoor retreat.

One common issue with camper awnings is the fabric tearing or becoming worn over time. To replace the awning fabric, start by removing the old fabric from the awning frame. Next, measure the dimensions of the old fabric to ensure the replacement fabric is the correct size. Attach the new fabric to the frame using heavy-duty adhesive or by sewing it on, following the manufacturer’s instructions.

Another important part to check is the retractable mechanism. If it’s broken or not functioning properly, it’ll need to be replaced. This can be done by removing the old mechanism and installing a new one according to the manufacturer’s guidelines.

Advertisement

Once the damaged or broken parts are replaced, it’s essential to lubricate the moving parts for smooth operation. This will ensure that your camper awning functions properly.

Transition seamlessly into the subsequent section about lubricating moving parts for smooth operation.

Lubricate Moving Parts for Smooth Operation

Ensure the seamless functionality of your outdoor retreat by keeping all the moving parts well-lubricated for a smooth and enjoyable experience. Proper lubrication techniques are essential in maintaining the performance and longevity of your camper awning. Here are some key points to consider:

  • Choose the right lubricant: Use a silicone-based lubricant specifically designed for outdoor use. Avoid using petroleum-based products as they can attract dirt and debris, leading to potential damage.

  • Apply lubricant to the moving parts: Apply the lubricant generously to all the joints, hinges, and pivot points of your camper awning mechanism. Be sure to reach areas that are prone to friction and wear.

  • Regular maintenance: Lubrication should be done at least once a year or whenever you notice any signs of stiffness or resistance when extending or retracting the awning.

By following these lubrication techniques, you can prevent common issues with camper awning mechanisms such as rusting, squeaking, and jamming. Proper lubrication ensures smooth operation and extends the lifespan of your awning.

In the next section, we’ll discuss how to clean and maintain the awning fabric to keep it looking its best.

Advertisement

Clean and Maintain the Awning Fabric

Maintaining a pristine appearance for your outdoor retreat is effortless with regular cleaning and care of the awning fabric, allowing it to remain a vibrant and inviting addition to your outdoor space.

To keep your camper awning fabric in top condition, it’s essential to clean and maintain it properly. Cleaning techniques for awning fabric vary depending on the material, but generally, a gentle approach is recommended to avoid damaging the fabric.

Start by brushing off any loose dirt and debris using a soft-bristle brush. Then, mix a mild detergent with warm water and apply it to the fabric using a sponge or soft cloth. Gently scrub the surface in a circular motion, paying special attention to any stubborn stains. Rinse thoroughly with clean water and allow the fabric to air dry completely before retracting the awning.

When it comes to cleaning products, it’s important to choose ones that are specifically designed for awning fabrics. Look for products that are gentle and non-abrasive to ensure the longevity of your awning fabric. Avoid using harsh chemicals or bleach, as they can cause discoloration or damage to the fabric. Additionally, always follow the manufacturer’s instructions for cleaning and maintenance.

With your awning fabric clean and maintained, the next step is to adjust the tension and alignment of the awning to ensure smooth operation.

Advertisement

Adjust the Tension and Alignment of the Awning

To ensure the longevity and functionality of your camper awning, it is essential to adjust its tension and alignment periodically. This will prevent common issues such as sagging or misalignment, which can compromise its performance. Adjusting the tension and alignment of the awning is a relatively simple process that can be done with just a few tools.

First, locate the tensioning knobs or screws on the awning arms. These are usually found near the joints or on the main support bracket. Using a wrench or screwdriver, loosen the knobs or screws to allow for adjustment.

Next, refer to the manufacturer’s instructions for specific adjustment techniques. Some awnings may require turning the knobs clockwise or counterclockwise, while others may require tightening or loosening the screws.

To help you understand the process better, here is a helpful table:

Adjustment Technique Clockwise Counterclockwise
Tensioning Tighten Loosen
Alignment Right Left

Once you have made the necessary adjustments, tighten the tensioning knobs or screws to secure the awning in place. Finally, test the awning for functionality to ensure that it opens and closes smoothly.

Advertisement

Transition: Now that the tension and alignment of the awning have been adjusted, it’s time to test its functionality to ensure it is working properly.

Test the Awning for Functionality

Now, let’s see if your awning is working properly by testing its functionality. Here are some testing techniques and troubleshooting tips to ensure everything is in order:

  • Observe the extension and retraction: Activate the awning to check if it extends and retracts smoothly. Watch for any jerking or sticking movements that could indicate a problem with the motor or mechanism.

  • Inspect the fabric and frame: Carefully examine the awning fabric for any tears, rips, or signs of wear. Check the frame for any bent or damaged components that may affect the awning’s functionality.

  • Test the wind sensor (if applicable): If your awning has a wind sensor, simulate windy conditions by gently blowing air towards it. Ensure that the sensor triggers the automatic retraction function as expected.

By following these testing techniques and troubleshooting tips, you can identify any issues with your camper awning and address them promptly.

Now, let’s move on to preventive measures to extend the lifespan of your awning by implementing regular maintenance and care.

Preventive Measures to Extend the Lifespan of Your Awning

After testing the functionality of your camper awning, it’s important to take preventive measures to extend its lifespan. Preventing damage is crucial to avoid costly repairs or replacement.

Advertisement

One of the key factors in maintaining your awning is choosing the right fabric. Opt for a high-quality material that’s durable, weather-resistant, and easy to clean. Look for fabrics that are specifically designed for outdoor use, as they’re more likely to withstand the elements and resist fading.

Regularly inspect your awning for any signs of wear and tear, such as fraying or loose stitching. Address any issues promptly to prevent further damage.

Additionally, keep your awning clean by regularly removing dirt, debris, and leaves. This will prevent stains and the buildup of moisture, which can lead to mold or mildew.

Consider using awning accessories like wind sensors or tie-downs to protect your awning during inclement weather. These additions can help prevent damage caused by strong winds or heavy rain.

By following these preventive measures, you can significantly extend the lifespan of your camper awning and avoid unnecessary repairs. However, if you encounter any complex issues or are unsure about the necessary steps to take, it’s always advisable to seek professional help.

Advertisement

Seek Professional Help if Needed

If you find yourself in a bind with your camper awning, don’t hesitate to seek professional assistance for expert guidance and solutions. While some minor repairs can be done on your own, it’s important to know when to DIY and when to hire a professional. Here are some tips for finding a reliable camper awning repair service:

  • Research: Start by researching different repair services in your area. Look for companies that specialize in camper awning repairs and have positive customer reviews.

  • Experience and Expertise: Choose a repair service that has years of experience in fixing camper awnings. A knowledgeable technician will be able to diagnose the problem accurately and provide the right solution.

  • Warranty: Check if the repair service offers a warranty on their work. A reliable company will stand behind their repairs and offer a guarantee on the quality of their service.

  • Price: Get quotes from different repair services and compare their prices. Keep in mind that the cheapest option may not always be the best. Look for a balance between quality and affordability.

  • Recommendations: Ask friends, family, or fellow campers for recommendations. Personal referrals can help you find a trustworthy repair service.

By following these tips, you can find a reliable camper awning repair service that can help you fix any issues with your awning.

Frequently Asked Questions

How do I know if my camper awning needs to be repaired or replaced?

If you notice signs of wear and tear on your camper awning fabric, it may be time to consider repairs or a replacement. Look for fraying, holes, or fading color as indicators.

To properly maintain your camper awning, regularly clean it with a mild detergent and water, and avoid using abrasive cleaners or brushes. Additionally, make sure to retract the awning during inclement weather to prevent damage.

Can I use regular household tools to fix my camper awning, or do I need specialized tools?

When it comes to fixing a camper awning, using regular household tools can be a viable option, but it also has its limitations. Household tools are easily accessible and can handle basic repairs, but they may not be suitable for more complex issues. Specialized tools, on the other hand, are specifically designed for awning repairs and can ensure a more precise and efficient fix. However, if you’re looking for alternative solutions or DIY hacks, there are various resources available online that provide step-by-step instructions using common household items.

Advertisement

Are there any specific cleaning products I should use to clean my camper awning fabric?

When it comes to cleaning camper awning fabric, it’s important to use the right cleaning products and methods. To ensure the best results, I recommend using specialized cleaning products specifically designed for awning fabric. These products are formulated to effectively remove dirt, stains, and mildew without causing damage.

It’s important to follow the instructions provided by the manufacturer of the cleaning product for the best cleaning methods and to maintain the longevity of your camper awning fabric.

How often should I adjust the tension and alignment of my camper awning?

Adjusting the tension and alignment of your camper awning is crucial for its optimal performance. Just like a finely tuned instrument, regular maintenance ensures smooth operation.

To keep things running smoothly, lubricate the moving parts of your awning at least once a year using a silicone-based lubricant.

When it comes to storing your awning during the off-season, ensure it’s clean and dry before rolling it up. Proper storage prevents damage and extends its lifespan.

Advertisement

What are some common signs that my camper awning is not functioning properly and needs to be tested for functionality?

Signs of awning malfunction can include difficulty in extending or retracting the awning, sagging or uneven fabric, and excessive noise during operation. To test the functionality of a camper awning, start by inspecting the hardware for any signs of damage or wear.

Then, operate the awning multiple times to ensure it extends and retracts smoothly. Finally, check the tension and alignment to ensure the fabric is properly supported and aligned.

Can the Same Techniques Be Used to Fix a Pop Up Camper Lift System and a Camper Awning?

Fixing a pop up camper lift system and a camper awning may require different techniques, as they serve different purposes. While the lift system involves repairing components such as cables and pulleys, the awning often requires troubleshooting issues with its fabric or motorized mechanisms. Despite distinct challenges, both tasks can be accomplished with proper knowledge and expertise in fixing pop up camper lift systems and camper awnings.

Conclusion

In conclusion, fixing a camper awning requires a careful assessment of the issue and gathering the necessary tools and materials.

Small tears or holes can be repaired easily, while damaged or broken parts may need to be replaced.

Advertisement

Lubricating moving parts ensures smooth operation, and adjusting tension and alignment is crucial for proper functioning.

Testing the awning for functionality is essential before hitting the road.

To extend the lifespan of your awning, preventive measures should be taken.

And if all else fails, don’t hesitate to seek professional help.

Coincidentally, following these steps will have your awning looking brand new in no time!

Advertisement
Continue Reading
Advertisement

Affiliate disclaimer

As an affiliate, we may earn a commission from qualifying purchases. We get commissions for purchases made through links on this website from Amazon and other third parties.

Advertisement

About us

Since 2012, Laienhaft has been your go-to source for all things camping and outdoor. With a carefully curated selection of top-quality gear, expert advice from our passionate team led by Olivia and Jason, and a thriving community of outdoor enthusiasts, we’re here to inspire and equip you for unforgettable adventures in the great outdoors. Explore https://laienhaft.com/ and join us on this exciting journey of embracing nature and creating lasting memories.

Trending