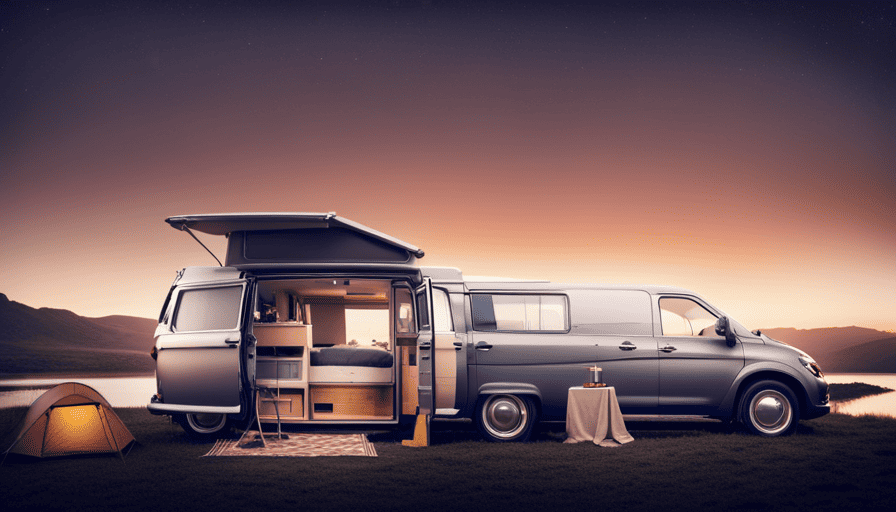
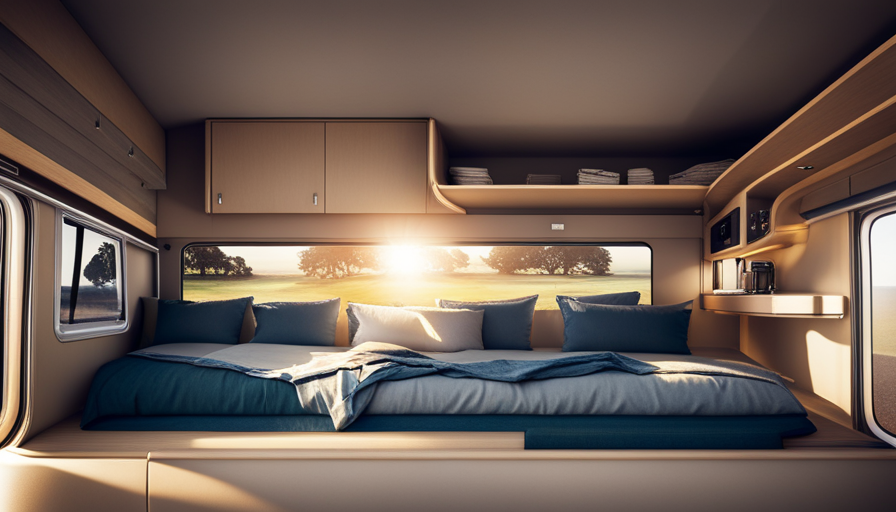
Transforming a minivan into a camper may seem daunting, but with the right plan and effort, converting your regular family vehicle into a cozy and functional camper is entirely feasible. Discover how you can easily create your own camping haven on wheels. Start your DIY adventure now and enjoy the freedom of exploring the great outdoors in your customized camper van.
In this article, I will guide you through the step-by-step process of converting your minivan into the perfect home on wheels. From assessing your needs and budget, to planning your layout and design, to gathering the necessary tools and materials – I’ve got you covered.
We’ll cover everything from removing seats and cleaning the interior, to installing insulation and flooring, to adding an electrical system and plumbing features. And of course, we’ll also discuss personalizing and decorating your camper to make it truly feel like home.
So, let’s dive in and turn that ordinary minivan into an extraordinary camper!
Key Takeaways
- Assess needs, budget, and desired features before starting the conversion.
- Plan layout and design for a functional and efficient setup.
- Choose lightweight and durable materials for interior construction.
- Install insulation, flooring, custom furniture, and storage solutions to optimize space and increase storage capacity.
Assess Your Needs and Budget
Now that you’ve decided to convert your minivan into a camper, it’s time to assess your needs and budget.
Before you begin, it’s important to consider your budget considerations and space requirements. First, determine how much you’re willing to spend on this project. Take into account the cost of materials, tools, and any professional help you may need.
It’s also crucial to think about your space requirements. How many people will be using the camper? Do you need enough space for sleeping, cooking, and storage? Consider the layout and design that’ll best fit your needs. Measure the dimensions of your minivan and create a floor plan that maximizes space efficiency.
Think about the types of features you want to include, such as a bed, kitchenette, or bathroom. Keep in mind that every inch of space counts, so prioritize your needs accordingly.
With your budget and space requirements in mind, you can now move on to planning the layout and design of your minivan camper.
Plan Your Layout and Design
Begin by envisioning the layout and design for your ideal camping setup, ensuring that every inch of space is utilized effectively and efficiently, creating a harmonious and functional sanctuary on wheels. Maximizing space is crucial in a minivan camper conversion, as you have limited square footage to work with.
Consider the different zones you want to include, such as a sleeping area, kitchenette, and storage space. Think about how each area will flow into the next, ensuring ease of movement and functionality.
When it comes to choosing the right materials and finishes, opt for lightweight and durable options that can withstand the demands of life on the road. Look for space-saving solutions like foldable furniture and multipurpose fixtures. Utilize vertical space by installing shelves and cabinets that maximize storage capacity. Consider using lightweight materials like plywood or composite boards for the construction of your camper’s interior.
As you plan your layout and design, keep in mind your personal preferences and needs. Do you prioritize a comfortable sleeping area or a spacious kitchenette? Remember to strike a balance between functionality and comfort. With a well-thought-out layout and the right materials, you can create a cozy and efficient camper.
In the next section, we will discuss how to gather the necessary tools and materials to bring your vision to life.
Gather the Necessary Tools and Materials
To make your dream camping setup a reality, you’ll need to gather the tools and materials necessary for the project.
The first step in converting a minivan into a camper is choosing the right vehicle. Consider the size, shape, and features of the minivan to ensure it meets your needs. Once you have found the perfect minivan, it’s time to gather inspiration and ideas. Browse online forums, watch YouTube videos, and visit camper van conversion websites to get a sense of what others have done. This will help you come up with a layout and design that suits your preferences. Next, you’ll want to gather all the necessary tools and materials for the conversion. This may include things like insulation, flooring, electrical components, and furniture. Once you have everything you need, it’s time to start the conversion process. This may involve removing seats, building storage compartments, and tying down truck camper components to ensure they are secure and safe for travel. Remember to take your time and be patient, as converting a minivan into a camper can be a time-consuming and detail-oriented project.
Now that you have a clear vision of what you want, it’s time to gather the necessary tools and materials. You will need basic tools such as a drill, screwdriver, and measuring tape. Additionally, you will need materials such as plywood, insulation, electrical wiring, and plumbing supplies if you plan on adding any amenities like a sink or toilet. It’s important to research and purchase the right materials for your specific needs to ensure a successful conversion.
With the tools and materials in hand, you can now move on to the next step: removing the seats and cleaning the interior. This will provide a blank canvas for your camper van conversion.
Remove Seats and Clean the Interior
Once you’ve chosen the right minivan for your adventure, it’s time to roll up your sleeves and start by removing the seats and giving the interior a thorough cleaning, creating a fresh canvas for your ultimate travel sanctuary. For example, imagine finding an old minivan with worn-out seats and dusty floors, but after removing the seats and deep-cleaning the interior, it transforms into a cozy and inviting camper van ready for endless road trips.
Before diving into the seat removal process, it’s crucial to prioritize safety considerations. Ensure the minivan is parked on a level surface and engage the parking brake to prevent any accidents. Next, disconnect the battery to avoid any electrical mishaps during the removal. Refer to the minivan’s manual or online resources for specific instructions on removing the seats. Once the seats are out, you’ll have a clearer view of the interior and can proceed with the cleaning process.
To effectively clean the interior, gather the best cleaning products suitable for the minivan’s surfaces. A mild detergent mixed with warm water works well for wiping down the dashboard, door panels, and other hard surfaces. For fabric upholstery, use a specialized fabric cleaner to remove any stains or odors. Don’t forget to vacuum the floors thoroughly and wipe down the windows for a sparkling finish.
Now that the seats are out and the interior is spotless, it’s time to move on to the next step: installing insulation and flooring, which will enhance the comfort and coziness of your camper van.
Install Insulation and Flooring
With the seats removed and the interior cleaned to perfection, it’s time to create a cozy and insulated space by installing the right flooring and insulation for your ultimate travel sanctuary.
Installing insulation is crucial to maintaining a comfortable temperature inside your camper and reducing noise from the outside. There are various insulation materials available, but I recommend using closed-cell foam insulation for its excellent insulation properties and moisture resistance. Cut the insulation panels to fit the walls, floor, and ceiling of your minivan, ensuring a snug and tight fit. Secure the insulation using adhesive or tape, making sure there are no gaps or air leaks.
Next, it’s time to choose the flooring material that suits your needs and personal style. Consider using vinyl or laminate flooring as they’re durable, easy to clean, and come in a wide range of designs. Start by measuring the floor area and cutting the flooring to fit. Lay the flooring down, starting from one corner and working your way across the space. Use adhesive or click-lock installation methods to secure the flooring in place.
Now that the insulation and flooring are in place, you’ve created a comfortable and insulated foundation for your camper. In the next section, we’ll explore how to build custom furniture and storage solutions to maximize the functionality of your minivan-turned-camper.
Build Custom Furniture and Storage Solutions
When building your custom furniture and storage solutions, you’ll be amazed to learn that optimizing every inch of available space can increase your storage capacity by up to 50%. One of the key elements to consider when converting a minivan into a camper is designing a comfortable and functional sleeping area. Custom bed designs are essential to ensure a good night’s sleep while maximizing the use of space. Foldable or modular beds are great options, allowing you to transform the area into a seating or dining space during the day.
In addition to the bed, creative storage solutions are crucial to keep your belongings organized and easily accessible. To visualize the endless possibilities, consider the following table:
| Storage Solution | Description |
|---|---|
| Overhead compartments | Utilize the space above for storing clothes, |
| bedding, and other lightweight items. | |
| Under-bed storage | Install drawers or bins underneath the bed for |
| storing larger items and equipment. | |
| Wall-mounted shelves | Take advantage of vertical space by adding |
| shelves for books, toiletries, and small items. |
By incorporating these custom bed designs and creative storage solutions, you can make the most of your minivan’s interior. In the next section, we will discuss how to install the electrical system and lighting, ensuring a comfortable and well-lit camper experience.
Install Electrical System and Lighting
To create a truly comfortable and well-lit interior, you should now proceed with installing an electrical system and lighting in your customized minivan. This step is crucial for ensuring that you have a reliable source of power and adequate lighting during your camping adventures.
Here are some important points to consider when installing an electrical system and lighting in your minivan:
-
Wiring and safety precautions: Before starting any electrical work, it’s essential to have a solid understanding of wiring basics and safety precautions. Make sure to use the appropriate gauge of wire for your electrical needs and install circuit breakers to prevent overloading.
-
Choosing the right lighting fixtures: When selecting lighting fixtures for your minivan camper, consider both functional and aesthetic aspects. LED lights are a popular choice due to their energy efficiency and long lifespan. Additionally, consider fixtures that can be dimmed or have adjustable brightness to create different atmospheres.
-
Incorporate proper switches and controls: Install switches strategically to control different lighting zones in your minivan. This will allow you to easily adjust the lighting levels based on your needs.
-
Install power outlets and USB ports: Having accessible power outlets and USB ports will enable you to charge your devices and power any additional appliances or accessories you may have.
-
Don’t forget about safety: Install smoke detectors and carbon monoxide detectors to ensure your safety while using electrical devices in your minivan.
By following these guidelines, you’ll be able to create a well-lit and functional interior in your minivan camper. In the next section, we’ll explore how to add water and plumbing features to complete your conversion.
Add Water and Plumbing Features
Now comes the fun part – let’s dive into the watery wonders and plumbing perfection of your ultimate minivan adventure oasis! When converting your minivan into a camper, adding water and plumbing features is essential for a comfortable and convenient experience on the road.
One of the first steps is to consider water storage options. You can install a freshwater tank underneath the van or utilize portable containers that can be easily refilled. Additionally, consider incorporating a gray water tank to collect wastewater from sinks or showers, ensuring environmental responsibility.
To make your camper self-sufficient, solar power is a great addition. Installing solar panels on the roof will provide you with a reliable source of electricity for running your water pump, charging devices, and powering other appliances. This eco-friendly solution allows you to enjoy your minivan adventure while minimizing your carbon footprint.
As you wrap up the water and plumbing features, it’s time to transition into the next section about personalizing and decorating your camper. Creating a cozy and inviting interior is key to maximizing your comfort during your travels. So let’s explore how you can turn your minivan into a home away from home!
Personalize and Decorate Your Camper
Transforming your minivan into a cozy and inviting oasis is all about personalizing and adding your unique touch. After adding water and plumbing features, it’s time to focus on creating a comfortable and visually appealing space.
Here are three key ways to personalize and decorate your camper:
-
Choose a theme: Selecting a theme for your camper can help create a cohesive and visually pleasing design. Whether it’s a rustic cabin, beach getaway, or modern minimalistic style, the theme will guide your choices for colors, patterns, and decorative elements.
-
Create a cozy sleeping area: One of the most important aspects of a camper conversion is the sleeping area. Invest in a comfortable mattress or foam pad and add cozy bedding, such as soft blankets and pillows. Consider installing blackout curtains or shades to block out light and ensure a good night’s sleep.
-
Add personal touches: Make your camper feel like home by incorporating personal touches. Hang family photos or artwork on the walls, display souvenirs from your travels, or bring along your favorite scented candles. Small details like decorative throw pillows, rugs, and curtains can also add a touch of personality to the space.
Now that your camper is personalized and decorated, it’s time to test and enjoy your new conversion.
Test and Enjoy Your New Camper Conversion
After personalizing and decorating your camper, it’s time to kick back and enjoy your new home on wheels. Perhaps by taking it on a road trip to explore the beautiful national parks, with over 400 to choose from in the United States alone. Before embarking on your adventure, it’s important to test your new camper conversion to ensure everything is in proper working order.
Start by checking the electrical system. Test all the lights, outlets, and appliances to make sure they’re functioning correctly. Don’t forget to charge the batteries and test the solar panels if you’ve installed them.
Next, examine the plumbing system. Fill the water tanks and check for any leaks or issues with the pipes. Test the water pump and make sure it’s providing a steady flow of water.
Once you’re confident in the functionality of your camper, it’s time to hit the road. Consider reaching out to fellow campers for testimonials and recommendations on camping destinations. With their insights, you can discover hidden gems and must-visit spots.
Remember to pack all the essentials for a comfortable trip, such as bedding, cookware, and outdoor gear. Plan your itinerary, but also leave room for spontaneity and exploration. Enjoy the freedom and flexibility that comes with traveling in your own personalized camper. Happy camping!
Frequently Asked Questions
How much does it typically cost to convert a minivan into a camper?
The cost range to convert a minivan into a camper can vary depending on the necessary equipment. On average, the conversion can cost between $1,000 to $5,000.
This cost includes essential equipment such as a bed platform, storage cabinets, insulation, and electrical components. Additional expenses may include a solar panel system, a portable toilet, a kitchenette, and other optional features.
It’s important to consider your budget and desired level of comfort when planning the conversion.
What are some common challenges or problems people encounter during the conversion process?
Common mistakes during a minivan to camper conversion include underestimating the amount of space needed for essential amenities like a bed, storage, and a kitchen area.
Another challenge is ensuring proper ventilation and insulation for comfort in different climates.
Essential tools for the conversion process include a jigsaw for cutting holes, a drill for installing fixtures, and a variety of measuring tools.
Attention to detail and careful planning are crucial to avoid these common challenges.
Are there any legal requirements or regulations to consider when converting a minivan into a camper?
Oh, the joy of legal requirements and safety regulations when converting a minivan into a camper! It’s like a thrilling obstacle course that adds an extra layer of excitement to the process.
Before embarking on this adventure, be prepared to navigate the maze of rules and regulations governing camper conversions. From weight limits to electrical systems, there are numerous guidelines to follow to ensure your converted minivan meets all the necessary legal and safety requirements.
How long does it usually take to complete a minivan camper conversion?
On average, the time required to complete a minivan camper conversion varies depending on the complexity of the project and the individual’s experience. However, it typically takes around 2-4 weeks to finish the conversion.
Essential tools for this process include power tools such as drills, saws, and sanders, as well as measuring tape, screwdrivers, and wrenches. These tools are necessary to ensure accurate and secure installation of the necessary components for a functional and comfortable camper.
Can I still use my minivan as a regular vehicle after converting it into a camper?
Yes, you can still use your minivan as a regular vehicle after converting it into a camper. However, there are some pros and cons to consider.
On the positive side, you’ll have a versatile vehicle that can be used for both daily commuting and camping adventures.
On the downside, the conversion may reduce the amount of seating or cargo space available, and the added weight of the camper features may impact fuel efficiency and handling.
What are the similarities in converting a cargo van and a minivan into a camper?
Converting a cargo van into a camper and converting a minivan into a camper share numerous similarities. Both projects involve the utilization of available space efficiently, incorporating sleeping and living areas, and incorporating essential amenities like kitchenette and storage. The process to convert cargo van into camper and a minivan into a camper often includes insulation, paneling, and customization based on individual preferences. Ultimately, the goal is to create a comfortable and functional living space on wheels.
Conclusion
In conclusion, converting a minivan into a camper is a thrilling and rewarding adventure that allows you to explore the world in style and comfort. By following the steps outlined in this guide, you can transform your minivan into a cozy and functional home on wheels. Additionally, adding personal touches and customizing the interior will make the camper feel like your own. Don’t forget to also consider cargo trailer conversion tips if you need extra storage or amenities for your travels. With a little creativity and effort, your minivan camper will be ready for unforgettable journeys and unforgettable memories.
From assessing your needs to personalizing your camper, every step is crucial in creating a space that reflects your unique personality. So grab your tools, unleash your creativity, and embark on this incredible journey of transforming your minivan into a camper that’ll take you on unforgettable adventures.
Happy travels!

