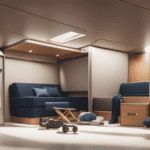
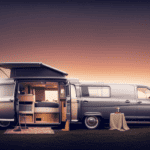
Are you dreaming of hitting the open road and exploring the world on your own terms? Do you crave the freedom to travel to any destination at any time based on your own desires? If so, converting a cargo van into a camper van may be the perfect solution for you.
In this step-by-step guide, I will show you how to transform a simple cargo van into a comfortable and functional camper that will be your home on wheels.
First, we will discuss how to choose the right van for your conversion, considering factors such as size, fuel efficiency, and budget. Then, we will dive into planning your layout and design, making sure to maximize space and functionality.
Next, we will tackle insulation and soundproofing to ensure a cozy and quiet interior. Electrical and plumbing systems will be installed to provide power and water on the go.
Once the basics are covered, we will move on to building furniture and storage units that will make your van feel like a home. Windows and ventilation will be added for natural light and fresh air.
Finally, we will paint and decorate the camper van to reflect your personal style. Safety features will also be installed to ensure peace of mind on your adventures.
By following these steps, you will have your own custom camper van that is ready for the road. So, let’s get started on this exciting journey of converting a cargo van into a camper!
Key Takeaways
- Choosing the right van size and model is crucial for a successful conversion
- Insulating and soundproofing the van is important for comfort and coziness
- Installing electrical and plumbing systems for power, lighting, and water is necessary
- Maximizing space with storage solutions, foldable furniture, and lightweight materials is essential for functionality and organization
Choose the Right Van for Conversion
Now that you’ve decided to embark on the epic journey of converting a cargo van into a camper, it’s time to delve into the thrilling task of choosing the right van for your grand adventure.
When it comes to choosing the right van for your camper conversion, there are a few key factors to consider: budget considerations and finding the right size and model.
First and foremost, it’s important to establish a budget for your camper conversion project. Determine how much you’re willing to spend on purchasing the van itself, as well as any additional costs for modifications and renovations. This will help narrow down your options and ensure that you stay within your financial means.
Next, consider the size and model of the van. Think about how many people will be traveling with you and how much space you’ll need for sleeping, cooking, and storage. Take into account the overall length, height, and width of the van, as well as any specific features or amenities you desire.
Once you have chosen the right van for your camper conversion, it’s time to start planning the layout and design. Transitioning into the subsequent section about planning your layout and design, you can begin envisioning how you want your camper to look and function.
Plan Your Layout and Design
When planning the layout and design for converting a cargo van into a camper, there are several key points to consider.
First, determine your sleeping and seating arrangements based on your personal preferences and the size of the van.
Next, consider your storage needs and how you can maximize the available space for storing your belongings.
Lastly, design your kitchen and bathroom space, taking into account the necessary appliances and fixtures you’ll need for cooking and hygiene.
By carefully considering these key points, you can create a functional and comfortable living space in your converted camper van.
Determine Your Sleeping and Seating Arrangements
First, envision your ideal sleeping and seating arrangements, considering factors such as comfort, space optimization, and versatility. When planning the sleeping arrangements, think about whether you prefer a fixed bed or a convertible setup that can be used as both seating and sleeping space. Consider the size of the van and how much space you want to allocate for sleeping.
For seating comfort, think about whether you want a bench seat, individual seats, or a combination of both. Take into account the number of people who will be using the van and how much legroom and back support you need.
Once you have determined your sleeping and seating arrangements, you can consider your storage needs. This will ensure that everything has its place and is easily accessible during your travels.
Consider Your Storage Needs
To optimize your space and ensure easy accessibility during your travels, carefully evaluate your storage requirements. When converting a cargo van into a camper, storage organization is key. Consider the items you will need to bring along, such as clothes, cooking utensils, and camping gear. To make the most of your limited space, it’s important to find space-saving solutions. One way to achieve this is by incorporating storage compartments and cabinets into your van. Utilize every nook and cranny by adding shelves and hooks to maximize storage capacity. Additionally, consider installing a roof rack or a hitch-mounted cargo carrier for larger items like bikes or kayaks. By efficiently organizing your storage space, you can ensure that everything has its place and is easily accessible during your travels. With your storage needs taken care of, let’s move on to designing your kitchen and bathroom space.
| Storage Solutions | Benefits |
|---|---|
| Storage Compartments | Allow for easy organization and accessibility of smaller items |
| Cabinets | Provide additional storage space for larger items |
| Shelves | Maximize vertical space and allow for storage of various items |
| Hooks | Hang items such as towels, jackets, or bags to keep them off the floor and free up space for other belongings |
Design Your Kitchen and Bathroom Space
Now it’s time to create a functional and stylish kitchen and bathroom area that’ll make your travels even more enjoyable.
When designing your kitchen, consider space-saving tips to maximize the limited area. Opt for compact appliances like a mini-fridge and a portable stove. Install a foldable countertop or use a cutting board that fits over your sink for extra workspace. Utilize vertical space by adding shelves or hanging storage baskets.
As for the bathroom, choose materials and finishes that are durable and easy to clean, such as waterproof vinyl flooring and moisture-resistant paint. Install a compact toilet and a space-saving shower. Consider using a portable water heater for hot showers on the go.
With a well-designed kitchen and bathroom, you’ll be ready to embark on your adventures.
Now, let’s move on to the next step, which is to insulate and soundproof your van.
Insulate and Soundproof Your Van
One key step in turning your cargo van into a cozy camper is insulating and soundproofing it, so you can enjoy a peaceful and comfortable travel experience. Here are three cost-effective insulation options to consider for your camper van:
-
Reflective insulation: This type of insulation is lightweight and easy to install. It uses reflective materials to reflect heat away from your van during hot days and helps to retain warmth during cold nights.
-
Spray foam insulation: This type of insulation provides excellent thermal insulation and soundproofing capabilities. It expands to fill every nook and cranny, creating an airtight seal that helps regulate temperature and reduces noise.
-
Fiberglass insulation: This traditional insulation option is widely available and relatively inexpensive. It comes in batts or rolls that you can easily cut to fit the walls and ceiling of your van. Fiberglass insulation is effective at reducing heat transfer and absorbing sound.
To further reduce noise in your camper van, consider using soundproofing materials such as mass-loaded vinyl or acoustic foam panels. These materials can be applied to the walls, floors, and ceiling to minimize road noise and create a more serene environment.
After insulating and soundproofing your van, the next step is to install electrical and plumbing systems to make it fully functional for your camping adventures.
Install Electrical and Plumbing Systems
When it comes to converting a cargo van into a camper, one of the most important aspects is setting up your power source. This involves installing a battery system or connecting to a shore power supply.
Next, you’ll want to focus on installing lighting and appliances, which can include LED lights, a refrigerator, and a stove.
Lastly, creating a water system is crucial for your camper van, whether it’s installing a sink with a water tank or connecting to a campground water hookup.
Set Up Your Power Source
To set up your power source in converting a cargo van into a camper, you’ll need to install a deep cycle battery, which can last up to twice as long as a regular battery. This battery is essential for providing electricity to your camper, especially when you’re not connected to a power source.
Additionally, it’s a good idea to have a portable solar panel as a renewable energy source. This will allow you to charge your battery even when you’re on the go. However, it’s always important to have a backup plan, so consider installing a generator as well. This will ensure that you have power even in situations where solar energy might not be sufficient.
With your power source in place, you can now move on to the next step of installing lighting and appliances, creating a comfortable and functional living space in your camper.
Install Lighting and Appliances
Once you’ve set up your power source, it’s time to install the necessary lighting and appliances to create a comfortable and functional living space in your converted van.
To enhance the cozy ambiance, there are various types of lighting for camper vans to consider. LED lights are energy-efficient, long-lasting, and perfect for illuminating different areas of the van. String lights can add a touch of whimsy and create a warm atmosphere. Spotlights are ideal for task lighting, allowing you to read or cook with ease.
Additionally, choosing the right appliances for your camper van is crucial. A compact refrigerator can keep your food fresh, while a portable stove allows you to cook meals on the go. Don’t forget about a small microwave for quick heating.
Now that you have your lighting and appliances in place, it’s time to create a water system for your camper van.
Create a Water System
Now you’re ready to craft a functional water system for your cozy mobile home.
When creating a water system for your camper, there are a few cost considerations and maintenance requirements to keep in mind. First, you’ll need to decide on the type of water storage you want, such as a freshwater tank or portable water containers. Consider the size of your van and your water usage needs when making this decision.
Next, you’ll need to install a water pump and a water heater if desired. These components will ensure you have a steady flow of water and hot water for cooking and cleaning. Additionally, don’t forget to include a sink and faucet in your water system design.
Proper maintenance of your water system is crucial to prevent leaks and ensure clean water. Regularly inspect all connections and fixtures, and sanitize your water tank periodically.
With your water system in place, you can now move on to the next step: building your furniture and storage units.
Build Your Furniture and Storage Units
Now that the electrical and plumbing systems are installed, it’s time to move on to building the furniture and storage units for our camper.
First, I’ll construct the bed and seating area, making sure to measure and cut the plywood to fit perfectly in the designated space.
Next, I’ll install cabinets and shelves to provide ample storage for all our belongings.
Lastly, I’ll maximize the space by incorporating foldable furniture, such as a collapsible table and chairs, to ensure that we can easily transform the space whenever needed.
Construct Your Bed and Seating Area
To create a cozy camper, start by building a comfortable bed and seating area in your cargo van.
The first step is to construct a sturdy bed frame that fits the dimensions of your van. Measure the space carefully and cut the necessary pieces of wood to build the frame. Use screws and brackets to secure the pieces together, ensuring stability.
Once the frame is complete, add a mattress that fits the dimensions perfectly.
Next, design a seating layout that maximizes space and comfort. Consider using a bench-style seating arrangement with storage underneath. This will provide additional storage space for your camping essentials.
Lastly, transition into the next section by mentioning that once the bed and seating area are complete, it’s time to install cabinets and shelves for added functionality and organization.
Install Cabinets and Shelves
Once you’ve created a cozy bed and seating area, it’s time to install cabinets and shelves to maximize functionality and keep your essentials organized.
Start by measuring the available space in your cargo van and plan where you want your cabinets and shelves to be installed. Use lightweight materials such as plywood to construct the cabinets and shelves. Secure them to the walls of the van using screws or brackets.
To further maximize space, consider installing hooks and hangers on the walls or inside the cabinets to hang items such as coats, bags, or cooking utensils. Organize your kitchen utensils by using drawer dividers or small storage boxes. This will ensure that everything has its place and is easily accessible.
With the cabinets and shelves in place, you can now move on to the next step of maximizing space with foldable furniture.
Maximize Space with Foldable Furniture
As you’re installing cabinets and shelves to keep your essentials organized, you’ll find that maximizing space with foldable furniture is a clever way to add depth and complexity to your camper.
Foldable furniture offers several advantages when it comes to converting a cargo van into a camper. Firstly, it allows you to easily transform your living space from day to night, as foldable beds can be tucked away during the day and unfolded for a comfortable sleep at night. Additionally, foldable tables and chairs can be collapsed and stored when not in use, creating more room for other activities.
There are various space-saving furniture options available, such as foldable dining tables, wall-mounted desks, and collapsible stools. These furniture pieces are designed to be compact and lightweight, making them perfect for a camper van conversion.
Now, let’s explore how to choose and install flooring and wall coverings to complete your camper transformation.
Choose and Install Flooring and Wall Coverings
When transforming your cargo van into a cozy camper, make sure to pick out and install flooring and wall coverings that will bring both style and comfort to your new home on wheels. The right flooring can make a big difference in the overall feel of your camper, so consider your options carefully. You could go for vinyl or laminate flooring, which are both durable and easy to clean. Alternatively, you could opt for carpet or rugs to add a touch of warmth and coziness. As for wall coverings, there are plenty of materials to choose from. You could use wood paneling for a rustic look or go for wallpaper or fabric for a more personalized touch. To help you visualize the possibilities, take a look at the table below:
| Flooring Options | Wall Covering Materials |
|---|---|
| Vinyl | Wood paneling |
| Laminate | Wallpaper |
| Carpet | Fabric |
| Rugs |
Once you’ve chosen your flooring and wall coverings, it’s time to move on to the next step: adding windows and ventilation to your camper.
Add Windows and Ventilation
Now that we’ve chosen and installed the perfect flooring and wall coverings for our camper van, it’s time to focus on another crucial aspect – adding windows and ventilation.
-
Window installation techniques:nnStart by measuring and marking the desired location for your windows. Use a jigsaw to carefully cut the openings, ensuring a precise fit. Install window frames using screws or adhesive, and seal any gaps with silicone caulk. Finally, attach the window panes securely to the frames.
-
Ventilation options for camper vans:nnProper ventilation is essential to keep the air fresh and prevent condensation buildup. Consider installing roof vents or window vents to allow for air circulation. You can also opt for a powered fan that can be mounted on the roof or wall to provide excellent airflow.
-
Maximize natural light:nnTo create a bright and airy space, choose windows that are large enough to let in ample natural light. This’ll make your camper van feel more spacious and inviting.
-
Enhance privacy:nnDon’t forget to install curtains or blinds to ensure privacy when needed.
With our windows installed and ventilation options in place, we can now move on to the next exciting step – painting and decorating our camper van to truly personalize it and make it our own.
Paint and Decorate Your Camper Van
To truly make your camper van feel like a personalized and cozy home on wheels, it’s time to dive into the exciting process of painting and decorating. This step will not only add a touch of style to your van but also create a comfortable and inviting atmosphere.
Start by choosing a color scheme that reflects your personality and preferences. Consider using light and neutral colors to make the space feel larger and brighter. Once you’ve decided on the colors, gather your painting supplies and begin by prepping the surfaces. Sand down any rough areas and apply a primer to ensure the paint adheres properly.
Then, start painting the walls, ceiling, and cabinets. Don’t forget to protect the floors and furniture with drop cloths.
After the paint has dried, it’s time to add some decorative touches. Consider incorporating camper van interior accessories such as curtains, throw pillows, and rugs to add warmth and personality to the space. Utilize wall space by installing hooks or shelves for extra storage. You can also use bins and baskets to keep your belongings organized. Remember to keep the overall design functional and practical, maximizing every inch of space in your camper van.
With the painting and decorating complete, it’s now time to focus on installing safety features.
Install Safety Features
Enhance your camper van with essential safety features to ensure peace of mind on the road. When converting a cargo van into a camper, it’s crucial to prioritize safety to protect yourself and your loved ones during your adventures. Here are two important safety features to consider:
-
Importance of seat belt installation:
- Begin by inspecting the existing seat belts in your van. Ensure they’re in good condition and meet safety standards.
- If your van doesn’t have seat belts, it’s crucial to install them properly. Consult a professional or refer to the vehicle’s manual for guidance.
- Install seat belts on all seating areas, including the driver and passenger seats, as well as any additional seats you’ve added to your camper van.
- Double-check that the seat belts are securely attached and functioning properly before hitting the road.
-
Installing fire extinguishers in the camper van:
- Choose a fire extinguisher that’s suitable for your camper van’s size and needs. Look for one with a rating of at least 5-B:C.
- Mount the fire extinguisher in an easily accessible location, such as near the entrance or kitchen area.
- Ensure everyone onboard knows how to use the fire extinguisher by reading the instructions and practicing with it.
- Regularly inspect the fire extinguisher to ensure it’s fully charged and in proper working condition.
By implementing these safety features, you can travel with peace of mind, knowing that you’ve taken important steps to protect yourself and your fellow travelers. Now, let’s move on to the next section and learn how to test and enjoy your camper van.
Test and Enjoy Your Camper Van
Are you ready to hit the road and experience the joy of testing out and enjoying your newly transformed camper van? After all the hard work you’ve put into converting your cargo van into a camper, it’s time to reap the rewards and embark on an adventure.
Here are some steps to help you make the most of your camper van experience.
First, finding the best camping spots is crucial. Research campgrounds in the areas you plan to visit and take note of their amenities, such as water and electricity hookups. Look for spots with beautiful scenery and activities that align with your interests, whether it’s hiking, fishing, or simply enjoying a peaceful view.
Next, organizing your camping gear will ensure a smooth and stress-free trip. Use storage containers and bins to keep everything in its place. Consider investing in collapsible items, such as tables and chairs, to save space. Create a checklist to ensure you have all the essentials, like cooking utensils, sleeping bags, and toiletries.
Once you’ve found the perfect camping spot and organized your gear, it’s time to relax and enjoy the fruits of your labor. Take in the beauty of nature, cook delicious meals using your onboard kitchen, and spend quality time with loved ones. Remember to disconnect from technology and embrace the simplicity of outdoor living.
Testing and enjoying your camper van is the ultimate reward for all your hard work. By finding the best camping spots and organizing your gear, you’ll be able to fully immerse yourself in the camper van lifestyle.
So pack your bags, hit the road, and create unforgettable memories in your newly converted camper van.
Frequently Asked Questions
How much does it cost to convert a cargo van into a camper?
Converting a cargo van into a camper can be done on a budget, but costs will vary depending on the level of customization and whether you go the DIY route or hire a professional.
A DIY conversion can cost anywhere from $1,000 to $10,000, depending on materials and equipment.
Hiring a professional can range from $5,000 to $50,000, depending on the extent of the conversion.
Let’s dive deeper into the cost breakdown and options available.
What are the legal requirements for converting a cargo van into a camper?
Legal requirements for converting a cargo van into a camper involve certain considerations and safety regulations. It’s crucial to abide by local laws regarding vehicle modifications, such as registering the converted van as a motorhome.
Ensure that your camper meets specific criteria, like having a separate sleeping area, cooking facilities, and a water supply. Additionally, safety measures like fire extinguishers, carbon monoxide detectors, and properly secured furniture are essential.
Always consult your local authorities for specific regulations.
Can I install a bathroom in my camper van?
Yes, you can install a bathroom in your camper van by installing plumbing and adding a shower. First, you’ll need to plan the layout and decide where you want to install the bathroom.
Next, you’ll need to install a water supply system, including a fresh water tank, a water pump, and plumbing pipes.
Then, you can install a shower unit and connect it to the water supply.
Finally, you’ll need to install a waste water tank and a toilet.
How do I choose the right type of insulation for my camper van?
Choosing the right insulation for your camper van is like finding the perfect winter coat—it’s all about keeping the warmth in and the cold out.
There are a few types of insulation to consider. Fiberglass insulation is affordable and readily available, but it can be itchy and may not provide the best thermal performance.
Foam insulation, on the other hand, offers excellent insulation properties and is easy to install.
Reflective insulation is another option, providing a barrier against radiant heat.
Ultimately, the best choice depends on your budget, climate, and personal preferences.
What are some tips for maximizing space and storage in a camper van conversion?
To maximize space in a camper van conversion, there are several creative storage solutions you can consider. One idea is to utilize vertical space by installing shelves or hanging organizers.
Another option is to incorporate multi-functional furniture, such as a bed with storage underneath or a table that can be folded away when not in use.
Additionally, utilizing the space under benches or stairs for storage can help maximize every inch of the van.
Conclusion
After months of hard work and dedication, my cargo van’s been transformed into a magnificent camper, ready for countless adventures. The once empty space now boasts a well-thought-out layout, with cozy furniture and ample storage for all my belongings.
The insulation and soundproofing ensure a peaceful and comfortable atmosphere, while the electrical and plumbing systems provide the necessary amenities. With windows that offer breathtaking views and a fresh breeze, my camper van’s like a floating oasis on wheels.
I can’t wait to hit the open road and explore the world in my newfound sanctuary.

