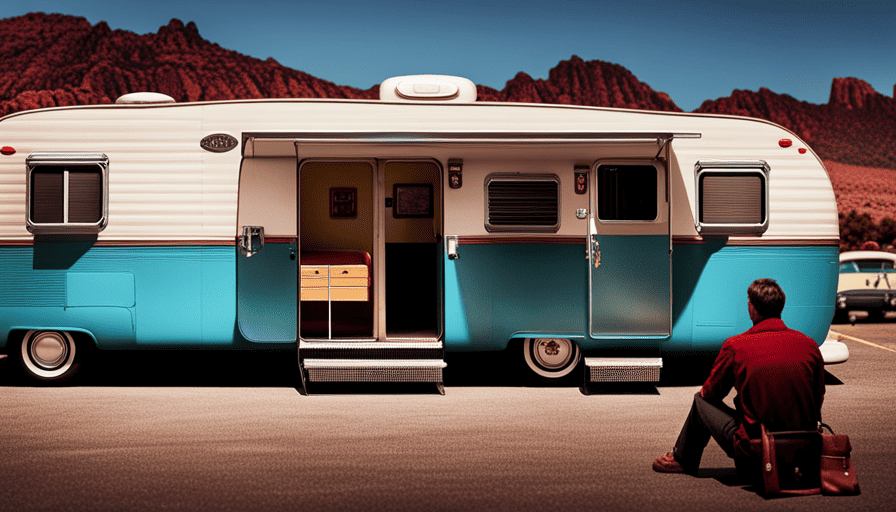
Envision setting off on an expedition where your path turns into a canvas and the globe reveals itself in front of you. A cargo trailer, repurposed into a camper, serves as the vehicle that transports your aspirations and adventures.
With a little creativity and some handy skills, you can turn a simple cargo trailer into a cozy and personalized home on wheels. In this article, we will guide you through the process of converting a cargo trailer into a camper, step by step. From assessing your needs and planning your layout, to adding windows and personalizing your space, we will cover it all.
Get ready to unleash your inner designer and create a mobile oasis that reflects your unique style and spirit. So, buckle up and join us on this transformative journey as we show you how to turn a cargo trailer into a camper that is ready to hit the open road.
Key Takeaways
- Assess needs and plan the layout of the camper
- Insulate and weatherproof the interior for comfort and protection
- Hire a professional electrician for electrical wiring and lighting installation
- Install plumbing and water systems for a fully functional camper
Assess Your Needs and Plan Your Layout
Now that we know what we want in a camper, it’s time to figure out how to fit it all in our cargo trailer. The first step in this process is to assess the space available and plan the layout accordingly.
We need to consider the dimensions of the trailer and determine how much room we have to work with. This will help us decide on the size and placement of different components such as the bed, kitchen area, and storage space.
Designing for comfort is also a crucial aspect of turning a cargo trailer into a camper. We need to think about how to maximize the use of space while still creating a cozy and functional living area. This involves careful consideration of the layout, as well as the selection of materials and furnishings. We might want to add insulation to keep the camper comfortable in different weather conditions, as well as install windows to allow for natural light and ventilation.
Once we have assessed our needs and planned our layout, the next step is to remove any existing cargo features that aren’t necessary for our camper conversion. This will help us create a blank canvas to work with and make it easier to customize the space to our liking.
Remove Existing Cargo Features
First, let’s get rid of any unnecessary features in the cargo trailer. This step is crucial in transforming the trailer into a comfortable camper. Here are three items to consider during this process:
-
Assessing Costs: Before removing anything, it’s important to evaluate the costs involved. Determine what features are worth keeping and what can be discarded. This will help you allocate your budget effectively and ensure a successful conversion.
-
Removing Cargo Features: Start by removing any shelves, hooks, or other cargo-specific fixtures. These features may hinder the layout and functionality of your camper. By clearing out the cargo-related elements, you’ll create a blank canvas for your camper conversion.
-
Finding Inspiration: Look for camper conversion ideas online or in magazines to get inspired. You can find countless pictures and stories of creative transformations that’ll help you envision the possibilities for your own camper. Take note of layouts, storage solutions, and design elements that catch your eye.
With unnecessary features removed, it’s time to move on to the next step: insulating and weatherproofing the interior. This’ll ensure your camper can withstand various weather conditions and provide a comfortable living space.
Insulate and Weatherproof the Interior
Ensure your future adventures are cozy and protected by insulating and weatherproofing the interior of your transformed cargo trailer. The insulation techniques you choose will greatly impact the comfort level inside your camper.
One popular option is to use foam board insulation, which is easy to install and provides excellent thermal resistance. Another option is spray foam insulation, which expands to fill every nook and cranny, creating a seamless barrier against heat and cold. Whichever method you choose, make sure to insulate the walls, floor, and ceiling to prevent drafts and maintain a consistent temperature.
Once the insulation is in place, it’s time to focus on weatherproofing. This step is crucial to protect your camper from moisture, leaks, and harsh weather conditions. Start by sealing any gaps or cracks with silicone caulk or weatherstripping. Pay special attention to windows, doors, and vents, as these are common areas for water intrusion.
Next, apply a waterproof sealant to the exterior of your trailer, paying attention to seams and joints. This will create a protective barrier against rain and snow.
With the interior insulated and weatherproofed, you can now move on to the next step of your camper conversion journey: installing electrical wiring and lighting. Transitioning smoothly into the next section, you’ll learn how to bring power and illumination to your new home on wheels.
Install Electrical Wiring and Lighting
After insulating and weatherproofing the interior, it’s time to bring power and illumination to your newly transformed mobile home by installing electrical wiring and lighting. Ensuring electrical safety is crucial, so it’s recommended to hire a professional electrician for this task. They’ll ensure that the wiring is done correctly and up to code, minimizing any potential hazards.
When it comes to lighting options, there are various choices to consider. LED lights are energy-efficient and provide bright illumination, perfect for a camper. They’re also available in different colors and can be easily installed. Another option is installing recessed lighting, which provides a sleek and modern look. Additionally, wall sconces or pendant lights can add a touch of elegance to your camper.
When working with electrical wiring, it’s essential to follow safety guidelines. Make sure to turn off the power source before starting any installation or repairs. Use the appropriate tools and materials and avoid overloading circuits. Installing a circuit breaker can help protect your electrical system from overload and short circuits.
Now that your camper is well lit and powered up, it’s time to move on to the next step: building and customizing your furniture and storage. This’ll allow you to create a functional and personalized space that meets your needs and preferences.
Build and Customize Your Furniture and Storage
Ready to create a cozy and functional living space? Let’s dive into building and customizing your furniture and storage for a personalized touch in your mobile home transformation.
One of the best parts about converting a cargo trailer into a camper is the ability to design and build your furniture to perfectly fit your needs and style. Whether you prefer a rustic, minimalist, or modern aesthetic, this is your chance to let your creativity shine.
Start by measuring your space and sketching out a floor plan. This will help you determine the size and layout of your furniture pieces. Next, gather your materials and get to work! Build a bed frame with storage underneath to maximize space or create a dinette area that can easily convert into an extra sleeping area. Don’t forget about the kitchen! Install cabinets and shelves to store your cookware and food supplies.
Once your furniture is built, it’s time to personalize and decorate. Add cushions, pillows, and curtains in your favorite colors and patterns to make your camper feel like home. Hang artwork or family photos on the walls to add a personal touch. And don’t forget about storage! Utilize bins, baskets, and hooks to keep everything organized and easily accessible.
Now that you’ve built and customized your furniture and storage, it’s time to move on to the next step: installing plumbing and water systems. With these essential features in place, your cargo trailer will truly transform into a comfortable and functional camper.
Install Plumbing and Water Systems
Let’s now move on to installing the plumbing and water systems to make your mobile home fully functional and ready for all your daily needs. Designing a plumbing system for your cargo trailer camper is crucial to ensure you have access to water wherever you go.
Start by mapping out the layout and determining where you want your sink, shower, and toilet to be located. Consider the size of your water tanks and the amount of water you’ll need for your daily activities.
When it comes to water storage options, you have a few choices. You can install a freshwater tank underneath the trailer or use portable water containers that can be easily refilled. For greywater, you can either connect a hose to drain it directly into a designated area or install a separate greywater tank.
Ensure that your plumbing system is properly sealed to prevent leaks and use flexible water lines to accommodate the movement of the trailer. Don’t forget to install a water pump to provide water pressure.
Now that you have your plumbing system in place, it’s time to choose and install flooring and wall coverings. These elements will not only add aesthetic appeal to your camper but also provide insulation and durability.
Transitioning into the next section, let’s explore how to transform your cargo trailer into a cozy and stylish living space.
Choose and Install Flooring and Wall Coverings
Once you’ve finalized your plumbing system, it’s time to select and install flooring and wall coverings to create a warm and inviting living space inside your mobile home.
When it comes to flooring options for your camper, there are several choices to consider. One popular option is vinyl flooring, which is durable, easy to clean, and comes in a variety of styles and colors. Another option is laminate flooring, which is affordable and offers the look of real wood or tile. If you prefer a more luxurious feel, you can opt for carpeting, although keep in mind that it may require more maintenance.
In addition to the flooring, you’ll also need to choose the right wall covering materials. One option is to use paneling, which is easy to install and comes in a range of finishes. Another option is to use wallpaper, which can add texture and patterns to your camper’s interior. If you prefer a more rustic look, you could even consider using reclaimed wood or shiplap.
Once you’ve chosen your flooring and wall coverings, it’s time to move on to the next step: adding windows and ventilation. This will help bring in natural light and fresh air, making your camper feel more spacious and comfortable.
Add Windows and Ventilation
Don’t forget to add windows and ventilation to your mobile home, because who needs fresh air and natural light when you’re trying to recreate the feeling of being trapped in a stuffy box? Adding windows not only enhances the aesthetic appeal of your camper but also brings in much-needed natural light.
Here are three key considerations for window installation:
-
Window Types: Choose the right window style for your camper, such as sliding windows, awning windows, or fixed windows. Sliding windows are great for easy operation, while awning windows provide ventilation even during rainy days. Fixed windows are ideal for areas where you don’t require additional airflow.
-
Placement: Strategically plan the placement of windows to maximize both views and cross ventilation. Consider placing windows near your sleeping area for a stunning view of nature, and near the kitchen for easy airflow while cooking.
-
Ventilation System: Besides windows, install a ventilation system to keep your camper fresh and comfortable. Consider options like roof vents, which can be opened to release hot air and allow cool air to flow in.
Now that you’ve installed windows and ensured proper ventilation, it’s time to personalize your camper with decor and accessories.
Personalize Your Camper with Decor and Accessories
Make your camper feel like home by adding your personal touch with decor and accessories. When it comes to decorating your cargo trailer camper, there are plenty of creative and budget-friendly ways to make it cozy and inviting.
First, consider the theme or style you want for your camper. Whether you prefer a rustic cabin feel or a beachy oasis, choose colors, patterns, and textures that reflect your desired aesthetic. Use curtains, rugs, and throw pillows to add warmth and personality to your space. Wall decals or removable wallpaper can also be a great option for adding visual interest without permanently altering the walls.
In addition to decor, storage solutions are essential for keeping your camper organized and clutter-free. Utilize wall-mounted hooks and shelves to maximize vertical space. Opt for collapsible furniture and storage bins that can easily be stowed away when not in use. Don’t forget about the ceiling! Hanging storage nets or baskets can be a great way to store lightweight items such as bedding or clothing.
As you personalize your camper with decor and find storage solutions, keep in mind that functionality is key. Consider the layout and flow of your space to ensure easy access to your belongings. With these decorating tips and storage solutions, you can transform your cargo trailer into a camper that feels like a true home away from home.
Now that your camper is decorated and organized, it’s time to test and prepare for your first adventure.
Test and Prepare for Your First Adventure
Now that you’ve personalized your camper with decor and storage solutions, it’s time to put it to the test and prepare for your exciting first adventure. The anticipation is building as you get ready to embark on your maiden voyage. But before you hit the road, it’s important to make sure you have everything you need for a successful trip.
First things first, you’ll want to plan out your route and choose a destination for your first trip. Whether it’s a nearby campground or a scenic national park, pick a place that suits your preferences and allows you to fully enjoy the camper experience.
Next, it’s time to pack your essentials. Make a checklist of items such as bedding, cooking utensils, toiletries, and clothing. Don’t forget to bring along any outdoor gear you might need, like hiking boots or fishing equipment. It’s also a good idea to stock up on non-perishable food items and plenty of water for your journey.
As you load up your cargo trailer, be mindful of weight distribution to ensure a smooth ride. Secure any loose items and double-check that all doors and windows are locked. Before you hit the road, take a moment to familiarize yourself with the camper’s features and systems, such as the electrical and water systems.
With everything packed and ready to go, it’s time to hit the road and embark on your first adventure in your newly converted camper. Enjoy the freedom and flexibility that comes with traveling in your own customized space, and get ready to make memories that will last a lifetime.
Frequently Asked Questions
How much does it typically cost to turn a cargo trailer into a camper?
On average, transforming a cargo trailer into a cozy camper can cost around $5,000 to $20,000. This cost breakdown includes essential materials like insulation, flooring, electrical wiring, plumbing, and furniture.
However, it’s important to note that the total expense can vary depending on the size of the trailer, desired amenities, and personal preferences.
To complete the project, you’ll need tools such as a drill, saw, measuring tape, and basic hand tools.
Can I legally convert a cargo trailer into a camper and use it for camping purposes?
When it comes to converting a cargo trailer into a camper, there are pros and cons to consider.
On the positive side, it allows for customization and cost savings compared to buying a pre-built camper. However, there may be legal implications depending on your jurisdiction. It’s essential to research and ensure that the conversion meets all safety and regulatory requirements.
Additionally, maximizing space in a converted cargo trailer camper can be achieved through clever storage solutions and efficient furniture arrangements.
What are some common mistakes to avoid when converting a cargo trailer into a camper?
When converting a cargo trailer into a camper, there are common pitfalls to avoid.
One key mistake is underestimating the importance of proper insulation, leading to uncomfortable temperatures.
Another is overlooking the need for ventilation, which can result in condensation and mold.
It’s also crucial to have the essential tools on hand, such as a power drill, level, and measuring tape.
By avoiding these mistakes and being prepared, your cargo trailer will transform into the perfect camper.
Are there any specific safety regulations or guidelines to consider when installing electrical wiring and lighting in a camper?
When it comes to electrical wiring installation and lighting safety regulations in a camper, there are a few important guidelines to consider.
First, it’s crucial to follow local building codes and regulations to ensure your wiring is up to standard.
Additionally, using proper insulation and protection for your wiring is essential to prevent any potential hazards.
Lastly, make sure to use appropriate lighting fixtures that are rated for use in a recreational vehicle to ensure safety and functionality.
How long does the entire process of converting a cargo trailer into a camper usually take?
On average, the entire process of converting a cargo trailer into a camper takes around 4-6 weeks. However, the duration can vary depending on factors like the size of the trailer and the complexity of the renovations.
To successfully complete the conversion, you’ll need a variety of tools such as power tools, measuring tape, a drill, a saw, and electrical wiring equipment.
This project requires patience, creativity, and a lot of hard work, but the end result is worth it.
Conclusion
In conclusion, turning a cargo trailer into a camper is a rewarding and creative project that allows you to customize your own adventure on wheels.
With careful planning and some DIY skills, you can transform a simple trailer into a cozy and functional living space.
Did you know that according to a recent survey, over 60% of people who’ve converted a cargo trailer into a camper have reported a significant increase in their overall happiness and sense of freedom?
So why wait? Start your camper conversion journey today and unlock a world of possibilities!

