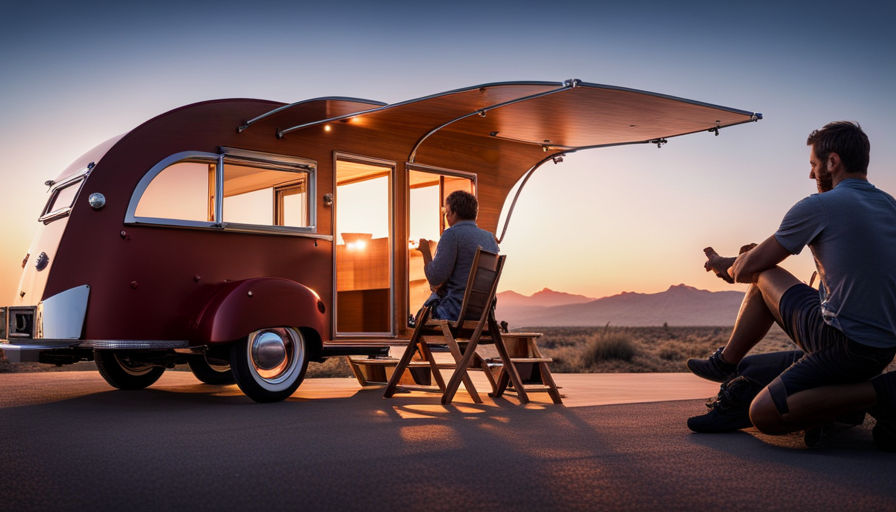
Are you dreaming of hitting the open road in your own teardrop camper? Look no further, as we have all the resources you need! This article provides a comprehensive guide to help you build your very own teardrop camper.
From gathering the necessary tools and materials to finalizing and testing your creation, we will walk you through the entire process.
First, we’ll start by helping you gather all the tools and materials you’ll need. Then, we’ll guide you through the design and planning phase, ensuring that your teardrop camper is both functional and stylish.
Once you have your design in place, we’ll move on to building the frame and trailer base, followed by constructing the walls and roof.
Next, we’ll show you how to install windows and doors, as well as the electrical and plumbing systems, to make your teardrop camper fully equipped for your adventures.
Then, we’ll teach you how to paint and finish the exterior, giving it that personal touch.
Finally, we’ll help you install the flooring and furnishings, transforming your teardrop camper into a cozy home away from home.
So, let’s get started on this exciting journey of building your very own teardrop camper!
Key Takeaways
- Choose lightweight and durable materials for the exterior and interior construction of the teardrop camper.
- Consider layout, size, and functionality when designing the interior of the camper, and incorporate clever storage solutions.
- Install windows for natural light and ventilation, and properly seal doors to prevent water leaks.
- Carefully plan the electrical and plumbing systems, and thoroughly inspect all systems to ensure reliability and comfort.
Gather the Necessary Tools and Materials
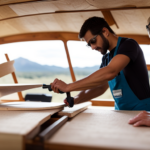
Now that we’ve got our teardrop camper plans in hand, it’s time to gather all the tools and materials we’ll need to bring our dream camper to life!
Choosing the right materials is essential for a successful build. For the exterior, we recommend using lightweight and durable materials such as aluminum or fiberglass. These materials are weather-resistant and will ensure your camper lasts for years to come.
When it comes to the interior, plywood is a popular choice for the walls and cabinets due to its strength and affordability.
Next, let’s talk about safety precautions during construction. It’s important to wear protective gear such as goggles and gloves to prevent any accidents. Additionally, make sure to work in a well-ventilated area to avoid inhaling any harmful fumes from adhesives or paints. Take your time and follow the instructions carefully to minimize the risk of injuries.
Now that we have all the tools and materials gathered, it’s time to move on to the next step of designing and planning our teardrop camper. By carefully considering the layout and functionality, we can create a camper that perfectly suits our needs.
Design and Plan Your Teardrop Camper
Begin by envisioning the perfect little getaway on wheels. Designing and planning your teardrop camper is an exciting and crucial step in the building process. To ensure a successful build, here are some teardrop camper design tips and building techniques.
First, consider the layout and size of your camper. Think about how many beds you want, the kitchen setup, and the storage space needed. Sketch out your ideas and make sure everything fits within the dimensions of a teardrop camper.
Next, think about the materials you’ll use. Lightweight and durable materials such as marine-grade plywood and aluminum are commonly used in teardrop camper construction. Consider the weight distribution and balance to ensure a stable and safe camper.
When designing, keep in mind the aerodynamics of your teardrop camper. Sleek, curved lines reduce wind resistance and improve fuel efficiency. Additionally, consider incorporating windows for natural light and ventilation.
Lastly, think about the overall aesthetic of your camper. Consider adding personal touches such as decals or a unique paint job to make it your own.
With these teardrop camper design tips and building techniques in mind, you can now move on to building the frame and trailer base, where the foundation of your camper will be created.
Build the Frame and Trailer Base
Get ready to embark on an exhilarating journey as you construct the sturdy frame and trailer base that’ll lay the foundation for your ultimate adventure machine.
Building the frame and trailer base is a critical step in creating a teardrop camper that’s not only durable but also safe and reliable on the road.
First, let’s talk about the trailer suspension. This is what’ll support the weight of your camper and ensure a smooth ride. Choose a suspension system that’s designed to handle the weight of your camper and provides the necessary shock absorption. Make sure to follow the manufacturer’s instructions carefully when installing the suspension system to ensure proper alignment and functionality.
Next, let’s discuss waterproofing techniques. It’s essential to protect your teardrop camper from the elements, especially when you’re out in the great outdoors. Apply a high-quality waterproof sealant to all the joints and seams of your frame and trailer base. This’ll create a barrier against moisture and prevent any potential leaks.
With the frame and trailer base complete, it’s time to move on to the next step: constructing the walls and roof. This is where your teardrop camper’ll really start to take shape, providing you with a cozy and comfortable space for your adventures.
Construct the Walls and Roof
To truly understand the effectiveness of a certain construction technique, you need to investigate the truth of the theory. When it comes to constructing the walls and roof of your teardrop camper, there are a few key factors to consider.
One of the most important aspects is insulation. Proper insulation will help regulate the temperature inside the camper and make it more comfortable for camping in different weather conditions.
When insulating the walls and roof, it’s crucial to choose the right materials. For the walls, consider using rigid foam insulation boards. These boards are lightweight, easy to cut, and provide excellent insulation.
For the roof, you can use a combination of rigid foam insulation and reflective foil insulation. This combination will help keep the camper cool in hot weather and retain heat in colder temperatures.
To grab your attention, here are three important tips for insulating the walls and roof:
- Use rigid foam insulation boards for the walls.
- Consider a combination of rigid foam insulation and reflective foil insulation for the roof.
- Ensure proper installation and sealing to prevent any air leakage.
Now that the walls and roof are properly insulated, it’s time to move on to the next step: installing windows and doors. This will not only add aesthetic appeal but also improve ventilation and accessibility.
Install Windows and Doors
Installing windows and doors in your teardrop camper not only enhances its aesthetic appeal, but also allows for improved ventilation and easy access to the interior space.
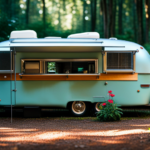
When it comes to teardrop camper window options, there are a few choices to consider. The most common option is a sliding window, which provides good airflow and can be easily opened and closed. Another option is a crank-out window, which can be adjusted to different angles to control the amount of ventilation. Additionally, you can also install a small fixed window for added natural light.
To install the windows, start by measuring the openings and purchasing the appropriate size. Then, remove any trim or existing window frames. Apply a layer of butyl tape around the opening to create a watertight seal. Place the window into the opening and secure it with screws, making sure it is level and centered. Finally, apply a bead of silicone caulk around the edges to further seal it.
When it comes to doors, it’s important to properly seal them to prevent any water leaks. Start by installing the door frame and make sure it’s plumb and square. Apply a layer of butyl tape around the frame and place the door in the opening. Secure it with screws and adjust the hinges if necessary. Finally, apply a bead of silicone caulk around the edges to ensure a watertight seal.
With the windows and doors installed, you can now move on to building the interior layout and features, creating a comfortable and functional space for your teardrop camper.
Build the Interior Layout and Features
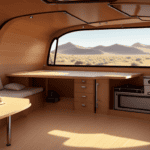
Create a cozy and functional interior space by carefully designing and arranging the layout, incorporating clever storage solutions, and adding thoughtful features that make your teardrop camper truly feel like a home away from home.
When it comes to space optimization techniques, every inch counts in a teardrop camper. Consider using multi-functional furniture and built-in storage to maximize the available space. For example, you can install a foldable dining table that can be used as a workspace during the day and transformed into a comfortable bed at night.
Customizing the interior for your needs is essential to create a camper that suits your lifestyle. Think about your specific requirements and preferences. Do you need extra storage for outdoor gear or a dedicated space for cooking? Incorporate these elements into the layout and choose materials and finishes that reflect your personal style.
As you design the interior, keep in mind the weight distribution to ensure stability and safety on the road.
Lastly, when planning the interior layout, consider the subsequent section about installing electrical and plumbing systems. By doing this, you can strategically position outlets, switches, and plumbing fixtures for convenience and ease of installation.
Install Electrical and Plumbing Systems
Make your teardrop camper feel like a true home away from home by installing electrical and plumbing systems that provide convenience and comfort during your adventures.
When it comes to the electrical system design, it’s important to plan it out carefully to ensure all your needs are met. Start by determining what appliances and electronics you’ll be using and calculate the power requirements for each. This will help you determine the size of your battery and the number of solar panels needed to keep it charged. Consider installing LED lights throughout the camper as they’re energy-efficient and provide ample lighting.
As for the plumbing system installation, decide on the type of water source you want to use, whether it’s a fresh water tank or a connection to an external source. Install a water pump to ensure a steady flow of water and don’t forget to include a gray water tank for waste disposal.
With a well-designed electrical and plumbing system, your teardrop camper will be fully equipped for all your adventures.
Now, let’s move on to the next step of the process, which is to paint and finish the exterior.
Paint and Finish the Exterior
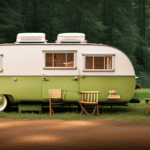
To give your teardrop camper a polished and eye-catching look, you’ll want to start by painting and adding the finishing touches to the exterior. Choosing the right paint color is crucial in achieving the desired aesthetic. Popular teardrop camper paint colors include classic white, vibrant red, and earthy tones like forest green or sandy beige. Whatever color you choose, make sure it complements your overall design theme.
Before painting, it’s important to prepare the surface properly. Start by sanding down any rough areas and filling in any imperfections with putty. This will ensure a smooth finish. Use a high-quality primer to create a good base for the paint to adhere to. Apply thin coats of paint, allowing each coat to dry completely before adding the next. This will prevent drips and give you a professional-looking result.
To achieve a smooth finish, consider using a paint sprayer instead of a brush or roller. Sprayers provide a more even application and minimize the appearance of brush strokes. Make sure to work in a well-ventilated area and wear appropriate protective gear.
Once you’ve finished painting, add the final touches to complete the exterior. This may include adding decals, pinstriping, or other decorative elements. These details can really make your teardrop camper stand out.
Transitioning to the next section about installing flooring and furnishings, it’s important to have a solid foundation for your interior design.
Install Flooring and Furnishings
Now it’s time to bring your teardrop camper to life by installing the flooring and furnishings. When it comes to teardrop camper flooring options, there are a few factors to consider. First, you’ll want to choose a durable material that can withstand the wear and tear of camping trips. Popular options include vinyl, laminate, and hardwood. Each has its advantages, such as easy maintenance or a more natural look.
Next, think about the comfort factor. Adding foam or carpet underlay beneath your flooring can provide extra cushioning for your feet.
Choosing the right furnishings for your teardrop camper is essential to maximize space and functionality. Opt for multipurpose items, like folding tables and chairs, that can be easily stored away when not in use. Look for lightweight and compact furniture to avoid adding unnecessary weight to your camper. Additionally, consider storage solutions such as built-in cabinets or under-bed storage to make the most of the available space.
As you finalize and test your teardrop camper, make sure all the flooring is securely installed and that the furnishings are properly secured for travel. This will ensure a safe and enjoyable camping experience.
Finalize and Test Your Teardrop Camper
Once you’ve put the finishing touches on your teardrop adventure haven, it’s time to finalize and test it out to ensure a seamless and unforgettable camping experience. The testing phase is crucial to ensure that your teardrop camper is safe, functional, and comfortable for your upcoming adventures.
First, it’s important to thoroughly inspect all the systems of your teardrop camper. Check the electrical system, plumbing, and gas lines to make sure everything is in proper working order. Test all the lights, outlets, and appliances to ensure they’re functioning correctly. Don’t forget to check for any leaks or water damage as well.
Next, take your teardrop camper for a test drive. This’ll allow you to assess the handling and towing capabilities of your camper. Pay attention to how it feels on the road and make any necessary adjustments to ensure a smooth and safe journey.
During the testing phase, it’s also a good idea to spend a night or two in your teardrop camper. This’ll give you the opportunity to identify any comfort issues or design flaws that need to be addressed. Test out the sleeping area, seating arrangements, and storage solutions. Make sure everything’s practical and functional for your camping needs.
By thoroughly testing and finalizing your teardrop camper design, you can ensure that it’s ready for all your future adventures. So, don’t rush through this phase and take the time to make any necessary adjustments. Once your camper passes all the tests, you’ll have a reliable and comfortable haven to enjoy the great outdoors.
Frequently Asked Questions
How long does it typically take to build a teardrop camper from start to finish?
On average, building a teardrop camper takes a considerable amount of time, but it’s a labor of love that’s totally worth it! The process typically takes around 200 hours from start to finish.
To get started, you’ll need essential tools like a drill, jigsaw, and sander. Additionally, having access to a workbench and a well-ventilated workspace is crucial.
With these tools and a little patience, you’ll be well on your way to crafting your dream teardrop camper.
Are there any specific building codes or regulations that need to be followed when constructing a teardrop camper?
When constructing a teardrop camper, it’s important to be aware of building code requirements and safety regulations. These guidelines ensure that your camper meets the necessary standards for structural integrity and safety. Building codes may vary depending on your location, so it’s crucial to research and adhere to the specific regulations in your area. By following these guidelines, you can ensure that your teardrop camper is built to code and provides a safe and enjoyable experience.
What are some common mistakes to avoid when building a teardrop camper?
When building a teardrop camper, it’s important to be aware of common mistakes to avoid.
One common mistake is not properly sealing the seams and joints, resulting in leaks during rainy weather.
Another mistake is underestimating the weight distribution, which can lead to stability issues while towing.
To prevent these and other mishaps, it’s helpful to research and follow tips and tricks from experienced builders.
Taking the time to plan and execute the construction carefully will ensure a successful teardrop camper build.
Is it possible to customize the design of a teardrop camper to fit specific needs or preferences?
Customizing the design of a teardrop camper is like adding a touch of personal flair to your own little adventure oasis. It’s an opportunity to create a space that perfectly fits your needs and preferences. From choosing the layout to selecting the materials and colors, the possibilities are endless.
Whether you want extra storage, a cozy sleeping area, or a mini kitchen, customizing allows you to tailor your teardrop camper to your unique style and requirements. Let your imagination run wild!
Can a teardrop camper be easily transported and towed by a regular-sized vehicle?
Yes, a teardrop camper can be easily transported and towed by a regular-sized vehicle. The towing capacity of a teardrop camper is typically around 1,500 to 2,000 pounds, making it compatible with a wide range of vehicles. The compact size and lightweight construction of teardrop campers allow for easy towing and maneuverability on the road.
This is one of the advantages of teardrop campers, as they offer the convenience of traveling with minimal hassle.
Can I Use the Folding Bed I Made for My Camper on a Teardrop Camper?
Yes, you can absolutely use the folding bed you made for your camper on a teardrop camper. By making a folding bed for camper, you have created a versatile solution that can be easily adapted to different types of recreational vehicles. Whether it’s a traditional camper or a teardrop camper, your folding bed will provide comfort and convenience wherever you decide to explore.
Can I Use Teardrop Camper Plans to Build My Own Camper?
Yes, you can use a teardrop camper construction guide to build your own camper. These plans provide step-by-step instructions and diagrams to help you construct your camper. With the right tools and materials, you can easily build a teardrop camper that meets your specific needs and preferences.
Conclusion
So there you have it, folks! We’ve reached the end of our teardrop camper building journey. We’ve gathered our tools, designed our dream camper, and put in the hard work to bring it to life.
From constructing the sturdy frame to adding the finishing touches, we’ve covered every step with detail and precision.
Now, it’s time to sit back, relax, and enjoy the fruits of our labor. Happy camping, and may your teardrop adventures be filled with joy and tranquility!

