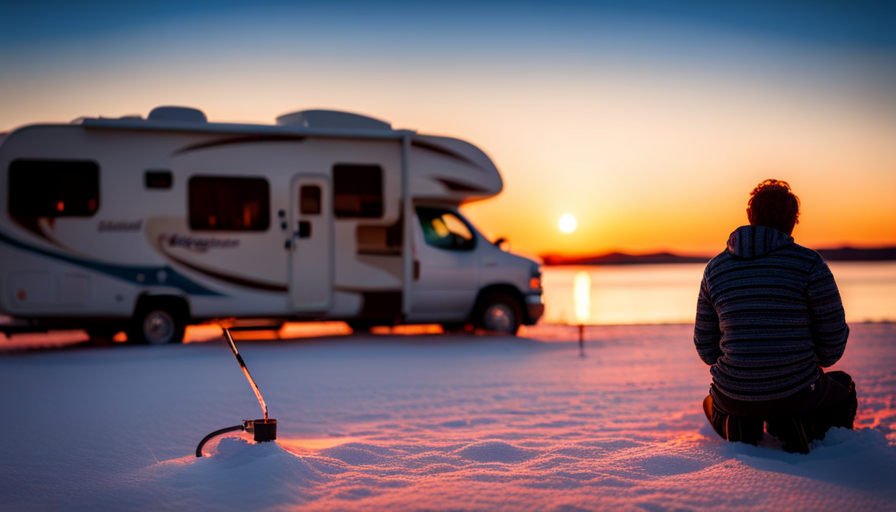
Getting a camper trailer ready for winter is a big job. It requires careful attention and a thorough understanding of the important steps needed to protect your investment from the harsh winter weather. With freezing temperatures and snowstorms on the horizon, it’s important to plan ahead to ensure that your camper trailer remains in top condition during the winter season.
In this article, we will guide you through the process of winterizing your camper trailer, providing you with a comprehensive checklist to follow. From preparing the water systems and protecting the exterior to insulating the interior and storing the batteries, we will leave no stone unturned.
Additionally, we will offer tips on how to secure the trailer, check for pests, maintain ventilation, and regularly monitor its condition. By following our expert advice, you can rest assured that your camper trailer will be ready to withstand even the harshest winter weather.
Key Takeaways
- Winterizing a camper trailer involves steps such as preparing water systems, protecting the exterior, insulating the interior, and storing batteries.
- Water system maintenance, including draining the system, bypassing the water heater, and using antifreeze, is crucial to prevent costly repairs and ensure a smooth transition into winter.
- Proper care and protection of tires, including checking pressure, inspecting tread depth, and using tire covers, is necessary during winter.
- Securing doors and windows, checking for pests, maintaining ventilation, and clearing snow and debris from the roof are important steps to ensure the trailer is well-maintained and protected during winter.
Prepare the Water Systems
Now it’s time to get our water systems ready for the cold winter ahead, so we don’t have to worry about any freezing pipes or damage to our beloved camper trailer. Proper water system maintenance is essential to prevent costly repairs and ensure a smooth transition into the winter season.
To begin, we need to gather our winterizing checklist. This includes a water heater bypass kit, non-toxic RV antifreeze, a water pump converter kit, and a water pressure regulator.
First, we’ll start by draining all the water from the system. This involves emptying the fresh water tank, opening all faucets, and flushing out the black and gray water tanks. Once the system is empty, we’ll proceed to bypass the water heater using the provided kit. This prevents antifreeze from entering the water heater, which can be damaging.
Next, we’ll connect the water pump converter kit to the fresh water inlet. This allows us to draw antifreeze directly into the system. With all faucets and fixtures closed, we’ll turn on the water pump and systematically open each faucet until the antifreeze flows out. This ensures that all the water lines are filled with antifreeze and protected from freezing temperatures.
To protect the exterior of our camper trailer, we’ll move on to the next section.
By following these steps, we can rest easy knowing our water systems are winterized and ready for the cold months ahead.
Protect the Exterior
To keep your home on wheels safe from the harsh winter elements, you’ll want to make sure its outer shell is as snug as a cozy blanket. One of the key steps in winterizing your camper trailer is protecting the exterior. This involves using protective covers and winterizing products to shield your trailer from the cold, snow, and ice.
First and foremost, invest in quality protective covers for your camper trailer. These covers are specifically designed to withstand winter weather conditions and provide an extra layer of protection against moisture and debris. Make sure to choose a cover that fits your trailer properly and covers all exposed areas, including the tires.
In addition to protective covers, there are various winterizing products available in the market. These products are formulated to protect the exterior of your camper trailer from the damaging effects of freezing temperatures. They create a barrier that prevents moisture from seeping into the trailer’s exterior surfaces, preventing potential damage such as rust or peeling paint.
By using protective covers and winterizing products, you can ensure that your camper trailer’s exterior remains in top condition throughout the winter season. With the exterior protected, it’s time to move on to insulating the interior to further safeguard your home away from home from the chilly weather.
Insulate the Interior
When it comes to insulating the interior of a camper trailer, there are two key points to keep in mind. First, it’s crucial to seal any drafts or leaks that may allow cold air to seep in. This can be done by using weatherstripping or caulk to seal gaps around windows, doors, and vents.
Second, using insulation is essential in order to keep the interior warm during the winter months. This can be achieved by adding insulation to the walls, floors, and ceiling of the camper, using materials such as foam board or fiberglass insulation.
By addressing these two aspects, we can ensure that the interior of the camper remains cozy and comfortable even in colder temperatures.
Seal Any Drafts or Leaks
First, check for any drafts or leaks in your camper trailer and seal them to ensure a cozy and warm winter camping experience. Start by inspecting the windows and doors for any gaps or cracks. Use weatherstripping or caulk to repair drafts, ensuring a tight seal.
Additionally, examine the seams and corners of the trailer for any potential leaks. Apply a waterproof sealant to these areas to prevent any water from seeping in. Don’t forget to check the roof, as it’s a common source of leaks. Use a roof sealant to patch up any holes or damaged areas.
By repairing drafts and sealing leaks, you can keep the chilly winter air out and create a comfortable living space. To further enhance insulation, use insulation to keep the interior warm, providing an extra layer of protection against the cold.
Use Insulation to Keep the Interior Warm
Using insulation in your camper can help keep the interior warm and snug as a bug in a rug during the winter months. There are several types of insulation that you can use, such as fiberglass, foam board, and reflective insulation. Fiberglass insulation is easy to install and provides excellent thermal resistance.
Foam board insulation is lightweight and can be cut to fit various spaces. Reflective insulation is great for blocking radiant heat.
To install insulation, start by measuring the walls, ceiling, and floor of your camper. Cut the insulation to fit these measurements and secure it in place using adhesive or staples. Pay special attention to areas where drafts or leaks may occur, such as windows, doors, and vents.
Once the insulation is installed, you can move on to removing perishable items to prepare your camper for winter storage.
Remove Perishable Items
To prepare your camper trailer for winter, start by removing any perishable items. This includes all food and drinks that can spoil or freeze during the cold months. Make sure to empty out the refrigerator, pantry, and any other storage areas where you may have kept food.
Properly dispose of any perishables to avoid attracting pests or mold growth. Once the perishable items are removed, it’s a good time to clean and sanitize the storage areas. Wipe down shelves, countertops, and cabinets with a mild cleaner to remove any food residue or odors. Pay special attention to areas where food may have spilled or leaked.
Additionally, remove any cleaning supplies that may freeze or become damaged in low temperatures. Store these items in a cool, dry place until spring.
With perishable items and cleaning supplies removed, the next step is to store the batteries to prevent them from freezing or losing power over the winter months.
Store the Batteries
Make sure your batteries are stored in a safe place to prevent them from freezing or losing power over the winter months, just as you would safeguard a valuable treasure.
Proper battery maintenance is crucial for ensuring their longevity and optimal performance. Before storing the batteries, it’s important to disconnect them from the camper trailer’s electrical system. This’ll prevent any parasitic draw that could drain the batteries over time.
Inspect the batteries for any signs of damage or corrosion, and clean them if necessary using a mixture of baking soda and water. Once cleaned, dry the batteries thoroughly to prevent moisture buildup.
To store the batteries, choose a cool and dry location, away from extreme temperatures. It’s recommended to store them in a garage, basement, or a battery storage box specifically designed for winter storage.
Connect the batteries to a smart charger or a battery maintainer to keep them charged throughout the winter. This’ll prevent them from losing power and ensure they’re ready to use when camping season resumes.
Now that your batteries are safely stored, let’s move on to the next section about protecting the tires.
Protect the Tires
Ensure your tires are properly cared for to avoid any potential danger and keep your adventures rolling smoothly. Tire maintenance is crucial when winterizing your camper trailer. Here are some key steps to follow:
-
Check the tire pressure: Cold weather can cause tire pressure to drop, so it’s essential to check and inflate the tires to the recommended levels. This will prevent any damage or uneven wear.
-
Inspect the tread: Inspect the tread depth and look for any signs of wear or damage. Replace the tires if necessary, as worn-out tires can be dangerous on icy or wet roads.
To provide additional protection, consider using tire covers. These covers shield the tires from harsh weather conditions and UV rays. They also prevent cracking and dry rot, extending the lifespan of your tires.
- Clean the tires: Before storing the camper trailer, clean the tires thoroughly to remove any dirt, debris, or chemicals that could potentially damage the rubber.
By following these tire maintenance steps and utilizing tire covers, you can ensure your camper trailer is ready for winter storage. Now, let’s move on to securing the trailer to complete the winterization process.
Secure the Trailer
When securing a trailer, it’s crucial to lock all doors and windows to prevent unauthorized access. This ensures the safety and security of your belongings inside the trailer.
Additionally, installing wheel locks or hitch locks provides an extra layer of protection against theft. They immobilize the trailer and prevent it from being easily towed away.
By following these steps, you can have peace of mind knowing that your trailer is securely locked and protected.
Lock all Doors and Windows
Locking all the doors and windows is like giving your camper trailer a cozy, protective hug before winter settles in. It not only keeps your belongings safe from potential theft but also helps to maintain the integrity of your trailer.
During winter, strong winds and heavy snow can cause damage to the interior, leading to costly repairs. By using window and door locks, you can ensure that they stay tightly sealed, preventing any drafts or moisture from entering.
When choosing locks, opt for sturdy, weather-resistant options that are specifically designed for camper trailers. Make sure to install them properly, following the manufacturer’s instructions. Additionally, consider installing wheel locks or hitch locks for added security.
These measures will give you peace of mind knowing that your camper trailer is well protected throughout the winter season.
Install Wheel Locks or Hitch Locks
Installing wheel locks or hitch locks on your camper trailer before the winter season can provide an extra layer of security and peace of mind. These locks are designed to prevent theft and unauthorized access to your trailer, ensuring that it stays safe and protected during the winter months. Here are some benefits of installing wheel locks or hitch locks:
- Wheel lock benefits:
- Prevents the trailer from being towed away
- Deters potential thieves
- Adds a visual deterrent to protect your investment
- Gives you peace of mind knowing your trailer is secure
- Easy to install and remove when needed
To install hitch locks, follow these steps:nn1. Choose a high-quality lock that fits your trailer hitch.nn2. Insert the lock into the hitch receiver and secure it according to the manufacturer’s instructions.nn3. Test the lock to ensure it’s properly engaged.
By installing wheel locks or hitch locks, you can safeguard your camper trailer from theft and enjoy a worry-free winter season.
Now, let’s move on to the next section and check for any pests that might’ve taken refuge in your trailer during the offseason.
Check for Pests
Don’t forget to be on the lookout for those pesky critters that could turn your camper trailer into their winter vacation home! Pest prevention is an important step in winterizing your camper trailer to ensure that no unwanted guests make themselves comfortable during the colder months.
Start by thoroughly inspecting the exterior of your trailer for any openings or gaps that pests could use to enter. Seal these areas with caulk or weatherstripping to keep them out.
Next, remove any food or crumbs that may attract pests and store all food in airtight containers. It’s also a good idea to use pest control products such as traps or repellents to further deter pests from entering your camper trailer.
Finally, check the interior of your trailer for any signs of pests such as droppings or nests and take appropriate measures to eliminate them. Maintaining ventilation is crucial to preventing condensation and mold growth in your camper trailer during the winter months. This can be achieved by opening windows or using vents, but be sure to take the necessary precautions to prevent pests from entering through these openings.
With these pest prevention measures in place, you can now move on to maintaining proper ventilation in your camper trailer.
Maintain Ventilation
To keep your cozy home away from home fresh and mold-free, it’s important to ensure proper ventilation is maintained throughout the winter months. Adequate airflow is crucial to prevent condensation buildup, which can lead to mold and mildew growth.
Maintaining ventilation in your camper trailer is a simple yet effective way to protect your investment. Start by inspecting all vents and openings in your trailer. Ensure that they’re clear of any debris or obstructions that may hinder the airflow. Use a soft brush or compressed air to remove any dirt or dust from the vents.
Next, consider installing vent covers or air deflectors to help maintain airflow while still protecting against the elements. These covers can be easily attached to the existing vents and will prevent rain or snow from entering while allowing fresh air to circulate.
In addition, keep a window cracked open slightly to allow for continuous air exchange. This’ll help reduce humidity levels inside the trailer and prevent condensation from forming on windows and walls.
Regularly check on the trailer to ensure that ventilation is maintained throughout the winter months. By following these steps, you can enjoy a cozy and mold-free camper trailer all winter long.
Regularly Check on the Trailer
We should visit the trailer periodically to ensure everything’s in good condition. This will help us identify any potential issues or maintenance needs before they become major problems.
Additionally, it’s important to clear any snow or debris from the roof to prevent damage and maintain the structural integrity of the trailer.
Regularly checking on the trailer and performing these tasks will help ensure its longevity and functionality.
Visit the Trailer Periodically to Ensure Everything is in Good Condition
Make sure you swing by the trailer every so often to guarantee that everything’s in tip-top shape. Regularly conducting a trailer condition check is crucial for proper maintenance.
Start by inspecting the exterior for any signs of damage, such as cracks, leaks, or loose seals. Check the tires for wear and tear, ensuring they’re properly inflated. Look for any signs of pests or rodents that may have made their way into the trailer.
Inside, check the plumbing system for leaks and make sure all appliances are functioning correctly. Additionally, inspect the electrical system, including the battery and connections. Finally, assess the overall cleanliness of the trailer, making sure to clear any snow or debris from the roof, preparing for the subsequent section on maintenance.
Clear Any Snow or Debris from the Roof
Don’t forget to clear off any snow or debris from the roof of your trailer to ensure it’s in pristine condition. Proper roof maintenance is crucial for winterizing your camper trailer.
When snow accumulates on the roof, the weight can cause structural damage and potential leaks. To clear the snow, use a soft bristle broom or a plastic shovel to gently remove it. Avoid using metal shovels or sharp tools that could damage the roof surface.
Be thorough in removing all snow, especially around vents, skylights, and antennas. Additionally, clear any debris, such as leaves or branches, that may have accumulated on the roof.
Regularly inspecting and clearing the roof will help prevent any potential issues and keep your camper trailer in optimal shape throughout the winter season.
Frequently Asked Questions
How do I properly winterize the propane system in my camper trailer?
To properly winterize the propane system in our camper trailer, we need to take a few precautions. First, make sure the propane tank is completely empty before starting the winterization process. Next, turn off the propane supply valve and disconnect any propane-powered appliances. Drain any remaining propane from the lines and remove the regulator. Finally, store the propane tank in a safe, well-ventilated area.
Common mistakes when winterizing include forgetting to empty the tank and not properly securing the tank during storage.
What steps should I take to prevent rodents from getting into my camper trailer during the winter?
To prevent rodents from infiltrating your camper trailer during winter storage, follow these steps.
First, thoroughly clean the interior, removing any food crumbs or debris that may attract rodents.
Seal all possible entry points, such as gaps in doors or vents, with steel wool or wire mesh.
Place rodent repellents, like mothballs or peppermint oil-soaked cotton balls, in strategic locations.
Finally, inspect your trailer regularly and address any signs of rodent activity promptly.
These winter storage tips will help keep your camper trailer rodent-free.
Can I use regular antifreeze to winterize the water system in my camper trailer?
Using regular antifreeze for winterizing a camper trailer’s water system isn’t recommended. RV antifreeze is specifically designed for this purpose and is non-toxic, ensuring the safety of your water system. Before winterization, it’s crucial to properly flush out the water system to remove any contaminants. Start by draining the water tank and hot water heater, then open all faucets and run the water pump until no water remains. This will prevent any potential damage during the winter months.
Is it necessary to cover the camper trailer with a tarp during the winter?
Covering your camper trailer with a tarp during the winter provides several benefits. It helps to protect the exterior from harsh weather conditions, such as snow, ice, and UV rays, which can cause damage over time. Additionally, it helps to prevent moisture buildup and keeps the interior dry.
However, there are alternative options, such as using a specialized camper trailer cover, which offers a more tailored fit and added protection.
How often should I check on my camper trailer during the winter to ensure it is in good condition?
During the winter, it’s crucial to regularly check your camper trailer for any potential leaks. Trust me, it’s not a thrilling adventure to discover a flooded camper in the middle of a snowstorm. Leaks can cause serious damage to your trailer, so it’s best to nip them in the bud.
Additionally, you should also be aware of common winter maintenance issues such as frozen pipes and battery problems. Stay vigilant, my fellow camper enthusiasts!
Conclusion
In conclusion, winterizing a camper trailer is essential to protect it from the harsh elements and ensure its longevity. By following the steps outlined in this article, we can properly prepare the water systems, protect the exterior, insulate the interior, remove perishable items, store the batteries, secure the trailer, check for pests, maintain ventilation, and regularly check on the trailer.
Did you know that according to a survey, 85% of camper owners who properly winterize their trailers experience fewer maintenance issues in the spring? So, take the time to winterize your camper trailer and enjoy a stress-free camping season next year!


