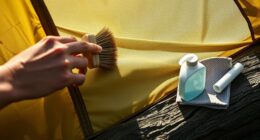
Preparing a fifth-wheel camper for winter is crucial to ensure its longevity and protect it from the harsh winter conditions. As avid campers, we understand the importance of carefully maintaining our beloved camper.
In this article, we will guide you through the step-by-step process of winterizing your 5th wheel camper, providing you with the essential knowledge and tools to do it right.
Imagine this: a picturesque winter scene, with snow-covered mountains and forests. Now picture your 5th wheel camper snugly tucked away, shielded from the freezing temperatures and potential damage. By following our detailed instructions, you’ll be able to prepare your camper for the winter months ahead, preventing costly repairs and keeping it in top-notch condition.
From draining and flushing the water system to adding antifreeze and insulating vulnerable areas, we’ve got you covered. So, let’s dive in and get your 5th wheel camper winter-ready!
Key Takeaways
- Gather necessary supplies for winterization: non-toxic RV antifreeze, water heater bypass kit, water pump converter kit, water pressure regulator, water system blowout plug, and basic tools
- Drain and flush the water system to remove remaining water and prevent freezing
- Protect exterior of camper with covers designed for snow, ice, and UV rays
- Insulate vulnerable areas like windows, doors, and skylights to reduce heat loss and prevent drafts
Gather the necessary supplies
Before you can start winterizing your 5th wheel camper, you’ll need to gather all the necessary supplies.
Winterizing supplies are essential for protecting your camper from the harsh winter weather and preventing any potential damage.
The first item you’ll need is a non-toxic RV antifreeze, specifically designed for winterization. This antifreeze will be used to protect your water system from freezing and causing costly damage.
Additionally, you’ll need a water heater bypass kit, which will allow you to bypass the water heater during the winterization process. This is important because draining the water heater can be time-consuming and may require professional assistance.
Other supplies you’ll need include a water pump converter kit, which will allow you to pump the antifreeze throughout the system, a water pressure regulator to protect your plumbing from high pressure, and a water system blowout plug to remove any remaining water from the system.
It’s also a good idea to have a set of basic tools on hand, such as pliers and wrenches, to help with any necessary adjustments or repairs.
Once you have gathered all the necessary supplies, you can move on to the next step of the winterization process: drain and flush the water system.
This step is crucial for removing any remaining water from the system and preventing freezing.
Drain and flush the water system
First, make sure to completely empty and clean out the entire water system to avoid any freezing surprises during the cold months. Flushing procedures are crucial in winterizing your 5th wheel camper.
To begin, turn off the water heater and disconnect the water supply. Open all the faucets, including the hot and cold water, to drain any remaining water.
Next, locate the low point drains, usually found near the water tank, and open them to remove any residual water. Don’t forget to check the water pump, as it may have its own drain valve.
Once the water is drained, it’s time to flush the system. Mix a non-toxic RV antifreeze with water following the manufacturer’s instructions. Use a pump or gravity to push the antifreeze solution through each faucet, toilet, and shower until you see the vibrant pink color. This process ensures that the antifreeze reaches all parts of the water system, preventing potential damage from freezing temperatures.
Now that the flushing procedures are complete, you can transition into the next step of the winterizing checklist: removing and storing any water filters or cartridges.
Remove and store any water filters or cartridges
Once you’ve completed draining and flushing the water system, it’s important to remove and store any water filters or cartridges. Water filters are crucial in maintaining the quality of water in your 5th wheel camper, so it’s essential to store them properly to prevent damage.
To begin, turn off the water supply and relieve any pressure in the system. Locate the water filter housing, which is usually near the water inlet, and carefully remove the filter cartridge. Inspect the cartridge for any signs of wear or damage, and replace if necessary.
Thoroughly clean the housing using a mild detergent and rinse it with clean water. Allow both the cartridge and housing to dry completely before storing them in a dry and secure location. Make sure to label the storage container for easy identification in the future.
Now that the water filters are safely stored, we can move on to the next step of winterizing your 5th wheel camper – adding antifreeze to the water lines.
Add antifreeze to the water lines
To protect your water lines from freezing, it’s time to add antifreeze and ensure a smooth flow through the winter. Here’s how to properly add antifreeze to your 5th wheel camper’s water lines:
-
Prepare the antifreeze: Choose a non-toxic antifreeze specifically designed for RV use. Ensure it’s safe for your plumbing system and follow the manufacturer’s instructions for dilution if necessary.
-
Locate the water pump: Find the water pump in your camper. It’s usually located near the fresh water tank or in a utility compartment.
-
Connect the antifreeze: Disconnect the intake hose from the fresh water tank and connect it to a container filled with antifreeze.
-
Turn on the pump: Turn on the water pump and open all the faucets, starting with the one that’s furthest away. Run the water until you see the antifreeze flowing out of each faucet. Don’t forget to flush the toilet and run the shower as well.
Remember to always prioritize safety when handling antifreeze. Wear gloves, goggles, and follow the manufacturer’s guidelines for proper disposal. Alternatively, you can explore alternative winterization methods such as using compressed air to blow out the water lines.
Next, we’ll discuss how to drain and flush the holding tanks to complete the winterization process.
Drain and flush the holding tanks
Now it’s time to deal with the not-so-fun part: draining and flushing those pesky holding tanks.
To winterize your 5th wheel camper properly, it’s crucial to empty all the tanks completely. Start by locating the drain valves for the fresh water, gray water, and black water tanks. Open each valve one at a time and allow the contents to flow out. Be sure to wear gloves and take caution as the liquid may contain harmful bacteria.
Once the tanks are empty, it’s important to flush them thoroughly to prevent any residue from freezing and causing damage. There are various flushing techniques you can use, such as using a tank wand or a built-in tank flush system. Make sure to follow the manufacturer’s instructions for your specific camper.
After flushing, close the drain valves securely to avoid any leaks.
Now that the holding tanks are taken care of, it’s time to move on to the next step: protecting the exterior and tires of your 5th wheel camper.
Protect the exterior and tires
Take a moment to appreciate the beauty of your 5th wheel’s exterior and ensure its longevity by protecting it from the harsh winter elements. One of the most effective ways to do this is by using protective covers. These covers are specifically designed to shield your camper from snow, ice, and UV rays, preventing any damage to the exterior.
Before covering your 5th wheel, make sure to give it a thorough cleaning, removing any dirt or debris that could potentially cause scratches. Additionally, consider investing in a cover that’s breathable to prevent any moisture buildup underneath.
Another important aspect of winterizing your 5th wheel camper is winter tire maintenance. Cold temperatures can cause tire pressure to drop, leading to decreased performance and potential damage. It’s crucial to check the tire pressure regularly and inflate them to the manufacturer’s recommended levels. Additionally, consider investing in winter tires specifically designed to handle icy and snowy conditions for better traction and control on the road.
Now that you’ve protected the exterior and ensured proper winter tire maintenance, it’s time to move on to the next step: covering vents and openings.
Cover vents and openings
Ensure the protection of your 5th wheel camper’s interior by covering all vents and openings to prevent any potential damage during the winter months. Preventing condensation is crucial to maintaining the integrity of your camper. Moisture can lead to mold, mildew, and other forms of water damage.
Begin by inspecting all vents and openings, including the roof vents, refrigerator vents, and plumbing vents. Use appropriate covers or sealants to prevent water and cold air from entering these areas. Additionally, consider installing vent cushions or draft stoppers to further insulate these openings.
Securing the camper against wildlife is another important aspect of winterizing. Small animals, such as mice or squirrels, can find their way into your camper through small openings. Use mesh screens or rodent-proof covers to block these entry points. Pay close attention to areas where pipes or wires enter the interior, as these are common entry points for pests.
To further protect your camper, insulate vulnerable areas such as windows, doors, and skylights. This will help to reduce heat loss and prevent drafts. Insulation kits specifically designed for RVs are readily available and easy to install.
By covering vents and openings, preventing condensation, and securing the camper against wildlife, you can ensure the interior of your 5th wheel camper remains protected during the winter months.
Transitioning into the next section, let’s discuss how to insulate vulnerable areas to maximize energy efficiency.
Insulate vulnerable areas
To optimize energy efficiency, fortify and insulate susceptible sections of your 5th wheel’s structure, such as windows, doors, and skylights, to thwart cold air infiltration and heat loss.
Insulation techniques are crucial in preventing heat loss and maintaining a comfortable interior temperature during winter. One effective method is to use weatherstripping to seal any gaps around windows and doors. This will create a tight seal, preventing drafts and reducing heat loss. Additionally, applying window film can provide an extra layer of insulation by reducing heat transfer through the glass.
Another vulnerable area that requires insulation is the skylight. You can use an insulating cover or a thick piece of foam to block cold air from entering through the skylight. This will help maintain a consistent temperature inside the camper.
In addition to insulating these areas, it is important to check for any other potential sources of heat loss, such as gaps in the walls or floor. These can be sealed with caulk or expanding foam insulation.
By implementing these insulation techniques, you can significantly improve the energy efficiency of your 5th wheel camper during the winter months. This will not only keep you warm and comfortable but also save on heating costs.
As we move on to the next section about storing your camper in a safe location, it’s important to ensure that all insulation measures are in place to protect your camper from the harsh winter elements.
Store your camper in a safe location
Find a secure spot to store your 5th wheel, where it’ll be protected from the elements and potential damage. Safe storage is essential during the winter months to make sure your camper remains in good condition. When searching for a storage location, consider a covered facility or a spot with a sturdy roof to shield your 5th wheel from snow, rain, and harsh winds.
Additionally, look for a place with good drainage to prevent water accumulation and potential water damage. It’s also important to find a location that’s secure, with measures such as fencing, security cameras, or on-site personnel to deter theft or vandalism.
Before storing your camper, take winter weather precautions such as draining the water system and disconnecting the battery to prevent freezing and damage. Covering your camper with a breathable cover can also provide an extra layer of protection against dirt, dust, and UV rays.
Regularly check for maintenance issues throughout the winter season to catch any potential problems early on. This’ll help you address any issues before they worsen and ensure that your 5th wheel is ready for the next camping season.
Regularly check for maintenance issues throughout the winter season
Make sure you keep a close eye on your 5th wheel during the winter months. Check for any maintenance issues that may arise, like a small crack in the roof that could turn into a major leak if left unattended. It’s crucial to regularly inspect the plumbing system to prevent freezing and potential damage.
Here are some key areas to focus on:
-
Inspect all exposed pipes and fittings for any signs of cracks or leaks. Even a small crack can lead to water leakage, causing significant damage to your camper.
-
Check the water heater for any signs of rust or corrosion. This could indicate a leak or a faulty heating element, which should be addressed promptly.
-
Ensure that all drain valves and faucets are tightly closed to prevent any water from remaining in the system. Water left inside can freeze and cause pipes to burst.
-
Insulate any exposed pipes or fittings with foam pipe insulation to provide an extra layer of protection against freezing temperatures.
By regularly checking for maintenance issues throughout the winter season, you can prevent costly repairs and ensure that your 5th wheel camper remains in optimal condition. Remember to address any identified issues promptly to avoid further damage.
Frequently Asked Questions
How much antifreeze will I need to winterize the water lines in my 5th wheel camper?
To properly drain the water lines in your 5th wheel camper, start by shutting off the water supply and opening all faucets and drains.
Next, locate the low point drains and open them to remove any remaining water.
To protect the exterior from winter weather damage, clean and dry the camper thoroughly. Apply a protective sealant to the roof, windows, and seams.
Cover the camper with a weatherproof cover to shield it from snow, ice, and harsh winds.
Can I use a different type of antifreeze other than the one specified in the article?
When it comes to using a different type of antifreeze for winterizing your 5th wheel camper, there are options available. However, it’s important to consider the pros and cons before making a decision. Different types of antifreeze, such as propylene glycol or ethanol-based solutions, may have varying freezing points and corrosion inhibitors. While they may offer some benefits, it’s crucial to ensure compatibility with your camper’s plumbing system and follow manufacturer recommendations. Ultimately, choosing the right antifreeze is essential for protecting your water lines during the winter months.
Is it necessary to remove the water filters or cartridges before winterizing my camper?
It’s not necessary to remove the water filters or cartridges before winterizing your camper. However, it’s recommended to do so in order to prevent any potential damage to them. Winterizing the camper’s plumbing system is crucial to protect it from freezing temperatures.
Hiring a professional for the winterization process ensures that it’s done correctly, minimizing the risk of any issues occurring. This will help maintain the integrity of the camper’s plumbing system and prevent costly repairs in the future.
How often should I check for maintenance issues throughout the winter season?
Throughout the winter season, it’s recommended to check for maintenance issues on a regular basis. This ensures that any potential problems are identified and addressed promptly.
It’s advisable to perform a thorough inspection every 2-4 weeks, focusing on key areas such as the roof, windows, tires, and electrical systems.
Additionally, it’s important to use RV-specific antifreeze when winterizing your camper, as it provides superior protection against freezing temperatures and potential damage to the plumbing system.
Are there any specific tools or equipment I need to gather before starting the winterization process?
Before starting the winterization process, gather the necessary tools and equipment to ensure a thorough job.
One interesting statistic to note is that the average amount of antifreeze needed for winterizing a 5th wheel camper is approximately 3 gallons.
Some essential tools include a water pump converter kit, a water heater bypass kit, and a water filter bypass kit.
Additionally, consider alternative antifreeze options such as RV-specific non-toxic antifreeze.
Regularly check for maintenance issues throughout the winter season to avoid any potential problems.
Is the Process of Winterizing a 5th Wheel Camper Similar to Winterizing an RV Camper?
Yes, the process of winterizing an rv camper is similar to winterizing a 5th wheel camper. Both require draining the water system, adding antifreeze, and properly storing the unit to prevent damage during the colder months. It’s essential to follow the manufacturer’s guidelines for each specific type of camper.
Conclusion
In conclusion, winterizing a 5th wheel camper is a crucial task to protect your investment during the cold months. By following these steps and taking the necessary precautions, you can ensure that your camper remains in top condition and is ready for your next adventure come springtime.
Remember, just as we cover our bodies to shield ourselves from the harsh winter winds, we must also cover our campers to shield them from the elements. So, take the time to properly winterize your 5th wheel camper and give it the protection it deserves.
Safe travels!


