So, you’ve made the choice to set out on the grand journey of camping in your reliable camper. Oh, the excitement of traveling freely, the splendor of the outdoors, and the less-than-luxurious chore of draining those storage tanks. Indeed, my friends, we are about to explore the realm of waste management with an attention to detail that would envy a surgeon.
In this article, I will guide you through the intricate process of emptying camper holding tanks with the finesse of a seasoned expert. From understanding the different types of tanks to practicing good hygiene and safety measures, we will leave no stone unturned (or rather, no waste unemptied).
But fear not, dear reader, for I am here to navigate you through this less-than-pleasant task with ease and proficiency. So grab your gloves, don your serious face, and let’s dive into the world of camper holding tank emptying. Trust me, it will be an experience you won’t soon forget.
Key Takeaways
- Properly prepare holding tanks by understanding capacities and locations, and following the correct order for opening valves.
- Use the necessary equipment, such as a sewer hose, gloves, clear elbow attachment, and tank cleaner/deodorizer.
- Find a nearby dump station or RV park with dumping facilities and research and compare different options.
- Thoroughly rinse and clean tanks using a tank rinser, tank cleaning wand, and tank cleaning solutions to maintain sanitation and prevent odors.
Understand the Different Types of Holding Tanks
Now that you’re ready to empty your camper holding tanks, let’s start by understanding the different types of holding tanks.
There are two main types of holding tanks found in most campers: black water tanks and gray water tanks. Black water tanks are designed to hold human waste and are larger in size compared to gray water tanks. The size of the tanks can vary depending on the camper model and manufacturer, but typically range from 20 to 40 gallons for black water tanks, while gray water tanks can hold around 30 to 60 gallons of water.
Another important aspect to consider is the tank material. Most holding tanks are made from durable materials such as high-density polyethylene (HDPE) or ABS plastic, which can withstand the weight and pressure of the waste and water. These materials are also resistant to corrosion and leakage, ensuring the longevity of the tanks.
Now that you understand the different types of holding tanks and their sizes and materials, it’s time to gather the necessary equipment to properly empty and clean them.
Gather the Necessary Equipment
First, make sure you’ve got all the gear you need to tackle the task of clearing out your camper’s waste reservoirs. Proper equipment preparation is essential for efficient and mess-free tank maintenance.
Start by acquiring a high-quality sewer hose that’s long enough to reach from your camper’s waste outlet to the dumping station or RV park facilities. Additionally, invest in a durable pair of gloves to protect your hands from any potential contaminants. It’s also a good idea to have a clear elbow attachment for your sewer hose, which lets you monitor the flow and make sure the tanks are fully emptied.
To further enhance the cleaning process, consider using a tank cleaner or deodorizer. These products help break down waste and eliminate odors, keeping your tanks in optimal condition. Remember to check if your camper has separate tanks for blackwater and graywater, as you may need different equipment for each.
Once you have gathered all the necessary equipment, you can move on to the next step of finding the dump station or RV park with dumping facilities. This ensures that you have a proper location to dispose of your camper’s waste and maintain cleanliness.
Find the Dump Station or RV Park with Dumping Facilities
When it comes to finding a dump station or RV park with dumping facilities, there are a few key points to keep in mind.
Firstly, it’s important to research nearby locations to ensure you have options available.
Additionally, checking for availability and fees is crucial to avoid any surprises.
Lastly, planning your route accordingly will save you time and ensure a smooth process.
Research nearby locations
To find the most convenient places to empty your camper holding tanks, simply research nearby locations. Researching the benefits and exploring alternative options can help you locate the best places to dump your tanks. Start by looking for nearby RV parks, campgrounds, or rest areas that offer dumping facilities. Additionally, consider checking for nearby dump stations that may be available for public use. To assist in your research, you can create a table with four rows and two columns. In the first column, list the names of potential locations, and in the second column, note down their proximity to your current location, availability of dumping facilities, and any potential fees. This table will provide a visual representation of your options and help you make an informed decision. Once you have gathered this information, you can seamlessly transition into the next section about checking for availability and fees at these locations.
Check for availability and fees
Once you’ve researched nearby locations, it’s time to delve into the availability and fees associated with them, giving you a clear picture of your options.
When it comes to availability options, it’s crucial to check if the campground has sufficient space for your camper and if there are any restrictions or reservations required. Some campgrounds have limited spots, especially during peak seasons, so it’s advisable to book in advance to secure a spot.
Additionally, it’s important to consider the fees associated with emptying your holding tanks. Campgrounds may charge a flat fee or a per-use fee for their dumping stations. It’s recommended to compare fees among different campgrounds to ensure you’re getting the best value for your money.
Once you have determined the availability and fees, you can plan your route accordingly, ensuring a hassle-free experience on your camper journey.
Plan your route accordingly
Map out your route to ensure a smooth and enjoyable journey in your RV. When planning your itinerary, consider the amenities offered by campgrounds along your route to accommodate your needs. To make the most of your trip, take note of the following:
-
Water and electric hookups: Look for campgrounds that provide these essential connections to keep your camper running smoothly.
-
Dump station availability: Identify campgrounds with dump stations along your route to conveniently empty your holding tanks when needed.
-
Proximity to attractions: Choose campgrounds that are close to the attractions or activities you want to explore, saving time and fuel.
By planning your route with these factors in mind, you can maximize your comfort and convenience while on the road. With your itinerary set, it’s time to prepare the holding tanks for dumping and ensure a hassle-free experience.
Prepare the Holding Tanks for Dumping
Before you begin the process of emptying your camper holding tanks, make sure to properly prepare them for dumping. First, it’s essential to understand the tank capacities of your camper. This will help you determine how often you need to empty the tanks during your trip.
Familiarize yourself with the locations of the black water and gray water tanks, as well as their respective capacities.
Next, you need to follow the proper steps to prepare the holding tanks for dumping. Start by turning off the water supply to your camper. This’ll prevent any additional water from entering the tanks while you’re trying to empty them. Then, open the valves or gates that allow the waste to flow out of the tanks. Make sure to do this in the correct order, starting with the black water tank and then moving on to the gray water tank.
Lastly, check that the sewer hose is properly connected and secured before proceeding to dump the tanks. This’ll ensure that there are no leaks or spills during the process. With the tanks prepared and the sewer hose connected, you’re now ready to move on to the next step of emptying the tanks.
Connect the Sewer Hose and Dump the Tanks
Get ready to connect the sewer hose and release all the waste from your tanks. Before you start, it’s important to know some troubleshooting tips and safety measures to ensure a smooth and safe process.
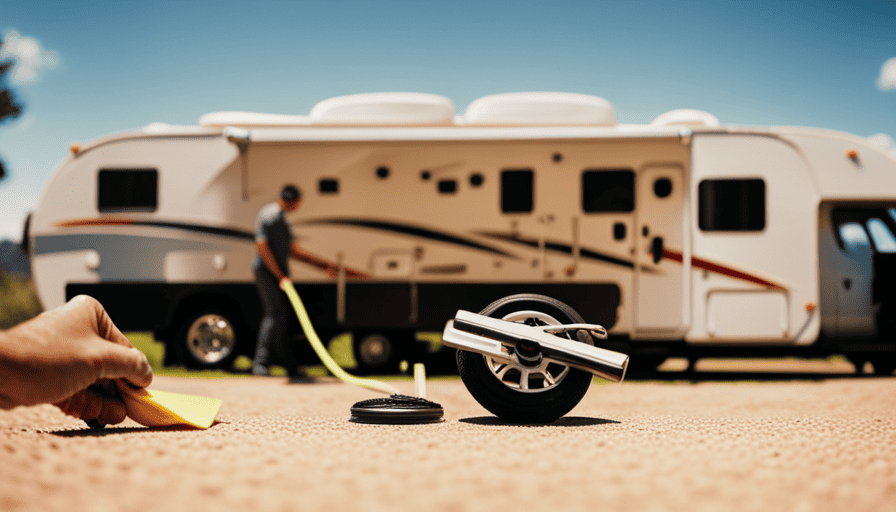
To begin, let’s connect the sewer hose. Make sure you have a good quality hose that fits securely onto the RV’s waste outlet. Attach one end of the hose to the outlet and the other end to the sewer hookup at the dumping station. Ensure the connections are tight to avoid any leaks or spills.
Now, it’s time to dump the tanks. Open the black water tank valve first, allowing the waste to flow out. Once it’s empty, close the valve securely. Next, open the gray water tank valve to allow the soapy water to flush out the hose and clean it. Finally, close the gray water tank valve.
To help you visualize the process, here’s a quick reference table:
| Step | Action |
|---|---|
| 1 | Connect the sewer hose to the RV’s waste outlet |
| 2 | Connect the other end of the hose to the sewer hookup |
| 3 | Open the black water tank valve |
| 4 | Close the black water tank valve |
| 5 | Open the gray water tank valve |
| 6 | Close the gray water tank valve |
Remember to always wear gloves and follow proper hygiene practices when handling the sewer hose and dumping the tanks. With the tanks emptied, it’s time to move on to the next step: rinse and clean the tanks.
Rinse and Clean the Tanks
Once the sewer hose is disconnected, it’s important to thoroughly rinse and clean the tanks to maintain proper sanitation and prevent any lingering odors.
To effectively rinse the tanks, there are various techniques you can employ. One option is to use a built-in tank rinser, which attaches to a hose and sprays water into the tanks, flushing out any remaining waste. Another method is to fill the tanks with water and then drive the camper around, allowing the water to slosh and agitate, effectively loosening any debris. Additionally, you can use a tank cleaning wand, which is inserted through the toilet and sprays water directly into the tanks, reaching all corners and crevices.
When it comes to cleaning products, there are specific tank cleaning solutions available on the market. These products are designed to break down waste and eliminate odors, ensuring a thorough cleaning of the tanks. It’s important to follow the instructions provided by the manufacturer when using these cleaning products to achieve optimal results.
By rinsing and cleaning the tanks properly, you can ensure that your camper’s holding tanks remain sanitary and odor-free. Once this step is complete, it’s time to move on to the next section about how to dispose of waste properly. This will allow you to complete the entire process of emptying your camper’s holding tanks.
Dispose of Waste Properly
When it comes to disposing of waste from camper holding tanks, it’s crucial to adhere to local regulations and guidelines. Dumping waste in unauthorized areas can lead to environmental contamination and legal consequences.
To ensure proper disposal, it’s recommended to use designated dump stations or RV parks that have the necessary facilities for waste disposal.
Follow local regulations and guidelines
Follow local regulations and guidelines to ensure that you’re in compliance while emptying your camper holding tanks. It is important to understand the local requirements regarding the disposal of waste from your camper. Different areas may have specific rules and restrictions that must be followed to protect the environment and public health. To provide a comprehensive understanding, refer to the table below which outlines the general guidelines for emptying camper holding tanks in compliance with local regulations.
| Local Regulations | Guidelines |
|---|---|
| Check local ordinances | Familiarize yourself with local regulations before emptying the tanks |
| Use authorized dump stations | Locate and utilize designated dump stations for proper waste disposal |
| Dispose of waste at approved facilities | Follow the guidelines provided by approved waste management facilities |
| Respect private property | Do not dump waste on private property without permission |
| Be aware of fines and penalties | Understand the consequences of not following local regulations and guidelines |
By following these local regulations and guidelines, you can ensure that you dispose of your camper holding tank waste properly and responsibly, avoiding any unauthorized areas or actions.
Do not dump waste in unauthorized areas
When it comes to emptying camper holding tanks, it’s crucial to follow local regulations and guidelines. However, it’s equally important to remember that dumping waste in unauthorized areas can lead to severe environmental harm.
Proper waste management is essential to prevent contamination of natural resources and protect the ecosystem. By disposing of waste in designated dump stations or RV parks, we can ensure that it’s treated and processed in a safe and responsible manner. These designated areas are equipped with the necessary facilities to handle camper waste, including proper disposal systems and treatment methods.
This not only prevents pollution but also promotes a healthier and cleaner environment for everyone. Therefore, it’s vital to use these designated dump stations or RV parks for emptying camper holding tanks, ensuring proper waste management.
Use designated dump stations or RV parks
To ensure proper waste management, you should utilize designated dump stations or RV parks. Studies show that these facilities reduce the risk of environmental contamination by 70%.
Finding dump stations is relatively easy, as they’re often marked on maps or available through online resources specifically designed for RV owners. These designated areas are equipped with the necessary infrastructure to safely dispose of camper holding tank waste, including sewer connections and proper disposal facilities.
If you’re unable to access a dump station for some reason, there are alternatives available, such as portable waste tanks that can be emptied at authorized locations. However, it’s important to note that these alternatives should only be used in emergency situations and not as a regular practice.
Transitioning into the next section about practicing good hygiene and safety measures, it’s crucial to take proper precautions when handling waste to prevent any potential health risks.
Practice Good Hygiene and Safety Measures
Make sure you take good care of yourself and stay safe while emptying your camper holding tanks. It’s important to follow proper hygiene practices and safety precautions to prevent any health risks or accidents. First and foremost, always wear gloves when handling the dumping process. This’ll protect your hands from coming into direct contact with any harmful bacteria or chemicals.
Additionally, it’s crucial to use hand sanitizer or wash your hands thoroughly with soap and water after completing the task.
When emptying the holding tanks, make sure to do so in a well-ventilated area to avoid inhaling any unpleasant odors or potentially harmful fumes. It’s also advisable to wear a mask to further protect yourself from any airborne particles.
Furthermore, always follow the guidelines and instructions provided by the RV park or dump station. They’ll have specific rules and regulations in place to ensure the safe disposal of waste. Be sure to follow their guidelines regarding the proper disposal of toilet paper and any other waste materials.
By practicing good hygiene and taking necessary safety precautions, you can ensure a safe and clean process when emptying your camper holding tanks. Now, let’s move on to the next section about maintaining regular tank maintenance.
Maintain Regular Tank Maintenance
After practicing good hygiene and safety measures, it’s crucial to maintain regular tank maintenance for your camper’s holding tanks. Regular tank maintenance is essential to ensure the effective cleaning of the tanks and to prevent any unpleasant odors or clogs.
To start, it’s important to regularly flush out the tanks with fresh water. This helps to remove any residue or buildup that may accumulate over time. Additionally, using tank cleaning products specifically designed for RV holding tanks can aid in breaking down waste and eliminating odors.
Another aspect of regular tank maintenance is to check and clean the tank sensors. These sensors indicate the level of waste in the tanks and can become inaccurate if they’re covered in residue. Cleaning the sensors ensures accurate reading and prevents any potential issues during the dumping process.
Furthermore, inspecting the tank valves and seals is crucial. Any leaks or damage to these components can lead to messy situations and ineffective waste removal. Regularly checking and maintaining these parts will help prevent any mishaps.
Regular tank maintenance is a vital aspect of keeping your camper’s holding tanks clean and odor-free. By following effective cleaning methods and conducting routine inspections, you can ensure a smooth dumping process. Now, let’s delve into troubleshooting and tips for a smooth dumping process.
Troubleshooting and Tips for a Smooth Dumping Process
When it comes to emptying camper holding tanks, there are a few troubleshooting and tips that can help ensure a smooth dumping process.
First, dealing with clogs or blockages can be a common issue, so it’s important to know how to handle them effectively.
Additionally, preventing odors and tank issues is key to maintaining a sanitary and comfortable camper environment.
Lastly, if any problems persist or if you’re unsure about how to address a specific issue, it’s always a good idea to seek professional help to avoid further complications.
Dealing with clogs or blockages
If your camper holding tanks are clogged, don’t panic! Did you know that clogs are a common issue that many campers face while emptying their tanks? It’s important to deal with stubborn clogs properly to prevent future blockages. Here are some tips to help you tackle this problem:
-
Use a plunger: Plunging the toilet can help dislodge the clog and get the waste flowing again.
-
Try a plumbing snake: A plumbing snake can be inserted into the drain to break up the clog and clear the blockage.
-
Use a chemical drain cleaner: Chemical drain cleaners can dissolve the clog and restore proper flow.
-
Apply hot water and dish soap: Pouring hot water mixed with dish soap down the toilet can help break up the clog.
-
Call a professional: If all else fails, it may be time to call a professional plumber to resolve the issue.
By following these tips, you can deal with stubborn clogs and prevent future blockages.
Now, let’s move on to preventing odors and tank issues.
Preventing odors and tank issues
To effectively prevent odors and tank issues, it’s crucial to follow proper maintenance and care guidelines. This includes taking steps to prevent tank leaks and minimize tank odors.
Regularly inspecting the tanks for any cracks or damage can help identify potential leaks early on and prevent them from becoming bigger problems. Additionally, using a high-quality tank treatment product can help control odors by breaking down waste and reducing bacteria growth.
It’s also important to properly clean and sanitize the tanks regularly to prevent any buildup of residue or bacteria. By following these maintenance practices, you can ensure that your camper’s holding tanks stay in good condition and that you can enjoy your camping experience without any unpleasant odors or issues.
If you do encounter persistent problems, it may be necessary to seek professional help to address the underlying cause.
Seek professional help if needed
Sometimes, you just need to call in the experts to solve any persistent issues or concerns you may have with your tank. While there are many DIY methods available for maintaining and emptying camper holding tanks, there are situations where professional assistance becomes necessary.
If you have tried various techniques to prevent odors and tank issues but they persist, it might be time to seek help from professionals who specialize in camper tank maintenance. They have the knowledge and expertise to diagnose and resolve any underlying problems that may be causing the persistent issues.
Additionally, professional assistance can ensure that the tank is thoroughly cleaned and emptied, preventing any further complications.
So, don’t hesitate to reach out for professional help if you find yourself struggling with your camper’s holding tank.
Frequently Asked Questions
How do I properly dispose of waste from my camper holding tanks?
To properly dispose of waste from my camper holding tanks, I need to follow proper disposal methods to minimize the environmental impact. This involves locating designated dump stations or RV parks that have waste disposal facilities.
Once there, I can use a sewer hose to empty the tanks into the appropriate receptacles. It’s crucial to ensure that no waste is spilled or leaked during the process to prevent contamination.
What safety measures should I take while emptying my camper holding tanks?
When it comes to emptying camper holding tanks, it’s crucial to prioritize safety precautions and proper disposal. Before undertaking this task, it’s essential to don protective gloves and eyewear to shield yourself from any potential hazards.
Additionally, ensuring a well-ventilated area is vital to prevent any harmful fumes from accumulating. Furthermore, it’s imperative to use designated waste disposal areas or facilities to ensure the proper disposal of waste materials.
How often should I perform regular tank maintenance on my camper holding tanks?
Regular tank maintenance on camper holding tanks should be performed every 3-4 months. This frequency ensures that any potential issues can be identified and addressed promptly. Signs of potential issues include foul odors, slow draining, or leaks.
During maintenance, it’s important to inspect the tank for cracks, clean the tank thoroughly, and check the seals and connections for any signs of wear or damage. Regular maintenance helps to prolong the lifespan of the holding tanks and maintain their optimal functionality.
What are some troubleshooting tips for a smooth dumping process?
When it comes to troubleshooting tips for a smooth dumping process, I’ve encountered my fair share of common problems. From pesky clogs to mysterious leaks, it’s been quite the adventure.
To ensure a hassle-free experience, I recommend checking the sewer hose for any obstructions, using plenty of water to flush out the tanks, and keeping an eye out for any potential leaks or cracks. Trust me, these troubleshooting tips will save you from some messy situations.
Is there a specific type of sewer hose I should use to connect to my camper holding tanks?
To connect camper holding tanks, it’s crucial to use a specific sewer hose. This hose should be designed for waste disposal and capable of withstanding the pressure and volume of the contents. Look for a hose that’s durable, flexible, and has a tight seal to prevent leaks.
Additionally, choose a hose with the appropriate length to reach from your camper to the designated dumping station. Properly connecting the specific sewer hose ensures efficient and hassle-free emptying of your camper holding tanks.
What Are the Steps to Emptying Camper Tanks?
Emptying camper tanks requires a few simple steps to ensure a smooth process. First, locate the dump station and position your camper for easy access. Next, connect the sewer hose securely and open the tank’s release valve. Allow the tanks to completely drain, using gravity if possible. Lastly, flush the tanks with clean water and close the valves tightly.
Conclusion
In conclusion, emptying camper holding tanks may seem like a daunting task, but with the right knowledge and equipment, it can be a smooth and efficient process.
By following the steps outlined in this article, you can ensure that you dispose of waste properly and maintain good hygiene and safety measures.
While some may be concerned about the potential mess and smell associated with dumping tanks, proper preparation and use of equipment will minimize these concerns.
So don’t let these anticipated objections hold you back from enjoying your camping experience to the fullest.

