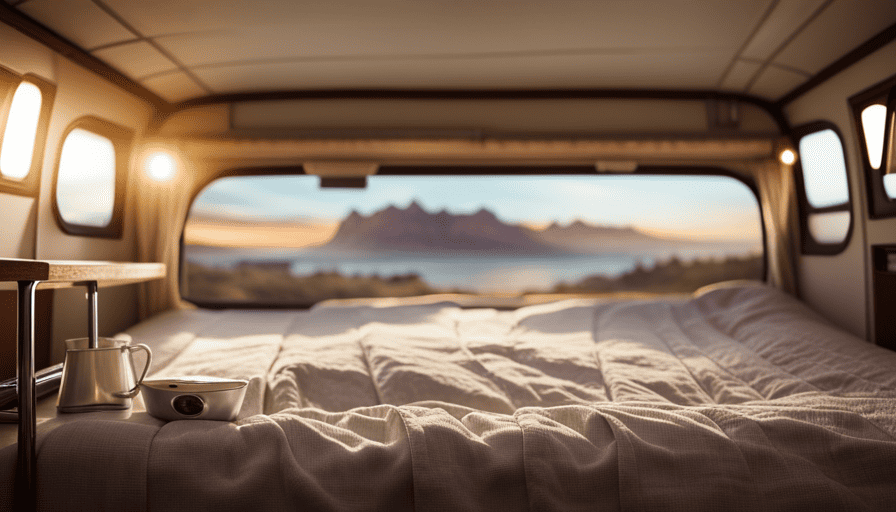
Are you prepared to venture out onto the open highways and set off on memorable journeys? Picture the liberty of owning a customized camper that’s specifically designed to cater to your personal preferences and requirements.
Converting a trailer into a camper is a thrilling project that allows you to transform a simple trailer into a cozy, functional home on wheels. From insulation and flooring to furniture and storage solutions, every step of the conversion process is an opportunity to unleash your creativity and design a space that reflects your personal style. As you embark on this exciting project, keep in mind some key truck camper building tips to ensure a successful and comfortable camper conversion. It’s important to carefully plan and measure the space in order to maximize functionality and avoid wasted space. Additionally, consider using lightweight and durable materials to ensure your camper is both efficient and easy to tow. Lastly, don’t be afraid to seek inspiration from other camper conversions and do thorough research to gather ideas and techniques to make your project a success.
In this article, I will guide you through the step-by-step process of converting a trailer into a camper, providing you with the necessary tools, materials, and techniques to ensure a successful conversion. First and foremost, choose the right camper trailer for your needs. Consider the size, layout, and features that are important to you. Once you have the perfect trailer, you can start planning the layout and design of your new camper. Remember, the key to a successful conversion is choosing the right camper trailer from the beginning.
So, grab your tools and let’s get started on this exciting journey of turning your trailer into the camper of your dreams!
Key Takeaways
- Assess the trailer condition and create a repair checklist before starting the conversion project.
- Design a functional layout for the camper, considering space optimization and multifunctional furniture options.
- Insulate the trailer properly to control temperature, reduce noise, prevent condensation, and increase energy efficiency.
- Ensure a well-designed electrical and plumbing system, using durable materials and following safety guidelines.
Assess Your Trailer and Plan Your Layout
Get ready to transform your trailer into a cozy camper by first assessing its current state and planning out the perfect layout for your future adventures!
Start by assessing the condition of your trailer. Look for any structural damage, leaks, or worn-out components that need to be repaired or replaced. Make a checklist and note down everything that needs attention. This will help you prioritize and budget for any necessary repairs.
Next, it’s time to design a functional layout for your camper. Think about how you want to use the space and what amenities are important to you. Consider factors like sleeping arrangements, kitchen facilities, storage options, and bathroom facilities. Sketch out a rough floor plan and experiment with different layouts until you find one that maximizes space and meets your needs.
Once you have a clear layout in mind, gather necessary tools and materials to get started on your camper conversion project. You’ll need basic hand tools like a drill, screwdrivers, and a saw, as well as materials like lumber, insulation, and wiring. Having everything ready before you begin will help you stay organized and make the process smoother.
With your trailer assessed and your layout planned, it’s time to gather the necessary tools and materials and begin transforming your trailer into the camper of your dreams.
Gather Necessary Tools and Materials
First, you’ll need to round up all the essential tools and materials to transform your trailer into a cozy camper. To start, make sure you have a good set of basic tools such as screwdrivers, wrenches, and pliers. You’ll also need a power drill, measuring tape, and a level to ensure everything is installed properly.
In terms of materials, you’ll need insulation, plywood, screws, and nails. It’s important to have enough insulation to keep your camper comfortable in different climates. Additionally, consider your trailer conversion budget and timeline. Determine how much you’re willing to spend on materials and how long you’re willing to dedicate to the project. This will help you prioritize what tools and materials to purchase.
With all the necessary tools and materials in hand, you can move on to the next step of insulating your trailer. This is crucial for creating a comfortable living space inside your camper.
Insulate Your Trailer
Make sure you insulate your space properly to keep the interior cozy and comfortable. Start by gathering materials like insulation, plywood, screws, and nails.
Insulation techniques are essential to maintain a comfortable temperature inside your camper, regardless of the weather outside. Installing insulation will not only provide thermal comfort but also offer energy efficiency benefits. Here are five reasons why insulating your trailer is crucial:
- Improved temperature control: Insulation helps maintain a consistent temperature inside the camper, keeping you warm in winter and cool in summer.
- Noise reduction: Proper insulation minimizes outside noise, creating a peaceful and serene environment inside your camper.
- Condensation prevention: Insulating walls and ceiling helps prevent condensation buildup, reducing the risk of mold and mildew.
- Energy savings: Insulation reduces the need for heating and cooling, resulting in lower energy consumption and cost savings.
- Increased durability: Insulated trailers are better protected against extreme temperatures, reducing wear and tear on the interior.
Now that your trailer is properly insulated, it’s time to move on to the next step: installing the flooring and walls.
Install Flooring and Walls
When it comes to installing flooring in your trailer camper, it’s important to choose options that are not only durable but also easy to clean. Look for materials such as vinyl or laminate that can withstand the wear and tear of camping adventures.
Additionally, installing walls in your trailer camper can provide added privacy and enhance the overall aesthetics of your space. Consider using materials like wood paneling or wallpaper to create a cozy and inviting atmosphere.
Select durable and easy-to-clean flooring options
To give your trailer a camper feel, consider choosing a flooring option that’s as durable and easy-to-clean as a stainless steel countertop. When converting a trailer into a camper, the flooring is an important aspect to consider. You want something that can withstand the wear and tear of outdoor adventures while also being easy to maintain.
There are several options that fit the bill. One popular choice is vinyl flooring. It’s durable, resistant to water and stains, and easy to clean with just a mop and some mild soap. Another option is laminate flooring, which is known for its durability and scratch resistance. It’s also easy to clean with a damp cloth or mop.
With either option, you can easily transform your trailer into a comfortable and functional camper.
Now, let’s move on to the next step of the conversion process: installing walls for added privacy and aesthetics.
Install walls for added privacy and aesthetics
After selecting a durable and easy-to-clean flooring option for your trailer-turned-camper, it’s time to focus on creating a cozy and private space. Privacy is essential when you’re on the road, and there are several options to consider.
-
Curtains: Hang curtains on tension rods to divide the space and provide privacy when needed.
-
Folding screens: These portable screens are great for creating separate areas within your camper.
-
Room dividers: Install a room divider to divide the space and add a touch of style.
-
Decorative wall panels: These panels not only provide privacy but also add a decorative element to your camper’s interior.
Installing walls not only offers added privacy but also enhances the aesthetics of your camper. Decorative wall panels can be easily installed and come in various styles and designs, allowing you to personalize your space.
Now that you have created a private and stylish interior, let’s move on to the next step: building furniture and storage solutions.
Build Furniture and Storage Solutions
Assemble the furniture and storage solutions to transform your trailer into a cozy camper. When it comes to furniture arrangement, consider the layout of your trailer and the space available. Start by placing the larger furniture pieces first, such as the bed or sofa, to establish a focal point. This will help you determine the flow of the space and optimize the available area.
Once the larger pieces are in place, you can add smaller items like chairs or tables to complete the setup.
Storage organization is crucial in a camper to maximize space and keep everything organized. Utilize storage solutions that are compact and multifunctional. Install overhead cabinets or shelves to store clothing, kitchen supplies, and personal items. Consider using under-bed storage containers or drawers to make the most of the space underneath the bed. Additionally, utilize wall-mounted organizers or hooks to hang items like hats, keys, or small bags.
With the furniture and storage solutions in place, you can now move on to installing the electrical and plumbing systems. This will ensure that your camper is fully equipped and functional for your adventures.
Install Electrical and Plumbing Systems
Now it’s time to bring your camper to life by wiring the electrical and plumbing systems throughout, ensuring a seamless and functional experience for all your adventures. Designing efficient systems is key to maximizing the functionality of your camper. Let’s start with the electrical system. Begin by creating a detailed plan, mapping out where each outlet, light fixture, and appliance will be placed. This will help you determine the necessary wiring and ensure everything is connected properly. When installing the electrical system, remember to follow all safety guidelines and use appropriate materials. Troubleshooting common problems, such as blown fuses or faulty connections, may require some electrical knowledge, but with patience and research, you can easily resolve them.
Next, let’s move on to the plumbing system. Just like with the electrical system, a well-designed plan is crucial. Determine the layout of your water tanks, pumps, and pipes to ensure efficient water flow. When installing the plumbing system, use durable materials that are suitable for the road. Don’t forget to add insulation to prevent freezing during colder temperatures. Be prepared to troubleshoot issues such as leaks or clogged pipes, which can occur over time. Regular maintenance and inspections will help you catch and fix any problems early on.
Now that you have your electrical and plumbing systems in place, you can move on to customizing the interior of your camper. [Transition into the next section about customizing the interior].
Customize the Interior
Once you’ve got the electrical and plumbing systems in place, it’s time to put your personal touch on the interior of your cozy home on wheels.
One of the first things you’ll want to consider is custom cabinetry. This will not only provide you with ample storage space for your belongings, but it will also give your camper a polished and organized look. You can install cabinets above the kitchen area, along the walls, and even under the bed for maximum utilization of space.
Next, focus on creating comfortable sleeping arrangements. This is crucial as a good night’s sleep is essential for those long road trips. You can either choose to install a permanent bed or go for a convertible sleeping area that can be easily transformed into a dinette during the day. Consider adding a memory foam mattress or a cozy sleeping pad for added comfort.
Lastly, when customizing the interior, don’t forget to add personal touches such as curtains, rugs, and throw pillows to make your camper feel like a home away from home.
Once you’ve completed customizing the interior, it’s important to test and ensure safety by double-checking all the electrical connections, plumbing systems, and any other installations you’ve made. This will give you peace of mind while you hit the road and embark on your adventures.
Test and Ensure Safety
In order to ensure the safety of my camper, I need to thoroughly inspect all electrical and plumbing connections. This means checking for any loose wires, frayed cords, or faulty outlets.
I also need to be on the lookout for any potential hazards or safety issues, such as sharp edges, uneven surfaces, or flammable materials.
By taking the time to carefully test and inspect these areas, I can ensure that my camper is safe and ready for use.
Inspect all electrical and plumbing connections
First, make sure you’re thoroughly inspecting all electrical and plumbing connections in your trailer to ensure they are in proper working order before converting it into a camper. Inspecting plumbing connections is crucial to prevent any leaks or water damage once you start using your camper. Check for any signs of corrosion, loose fittings, or worn-out seals. It’s important to address these issues before they become bigger problems. Additionally, don’t forget to check the electrical system in your trailer. Test all outlets, lights, and appliances to ensure they are functioning correctly. Look for any frayed wires or exposed connections that could pose a safety risk. By carefully inspecting the electrical and plumbing connections, you can identify and address any issues before converting your trailer into a camper. This will help create a safe and functional living space for your camping adventures. Next, we will discuss how to check for any potential hazards or safety issues.
Check for any potential hazards or safety issues
Be sure to thoroughly inspect your electrical and plumbing connections for any potential hazards or safety issues. This will ensure a worry-free and secure camping experience.
Start by identifying potential dangers such as frayed wires, loose connections, or signs of water leakage. Check all electrical outlets, switches, and lights to make sure they’re functioning properly and securely fastened.
Similarly, examine all plumbing connections, including pipes, faucets, and drains, for any leaks, cracks, or loose fittings. This step is crucial to ensure the camper’s structural integrity and prevent accidents or damage during your outdoor adventures.
Once you’ve thoroughly inspected and addressed any potential hazards or safety issues, you can proceed to the next section and prepare for exciting outdoor activities.
Prepare for Outdoor Adventures
To prepare for outdoor adventures with my newly converted camper, I need to pack essential camping gear and equipment. This includes items such as a tent, sleeping bags, cooking utensils, and a first aid kit.
Once everything is packed, I can then plan my first camping trip, taking into consideration factors such as location, duration, and activities to ensure a successful and enjoyable experience.
Pack essential camping gear and equipment
Once the trailer’s converted into a camper, it’s important to pack essential camping gear and equipment to ensure a comfortable outdoor experience.
Did you know that a survey conducted by the Outdoor Foundation found that 40% of campers believe that having the right gear is the key to a successful camping trip?
To make sure you have everything you need, start by choosing the right camping gear. This includes a reliable tent that fits your needs, a comfortable sleeping bag, and a sturdy camping stove for cooking meals.
Next, set up a comfortable sleeping area by using a sleeping pad or air mattress, along with cozy blankets and pillows.
Don’t forget to pack essential items like a camping chair, lantern, and cooking utensils.
Now that you’re all set with your camping gear, it’s time to plan your first camping trip with your newly converted camper, ensuring unforgettable adventures await.
Plan your first camping trip with your newly converted camper
Get ready to embark on your first camping adventure with your newly transformed camper! Before you hit the road, make sure you have everything you need by creating a camping checklist. Include essentials like sleeping bags, cooking utensils, a first-aid kit, and food supplies.
Research the best camping spots in your area and choose one that suits your preferences. Whether you prefer a secluded forest campground or a beachside spot, there are plenty of options to explore.
Once you’ve picked your destination, plan your route and make any necessary reservations. Remember to pack your map and GPS for navigation.
As you head out on your trip, be prepared for unexpected challenges and enjoy the journey. Transitioning into the next section, maintaining and upgrading your camper will ensure it stays in top-notch condition for future adventures.
Maintain and Upgrade Your Camper
Upgrading and maintaining your camper is essential for ensuring a comfortable and enjoyable camping experience. When it comes to upgrading your camper, one area you may want to focus on is the kitchen appliances. Having functional and efficient appliances can make a big difference in your camping experience.
Consider upgrading to a modern and energy-efficient stove, refrigerator, and microwave. These upgrades will not only enhance the functionality of your camper kitchen but also make cooking and storing food easier and more convenient.
Another important upgrade to consider is adding solar power to your camper. Solar power can provide you with a reliable and sustainable source of electricity while on the road. Installing solar panels on the roof of your camper can help you harness the power of the sun and charge your camper’s batteries. This means you can use your appliances, charge your devices, and run your lights without relying solely on campground electricity or your camper’s generator. Additionally, solar power is environmentally friendly and can save you money in the long run.
Upgrading your camper’s kitchen appliances and adding solar power are two important steps to maintaining and improving your camper. These upgrades will not only enhance your camping experience but also make it more convenient and sustainable. So, don’t overlook the importance of maintaining and upgrading your camper.
Frequently Asked Questions
What are some common mistakes to avoid when converting a trailer into a camper?
Common mistakes to avoid when converting a trailer into a camper are crucial to ensure a successful transformation. One common mistake is underestimating the importance of proper insulation, which can lead to uncomfortable temperatures and increased energy usage.
Another mistake is overlooking the need for sufficient storage space, resulting in cluttered and disorganized living quarters.
To avoid these mishaps, consider researching tips and tricks from experienced DIYers and consulting experts for guidance throughout the process.
How long does it typically take to complete a trailer-to-camper conversion project?
On average, it takes several weeks to a few months to complete a trailer-to-camper conversion project. The time can vary depending on the complexity and size of the trailer, as well as the individual’s experience and available time. Necessary skills for the project include basic carpentry, electrical knowledge, plumbing, and the ability to work with various materials. It is crucial to have patience and attention to detail for a successful conversion.
Are there any legal requirements or permits needed for converting a trailer into a camper?
Sure thing! When it comes to converting a trailer into a camper, it’s important to be aware of the legal requirements and permits involved.
Depending on where you live, there may be specific regulations that need to be followed. Additionally, it’s crucial to consider the conversion timeframe, as it can vary depending on the complexity of the project.
To keep costs down, using budget-friendly materials can be a great option. Lastly, a dual-purpose trailer can offer versatility and convenience for your camping adventures!
What are some budget-friendly options for materials and furnishings during the conversion process?
When it comes to converting a trailer into a camper on a budget, there are some great options for finding budget-friendly materials and creative furnishing ideas.
For materials, consider checking out thrift stores, salvage yards, or online marketplaces for discounted items like cabinets, flooring, and appliances.
As for furnishings, think outside the box and repurpose items you already have, like using an old storage trunk as a coffee table or turning crates into shelves.
Get creative and save money while transforming your trailer into a cozy camper.
Can I still use my trailer for hauling cargo after it has been converted into a camper?
Yes, you can still use your trailer for hauling cargo after it’s been converted into a camper. One of the pros of converting a trailer into a camper is the versatility it offers. However, there are a few cons to consider.
The added weight of the camper conversion may decrease the trailer’s hauling capacity. Additionally, the interior modifications may limit the available space for cargo. To maximize space in a converted trailer, consider using foldable furniture, utilizing storage bins, and installing overhead storage compartments.
Conclusion
Well, who would’ve thought? I never imagined that I’d be able to convert a simple trailer into a magnificent camper! It was quite the journey, filled with ups and downs, but in the end, I created a cozy little haven on wheels.
From assessing and planning the layout, to insulating, installing, and customizing, every step was a challenge. But now, as I sit here, sipping a cup of hot cocoa in my camper, I can’t help but smile.
Who needs a fancy RV when you can create your own dream on wheels?

