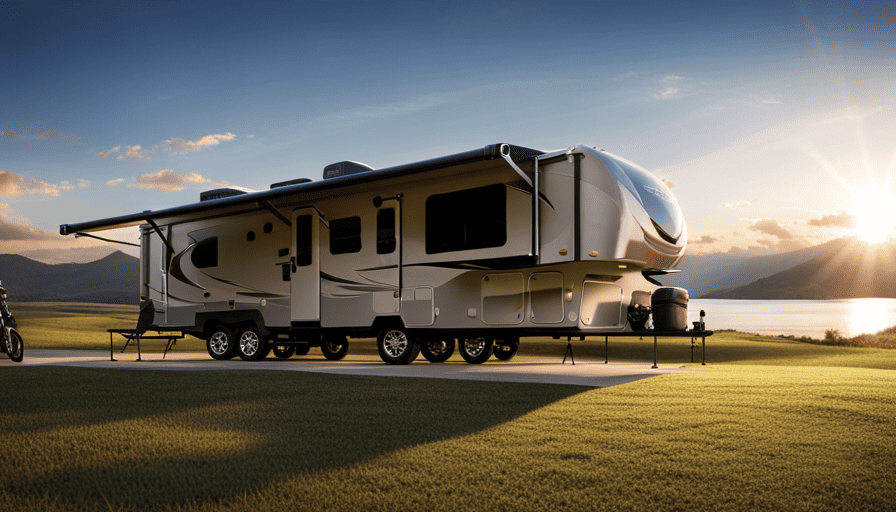
Maintaining a camper roof by cleaning it might not seem like the most exciting job, but it’s critical for adequate upkeep. If you ignore cleaning your camper’s roof, you could face issues like damage, leaks, and potential health risks. Yet, armed with the correct tools and some effort, you can effortlessly maintain your camper roof in top shape.
In this step-by-step guide, I will walk you through the process of cleaning your camper roof, from gathering your cleaning supplies to inspecting and repairing any damage. By following these instructions, you will not only ensure the longevity of your camper roof but also create a clean and comfortable environment for your camping adventures.
So let’s roll up our sleeves and get started on giving your camper roof the TLC it deserves!
Key Takeaways
- Properly cleaning the camper roof is essential for maintenance, preventing damage, leaks, and health hazards.
- It is important to gather the right cleaning supplies, such as a cleaner specifically designed for camper roofs and a soft-bristle brush or sponge.
- The steps to clean a camper roof include wetting the surface, applying a cleaning solution, letting it sit, and then scrubbing in a gentle circular motion.
- It is crucial to regularly inspect the roof, remove any loose debris, and use a blower or compressed air for hard-to-reach areas or stubborn debris.
Gather Your Cleaning Supplies
Now, it’s time to gather all your cleaning supplies and get ready to give your camper roof a sparkling clean! The first thing you’ll need are the right cleaning products. Look for a cleaner specifically designed for camper roofs, as they’re formulated to remove dirt, grime, and stains without damaging the roof material.
You can find these cleaners at your local RV supply store or online. Additionally, you’ll need a soft-bristle brush or sponge to scrub away any stubborn dirt or debris. This will ensure a thorough clean without scratching the surface.
When it comes to cleaning techniques, start by wetting the roof surface with water to loosen any loose dirt. Then, apply the cleaning solution according to the manufacturer’s instructions. Let it sit for a few minutes to allow the cleaner to work its magic.
Next, use the soft-bristle brush or sponge to scrub the roof in a gentle, circular motion. Pay extra attention to any heavily soiled areas. Rinse the roof thoroughly with clean water to remove all traces of the cleaner.
With your cleaning supplies in hand and armed with the right techniques, you’re now ready to move on to the next step of preparing the roof surface for a thorough cleaning.
Prepare the Roof Surface
To properly prepare the surface, it’s essential to meticulously remove any debris or loose particles from the top of your camper. This step is crucial in ensuring that the cleaning process is effective and that the roof is thoroughly cleaned. Here are four important things to keep in mind when preparing the roof surface for cleaning:
-
Inspect the roof: Before starting the cleaning process, carefully examine the roof for any signs of damage, such as cracks or leaks. It’s important to address any issues before proceeding with the cleaning.
-
Sweep or brush off loose debris: Use a soft-bristle brush or broom to gently sweep away any leaves, twigs, or dirt from the roof. This will prevent these particles from getting in the way while cleaning and potentially scratching the surface.
-
Use a blower or compressed air: For hard-to-reach areas or stubborn debris, a blower or compressed air can be useful. Blow away any remaining loose particles, making sure to cover all corners and crevices.
-
Rinse the roof: Once the loose debris is removed, rinse the roof with water to further clean the surface. Use a hose with a sprayer attachment to ensure an even distribution of water.
With the roof surface properly prepared, we can now move on to choosing the right cleaning solution to effectively remove dirt and stains.
Choose the Right Cleaning Solution
When it comes to choosing the right cleaning solution for your camper roof, there are a few key points to consider.
First, you can decide between homemade and store-bought solutions. Homemade solutions can be cost-effective and environmentally friendly, but store-bought solutions are often formulated specifically for camper roofs.
Second, it’s important to take into account the material of your roof. Different materials require different cleaning solutions to avoid damage.
By considering these factors, you can ensure that you choose the right cleaning solution for your camper roof.
Homemade vs. Store-Bought
If you’re looking to decide between homemade or store-bought solutions for cleaning your camper roof, you can either whip up your own concoction using common household items or head to the nearest store for a ready-made product.
When comparing homemade vs. store-bought options, cost is one factor to consider. Homemade solutions tend to be more cost-effective because they use ingredients you likely already have at home, such as vinegar, dish soap, and water. On the other hand, store-bought cleaners may offer convenience and specialized formulas for specific roof materials, but they can be more expensive.
When considering the roof material, it’s important to keep in mind that different materials may require different cleaning solutions.
Now, let’s dive into the next step and explore how to consider the roof material.
Consider the Roof Material
Now let’s take a moment to think about what type of material your camper’s roof is made of and how that can affect your cleaning approach. Considering different roof materials is important because each material requires a specific method of cleaning to avoid damage.
Here are four roof maintenance tips to keep in mind:
-
For rubber roofs, use a mild detergent and a soft brush to gently scrub away dirt and grime. Avoid using harsh chemicals that can degrade the rubber.
-
Fiberglass roofs can be cleaned with a non-abrasive cleaner and a soft cloth. Be careful not to scrub too hard, as this can cause scratches.
-
Metal roofs should be cleaned with a mild soap and water solution. Avoid abrasive cleaners that can scratch the surface.
-
For vinyl roofs, use a vinyl roof cleaner and a soft brush to remove dirt and stains. Avoid using bleach or harsh chemicals that can discolor the vinyl.
Considering the different roof materials and following these maintenance tips will help you keep your camper’s roof clean and in good condition.
Now, let’s move on to the next step of cleaning from top to bottom.
Start Cleaning from Top to Bottom
When starting to clean the camper roof, it’s important to follow three key points.
First, use a soft bristle brush to avoid damaging the surface.
Second, scrub in circular motions to ensure the cleaning solution is evenly distributed.
Finally, rinse thoroughly to remove any residue and leave the roof spotless.
By following these steps, you can effectively clean your camper roof and maintain its longevity.
Use a Soft Bristle Brush
Gently scrub the camper roof with a soft bristle brush, like a gentle rain shower caressing the surface. This cleaning technique ensures that you remove dirt and debris without causing any damage to the roof material. Using a soft bristle brush is essential as it won’t scratch or scrape the surface. To give you a better understanding of the best cleaning tools, here’s a table that compares different types of brushes:
| Brush Type | Bristle Material | Ideal For |
|---|---|---|
| Soft Bristle | Nylon or plastic | Fiberglass or rubber roofs |
| Medium Bristle | Synthetic | Metal or vinyl roofs |
| Hard Bristle | Wire | Heavy-duty cleaning |
Once you’ve gently scrubbed the roof with a soft bristle brush, it’s time to move on to the next step – scrubbing in circular motions. This will help to further loosen any stubborn stains and ensure a thorough cleaning.
Scrub in Circular Motions
To achieve a spotless shine, imagine yourself effortlessly gliding the brush in circular motions, gently coaxing away any lingering grime and revealing the true beauty of your camper’s roof.
Scrubbing in circular motions offers several benefits when cleaning camper roofs. First, it helps to evenly distribute the cleaning solution, ensuring that every inch of the roof is covered. This prevents streaks and ensures a thorough cleaning.
Second, circular motions help to break up stubborn dirt and stains, making them easier to remove. It also helps to avoid damaging the roof material by applying even pressure.
To effectively scrub in circular motions, start at one corner of the roof and work your way towards the opposite side. Use light to moderate pressure and make sure to cover the entire surface area.
Rinse thoroughly to remove any remaining dirt and cleaning solution.
Rinse Thoroughly
Make sure you thoroughly rinse off any remaining dirt and cleaning solution to reveal a sparkling surface that glistens under the sun.
To achieve a thorough rinse, there are a few techniques you can try. First, use a hose with a nozzle attachment to create a gentle spray. Start at one end of the camper roof and work your way towards the other end, ensuring that you cover the entire surface.
Next, consider using a soft brush or sponge to help loosen any stubborn dirt or grime.
After rinsing, it’s important to properly dry the roof to prevent water spots and potential damage. You can either let it air dry or use a clean, dry cloth to gently pat dry the surface.
With the roof clean and dry, you can now move on to the next step: paying attention to any stains or mold that may be present.
Pay Attention to Stains and Mold
Hey there, keep an eye out for any pesky stains or mold on your camper roof! Mold prevention is essential to maintain a clean and healthy environment inside your camper.
To start, inspect the roof for any signs of mold or stains. If you spot any, it’s crucial to address them promptly. Begin by preparing a mixture of equal parts water and white vinegar in a spray bottle. Spray the affected areas generously and let the solution sit for about 15 minutes. Then, using a soft-bristle brush, scrub the stains gently in circular motions. Rinse the roof thoroughly with clean water.
For tougher stains, you may need to use a specialized cleaner designed for RV roofs. Follow the instructions on the label carefully. After removing the stains, it’s important to dry the roof completely to prevent moisture buildup.
Now that you’ve tackled the stains and mold, let’s move on to an equally important step – don’t forget the seams and edges.
Don’t Forget the Seams and Edges
Remember, it’s important to pay attention to the seams and edges of your camper’s rooftop to ensure a watertight seal and avoid potential damage. Properly sealing the seams is crucial in preventing leaks and prolonging the lifespan of your camper roof. There are various seam sealing and waterproofing options available in the market that can effectively protect your camper from water damage.
To start, thoroughly clean the seams and edges of your camper roof using a mild detergent and a soft brush. Remove any dirt, debris, or old sealant that may be present. Once the area is clean and dry, apply a high-quality seam sealer or waterproofing product along the seams and edges. Ensure that the product is specifically designed for outdoor use and is compatible with your camper roof material.
To provide a visual representation of the different seam sealing and waterproofing options available, here is a table:
| Seam Sealing and Waterproofing Options |
|---|
| Silicone Sealant |
| Butyl Tape |
| Roofing Cement |
| Liquid Rubber |
| Seam Tape |
After applying the sealant or waterproofing product, allow it to dry completely according to the manufacturer’s instructions. This will create a strong and durable barrier against water penetration. Now, you can transition into the subsequent section about rinsing and drying the roof properly to complete the cleaning process.
Rinse and Dry the Roof Properly
To ensure proper maintenance, it’s essential to thoroughly rinse and dry your RV’s rooftop. After cleaning the seams and edges, it’s time to give the entire roof a good rinse.
Here are three roof cleaning techniques you can use:
-
Start by using a hose with a high-pressure nozzle to remove any loose dirt and debris. This will help loosen and wash away any stubborn grime stuck on the surface.
-
Next, grab a long-handled brush with soft bristles and some mild soap mixed with water. Gently scrub the roof in a circular motion, paying extra attention to stained or dirty areas. This will help lift and remove any remaining dirt or stains.
-
Once the entire roof has been scrubbed, rinse it thoroughly with clean water. Make sure to rinse away all the soap residue to prevent streaks or spots from forming.
After rinsing, it’s important to dry the roof properly to avoid water damage or mold growth. You can use a soft cloth or a squeegee to remove any excess water. Finally, let the roof air dry completely before moving on to the next step.
Now that the roof is clean and dry, it’s time to inspect and repair any damage that may have occurred over time.
Inspect and Repair any Damage
Now it’s time for me to carefully examine and fix any potential issues or wear and tear that may have occurred on my RV’s rooftop. Inspecting and repairing any damage is crucial to maintaining the longevity and functionality of the camper roof. By promptly addressing any issues, I can prevent further damage and costly repairs in the future.
To begin, I will thoroughly inspect the entire roof surface for any signs of damage such as cracks, punctures, or loose seams. I will pay close attention to areas around vents, skylights, and any other protrusions on the roof. Once I identify any damages, I will proceed with the necessary repair techniques. This may involve sealing cracks with a waterproof sealant, patching punctures with roof repair tape, or reattaching loose seams with adhesive.
To better visualize the process, here is a table summarizing the repair techniques and prevention methods:
| Repair Techniques | Prevention Methods |
|---|---|
| Seal cracks with waterproof sealant | Regularly inspect the roof for damage |
| Patch punctures with roof repair tape | Keep the roof clean and free from debris |
| Reattach loose seams with adhesive | Avoid walking on the roof unnecessarily |
By following these steps and regularly inspecting and repairing any damage, I can ensure the longevity of my camper roof. Now let’s move on to the next section, where I will share some valuable regular maintenance tips to keep my roof in top condition.
Regular Maintenance Tips
When it comes to maintaining your camper roof, there are a few key points to keep in mind. First and foremost, it’s important to schedule regular cleanings to prevent the buildup of dirt, debris, and mold.
Additionally, protecting the roof from UV damage is crucial in order to prolong its lifespan and prevent any potential leaks or cracks.
By following these steps, you can ensure that your camper roof stays in great condition for years to come.
Schedule Regular Cleanings
Make sure you regularly clean your camper roof, just like you would sweep the dust off your kitchen counters. Regular cleaning benefits your roof in many ways, such as preventing the buildup of dirt, leaves, and debris, which can cause damage over time.
Cleaning frequency suggestions depend on factors like weather conditions and how often you use your camper. However, it’s generally recommended to clean your camper roof at least once every three months. To make this task easier, here are four steps you can follow:
-
Start by removing any loose debris like leaves or twigs using a broom or a soft brush.
-
Next, rinse the roof with water to remove any remaining dirt.
-
Use a mild soap or specialized camper roof cleaner to scrub the surface gently.
-
Rinse thoroughly with clean water and allow the roof to dry completely before moving on to the next step.
By regularly cleaning your camper roof, you ensure its longevity and prevent future issues.
Now, let’s learn how to protect the roof from UV damage.
Protect the Roof from UV Damage
To keep your camper roof in top shape, don’t forget to shield it from harmful UV rays. UV rays can cause damage over time, leading to cracks, fading, and deterioration of the roof material.
One way to protect your camper roof is by applying a protective roof coating. These coatings act as a barrier, reflecting the UV rays and preventing them from penetrating the roof surface. Not only do these coatings provide UV protection, but they also offer other benefits such as waterproofing and increasing the lifespan of the roof.
Regular maintenance of your roof, including applying a protective coating, can save you money in the long run by preventing costly repairs or even roof replacement. By taking the time to protect your camper roof from UV damage, you can enjoy a clean and well-maintained camper roof for years to come.
Enjoy a Clean and Well-Maintained Camper Roof!
Imagine yourself basking in the glory of a pristine camper roof, free from the grimy residue of countless road trips and camping adventures. To enjoy a clean and well-maintained camper roof, it’s essential to establish a regular cleaning schedule.
By doing so, you not only keep your roof looking great but also prevent potential water damage.
To achieve this, follow these steps:
-
Gather the necessary supplies: a soft-bristle brush, mild soap or specialized RV roof cleaner, a hose, and a ladder if needed.
-
Begin by removing any loose debris like leaves or twigs from the roof surface.
-
Mix the mild soap or RV roof cleaner with water in a bucket according to the product instructions.
-
Using the soft-bristle brush, gently scrub the roof in a circular motion, paying extra attention to any stubborn stains or dirt buildup.
-
Rinse the roof thoroughly with a hose, making sure to remove all the soap residue.
-
Inspect the roof for any signs of damage or potential leaks while it’s still wet. If necessary, make any repairs or address issues promptly.
-
Finally, allow the roof to dry completely before closing it up.
By following this regular cleaning schedule, you not only ensure a clean roof but also prevent water damage, extending the lifespan of your camper. So, don’t hesitate to give your roof the attention it deserves and enjoy worry-free adventures!
Frequently Asked Questions
How often should I clean my camper roof?
I clean my camper roof regularly to maintain its condition and prevent damage. Signs of a dirty camper roof include black streaks, mold, and debris buildup. To clean it, I start by rinsing the roof with water to remove loose dirt. Then, I use a mild detergent and a soft bristle brush to scrub the roof in a circular motion. After thoroughly rinsing, I inspect for any remaining dirt and repeat the process if needed.
Can I use regular household cleaning products to clean my camper roof?
Yes, you can use regular household cleaning products to clean your camper roof, but it’s important to be cautious. Some cleaning products might contain chemicals that can potentially damage your camper roof. As an alternative, consider using mild dish soap mixed with water. This solution is effective in removing dirt and grime without causing any harm. Always test a small area first and rinse thoroughly to prevent any potential damage to your camper roof.
What should I do if there are stubborn stains on my camper roof?
If there are stubborn stains on my camper roof, I recommend using a specialized cleaning product designed for removing tough stains on camper roofs. These products are formulated to be gentle yet effective, ensuring that they won’t damage the roof material.
To use, simply follow the instructions on the product label, which usually involve spraying the cleaner onto the stain, letting it sit for a few minutes, and then scrubbing gently with a soft brush or sponge. Rinse thoroughly afterwards to remove any residue.
How can I prevent mold from growing on my camper roof?
To prevent mold from growing on my camper roof, I make sure to take proactive measures. Firstly, I regularly inspect the roof for any signs of damage or leaks, as preventing roof leaks is crucial.
Secondly, I keep the roof clean by using the best cleaning products for camper roofs, ensuring that dirt and debris are removed.
Lastly, I maintain proper ventilation inside the camper to reduce humidity levels, which helps in preventing mold growth.
Are there any specific precautions I should take when cleaning the seams and edges of my camper roof?
When cleaning the seams and edges of my camper roof, I take some specific precautions to ensure a thorough job. First, I use a gentle cleaning solution and a soft-bristled brush to avoid damaging the roof material.
I carefully scrub along the seams and edges, paying extra attention to any areas with visible dirt or grime. It’s also important to use a ladder or step stool for safety.
Lastly, I recommend using a rubber seal conditioner to protect the seams and prevent future leaks.
Can I Use the Same Cleaning Method for Cleaning the Fiberglass Camper and its Roof?
When cleaning a fiberglass camper and its roof, it is essential to use the right approach for optimum results. While a gentle yet effective cleaning method is crucial for preserving the fiberglass surfaces, the camper roof may require additional attention due to potential dirt accumulation. Therefore, it’s advisable to tailor the cleaning technique to suit these specific areas while keeping the cleaning fiberglass camper keyword in mind throughout the process.
Conclusion
In conclusion, cleaning your camper roof is an important part of maintaining your vehicle and ensuring its longevity. By following the steps outlined in this article, you can easily and effectively clean your camper roof.
Remember to gather your cleaning supplies, prepare the roof surface, choose the right cleaning solution, clean from top to bottom, pay attention to stains and mold, rinse and dry the roof properly, and inspect and repair any damage. Regular maintenance is key to keeping your camper roof in top shape.
For example, one camper owner, Sarah, followed these steps and was able to remove years of dirt and grime from her roof, restoring it to its original shine. By taking the time to clean and maintain your camper roof, you will be able to enjoy many more adventures on the road.


