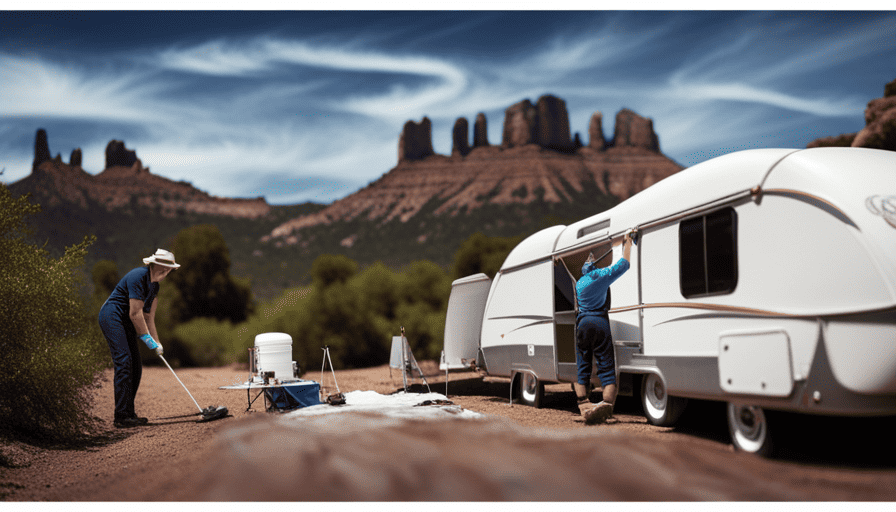
So, you’re now the proud owner of a camper and eager to explore the highways and byways. However, before setting off on your upcoming journey, there’s a crucial step you must address – cleaning the roof of your camper.
Now, I know what you’re thinking – cleaning a roof sounds like a daunting task. But fear not, my fellow campers, because I’m here to guide you through the process step by step.
Cleaning your camper roof is essential to keep it in top shape and prevent any potential damage. From gathering your cleaning supplies to applying a protective sealant, I’ll cover everything you need to know to ensure your roof stays clean and well-maintained.
So, grab your cleaning gear and get ready to tackle this task head-on. With a little bit of effort and some helpful tips, you’ll have a sparkling clean camper roof in no time.
Let’s dive in and get started!
Key Takeaways
- Regularly clean the camper roof using a mild soap solution or specialized camper roof cleaner to remove dirt and grime.
- Thoroughly rinse the roof with clean water to remove all soap residue and ensure a clean surface.
- Inspect the roof for signs of damage or wear, such as cracks, tears, or loose seams, and repair any issues before cleaning.
- Apply a protective sealant designed for camper roofs with UV protection to prevent leaks and maintain the roof’s condition.
Gather Your Cleaning Supplies
Now that you know the importance of keeping your camper roof clean, it’s time to gather all the supplies you’ll need to get the job done efficiently. Cleaning your camper roof requires specific techniques and recommended products to ensure a thorough and effective cleaning.
To start, you’ll need a sturdy ladder that can safely reach your camper roof. This is important for your safety and stability while cleaning. You should also have a good quality hose with a spray nozzle attachment for rinsing off the roof. Additionally, a soft bristle brush or mop will be useful for scrubbing away dirt and grime.
When it comes to cleaning products, it’s best to use ones that are specifically designed for camper roofs. Look for cleaners that are safe for your roof material and won’t cause any damage. Some recommended products include roof cleaners with mildew and stain removal properties. These can help remove stubborn stains and keep your roof looking clean and bright.
Now that you’ve gathered all your cleaning supplies, it’s time to move on to the next step: preparing the surface. This involves removing any debris or loose dirt from the roof before applying any cleaning products.
Prepare the Surface
First, you’ll want to make sure that the surface is properly prepared before starting the cleaning process. Cleaning techniques and regular roof maintenance are essential to keep your camper roof in good condition. Here are three important steps to prepare the surface:
-
Inspect for damage: Begin by thoroughly inspecting the roof for any signs of damage, such as cracks, tears, or loose seams. Repair any issues before proceeding with the cleaning to prevent further damage.
-
Clear the area: Remove any loose debris, such as leaves, twigs, or branches, from the roof surface. This will make it easier to clean and prevent these items from scratching or damaging the roof.
-
Wet the surface: Before applying any cleaning solution, wet the roof surface with water. This helps to loosen dirt and grime, making it easier to remove during the cleaning process.
By following these preparation steps, you ensure that the surface is ready for the next phase of cleaning. Now, let’s move on to the next section where we’ll discuss how to remove debris and dirt from the camper roof.
Remove Debris and Dirt
Once you clear away the debris and dirt, you’ll be amazed at the refreshed and pristine surface of your camper’s roof. Cleaning techniques are crucial in maintaining the longevity of your roof and preventing future damage.
Start by removing any loose debris, such as leaves or twigs, using a soft-bristle brush or a leaf blower. Be careful not to scratch the surface while doing so.
Next, tackle the stubborn dirt and grime by using a mild soap solution and a soft sponge or cloth. Gently scrub the roof in circular motions, working from one end to the other. Pay extra attention to areas with stains or bird droppings, as they may require a bit more elbow grease.
Rinse the roof thoroughly with clean water to remove any soap residue.
By regularly cleaning your camper’s roof and using proper techniques, you’ll not only maintain its appearance but also prevent future damage.
Now, let’s move on to the next step – scrubbing the roof.
Scrub the Roof
To really give your camper’s roof a thorough cleaning, it’s time to roll up your sleeves and get to scrubbing, just like giving an old car a loving hand wash.
Roof maintenance is an important aspect of keeping your camper in top shape, and cleaning techniques can vary depending on the material of your roof.
Start by preparing a cleaning solution that’s safe for your roof, such as a mild detergent mixed with water. Using a soft-bristle brush or a sponge, gently scrub the roof in small sections, working from one end to the other.
Pay special attention to any stubborn stains or areas with built-up dirt. Be careful not to use excessive force, as this can damage the roof.
As you scrub, periodically rinse your brush or sponge to remove any dirt or debris. It’s important to rinse thoroughly after scrubbing to ensure that all the cleaning solution and dirt are completely removed. This will prevent any residue from causing damage or discoloration to your camper’s roof.
So, let’s move on to the next step and make sure to rinse thoroughly.
Rinse Thoroughly
Make sure you give your camper’s canopy a good rinse as well to ensure a spotless and sparkling finish. Properly rinsing your camper roof is an important step in the cleaning process. It helps to remove any remaining dirt, debris, or cleaning solution that may be left on the surface.
Here are a few tips to help you rinse your camper roof thoroughly:
- Use a hose with a nozzle attachment to provide a steady stream of water. This will help to remove any loose dirt or debris.
- Start at one end of the roof and work your way towards the other end, making sure to cover the entire surface.
- Pay extra attention to areas where dirt and debris tend to accumulate, such as around vents or air conditioning units.
- Rinse the roof thoroughly until the water runs clear and free of any residue.
Properly drying your camper roof is just as important as rinsing it. Leaving it wet can lead to water spots or even mold and mildew growth. To prevent this, use a soft cloth or towel to gently dry the roof. Make sure to dry any areas where water may have pooled, such as around roof vents or gutters.
Once your camper roof is clean and dry, you can move on to treating any stubborn stains that may still be present.
Treat Stubborn Stains
After thoroughly rinsing your camper’s canopy, you can tackle any stubborn stains that may still be clinging to the surface. One common issue is rust stains. To remove rust stains, use a rust remover specifically designed for use on camper roofs. Apply the rust remover to the stained area and let it sit for a few minutes to penetrate the stain. Then, gently scrub the area with a soft-bristle brush. Rinse thoroughly to remove any residue.
When treating stubborn stains, it’s important to avoid common mistakes. First, never use abrasive cleaners or tools, as they can scratch or damage the surface of the roof. Instead, opt for gentle cleaners that are safe for use on camper roofs. Second, always follow the manufacturer’s instructions for any cleaning products you use. Using too much or too little can affect the effectiveness of the product. Lastly, be patient. Some stains may require multiple applications or additional scrubbing to fully remove.
Now that you’ve treated the stubborn stains, it’s time to inspect for any damage that may have occurred.
Inspect for Damage
Now is the time to carefully inspect your camper roof for any potential damage that may have occurred. Roof inspection is an essential step in maintaining the longevity of your camper and preventing any future issues.
Here are three key things to look for when inspecting your roof:
-
Check for any signs of leaks: Look for water stains or discoloration on the ceiling or walls inside your camper. These can indicate a leak in the roof. Pay close attention to areas around vents, skylights, and any other openings on the roof.
-
Inspect the seams and seals: Check the seams where different sections of the roof meet, as well as the seals around vents and skylights. Look for any cracks, gaps, or signs of deterioration. These areas are prone to leaks and should be repaired promptly.
-
Examine the overall condition of the roof: Look for any signs of wear and tear, such as loose or missing shingles, damaged or deteriorated coatings, or any other visible damage. These can be potential entry points for water and should be addressed.
By identifying leaks and assessing the condition of your camper roof, you can take the necessary steps to prevent further damage.
Now, let’s move on to the next section about applying a protective sealant to ensure your roof stays in good shape.
Apply Protective Sealant
To ensure the longevity of your camper’s roof and prevent future issues, it’s crucial to apply a protective sealant that will keep it in top shape.
There are several protective sealant options available on the market, each with its own benefits. It’s important to choose a sealant that’s specifically designed for camper roofs and offers UV protection to shield against the sun’s harmful rays.
Before applying the sealant, it’s essential to clean the roof thoroughly to remove any dirt, debris, or old sealant. Once the roof is clean and dry, you can begin applying the sealant.
Start by pouring a small amount onto a clean cloth or sponge, and then gently spread it across the roof surface. Be sure to apply an even coat, paying attention to any seams or areas that are prone to leaks.
Allow the sealant to dry completely before moving on to regular maintenance tips, such as inspecting for damage and cleaning the roof regularly. Taking these steps will help to keep your camper roof in excellent condition for years to come.
Regular Maintenance Tips
Regular maintenance is essential for ensuring the longevity and optimal condition of your camper’s roof. By taking preventive measures and following a regular cleaning routine, you can keep your camper roof in top shape for years to come.
To start, it’s important to regularly inspect your camper roof for any signs of damage or wear. Look for cracks, tears, or loose seams that may need repair. Additionally, make sure to remove any debris, such as leaves or branches, from the roof to prevent moisture buildup and potential damage.
When it comes to cleaning your camper roof, using the right products is crucial. I recommend using a mild detergent or specifically designed camper roof cleaner, as harsh chemicals can damage the roof material. Gently scrub the roof with a soft brush or sponge, paying close attention to any stubborn stains. Rinse thoroughly with clean water to remove all traces of soap.
To ensure the best results, it’s important to clean your camper roof regularly, at least once every three months, or more frequently if you frequently travel to dusty or dirty areas. By following these maintenance tips and using recommended cleaning products, you can enjoy a clean and well-maintained camper roof that’ll protect your investment for years to come.
Enjoy a Clean and Well-Maintained Camper Roof
Take a moment to imagine the joy and peace of mind that comes with a well-preserved sanctuary on wheels, where you can escape the chaos of everyday life and revel in the beauty of the open road. To ensure your camper remains in top condition, proper roof maintenance is essential.
Here are some tips to prevent roof leaks and keep your camper roof clean and well-maintained.
-
Regular Inspections: Conduct regular inspections of your camper roof to identify any signs of damage or wear. Look for cracks, tears, or loose seals that could potentially lead to leaks.
-
Cleaning: Regularly clean your camper roof to remove dirt, debris, and grime. Use a mild soap or specialized camper roof cleaner and a soft brush to gently scrub the surface. Rinse thoroughly with water and allow it to dry completely before moving on to the next step.
-
Sealing: Apply a high-quality camper roof sealant to prevent leaks. Ensure that all seams, vents, and edges are properly sealed. Pay extra attention to areas where water can pool, such as around the air conditioning unit or roof accessories.
-
Maintenance Schedule: Create a maintenance schedule for your camper roof, including regular inspections, cleaning, and resealing. Stick to this schedule to keep your roof in optimal condition.
By following these roof maintenance tips, you can enjoy a clean and well-maintained camper roof, ensuring your travels are leak-free and stress-free.
Frequently Asked Questions
How often should I clean my camper roof?
I’ve learned the hard way that neglecting to clean my camper roof regularly can lead to some serious issues. One summer, after months of heavy rain, I noticed water seeping into my camper. It turns out, the roof had developed a leak due to accumulated dirt and debris.
To prevent roof leaks, it’s crucial to clean your camper roof at least once every three months. Regular cleaning also helps you spot signs of roof damage early on, like cracked seals or missing shingles.
Can I use regular household cleaning products on my camper roof?
Yes, you can use regular household cleaning products on your camper roof, but it’s important to be cautious. Some household cleaning products may contain chemicals that can cause potential damage to your camper roof. It’s recommended to use household cleaning alternatives that are specifically designed for camper roofs to ensure the safety and longevity of your roof. These alternatives are formulated to effectively clean your camper roof without causing any harm.
Is it necessary to remove all the debris and dirt from the roof before scrubbing?
Before scrubbing, it’s absolutely necessary to remove all debris and dirt from the camper roof. Just like preparing a canvas before painting, a clean surface ensures maximum effectiveness.
Removing leaves, moss, and any other obstructions allows the cleaning process to penetrate and work its magic. Neglecting this crucial step would be like trying to paint over a dirty canvas – the results would be subpar.
So, take the time to clear the roof before scrubbing for a truly spotless finish.
Are there any specific areas on the camper roof that require extra attention during cleaning?
To prevent mold and mildew on a camper roof, there are a few areas that require extra attention during cleaning. First, focus on the seams and edges of the roof, as they’re more prone to moisture buildup.
Next, check the vents and air conditioning units for any signs of dirt or debris.
Finally, don’t forget to clean the gutters and downspouts to ensure proper drainage.
For effective cleaning, you’ll need a soft-bristle brush, a mild detergent, and a hose with a sprayer attachment.
Can I use a pressure washer to rinse off the roof?
Yes, you can use a pressure washer to rinse off the camper roof, but it’s important to follow pressure washer safety guidelines. Be sure to use a low-pressure setting to avoid damaging the roof material. Additionally, it’s essential to be cautious around seams, vents, and other vulnerable areas, as high-pressure water can cause leaks.
Alternatively, you can consider using other roof cleaning methods such as a soft brush and mild soap solution to ensure a thorough and safe cleaning process.
Can Cleaning a Camper Roof Help Fix Any Roofing Issues?
Cleaning a camper roof regularly is crucial for proper maintenance. However, it’s important to note that fixing camper roof issues solely through cleaning may not be effective. While cleaning can prevent minor problems like algae growth, it won’t address major concerns such as leaks or structural damage. For more serious issues, consulting a professional specializing in fixing camper roofs is recommended.
Conclusion
In conclusion, cleaning a camper roof is a necessary task that shouldn’t be overlooked. By following the steps outlined in this article, you can ensure that your camper roof remains clean and well-maintained for years to come.
Just like how a well-maintained roof protects a house from external elements, a clean camper roof also provides protection and longevity to your mobile home. So, take the time to clean your camper roof regularly and enjoy the peace of mind knowing that your home away from home is in excellent condition.

