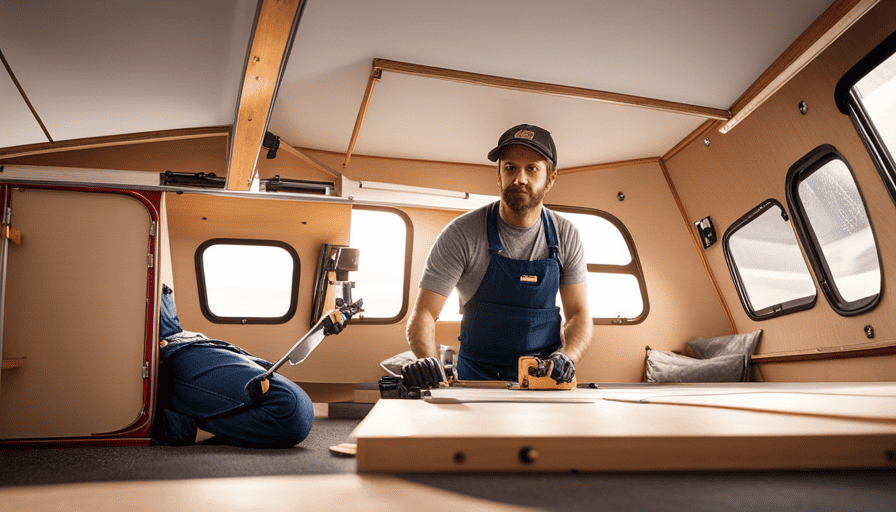
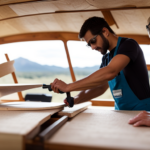
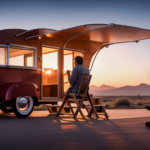
The allure of the open road, with its promise of freedom and adventure, has always captivated me. There’s a remarkable charm in discovering new locales, encountering fresh faces, and soaking in the wonders of nature. This is what inspired me to construct my personal teardrop camper, a snug and small mobile dwelling.
In this article, I’ll show you how to create your very own tear drop camper from scratch. With a little bit of planning, some basic tools, and a lot of determination, you can have your own custom-built camper in no time.
We’ll start by determining your budget and researching the materials you’ll need. Then, we’ll dive into the design phase, where we’ll create a blueprint for your dream camper. Once we have our plan in place, we’ll gather our tools and supplies and get to work building the frame and trailer base.
From there, we’ll construct the walls and roof, creating a sturdy and weatherproof shell. Inside, we’ll carefully craft the interior space, maximizing every inch of storage and comfort. We’ll then paint and seal the exterior, adding our own personal touch to the camper’s appearance.
Finally, we’ll install windows and ventilation systems to ensure a comfortable and breathable living space.
Once your tear drop camper is complete, it’s time for the exciting part – testing it out on the open road and enjoying the freedom it brings.
So let’s get started on this exciting DIY adventure together!
Key Takeaways
- Determine budget and research materials
- Choose a design that fits your needs and personal style
- Gather the necessary tools and supplies
- Install electrical and plumbing systems, maximize storage space, and finish the exterior before hitting the road
Determine Your Budget and Research Materials
Now, you’ll need to figure out your budget and start researching the materials you’ll need for building your tear drop camper.
Determining the budget is an essential first step in any project. Take some time to evaluate your financial situation and set a realistic spending limit. Consider how much you’re willing to invest in this project, including both the materials and any additional tools you may need.
Once you have determined your budget, it’s time to start finding the right materials. Researching the materials is crucial to ensure that you’re using high-quality components that’ll withstand the test of time. Look for durable and lightweight materials that are suitable for your tear drop camper’s construction. Some common materials used include plywood, aluminum, and fiberglass. Consider your desired design and functionality to select the most appropriate materials.
When researching, compare prices from different suppliers to find the best deals. Don’t forget to consider shipping costs if ordering online. Additionally, reach out to other DIY enthusiasts or join online forums for advice and recommendations on where to find affordable materials. Remember, finding the right materials at the right price is essential for staying within your budget.
With your budget determined and materials researched, it’s time to move on to the next step and design your tear drop camper.
Design Your Tear Drop Camper
First, let’s envision the perfect cozy haven on wheels, like a snug retreat nestled in nature. Designing your tear drop camper is an exciting and creative process that allows you to customize your mobile home according to your preferences and needs.
There are various tear drop camper designs to choose from, each offering its own unique features and advantages. You can opt for a classic teardrop shape, a more modern and aerodynamic design, or even a retro-inspired style. Consider factors such as size, layout, and functionality when selecting the design that suits you best.
When customizing your tear drop camper, think about your camping style and what amenities are essential to you. Do you prefer a compact kitchenette, a spacious sleeping area, or ample storage space? Adding extra windows or a skylight can enhance natural lighting and create a more open and airy ambiance inside. Don’t forget to consider the exterior as well, with options for paint colors, decals, and accessories to make your tear drop camper truly unique.
Incorporating your own personal touches and style will make your tear drop camper feel like a home away from home. As we move on to the next section about gathering your tools and supplies, you’ll be ready to bring your design to life.
Gather Your Tools and Supplies
Once you gather all the necessary tools and supplies, you’ll be ready to embark on an exciting journey of creating your own cozy haven on wheels. Before you begin, it’s important to determine the size, shape, and layout of your tear drop camper. Consider how many people will be using it and what amenities you want to include. This will help you plan for the right amount of space and storage.
Now, let’s talk about the interior. Choosing the right type of insulation is crucial for keeping your tear drop camper comfortable in various weather conditions. Look for insulation materials that are lightweight, yet provide excellent thermal efficiency. Fiberglass and closed-cell foam are popular choices.
Next, think about the flooring. You’ll want something durable and easy to clean. Plywood or vinyl flooring are common options that can withstand the wear and tear of outdoor adventures.
Determining the size, shape, and layout of your tear drop camper, as well as choosing the right insulation and flooring, are essential steps in creating your cozy haven on wheels. With these decisions made, you can now move on to the exciting next step of building the frame and trailer base.
Build the Frame and Trailer Base
To start constructing the foundation of your mobile sanctuary, you’ll need to focus on crafting the sturdy framework and reliable trailer base. The trailer frame assembly is a critical step, as it provides the structural integrity and support for your tear drop camper. Begin by measuring and cutting the steel or aluminum tubing according to your desired dimensions. Then, weld the pieces together to form the frame, ensuring it is square and level. This will ensure that your tear drop camper sits evenly on the trailer base.
Next, it’s time to construct the trailer base. This involves creating a solid platform that will support the weight of the camper. Start by attaching treated plywood to the frame, ensuring it is securely fastened. This will provide a sturdy base for the walls and roof to be built upon. Additionally, consider adding cross braces for added stability.
As you work on the trailer frame assembly and trailer base construction, it’s important to keep in mind the overall design and weight distribution of your tear drop camper. The table below illustrates some important factors to consider:
| Factors to Consider | Importance |
|---|---|
| Trailer frame material | High |
| Trailer base thickness | Medium |
| Cross brace placement | Medium |
| Weight distribution | High |
| Overall stability | High |
Once you have completed the frame and trailer base, you can then move on to constructing the walls and roof of your tear drop camper. This will bring you one step closer to creating your dream mobile sanctuary.
Construct the Walls and Roof
When constructing the walls and roof, you’ll want to envision the cozy interior of your mobile sanctuary taking shape as you carefully assemble the panels and secure them in place. To ensure that your tear drop camper is comfortable in all weather conditions, it’s important to insulate the walls properly. This will help regulate the temperature inside and provide a cozy atmosphere. Use a high-quality insulation material and follow the manufacturer’s instructions for installation.
Next, you’ll need to install a roof rack on top of your tear drop camper. This will allow you to carry additional gear, such as bikes or kayaks, on your camping adventures. Choose a sturdy and reliable roof rack that is compatible with the size and weight of your camper. Install it securely, following the manufacturer’s guidelines.
Once the walls are insulated and the roof rack is installed, you can start thinking about the next step: installing electrical and plumbing systems. These systems are essential for providing power, lighting, and water to your tear drop camper. By carefully planning and executing these installations, you’ll be one step closer to enjoying the comforts of home while on the road.
Install Electrical and Plumbing Systems
When it comes to installing the electrical and plumbing systems in a tear drop camper, there are two key points to consider.
First, it’s important to plan and install wiring for lights and appliances. This involves determining the best layout for outlets and switches, as well as properly connecting the wiring to ensure everything functions safely and efficiently.
Second, installing a water tank and plumbing for a sink is crucial for adding convenience to your camper. This entails selecting the right size and type of tank, as well as properly connecting the plumbing to ensure a reliable water supply for washing dishes and personal hygiene purposes.
Plan and Install Wiring for Lights and Appliances
Wiring the lights and appliances is like giving life to the tear drop camper, illuminating its potential for comfort and convenience.
When it comes to lighting options, LED lights are a popular choice due to their energy efficiency and long lifespan. They provide bright illumination while consuming minimal power, ensuring that your camper’s battery lasts longer. Additionally, consider installing dimmer switches to adjust the lighting intensity according to your preference.
For appliances, opt for energy-efficient options such as compact refrigerators and induction cooktops. These appliances consume less energy, allowing you to maximize the usage of your camper’s power supply.
Don’t forget to label the switches clearly and organize the wiring neatly to avoid confusion and potential hazards.
With the lights and appliances in place, it’s time to move on to installing a water tank and plumbing for a sink, enhancing the camper’s functionality.
Install a Water Tank and Plumbing for a Sink
To enhance the functionality of your camper, you can install a water tank and set up plumbing for a sink. This will allow you to have access to fresh water and easily wash dishes while on the road.
Start by selecting a suitable water tank that fits your camper’s dimensions and needs. Securely install the tank in a designated space, ensuring it is positioned securely and won’t shift during travel.
Next, connect the water tank to the sink using flexible tubing or pipes. Install a water pump to provide the necessary water pressure for the sink. Make sure to include a water filter to keep the water clean and safe for use.
Test the plumbing system for leaks and proper functionality before hitting the road. With the water tank and sink plumbing in place, you can now move on to creating the interior space for your camper.
Create the Interior Space
The cozy interior of the tear drop camper will make you feel right at home. When creating the interior space, it’s important to maximize storage and choose the right flooring. Here are three key considerations to keep in mind:
-
Maximizing Storage: In a small camper, it’s essential to utilize every inch of space. Install overhead cabinets to store kitchen utensils, clothing, and other essentials. Consider using storage containers that can fit under the bed or seating area. Use hooks and racks on the walls to hang items like towels and hats. By being smart with storage solutions, you can keep your camper clutter-free and organized.
-
Choosing the Right Flooring: The flooring in your tear drop camper should be durable and easy to clean. Consider using vinyl or laminate flooring that’s water-resistant and can withstand heavy foot traffic. You can also add a rug or carpet squares to make the space feel cozier. Choose a flooring color and pattern that complements the overall design of your camper.
-
Paint and Seal the Exterior: Now that the interior space is complete, it’s time to move on to the exterior. Painting and sealing the camper will not only protect it from the elements but also give it a personal touch. Use weather-resistant paint and apply a sealant to prevent water damage. Consider using colors that match your personal style and preferences.
With the interior space complete, it’s time to move on to the next step: painting and sealing the exterior.
Paint and Seal the Exterior
When it comes to giving your exterior a personal touch, don’t forget to paint and seal it to protect against the elements and add a unique flair to your cozy getaway. Choosing the right exterior paint colors is crucial in creating the desired aesthetic for your tear drop camper. Opt for colors that reflect your personality and blend with the surroundings. Whether you prefer bold and vibrant hues or earthy tones, the exterior paint will set the tone for your camping adventures.
To ensure longevity and durability, it is essential to weatherproof your tear drop camper. Start by applying a layer of primer to create a smooth surface for the paint to adhere to. Once the primer has dried, apply a quality exterior paint that is specifically designed to withstand the harsh outdoor conditions. Consider using a sealant to provide an extra layer of protection against moisture, UV rays, and other external factors.
In order to emphasize the importance of weatherproofing, here is a table showcasing three popular weatherproofing techniques:
| Technique | Description | Benefits |
|---|---|---|
| Caulking | Sealing gaps and joints | Prevents water leakage |
| Waterproofing membrane | Creates a barrier against moisture | Offers long-lasting protection |
| Rust-proofing | Treats metal surfaces to prevent rust | Extends the lifespan of your camper |
Now that the exterior is painted and sealed, it’s time to focus on the next step: installing windows and ventilation systems.
Install Windows and Ventilation Systems
Now that you’ve added a personal touch with a fresh coat of paint, it’s time to bring in some fresh air and natural light by installing windows and ventilation systems.
When it comes to choosing window types for your tear drop camper, there are a few options to consider. One popular choice is the sliding window, which allows for easy opening and closing. Another option is the crank window, which provides excellent ventilation control. Whichever type you choose, make sure to measure the opening accurately to ensure a proper fit.
In addition to windows, it’s essential to have adequate ventilation in your tear drop camper. One option is installing a roof vent, which allows hot air to escape and fresh air to circulate. Another option is a side vent, which can be opened to let in a breeze. Alternatively, you can opt for a combination of both roof and side vents for optimal airflow.
By incorporating windows and ventilation systems into your tear drop camper, you’ll create a comfortable and airy space to relax in.
After installing these features, you’ll be ready to test and enjoy your tear drop camper, taking it on adventures and making lasting memories.
Test and Enjoy Your Tear Drop Camper
Once you’ve completed all the necessary steps, it’s time to kick back and start enjoying the fruits of your labor in your cozy and functional tear drop oasis. But before you hit the road, it’s important to test and ensure that everything is in tip-top shape. Here are some maintenance tips to keep your tear drop camper running smoothly.
First, give your camper a thorough inspection. Check the tires for any signs of wear or damage and make sure they’re properly inflated. Inspect the exterior for any leaks or cracks in the body and windows. Test all the electrical components, including the lights, fans, and appliances, to make sure they’re working correctly.
Next, take your tear drop camper for a test drive. Pay attention to how it handles on the road and make any necessary adjustments to the hitch or suspension. Test the brakes to make sure they’re responsive and functioning properly.
Once you’re back from your test drive, it’s time to enjoy your tear drop camper. Set up camp and take advantage of all the amenities you’ve built into your oasis. Relax in the comfortable bed, cook a delicious meal in the kitchenette, and enjoy the convenience of your own private bathroom.
Remember to perform regular maintenance on your tear drop camper to keep it in great condition. This includes cleaning and sanitizing the interior, checking for any water leaks, and lubricating any moving parts. By following these maintenance tips, you can ensure that your tear drop camper will provide you with many enjoyable adventures for years to come.
Frequently Asked Questions
How much does it cost to build a tear drop camper on average?
On average, the cost to build a tear drop camper can vary depending on various factors such as the materials used, customization options, and personal preferences.
A cost breakdown typically includes expenses for the trailer frame, insulation, interior materials, kitchen appliances, electrical system, and exterior finishing.
To save costs, consider sourcing materials from salvage yards or repurposing items. Additionally, DIY skills and utilizing online resources can help cut down labor costs.
Are there any specific regulations or permits required for building a tear drop camper?
When building a tear drop camper, it’s important to be aware of any regulations and permits that may be required. Regulations can vary depending on your location, so it’s crucial to research and comply with local laws. Contact your local building department or zoning office to inquire about any necessary permits. They’ll be able to provide you with specific information and guidelines to ensure you’re building your tear drop camper in accordance with the regulations in your area.
Can I customize the design of my tear drop camper to fit my specific needs?
Absolutely! When it comes to customizing the design of your tear drop camper, the possibilities are endless. You can tailor every aspect to fit your specific needs, from the layout to the materials used. Need extra storage for your collection of antique spoons? No problem! Want a built-in espresso machine? You got it! Just make sure to take into account any specific requirements, such as weight limits or road regulations, to ensure a safe and enjoyable camping experience.
How long does it typically take to build a tear drop camper?
Typically, building a tear drop camper can take anywhere from a few weeks to a few months, depending on your level of experience and the complexity of the design. However, there are ways to streamline the process and stay within budget.
Start by carefully planning your build, creating a detailed timeline, and gathering all the necessary materials beforehand. Additionally, consider purchasing pre-made components or kits to save time and ensure a smoother construction process.
Are there any recommended resources or websites for finding affordable materials for building a tear drop camper?
Sure, finding affordable materials for building a tear drop camper can be a real treasure hunt! But fear not, fellow camper enthusiasts, for I’ve discovered some hidden gems for you.
When it comes to the best places to buy materials, online platforms like Craigslist, eBay, and even local Facebook groups can be great sources. Don’t forget to check out salvage yards, thrift stores, and even your own garage for repurposable items.
Happy hunting!
Can I Use the Same Fixing Method for a Broken Crank on a Tear Drop Camper?
When dealing with a broken crank on a tear drop camper, it is important to consider the specific fixing method required. While some fixing pop up camper crank methods may work universally, it is advisable to consult the manufacturer’s instructions. Each camper may have unique components, and following the correct procedure ensures a safe and effective repair.
Conclusion
In conclusion, building a tear drop camper has been a rewarding and fulfilling experience. From determining your budget to enjoying the final product, every step of the process has been worth it.
As I sit inside my cozy camper, I can’t help but marvel at the beauty of the world outside. The gentle breeze flows through the open windows, carrying with it the scent of pine trees. It’s moments like these that make all the hard work and attention to detail worthwhile.
So go ahead, embark on this adventure and create your own little haven on wheels. Happy camping!

