Are you ready to embark on the ultimate adventure? Imagine yourself driving along the highways, exploring new places, and waking up to breathtaking views every day. Designing your own personalized camper trailer is the perfect way to make this dream your everyday life.
It may seem like a daunting task, but trust me, it’s well worth the effort. I’ve been there, done that, and let me tell you, the sense of pride and accomplishment you’ll feel is unmatched.
From determining your needs and budget to customizing the interior, I’ll guide you through every step of the process. Whether you’re a seasoned DIY enthusiast or a novice, this article will provide you with all the information and tips you need to build your very own camper trailer.
So, grab your tools, put on your creative hat, and get ready to create the camper trailer of your dreams. It’s time to hit the road and make memories that will last a lifetime.
Key Takeaways
- Determining needs and budget before starting the build is crucial.
- Choose the right trailer base based on size, weight, material, and suspension system.
- Plan layout and design to optimize space and functionality.
- Install electrical and plumbing systems for convenience on the go.
Determine Your Needs and Budget
Before you start building, it’s crucial to determine your needs and budget. This will help you plan and make informed decisions throughout the process.
When it comes to determining your needs, think about how many people will be using the camper trailer and what amenities are essential for you. Consider factors such as sleeping arrangements, kitchen facilities, and bathroom requirements. Additionally, think about the purpose of your camper trailer. Will you be using it for weekend getaways or extended trips? This will help you prioritize the features you need.
Setting a budget is equally important. Determine how much you’re willing to spend on building the camper trailer and stick to it. Consider not only the cost of materials but also any necessary tools or equipment. Research the prices of different components and factor in any additional expenses, such as permits or professional assistance if needed. It’s important to be realistic about your budget to avoid overspending.
With your requirements and budget in mind, you can now move on to choosing the right trailer base. This step involves selecting the foundation of your camper trailer, which will determine its size, weight capacity, and overall stability.
Choose the Right Trailer Base
To start the project off right, let’s make sure we find the perfect foundation for our amazing adventure-on-wheels. Choosing the right trailer base is crucial to ensure a successful camper trailer build. There are several considerations to keep in mind when making this decision.
Firstly, think about the size and weight of the trailer base. Consider the towing capacity of your vehicle and the overall dimensions you desire for your camper. A smaller base may be easier to tow, but it may also limit the amount of living space inside. On the other hand, a larger base offers more room but can be more challenging to maneuver.
Secondly, evaluate the material of the trailer base. Common options include steel, aluminum, and fiberglass. Steel is strong and durable but may be susceptible to rust. Aluminum is lightweight and corrosion-resistant, but it can be more expensive. Fiberglass is lightweight and provides good insulation, but it may not be as strong as steel or aluminum.
Next, think about the suspension system of the trailer base. Consider factors such as off-road capabilities and the smoothness of the ride. A robust suspension system can handle rough terrains, while a softer suspension provides a more comfortable experience on the road.
Lastly, consider the cost of the trailer base. Set a budget and compare prices from different manufacturers. Remember to factor in any additional features or customization options you may want.
Choosing the right trailer base requires careful consideration of these factors. Once you’ve made your decision, it’s time to plan your layout and design, ensuring an efficient and functional camper trailer.
Plan Your Layout and Design
Let’s envision a layout and design that transforms your dream adventure-on-wheels into a cozy and functional home on the road. When planning your camper trailer layout, optimization is key. You want to make the most of the available space while ensuring that everything is easily accessible and efficiently organized.
Consider the size and shape of your trailer, and map out the different areas you’ll need, such as a sleeping area, kitchen, bathroom, and storage space. Look for design trends that maximize functionality, such as multipurpose furniture, foldable tables, and hidden storage compartments. Utilize vertical space by adding shelves or cabinets that reach up to the ceiling.
Think about the flow of your layout, ensuring that you have enough room to move around comfortably. Keep in mind that simplicity and minimalism can go a long way in creating a spacious and serene environment. With a well-thought-out layout and design, your camper trailer will become a home away from home.
Now, let’s move on to the next step and gather the necessary materials and tools to bring this vision to life.
Gather Materials and Tools
Once you’ve envisioned your dream layout and design, it’s time to gather the materials and tools needed to bring your cozy and functional adventure-on-wheels to life. Here’s a materials checklist and essential tools guide to help you get started:
- Lumber: Choose high-quality plywood, 2x4s, and 2x6s for the walls, floor, and roof of your camper trailer.
- Insulation: Opt for rigid foam insulation boards to ensure proper insulation and temperature control inside your camper.
- Electrical components: Get electrical wires, outlets, switches, and a breaker box for a safe and functional electrical system.
- Plumbing supplies: Don’t forget to include water tanks, pipes, faucets, and a water pump for a convenient water supply on the go.
Essential tools guide:
- Circular saw: This versatile tool will be your best friend for cutting lumber and other materials.
- Drill: Invest in a good quality drill with various drill bits for all your drilling needs.
- Screwdriver set: Make sure you have a set of screwdrivers to assemble and tighten screws.
- Measuring tape: Accurate measurements are crucial, so don’t forget this essential tool.
With all the materials and tools in hand, you’re now ready to move on to the next step and build the frame and structure of your camper trailer. This will provide the foundation for your cozy home on wheels.
Build the Frame and Structure
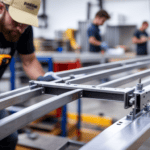
When building a camper trailer, the first step is to construct the base and frame. This involves measuring and cutting the plywood to the desired size and then attaching it to the trailer frame using screws or bolts.
Once the base is secure, it’s time to install the walls, roof, and flooring. This can be done by attaching pre-made panels to the frame, ensuring they’re level and properly aligned.
Finally, the flooring is installed, completing the basic structure of the camper trailer.
Construct the base and frame of the camper trailer
To start building your camper trailer, you’ll need to put together the base and frame using sturdy materials. Here are three essential steps to construct the base and frame:
-
Choosing materials: Opt for materials that are strong and durable, such as steel or aluminum. Consider the weight of the materials as well, as it’ll impact the overall weight of your trailer.
-
Ensuring stability: The base and frame should be designed to provide maximum stability. Use sturdy beams and cross supports to distribute the weight evenly and prevent any wobbling or swaying while on the road.
-
Constructing the base and frame: Begin by assembling the base using the chosen materials. Ensure all joints are securely fastened with bolts or welding. Then, build the frame using the same materials, taking care to align all components properly.
With the base and frame complete, it’s time to move on to the next section – installing the walls, roof, and flooring – to transform your trailer into a cozy camper.
Install walls, roof, and flooring
After constructing the base and frame of your camper trailer, it’s time to move on to the next step: installing the walls, roof, and flooring.
When it comes to camper trailer flooring options, you have a few choices to consider. One popular option is vinyl flooring, which is durable, easy to clean, and resistant to moisture. Another option is laminate flooring, which offers a stylish look and is also easy to maintain.
As for the roofing materials, you’ll want to choose something that’s lightweight yet durable, such as aluminum or fiberglass. These materials will provide protection from the elements while also keeping the weight of your camper trailer down.
Now that the walls, roof, and flooring are in place, it’s time to move on to installing the electrical and plumbing systems, ensuring that your camper trailer is fully functional for your next adventure.
Install Electrical and Plumbing Systems
Get ready to experience the ultimate convenience and comfort on your camper trailer journey by installing electrical and plumbing systems. When it comes to electrical wiring safety, it is crucial to follow proper procedures to avoid any potential hazards. Make sure to use the correct gauge wire for each circuit, and always turn off the power source before working on any electrical connections. Additionally, it’s important to properly ground all your electrical components to prevent electrical shocks.
For the plumbing system, regular maintenance is key to ensure a hassle-free trip. Check for any leaks or cracks in the pipes and fittings, and replace them if necessary. It’s also important to clean the water tanks regularly to prevent any buildup or contamination. To make it easier for you, here’s a helpful table outlining the key steps for installing electrical and plumbing systems:
| Electrical System | Plumbing System |
|---|---|
| Properly gauge wire for circuits | Check for leaks and cracks |
| Turn off power source before working on connections | Replace damaged pipes or fittings |
| Ground all electrical components | Clean water tanks regularly |
Now that your electrical and plumbing systems are in place, it’s time to move on to the next step of adding insulation and ventilation to your camper trailer.
Add Insulation and Ventilation
Once your electrical and plumbing systems are in place, you’ll want to ensure a comfortable and well-ventilated space for your journey, don’t you?
Adding insulation to your camper trailer has numerous benefits. It helps regulate the temperature inside, keeping it warm in the winter and cool in the summer. Insulation also reduces noise from outside, creating a peaceful environment for relaxation. There are various insulation materials to choose from, such as foam board, fiberglass, or spray foam. Each has its advantages and considerations, so make sure to research and select the one that suits your needs best.
In addition to insulation, proper ventilation is crucial for a pleasant camping experience. Good ventilation helps prevent condensation, mold, and stale air buildup. You can opt for roof vents, which allow hot air to escape and fresh air to circulate. Another option is installing windows that can be opened to let in a breeze. It’s also worth considering a fan or an air conditioning unit for those hot summer days.
With insulation and ventilation in place, your camper trailer will provide a cozy and breathable living space for your adventures. Now, let’s move on to the next step and talk about how to customize the interior to make it truly your own.
Customize the Interior
Ready to make your camper a reflection of your personal style? It’s time to transform the interior and create a space that’s uniquely yours. Customizing the interior of your camper is not only about making it aesthetically pleasing, but also about optimizing the available space and personalizing the decor.
One way to optimize space is by incorporating clever storage solutions. Consider adding shelves, cabinets, and hooks to maximize vertical space and keep your belongings organized. Additionally, collapsible furniture and multi-purpose items, such as a table that can also be used as a bed, can help save space and make your camper more functional.
When it comes to personalizing the decor, the possibilities are endless. You can choose a theme or color scheme that suits your taste and create a cohesive look throughout the camper. Adding curtains, throw pillows, and rugs can instantly add warmth and personality to the space. Don’t forget to hang artwork or photographs that bring you joy and make the camper feel like home.
Now that you’ve customized the interior to your liking, it’s time to move on to the next step: installing appliances and amenities.
Install Appliances and Amenities
Now that you’ve transformed the interior of your camper into a personalized oasis, it’s time to bring it to life by installing appliances and amenities that’ll make your adventures even more enjoyable. Adding appliances and amenities not only enhances your camping experience but also ensures that you have all the comforts of home on the road.
Efficient storage solutions are crucial in a camper trailer to maximize space and keep everything organized. Consider installing overhead cabinets, under-bed storage compartments, and hanging organizers to make the most of every inch. These storage solutions will help you keep your essentials within reach and minimize clutter, allowing for a more comfortable living space.
Creating a comfortable living space is essential for an enjoyable camper experience. Install a compact kitchenette with a stove, sink, and refrigerator, so you can prepare meals easily. A cozy seating area with a fold-out table is perfect for dining or relaxing. To stay connected, add a TV and a small sound system for entertainment during downtime.
Now that you’ve installed appliances and amenities, it’s time to test and modify as needed to ensure everything’s functioning properly and meets your needs.
Test and Modify as Needed
Before hitting the road, I always conduct a thorough inspection of my camper trailer’s functionality. I check every aspect of the trailer, from the electrical system to the plumbing, to ensure everything is in proper working order.
If I notice any issues or areas for improvement, I make the necessary adjustments or improvements before embarking on my journey. It’s important to address any potential problems beforehand to ensure a smooth and enjoyable trip.
Conduct a thorough inspection of the camper trailer’s functionality
Once you’ve got your hands on a camper trailer, it’s time to dive right into conducting a thorough inspection of its functionality to ensure it’s ready for your next adventure. Here’s a helpful inspection checklist to guide you through the process:
-
Start by checking the exterior for any signs of damage or wear, such as cracks, leaks, or loose parts.
-
Move on to the interior and test all appliances, including the stove, refrigerator, and air conditioner, to make sure they’re in working order.
-
Inspect the electrical system, including the lights, outlets, and battery, to make sure everything’s functioning properly.
-
Don’t forget to check the plumbing system for any leaks or clogs.
Troubleshooting common issues during the inspection will save you headaches on the road. Once you’ve completed the inspection and made any necessary adjustments or improvements, you’ll be ready to hit the road with confidence.
Make any necessary adjustments or improvements before hitting the road
Ensure that all necessary adjustments and improvements have been made to guarantee a smooth and worry-free journey ahead. When building a camper trailer, it’s important to be flexible and open to adjusting plans along the way.
As you conduct the inspection of your trailer’s functionality, take note of any areas that may need fine-tuning. Check the tires for proper inflation and tread depth, ensuring they’re road trip ready. Test all electrical systems, including lights, brakes, and battery power, to avoid any unexpected issues on the road.
Don’t forget to stock your camper with road trip essentials like bedding, kitchen supplies, and emergency equipment. By making these adjustments and properly preparing your camper trailer, you can embark on your journey with peace of mind, knowing that you’ve taken the necessary steps for a successful adventure.
Frequently Asked Questions
What type of trailer base is best for off-road camping?
When it comes to off-road camping, having the right trailer base is crucial. In my experience, the best option is a sturdy and durable frame with a high ground clearance. This will allow you to navigate rough terrains and tackle obstacles with ease.
Additionally, investing in the best off-road tires will provide the traction needed for challenging terrain. Don’t forget to pack essential off-road gear like recovery straps, a winch, and a high-lift jack for added safety and peace of mind.
How much weight can the camper trailer safely hold?
The weight capacity of a camper trailer is an important consideration for a safe and comfortable journey. It refers to the maximum weight that the trailer can safely hold without compromising its structural integrity. Proper weight distribution is crucial to ensure stability while on the road.
It is recommended to consult the manufacturer’s guidelines to determine the specific weight capacity for your camper trailer and to evenly distribute the weight to avoid any imbalances or potential accidents.
Can I customize the interior layout to include a bathroom?
Yes, you can customize the interior layout of a camper trailer to include a bathroom. By incorporating custom bathroom fixtures and utilizing a space-saving design, you can create a functional and comfortable bathroom within the limited space of a camper trailer. Consider options such as compact toilets, showers, and sinks that are specifically designed for small spaces. Additionally, maximize storage by using clever solutions like built-in shelves and foldable accessories.
What type of insulation is recommended for extreme weather conditions?
In extreme weather conditions, insulation efficiency is crucial to maintaining a comfortable interior temperature in a camper trailer. To combat the elements, I recommend using a high-quality insulation material such as closed-cell foam. Its exceptional insulating properties will keep the heat in during cold weather and the cool air in during hot weather.
When it comes to installation techniques, ensure a tight seal and cover all gaps to prevent any air leaks. This will maximize the effectiveness of the insulation and provide a cozy living space.
Are there any specific building codes or regulations I should be aware of when constructing a camper trailer?
When constructing a camper trailer, it’s crucial to be aware of building codes and regulations. These guidelines ensure that your camper trailer meets safety standards and is built with the appropriate materials.
Familiarize yourself with local building codes and regulations to avoid any legal issues or safety concerns. Building materials should be chosen carefully, considering their durability, weight, and insulation properties.
Following these regulations and using quality building materials will help create a safe and sturdy camper trailer.
Can I Use a Camper Trailer to Build a Camper on a Trailer?
Yes, it is possible to utilize a camper trailer as a base for building a camper on a trailer. By incorporating your desired modifications, such as adding insulation, walls, and other amenities, you can transform the trailer into a functional camper. In this way, you can effectively combine the convenience of a pre-existing trailer with the customization of building your own camper.
Conclusion
In conclusion, building your own camper trailer isn’t just a project, it’s an exhilarating adventure that’ll make you feel like a true master of the road. From determining your needs and budget to customizing the interior, every step of the process is filled with excitement and satisfaction. By following the steps outlined in this article, you can create a camper trailer that surpasses your wildest dreams.
So, get ready to hit the road in style and experience the freedom and joy that only a self-built camper trailer can provide. Happy travels!

