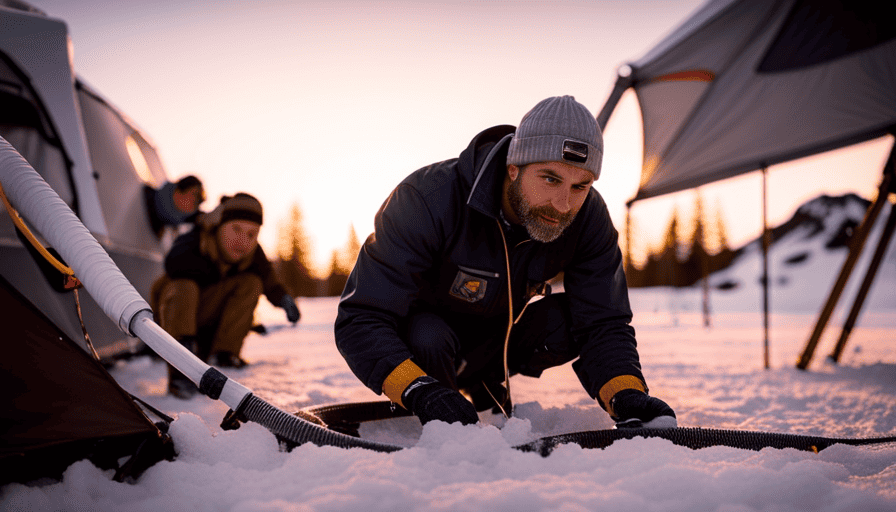
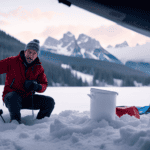
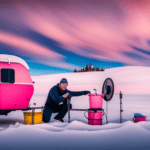
Alright everyone, come closer and pay attention. It’s that time of year once more, when the air becomes chilly and snow begins to cover the ground. Do you know what that indicates? It’s time to prepare your camper for winter!
Now, I know what you’re thinking – ‘Winterize? Ain’t that just a fancy way of sayin’ ‘get your camper ready for the cold weather’?’ Well, you’re right on the money there, my friend. And lucky for you, I’ve got all the know-how to get the job done right.
In this article, I’ll be sharing my years of experience and expertise on how to winterize your camper like a pro. We’ll cover everything from draining the water system and adding antifreeze, to emptying and cleaning the tanks. We’ll even talk about how to store your camper in a safe and dry location.
So, if you want to make sure your camper stays in tip-top shape during those long winter months, stick around. I’ve got all the tips and tricks you need to keep your home away from home cozy and protected from the elements.
Let’s dive in and get this winterization party started!
Key Takeaways
- Draining the water system is the first step in winterizing a camper.
- Use RV-specific antifreeze to protect the plumbing system from freezing temperatures.
- Disconnect the sewer hose and use a dump station or sewer hookup to empty the black and gray water tanks.
- Store camper on jack stands to prevent flat spots on tires.
Drain the Water System
Now it’s time to take a breather and let’s get that water system drained, so you can cozy up inside your camper worry-free during those chilly winter months! Winterizing a camper is essential to prevent freezing and potential damage to your plumbing system.
Here are some tips for draining the water system and ensuring a smooth winterization process.
First, locate the drain valves or plugs for both the fresh water and hot water tanks. Open these valves to allow the water to flow out. Make sure to have a hose connected to direct the water away from your camper. Don’t forget to open all faucets, including the shower and outdoor spigots, to release any remaining water trapped in the lines.
Once all the water has been drained, it’s time to move on to the next step: adding antifreeze to the plumbing. This will further protect your system from freezing temperatures. Remember to use RV-specific antifreeze, as regular automotive antifreeze can be harmful to your plumbing.
By following these steps, you’ll be well on your way to winterizing your camper and ensuring a worry-free winter season.
Add Antifreeze to the Plumbing
To properly protect your recreational vehicle for colder temperatures, it’s essential to add a specialized solution to the plumbing system. This step is crucial in preventing frozen pipes and potential damage to your camper.
When it comes to choosing the right antifreeze for your plumbing, there are a few key factors to consider. First, make sure to select an antifreeze that’s specifically formulated for RVs. These types of antifreeze are designed to be non-toxic and safe for your plumbing system. Additionally, look for antifreeze that’s rated for the lowest possible temperatures you expect to encounter during the winter. This will ensure that your pipes are adequately protected, even in extreme cold conditions.
When adding the antifreeze to your plumbing system, carefully follow the instructions provided by the manufacturer. Typically, this involves pouring the antifreeze directly into the fresh water tank and then using the water pump to distribute it throughout the entire plumbing system. Make sure to open all the faucets and run the water until you see the antifreeze flowing out. This will ensure that the solution reaches all areas of the plumbing system, including the hot water tank and the shower.
By properly adding antifreeze to your plumbing system, you can rest assured knowing that your camper is prepared for the winter months. Once this step is complete, it’s time to move on to the next section about emptying and cleaning the tanks.
Empty and Clean the Tanks
Once you’ve added antifreeze to your plumbing system, it’s time to tackle the important task of emptying and cleaning the tanks.
Emptying the tanks is crucial to prevent any freezing or damage during the winter months. Start by disconnecting the sewer hose and using a dump station or sewer hookup to empty the black and gray water tanks. Make sure to wear gloves and take precautions to avoid any contact with the waste.
Once the tanks are empty, it’s time to clean them thoroughly. To clean the tanks, use a specialized RV tank cleaner or a mixture of bleach and water. Pour the cleaner into each tank and fill them with fresh water. Let the cleaner sit for a couple of hours to break down any residue or buildup. Then, drain the tanks completely and rinse them multiple times to ensure all the cleaner is removed.
After emptying and cleaning the tanks, it’s essential to remove any remaining food and personal items from the camper. This step helps prevent any damage or pest infestations during the winter months.
Remove Food and Personal Items
After emptying and cleaning the tanks, it’s important to ensure that all food and personal items are removed from the camper to avoid any potential damage or pest infestations during the winter months. As an experienced camper, I have learned the importance of properly storing and organizing items to prevent any unwanted surprises when spring arrives.
To help you effectively remove food and personal items, I have prepared a table below with some discussion ideas on preventing pests and organizing storage space:
| Preventing Pests | Organizing Storage Space |
|---|---|
| Store all perishable food in airtight containers or remove it completely from the camper. | Utilize storage bins or bags to keep non-perishable items organized and protected from pests. |
| Clean all food crumbs and spills thoroughly, as they can attract rodents and insects. | Use stackable containers to maximize storage space and keep items secure during transport. |
| Inspect all personal items for any signs of pests before storing them. | Label your storage containers to easily locate items when needed. |
| Consider using natural pest repellents, such as lavender sachets or cedar chips. | Utilize all available space, including under beds and seating areas, to store items efficiently. |
By following these guidelines, you can ensure that your camper remains pest-free and your belongings are well-organized throughout the winter season. Once you have removed all food and personal items, the next step is to seal any leaks or cracks to further protect your camper.
Seal Any Leaks or Cracks
Make sure you check for any leaks or cracks in your camper to protect it from potential damage during the winter months. Repairing leaks and preventing water damage is essential for keeping your camper in good condition.
Start by thoroughly inspecting the exterior of the camper, paying close attention to areas where water could potentially seep in, such as windows, doors, roof vents, and seams. Look for any signs of moisture, such as water stains or soft spots on the walls or ceiling. If you find any leaks or cracks, it’s important to repair them promptly to prevent further damage. Use a sealant or caulk that’s specifically designed for RVs or campers and follow the manufacturer’s instructions for application.
Once you’ve sealed all the leaks and cracks, you can move on to the next step of winterizing your camper: covering it with a tarp or RV cover. This’ll provide an extra layer of protection against the elements and help keep your camper in optimal condition throughout the winter.
Cover the Camper with a Tarp or RV Cover
After sealing any leaks or cracks in my camper, the next step in winterizing is to cover it with a tarp or RV cover.
Both options have their benefits, but personally, I prefer using a tarp. Using a tarp provides excellent protection against snow, rain, and harsh winter elements. It acts as a sturdy shield, preventing any moisture from seeping into the camper and causing damage. Additionally, tarps are generally more affordable and readily available compared to RV covers.
When covering the camper with a tarp, there are a few tips to keep in mind. First, make sure the tarp is large enough to completely cover the camper. It should fit snugly and reach the ground on all sides. Secure the tarp tightly using bungee cords or ropes to prevent it from flapping in the wind. It’s also important to ensure that the tarp is properly ventilated to prevent the growth of mold or mildew.
Now, let’s move on to the next step: inflating and covering the tires. By doing this, we can ensure that the tires remain in good condition throughout the winter months.
Inflate and Cover the Tires
To ensure your tires stay in optimal condition during the winter months, don’t forget to properly inflate and cover them. Tire maintenance is crucial when it comes to winterizing your camper. Here are some winter storage tips to keep in mind:
-
Inflate the tires to the recommended pressure: Before covering your camper for the winter, make sure to inflate the tires to the recommended pressure. This will help prevent flat spots and ensure proper weight distribution.
-
Use tire covers: Investing in tire covers is a great way to protect your tires from harsh winter elements. These covers shield the tires from UV rays, moisture, and debris, preventing cracking and premature wear.
-
Rotate the tires: It’s a good idea to rotate the tires before storing your camper for the winter. This helps distribute wear more evenly, extending the overall lifespan of the tires.
-
Check the tread depth: Before winter storage, inspect the tread depth of your tires. If they’re worn down, it’s best to replace them to ensure optimal traction on icy roads.
-
Store the tires off the ground: If possible, store the camper on jack stands to take the weight off the tires. This helps prevent flat spots from forming during long periods of inactivity.
Taking these tire maintenance steps will go a long way in preserving the condition of your camper’s tires during the winter months. Now, let’s move on to the next section about disconnecting and storing the battery.
Disconnect and Store the Battery
Don’t forget to disconnect and store the battery, ensuring its safety and longevity throughout the winter months.
Battery maintenance is crucial when it comes to winterizing your camper. The cold temperatures can wreak havoc on the battery, causing it to lose charge and potentially even freeze. To prevent any damage, start by disconnecting the battery cables, starting with the negative cable first. This will prevent any accidental electrical currents while you work.
Next, remove the battery from the camper and clean it thoroughly with a mixture of baking soda and water to remove any dirt or corrosion. Once clean, dry the battery completely before storing it in a cool and dry place. It’s important to keep the battery off the ground to prevent any moisture or damage.
Consider using a battery maintainer or trickle charger to keep the battery charged and in good condition throughout the winter. Remember, proper battery maintenance is just one of many winter storage tips for your camper.
Now, let’s move on to securing the exterior and interior to ensure your camper stays protected during the colder months.
Secure the Exterior and Interior
Ensure the exterior and interior of your camper are secure to protect it during the colder months.
Insulation options are crucial for keeping the interior of your camper warm and preventing any damage caused by freezing temperatures. One effective option is to use foam insulation boards to cover windows and seal any gaps or cracks. This will help to keep the cold air out and the warm air in. Additionally, you can use insulation blankets or bubble wrap to insulate the exposed pipes and water tanks, preventing them from freezing and potentially bursting.
As part of your winterizing checklist, make sure to inspect the exterior of your camper for any loose or damaged parts. Check the roof for any leaks or cracks, and repair them if necessary. Secure all doors and windows tightly to prevent drafts and moisture from entering. Inside the camper, remove any perishable items that may attract pests during the winter months.
To transition into the next section about storing your camper in a dry and safe location, remember that a secure exterior and interior will help protect your camper during the winter, but storing it properly is equally important.
Store in a Dry and Safe Location
Finding a dry and safe location to store your camper is crucial, as statistics show that improper storage can lead to costly damage and repairs. When it comes to winterizing your camper, ensuring it’s stored in the right place is just as important as securing the exterior and interior.
Here are some key points to consider when choosing a storage location:
-
Indoor Storage:
- Look for a storage facility that offers indoor storage units specifically designed for campers. These units provide protection from the harsh winter elements, such as snow, ice, and freezing temperatures.
- Indoor storage units also provide added security, reducing the risk of theft or vandalism.
-
Outdoor Storage:
- If indoor storage isn’t available, look for a location with a sturdy and waterproof cover. This’ll help protect your camper from rain, snow, and UV damage.
- Ensure that the storage area is well-drained to prevent water buildup and potential damage to the camper’s undercarriage.
By choosing the right storage location, you can ensure that your camper remains protected throughout the winter months. Proper storage is a crucial step in the winterizing process and can save you from costly repairs and damage to your beloved camper.
Frequently Asked Questions
How often should the water system be drained and refilled during winterization?
During winter storage, it’s important to regularly drain and refill the water system to prevent freezing and damage. I recommend draining and refilling the system every 2-3 weeks to keep the water fresh and prevent any buildup or contamination.
This will also help ensure that the system is functioning properly when you’re ready to use your camper again in the spring. Regular water system maintenance is crucial for the longevity and performance of your camper.
Can I use regular antifreeze instead of RV-specific antifreeze for the plumbing?
Using regular antifreeze for RV plumbing can be a convenient option, but it’s important to consider the pros and cons. One interesting statistic to note is that regular antifreeze is typically less expensive than RV-specific antifreeze. However, it’s crucial to remember that regular antifreeze is toxic and can be harmful if ingested.
Additionally, it may not provide the same level of protection against freezing temperatures as RV-specific antifreeze. It’s always recommended to follow manufacturer guidelines and use the appropriate antifreeze for winterizing your camper.
How often should the tanks be cleaned and sanitized?
I recommend cleaning and sanitizing the tanks of your camper at least once every three months to ensure proper hygiene and prevent any buildup of bacteria or odors. Regular maintenance is crucial for maintaining the overall cleanliness and functionality of your camper’s plumbing system. By adhering to this schedule, you can enjoy worry-free travels and a clean, fresh water supply throughout your camping adventures.
What precautions should I take to prevent pests from infesting the camper during storage?
During camper storage, it’s crucial to take precautions to prevent pests. I once had a camper infested with mice, and it was a nightmare. To avoid this, you should take pest control measures during winterization.
Start by thoroughly cleaning the camper, removing all food and crumbs. Seal any openings or cracks to prevent access for pests. Additionally, use rodent repellents like mothballs or traps.
These precautions will ensure a pest-free camper when you’re ready to hit the road again.
Is it necessary to remove all furniture and appliances from the camper before winterizing?
Removing furniture and appliances is not necessary before winterizing a camper. However, it’s important to take certain winter storage tips into consideration. The winterizing process involves draining the water system, adding antifreeze, and protecting the camper from freezing temperatures. It’s crucial to properly winterize your camper to prevent damage to the plumbing system, appliances, and furniture. Regular winter maintenance for campers ensures they’re ready to hit the road again when spring arrives.
What Measures Should I Take When Camping at Zero Degrees?
When camping in subzero temperatures, it is crucial to take certain measures to ensure a safe and comfortable experience. Firstly, invest in high-quality winter camping gear such as a four-season tent, insulated sleeping bag, and thermal clothing. Proper layering, adequate insulation, and staying dry are essential. Additionally, always let someone know about your itinerary and pack sufficient food and water supplies. Most importantly, familiarize yourself with cold weather safety measures and be prepared for emergency situations.
Conclusion
So there you have it, folks! Winterizing a camper is an essential step to protect your investment during the cold winter months. By following these steps, you can ensure that your camper is properly prepared for the winter season.
Did you know that nearly 80% of camper owners choose to winterize their vehicles? This statistic highlights the importance of taking the necessary precautions to prevent any damage that can be caused by freezing temperatures.
Remember, a little bit of preparation now can save you from costly repairs in the future. Stay warm and happy camping!

