In the vast realm of nature’s sanctuary, where the seasons change and nature’s power is dominant, there is a hidden treasure: the camper. A trustworthy companion, it leads us on adventures and shows us new places. As the chilly grip of winter draws near, it is crucial to protect our reliable vehicle with the gift of safety.
With our vast knowledge and experienced hands, we shall embark on a journey to winterize our beloved camper. Like a skilled conductor leading an orchestra, we shall prepare the water system, insulate the interior, and protect the exterior. We shall tend to the battery, ensuring its vitality throughout the frosty months. And with a keen eye, we shall ward off the invasion of pests, safeguarding our precious haven.
Finally, we shall store our camper with care, like a mother tucking her child into bed. With these steps, we shall shield our beloved companion from winter’s harsh embrace, preserving it for future escapades.
So let us embark on this quest, dear readers, and bestow upon our camper the gift of winterization. Together, we shall conquer the cold and emerge victorious, ready to embark on new adventures when the sun’s warmth returns.
Key Takeaways
- Protect the camper from cold and prevent damage
- Drain the water system to avoid freezing and bursting pipes
- Insulate the interior with foam or fiberglass
- Disconnect and remove the battery
Prepare the Water System
Now it’s time to get the water system ready for the winter chill! As experienced campers, we know how important it is to properly prepare the water system to avoid any costly damage that can occur during the cold months.
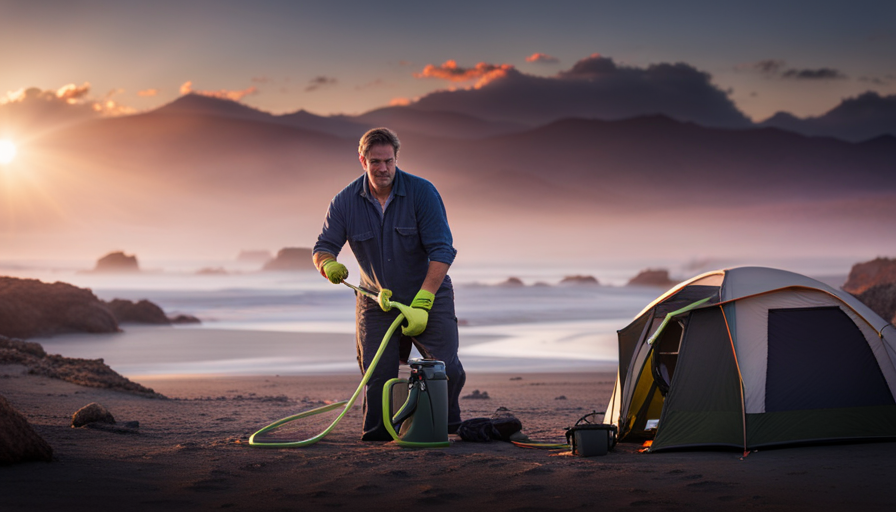
The first step in winterizing our camper is to drain all the pipes. We start by turning off the water supply and opening all the faucets, both inside and outside the camper. This allows the water to flow out and ensures that there is no water left in the pipes that could freeze and cause them to burst.
Once all the water has been drained, we move on to the next crucial step – using antifreeze. We pour antifreeze into all the drains, toilets, and tanks, making sure to follow the manufacturer’s instructions for the correct amount to use. This helps to protect the plumbing system from freezing temperatures.
With the water system prepared, it’s time to move on to insulating the interior, which will help keep the camper warm and cozy during the winter months.
Insulate the Interior
First, make sure you’ve properly insulated the interior of your camper to keep the cold air out. Choosing the right insulation is crucial for effective winterization. Look for insulation materials with a high R-value, such as foam or fiberglass, which provide excellent thermal resistance. These materials will help maintain a comfortable temperature inside your camper even during freezing temperatures.
Installing window coverings is another important step in insulating the interior. Use thick, thermal curtains or insulated window shades to prevent heat loss through the windows. These coverings create an extra barrier against the cold air, keeping your camper cozy and warm. Additionally, consider using weatherstripping to seal any gaps around windows, doors, or vents. This will further prevent cold drafts from entering the interior.
To summarize, properly insulating the interior of your camper is essential for winterization. Choose insulation materials with a high R-value and install window coverings to create an extra layer of protection against the cold. Don’t forget to seal any gaps with weatherstripping. By taking these steps, you’ll ensure a comfortable and energy-efficient interior during the winter months.
Now, let’s move on to the next section about how to protect the exterior of your camper.
Protect the Exterior
To keep your camper cozy and protected during the winter months, let’s talk about how you can ensure the exterior stays in top shape. One important step is to invest in protective covers for your camper. These covers are designed to shield your camper from harsh weather conditions, such as snow, ice, and freezing temperatures. They provide an extra layer of protection, preventing damage to the exterior and keeping it looking new for years to come.
In addition to using protective covers, it’s crucial to seal the windows and doors of your camper. This will help prevent drafts and keep the interior warm and comfortable. You can use weatherstripping or caulk to seal any gaps or cracks around the windows. Don’t forget to check the seals on the doors as well, as they can also let in cold air if not properly sealed.
By taking these measures to protect the exterior of your camper, you can ensure that it remains in excellent condition throughout the winter season.
Now, let’s move on to the next section and discuss how to maintain the battery, which is another important aspect of winterizing your camper.
Maintain the Battery
When winterizing a camper, it’s important to properly maintain the battery to ensure it remains in good condition.
The first step is to disconnect and remove the battery from the camper. This will prevent any drain or damage to the battery during the cold months.
Next, it’s essential to store the battery in a warm and dry location to prevent freezing and damage.
Finally, regularly charging the battery during the winter will help maintain its charge and prolong its lifespan.
By following these steps, we can ensure our camper battery will be ready to go when spring arrives.
Disconnect and Remove the Battery
Now, why would you want to disconnect and remove the battery before winterizing your camper? Well, when it comes to properly winterizing your camper and ensuring the longevity of your battery, removing it is a crucial step. Here are four reasons why you should disconnect and remove the battery:
-
It prevents power drain: By disconnecting the battery, you eliminate the risk of any power drain during the winter months when the camper isn’t in use.
-
It protects from freezing: Removing the battery allows you to store it in a location where it won’t be exposed to freezing temperatures, which can damage the battery.
-
It avoids corrosion: By disconnecting the battery, you reduce the chances of corrosion occurring due to exposure to moisture or other elements.
-
It increases battery lifespan: Properly removing and storing the battery prolongs its lifespan, ensuring that it’ll be ready to use again in the spring.
To ensure the battery remains in good condition, it’s essential to store it in a warm and dry location.
Store the Battery in a Warm and Dry Location
After disconnecting and removing the battery, we know that proper battery maintenance is crucial for winter storage. Finding a warm and dry location to store the battery is essential to ensure its longevity and performance.
Extreme cold temperatures can negatively affect the battery’s ability to hold a charge, so it’s important to protect it from freezing. We recommend storing the battery in a garage or basement where temperatures remain above freezing. Make sure to place it on a stable surface and keep it away from any flammable materials. This will help prevent any potential damage or accidents.
By taking these precautions, you can ensure that your battery stays in good condition during the winter months. When it’s time to prepare for the next camping season, regularly charging the battery during winter will be an important step in ensuring its readiness.
Regularly Charge the Battery During Winter
To maintain the battery’s optimal performance and prevent any issues, it’s crucial to regularly charge it throughout the winter months. Here are some tips for extending battery life and choosing the right battery for your camper:
-
Keep the battery fully charged: Regularly charge the battery to prevent it from losing its charge and becoming damaged. This will ensure that it’s ready to go when you start using your camper again.
-
Use a smart charger: Invest in a quality smart charger that can automatically adjust the charging rate to prevent overcharging and extend the battery’s lifespan.
-
Consider a deep cycle battery: Deep cycle batteries are designed to provide a steady amount of power over a long period of time. They’re ideal for campers as they can handle the demands of appliances and electronics.
By following these tips, you can prolong your battery’s life and ensure that it’s in top condition for your next camping adventure.
Now let’s transition into the next section about preventing pest infestations.
Prevent Pest Infestations
Don’t let pests ruin your winter camping experience – learn how to prevent infestations in your camper! When it comes to pest control methods, there are a few key strategies you can employ to keep those unwanted visitors at bay.
First and foremost, make sure to thoroughly clean your camper before storing it for the winter. Remove any food crumbs or spills that may attract pests. Additionally, consider using natural deterrents such as peppermint oil or mothballs to keep rodents away. These scents are known to repel pests and can be placed strategically throughout your camper.
Rodent prevention tips are also crucial in winterizing your camper. Start by inspecting your camper for any holes or cracks where rodents could enter. Use steel wool or caulk to seal off these entry points. It’s also a good idea to store any food items in airtight containers to prevent attracting rodents. Finally, consider placing traps or bait stations around the perimeter of your camper to catch any unwanted visitors.
By taking these pest control measures, you can ensure a pest-free winter camping experience. Once you have properly winterized your camper and prevented any potential infestations, it’s time to move on to the next step: storing your camper properly.
Store Properly
Make sure you store your vehicle properly to protect it from the harsh winter elements and ensure its longevity. Proper storage is essential in preventing damage to your camper during the winter months. Here are some key tips to help you store your camper properly:
-
Invest in a quality cover: A good cover will protect your camper from snow, ice, and other winter elements. Look for covers specifically designed for campers, as they provide the best protection.
-
Choose the right location: Find a dry, well-ventilated space to store your camper. A garage or covered storage facility is ideal, but if that’s not available, consider using a tarp or carport to create a temporary shelter.
-
Clean and prepare the camper: Before storing, thoroughly clean the interior and exterior of your camper. Remove any food, trash, or items that may attract pests. Drain all water tanks and lines to prevent freezing and potential damage.
-
Secure all openings: Seal any gaps or openings to prevent pests from entering your camper. Inspect for any cracks, holes, or damaged seals and repair them before storing.
Following these proper storage techniques will significantly reduce the risk of damage to your camper during the winter months, ensuring it’s ready for your next adventure.
Frequently Asked Questions
How often should I drain and refill the water system during winterization?
During winterization, it’s crucial to know how often to flush the water system to prevent freezing. We recommend draining and refilling the water system every 2-4 weeks, depending on the severity of the weather. This ensures that any stagnant water is removed and replaced with fresh water, reducing the risk of freezing.
Regular flushing also helps maintain the integrity of the water system and prevents any potential damage caused by freezing temperatures.
Can I use traditional household insulation materials to insulate the interior of my camper?
Using traditional household insulation materials to insulate the interior of a camper can be a tempting option. However, it’s important to consider the pros and cons.
On one hand, these materials are easily accessible and familiar to most people. On the other hand, they may not be the most effective choice for insulating a camper. They may not provide sufficient insulation against the cold temperatures and could lead to condensation or mold issues.
It’s worth exploring alternative insulation materials specifically designed for campers to ensure optimal insulation and protection during winter months.
Is it necessary to cover the tires and wheel wells to protect the exterior of the camper?
Yes, it’s necessary to cover the tires and provide wheel well protection to protect the exterior of the camper. Tire covers are essential in preventing damage caused by UV rays, harsh weather conditions, and moisture. They also help to maintain the tire’s integrity and prolong their lifespan.
Wheel well protection is equally important as it shields the wheel wells from debris, road salt, and other elements that could lead to rust or corrosion. Taking these precautions will help ensure the longevity and overall condition of your camper.
What maintenance steps should be taken to ensure the battery stays in good condition during the winter?
To ensure the battery stays in good condition during the winter, it’s crucial to prioritize winterizing the battery and follow proper battery maintenance during this chilly season.
The cold weather can drain the battery, leaving you stranded. To avoid this, disconnect the battery and store it in a warm, dry place.
Regularly check the battery’s charge and keep it fully charged using a trickle charger. This will help prolong its life and ensure it’s ready to go when spring arrives.
Are there any natural remedies or preventive measures to keep pests away from my camper during winter storage?
To keep pests away from your camper during winter storage, there are several natural pest control methods you can try. First, make sure to thoroughly clean and remove any food sources from the camper. Use peppermint oil or sachets of dried herbs, such as lavender or rosemary, to repel pests.
Seal any cracks or openings where pests might enter. Additionally, consider placing mousetraps or mothballs in strategic locations.
These winter storage tips will help protect your camper from unwanted guests.
What Are the Steps to Winterize My Camper?
Winterizing your camper is essential to protect it from the harsh cold weather. The steps to winterize your camper include draining all water from the tanks, pipes, and water heater. Use RV antifreeze to prevent any remaining water from freezing. Insulate the interior, seal any gaps or cracks, and cover the camper to shield it from the elements. Taking these steps will ensure your camper stays in great condition during the winter months.
Conclusion
In conclusion, winterizing your camper is essential to protect it from the harsh weather conditions. By following these steps, we can ensure that our camper remains in top-notch condition for the next camping season.
Remember, "an ounce of prevention is worth a pound of cure." Taking the time to properly prepare the water system, insulate the interior, protect the exterior, maintain the battery, prevent pest infestations, and store it properly will save us from potential headaches and costly repairs down the line.
Stay warm and happy camping!

