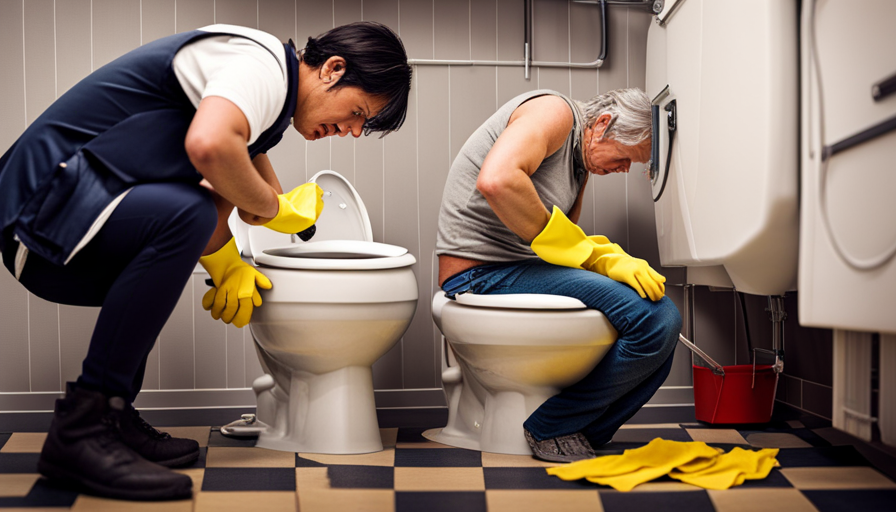
Have you ever experienced the frustration of a clogged RV toilet while on a memorable road trip? Picture this scenario: you’re surrounded by breathtaking nature, in the middle of nowhere, and your toilet decides to malfunction. This issue can quickly turn a perfect vacation into a stressful situation.
But fear not, fellow adventurers, because we’re here to help you unclog that troublesome toilet and get back to enjoying your journey.
In this article, we will guide you through the step-by-step process of unclogging a camper toilet. We’ll provide you with expert tips and tricks, as well as the necessary tools and supplies to get the job done.
From using a plunger and a toilet auger to employing a toilet snake and even resorting to a chemical drain cleaner as a last resort, we’ve got you covered.
We’ll also share preventive measures to avoid future clogs, ensuring that your future adventures go off without a hitch.
So, let’s roll up our sleeves, put our knowledge to the test, and get that camper toilet back in tip-top shape!
Key Takeaways
- Necessary tools for unclogging a camper toilet include a plunger, toilet auger, and drain snake.
- Preventive measures such as avoiding flushing non-toilet paper items and using plenty of water when flushing can help prevent clogs.
- A mixture of hot water and dish soap can be used to dissolve clogs effectively.
- Proper disposal of waste, regular tank emptying, and using toilet paper designed for RVs can help prevent future clogs.
Gather the necessary tools and supplies
Before you start, make sure you have all the tools and supplies you’ll need to tackle the task of unclogging your camper toilet. Preventive maintenance is key to avoiding clogs in the first place, so it’s a good idea to have a toilet maintenance kit on hand. This kit typically includes a plunger, a toilet auger, and a drain snake. The plunger is great for minor clogs and can help dislodge any blockages. The toilet auger is a handy tool for more stubborn clogs that the plunger can’t handle. It has a long flexible cable that can reach deeper into the pipes to break up the blockage. Lastly, the drain snake is useful for removing any debris that may be stuck in the toilet trap or drainpipe.
Once you have all your tools and supplies ready, the first step in unclogging your camper toilet is to turn off the water supply. This is important to prevent any accidental flooding or mess during the unclogging process. To do this, locate the water shut-off valve behind or near the toilet and turn it clockwise until it’s fully closed.
With the water supply turned off, you can now move on to the next step of unclogging your camper toilet.
Turn off the water supply to the toilet
To start, you’ll need to shut off the water supply to the restroom. As the saying goes, "A stitch in time saves nine." Not turning off the water supply before attempting to unclog a camper toilet can lead to potential risks and complications.
One major risk is the possibility of water overflow and flooding. If the toilet gets clogged and the water supply is still on, it can quickly create a messy and unsanitary situation inside the camper. Additionally, attempting to unclog the toilet with the water supply on can cause water pressure to build up, which may worsen the clog or even damage the plumbing system.
To properly turn off the water supply to a camper toilet, locate the shut-off valve. This valve is usually located behind or near the toilet, close to the wall. Turn the valve clockwise until it is fully closed. This will stop the flow of water to the toilet, ensuring that you can safely proceed with the unclogging process without any leaks or water damage.
Now that the water supply is off, let’s move on to the next step of using a plunger to try and unclog the toilet. By using this simple tool, you can often dislodge the clog and restore proper function to the toilet, allowing you to get back to enjoying your camping trip.
Use a plunger to try and unclog the toilet
Now, with the water supply turned off, it’s time to give the trusty plunger a go and restore the natural flow of things.
When it comes to toilet unclogging techniques, using a plunger is often the first method that comes to mind. It’s a simple yet effective tool that can dislodge the clog and get your camper toilet back in working order.
To begin, place the plunger over the drain opening and make sure it forms a tight seal. This will help create suction when you start plunging. With a firm grip on the handle, push down forcefully and then pull up quickly. Repeat this motion several times, maintaining a steady rhythm. The pressure from the plunging should dislodge the clog and allow the water to flow freely.
If the plunger doesn’t work, don’t panic. There are alternative methods for unclogging toilets that you can try. One option is to use a toilet auger, also known as a plumber’s snake. This tool is designed to reach deeper into the pipes and remove stubborn clogs. We’ll explore this method in more detail in the next section.
With the plunger technique attempted, let’s move on to the next step: using a toilet auger to tackle the stubborn clog.
If the plunger doesn’t work, try using a toilet auger
If the plunger doesn’t work, you might be feeling frustrated and discouraged, but don’t worry, there’s still a solution to your clog problem – try using a toilet auger and experience the satisfaction of a fully functional bathroom once again.
A toilet auger, also known as a toilet snake, is a handy tool that can effectively unclog your camper toilet. It works by extending a flexible wire coil down the drain to break up and remove the clog.
To use a toilet auger, start by inserting the coil end into the toilet bowl, making sure it goes all the way down. Then, rotate the handle clockwise to extend the coil into the drain. Slowly push and pull the handle to break up the clog and allow it to pass through the drain. Be careful not to apply too much force, as it may damage the toilet or pipes.
Toilet augers are a great alternative when the plunger fails to clear the clog. They are especially effective for removing clogs caused by excessive toilet paper, foreign objects, or solid waste build-up.
Once you’ve successfully unclogged the toilet, you can move on to the next step and use a toilet snake to remove any stubborn clogs.
Use a toilet snake to remove any stubborn clogs
Don’t let stubborn clogs ruin your day – grab a toilet snake and say goodbye to your plumbing troubles! When it comes to unclogging a camper toilet, a toilet snake can be a lifesaver.
Here are some toilet snake alternatives and tips for preventing toilet clogs to help you out.
First, let’s explore some toilet snake alternatives. If you don’t have a toilet snake on hand, you can try using a wire hanger. Straighten it out and create a hook at one end to maneuver through the toilet pipes. Another alternative is a drain bladder, which uses water pressure to push through the clog. Simply attach it to a hose and insert it into the toilet bowl.
Now, let’s talk about some tips for preventing toilet clogs in the first place. One important tip is to avoid flushing anything other than toilet paper down the toilet. Items like wet wipes, feminine hygiene products, and cotton balls can easily cause clogs. Additionally, make sure to use plenty of water when flushing to help prevent clogs from forming.
With these toilet snake alternatives and preventative tips in mind, you’ll be well-equipped to handle any stubborn clogs that may come your way. But if these methods don’t work, don’t worry – there’s still one more solution to try.
In the next section, we’ll discuss how to use a mixture of hot water and dish soap to break up the clog.
Use a mixture of hot water and dish soap to break up the clog
Tackle troublesome clogs by combining hot water and dish soap to dissolve the obstruction, leaving your plumbing problem-free. This simple and effective method is a great alternative to using a toilet snake, especially if you don’t have one on hand.
To start, make sure you have a large pot of hot water ready. It’s important to note that the water should be hot, but not boiling, as boiling water can potentially damage your toilet bowl. Carefully pour the hot water into the toilet bowl, aiming for the center, and let it sit for a few minutes. The heat from the water will help to soften and break up the clog.
Next, add a generous amount of dish soap to the bowl. Dish soap is a powerful degreaser and can help to further break down the clog. Use a toilet brush to gently agitate the water and soap mixture, ensuring that it reaches all areas of the clog.
After a few minutes, flush the toilet and see if the clog has cleared. If not, you may need to repeat the process or consider using a toilet snake or chemical drain cleaner as a last resort.
Using hot water and dish soap is a safe and effective method for unclogging a camper toilet. It’s important to prioritize safety and consider alternative clog removal methods before resorting to harsh chemicals.
Use a chemical drain cleaner as a last resort
When all else fails, you can resort to using a chemical drain cleaner as a last resort to eliminate the stubborn clog in your plumbing system. However, it’s important to prioritize safety when using chemical drain cleaners. Here are some key points to keep in mind:
-
Protective Gear: Before using a chemical drain cleaner, make sure to wear gloves and goggles to shield yourself from potential splashes or fumes.
-
Ventilation: Open windows and turn on fans to ensure proper ventilation while using the drain cleaner. The fumes can be harmful if inhaled for an extended period.
-
Follow Instructions: Read and follow the instructions on the chemical drain cleaner carefully. Use the recommended amount and avoid mixing different products, as this can lead to dangerous chemical reactions.
-
Consider Alternatives: If you’re uncomfortable using a chemical drain cleaner, there are alternative methods you can try. For example, using a plunger, a plumbing snake, or a mixture of hot water and dish soap can often be effective in breaking up the clog.
By prioritizing safety and considering alternatives, you can effectively tackle the stubborn clog in your camper toilet. Now, let’s move on to the next step: flush the toilet to check if the clog has been cleared.
Flush the toilet to check if the clog has been cleared
After following the safety precautions and considering alternative methods, it’s time to flush the toilet and see if the clog has been successfully eliminated. This step is essential to ensure that the water can flow freely and that the clog has been completely cleared.
To begin, slowly pour a bucket of water into the toilet bowl and observe how it drains. If the water drains without any issues and the toilet flushes properly, then congratulations! The clog has been successfully removed.
However, if the water doesn’t drain or if you notice any leaks, it’s important to address these issues before proceeding further. Checking for water leaks is crucial to prevent any potential damage to the camper. Look for any signs of water leakage around the base of the toilet or on the floor. If you notice any leaks, you may need to tighten the toilet bolts or replace the wax ring to create a proper seal.
Another important aspect to consider is the proper disposal of waste in a camper toilet. It’s crucial to follow the guidelines provided by the manufacturer to ensure that the toilet functions properly and that the waste is disposed of in a sanitary manner. Never dispose of anything other than human waste and toilet paper in the camper toilet to avoid future clogs.
Now that the clog has been cleared, it’s time to move forward and clean and sanitize the toilet.
Clean and sanitize the toilet after unclogging it
To ensure a clean and fresh environment, it’s time for us to give the toilet a thorough cleaning and sanitizing. Cleanliness maintenance is crucial in preventing the spread of harmful bacteria and maintaining a healthy living space. Proper sanitation not only keeps the toilet smelling fresh, but also reduces the risk of infections and illnesses.
Here are two important steps to follow for an effective cleaning and sanitizing routine:
-
Scrub the toilet bowl: Start by applying a toilet bowl cleaner to the entire surface of the bowl, including under the rim. Use a toilet brush to scrub the inside of the bowl, paying extra attention to any areas with stains or residue. Rinse the brush thoroughly after each scrub to prevent cross-contamination.
-
Disinfect the toilet: After scrubbing, it’s time to disinfect the toilet. Apply a disinfectant spray or wipe to the entire surface of the toilet, including the seat, lid, and handle. Allow the disinfectant to sit for the recommended amount of time indicated on the product label. Then, use a clean cloth or paper towel to wipe away the disinfectant.
To maintain proper sanitation, it’s important to take preventive measures to avoid future clogs, such as using less toilet paper or disposing of waste properly. By following these cleaning and maintenance practices, we can ensure a hygienic and odor-free camper toilet.
Take preventive measures to avoid future clogs, such as using less toilet paper or disposing of waste properly
By being mindful of our paper usage and properly disposing of waste, we can prevent future clogs and maintain a smoothly functioning bathroom. Taking preventive measures is key to avoiding future clogs in our camper toilet.
One of the main culprits of clogs is excessive toilet paper usage. To prevent this, we should use less toilet paper with each flush. It’s important to remember that camper toilets have smaller pipes, so using excessive amounts of toilet paper can easily lead to clogs. Additionally, we should consider using toilet paper specifically designed for RVs, as they’re often more easily broken down and less likely to cause clogs.
Proper waste disposal practices are also crucial in preventing future clogs. It’s important to only flush human waste and toilet paper down the toilet. Anything else, such as wipes, feminine products, or paper towels, should be disposed of in the trash. These items can easily cause clogs and damage the plumbing system in our camper.
Regularly emptying the black water tank is another preventive measure to avoid clogs. This tank holds all the waste from the toilet, so emptying it regularly will help prevent any build-up that could lead to clogs.
By following these simple preventive measures, we can ensure that our camper toilet remains clog-free and our bathroom functions smoothly throughout our camping trips.
Frequently Asked Questions
How do I gather the necessary tools and supplies to unclog a camper toilet?
To gather the necessary tools and supplies for unclogging a camper toilet, we need to be prepared. First, let’s make a list of the tools needed, such as a plunger, a toilet auger, and rubber gloves.
Next, we should buy supplies like a drain cleaner specifically designed for RV toilets and some disposable wipes for cleanup.
Having these tools and supplies on hand will ensure a smooth and successful unclogging process.
How do I turn off the water supply to the camper toilet?
To turn off the water supply to the camper toilet, first locate the water shut-off valve. It’s usually located near the base of the toilet or behind a panel. Turn the valve clockwise to shut off the water flow. This step is crucial for camper toilet maintenance as it prevents any water from entering the toilet while you work on unclogging it.
Remember to turn the valve counterclockwise to restore the water supply once the clog is cleared.
What should I do if the plunger doesn’t work to unclog the toilet?
If the plunger doesn’t work to unclog the toilet, don’t lose hope. We’ve got a few tricks to tackle this mess. One alternative method you can try is using a plumbing snake to break up the blockage and clear the way.
However, if all else fails, it might be time to call in the professionals. Sometimes, a trained plumber is the best solution for those truly stubborn clogs.
How do I use a toilet auger to unclog a camper toilet?
To unclog a camper toilet, there are alternative methods to using a toilet auger. One option is to use a plumber’s snake, which works similarly to an auger.
Another option is to create a DIY drain cleaner using a mixture of baking soda and vinegar.
To prevent clogs in a camper toilet, it’s important to avoid flushing anything other than toilet paper. Regular maintenance, such as using RV-specific toilet paper and periodically cleaning the tank, can also help prevent clogs.
When should I use a chemical drain cleaner as a last resort for unclogging the toilet?
When dealing with a stubborn clog in a toilet, it’s important to exhaust all other options before resorting to a chemical drain cleaner. These cleaners can be harsh and potentially damage the plumbing system. Instead, consider using natural methods for unclogging the toilet. Plungers, toilet augers, and hot water can often do the trick. If those methods fail, it may be time to consult a professional plumber who can offer safe alternatives to chemical drain cleaners.
Are the Steps to Unclog a Toilet in a Camper the Same as a Regular Toilet?
Unclogging a camper toilet may differ slightly from unclogging a regular toilet. While the basic steps remain the same, certain factors like limited space, plumbing differences, and water supply can complicate the process. It is essential to understand the specific mechanisms of your unclogging camper toilet and use appropriate techniques to tackle the issue effectively.
Conclusion
In conclusion, unclogging a camper toilet can be a frustrating task, but with the right tools and techniques, it can be done.
We gathered the necessary tools and supplies and turned off the water supply.
We used a plunger to try and unclog the toilet. If that didn’t work, we tried using a toilet auger and a snake to remove stubborn clogs.
As a last resort, we used a chemical drain cleaner.
Finally, we flushed the toilet to check if the clog was cleared, and then cleaned and sanitized the toilet.
Remember, taking preventive measures, such as using less toilet paper and disposing of waste properly, can help avoid future clogs.
So, let’s tackle that clog like a pro and get back to enjoying our camping adventures!

