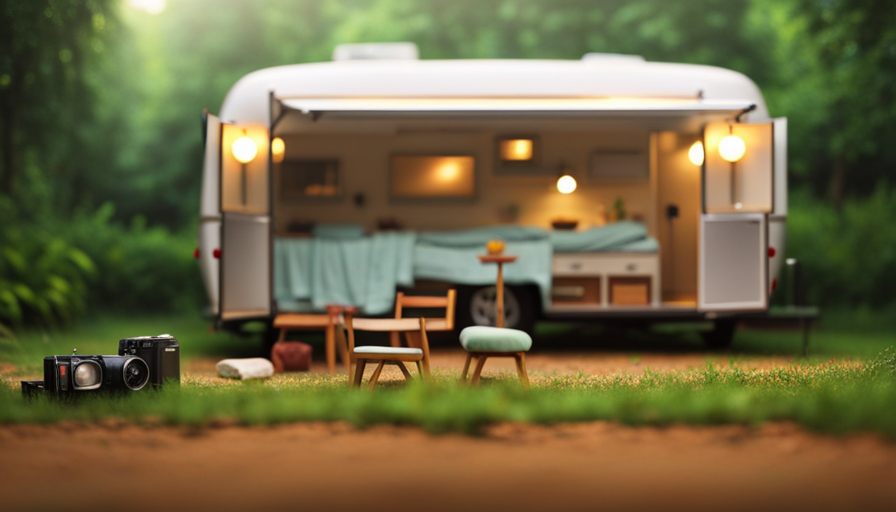
Have you ever fantasized about setting off on a camping journey with a camper customized just for you? Picture the liberty and adaptability of venturing out onto the open highways, possessing all the home comforts readily accessible to you.
It may seem like an impossible dream, but with a little creativity and some DIY spirit, you can turn a simple utility trailer into your very own camper.
Take, for example, the case of John and Sarah. They had always wanted to explore the great outdoors, but traditional campers were far beyond their budget. Determined to make their dream a reality, they decided to transform an old utility trailer into a cozy camper. With a clear plan and a few weekends of hard work, they successfully converted their trailer into a comfortable and functional living space.
In this article, we will guide you through the step-by-step process of transforming a utility trailer into a camper. From assessing your trailer’s potential for conversion to adding the finishing touches, we will provide you with all the information you need to create your own personalized camper.
So grab your tools and let’s get started on this exciting DIY adventure!
Key Takeaways
- Assess the trailer for a sturdy frame, solid flooring, and well-maintained tires
- Insulate and weatherproof the trailer using foam board or fiberglass insulation and waterproof materials
- Build a bed and seating area using lightweight and durable materials and multipurpose furniture
- Maximize storage space by utilizing vertical space, multi-functional furniture, and storage solutions
Assess Your Trailer’s Potential for Conversion
You’ll need to take a good look at your utility trailer and determine if it has the necessary features and space to be transformed into a comfortable camper. Start by assessing the trailer structure. Look for a sturdy frame, solid flooring, and well-maintained tires. Make sure there aren’t any structural issues that could compromise the safety and functionality of your camper.
Next, research camper conversion ideas. There are countless resources available online, from forums to blogs, where you can find inspiration and guidance. Look for trailers similar to yours that’ve been successfully converted into campers. Take note of the layout, storage solutions, and design elements that catch your eye.
Consider the size of your trailer and the number of people it needs to accommodate. Think about the specific features you want in your camper, such as a bed, kitchenette, or bathroom. Determine if the trailer has enough space to fit all the necessary components comfortably.
Once you’ve assessed your trailer’s potential and gathered ideas, it’s time to plan your layout and design. Transition into the next section by mentioning the importance of having a well-thought-out plan in order to create a functional and comfortable camper.
Plan Your Layout and Design
Start by envisioning the perfect layout and design for your new home on wheels – can you already imagine the cozy and functional spaces awaiting you? To optimize space in your utility trailer-turned-camper, carefully plan the layout to ensure every inch is utilized efficiently. Consider the activities you’ll engage in and how the different areas will flow together.
Will you have a dining area that can also double as a workspace? How about a sleeping area that can be transformed into a seating area during the day? Think about the storage options as well, such as cabinets, shelves, and under-bed compartments.
When choosing materials for your camper conversion, prioritize durability and weight. Lightweight materials will help keep the overall weight of your trailer down, allowing for easier towing. Opt for materials that are easy to clean and maintain, as well as ones that are resistant to moisture and temperature changes. This will ensure your camper withstands the rigors of the road and the elements.
As you plan your layout and choose materials, keep in mind the next step: insulating and weatherproofing your trailer. By creating a comfortable and protected environment inside, you’ll be able to enjoy your camper in any weather condition.
Insulate and Weatherproof Your Trailer
To ensure a comfortable and protected environment inside, we need to insulate and weatherproof our trailer. This step is crucial for creating a cozy home on wheels that can withstand any weather condition.
First, let’s talk about insulating methods. One popular option is to use foam board insulation, which provides excellent thermal resistance and is easy to install. Another option is fiberglass insulation, which is effective at reducing noise and is relatively affordable. Whichever method you choose, make sure to properly seal any gaps or cracks to prevent air leakage.
Next, let’s discuss choosing the right weatherproofing materials. Look for materials that are waterproof and can withstand harsh weather conditions. One popular option is to use a waterproof membrane, which is applied to the exterior walls and roof. Additionally, consider using weatherstripping tape to seal any openings, such as doors and windows.
By properly insulating and weatherproofing your trailer, you’ll create a comfortable interior that’s protected from the elements. This will allow you to enjoy your cozy home on wheels in any weather condition.
In the next section, we’ll explore how to install ventilation and windows to ensure proper airflow and natural light inside the camper.
Install Ventilation and Windows
Transforming your trailer into a cozy home on wheels involves strategically installing ventilation and windows to enhance airflow and fill the space with natural light. Proper ventilation is essential to prevent condensation, stale air, and odors from accumulating inside your camper.
There are different types of ventilation options available for camper trailers, including roof vents, powered fans, and side vents. These options can be installed to ensure optimal airflow and keep your living space fresh and comfortable.
When it comes to windows, choosing the right ones is crucial for both functionality and aesthetics. The best windows for camper trailers are those that are lightweight, durable, and easy to install. Acrylic windows are a popular choice as they’re lightweight, shatterproof, and provide good insulation. They also come in various sizes and shapes, allowing you to customize your camper’s appearance.
Installing windows and ventilation in your trailer not only enhances airflow but also brightens up the space with natural light. This makes your camper feel more open, spacious, and inviting. With proper ventilation and ample natural light, your trailer will be a comfortable and enjoyable living space on your travels.
Now that you’ve optimized the airflow and lighting in your trailer, it’s time to move on to the next step: building a bed and seating area.
Build a Bed and Seating Area
Now that you’ve optimized the airflow and lighting, let’s dive into creating a cozy bed and seating area that’ll provide ultimate comfort during your travels. Maximizing space is crucial when transforming a utility trailer into a camper.
Start by measuring the dimensions of your trailer and carefully plan the layout of your bed and seating area. Consider using multipurpose furniture that can serve as both seating and storage.
When choosing materials for your bed and seating area, opt for lightweight yet durable options. A popular choice for the bed is a foldable foam mattress that can be easily stored during the day. For the seating area, consider using cushions or futons that can be placed on top of storage compartments. This allows you to maximize the available space and have a comfortable place to sit.
Next, build a sturdy frame for your bed and seating area using plywood or another sturdy material. Attach the frame securely to the trailer’s walls, ensuring stability during travel. Once the frame is in place, add the foam mattress and cushions to complete the cozy seating and sleeping area.
Now that you have a comfortable bed and seating area, it’s time to create storage solutions. These’ll help you keep your belongings organized and make the most of the available space.
Create Storage Solutions
Once you’ve optimized the airflow and lighting, it’s time to explore creative storage solutions that’ll make your camper trailer feel organized and spacious. Maximizing space is crucial in a small trailer, so here are some ideas to help you organize your essentials:
-
Utilize vertical space: Install shelves or hanging organizers on the walls to store items such as clothes, kitchen utensils, and toiletries. You can also attach hooks to hang hats, jackets, or towels.
-
Use multi-functional furniture: Invest in furniture that doubles as storage, such as benches with hidden compartments or ottomans that open up to reveal storage space. This way, you can store items like bedding, extra clothes, or camping gear.
-
Opt for collapsible or stackable containers: Choose storage containers that can be collapsed or stacked when not in use. This’ll save space and allow you to store items like groceries, cooking utensils, or outdoor equipment efficiently.
By implementing these storage solutions, you can effectively organize your trailer and maximize the available space. Once you have everything neatly stored away, you’ll have more room to install a kitchenette and cooking area. This’ll provide you with the convenience of cooking meals while on the road, making your camper trailer truly functional for your camping adventures.
Install a Kitchenette and Cooking Area
With a kitchenette and cooking area, you’ll be able to whip up delicious meals on the road, satisfying your taste buds and creating unforgettable memories.
When outfitting your utility trailer as a camper, it’s important to consider the essential kitchen items you’ll need. Start by choosing compact appliances such as a small refrigerator, a portable stove, and a microwave. These space-saving kitchen essentials will ensure that you have all the necessary tools to prepare meals while on the go.
Next, focus on creating storage solutions for your kitchen supplies. Install shelves or cabinets to keep your pots, pans, and utensils organized and easily accessible. Utilize magnetic strips or hooks to hang cooking utensils and knives, freeing up valuable counter space. Consider using collapsible or stackable containers to store dry goods and pantry items efficiently.
To optimize your cooking area, create a designated countertop space by installing a foldable table or countertop extension. This’ll provide you with ample space for meal preparation. Additionally, consider adding a sink with a water storage system, allowing you to wash dishes and clean up after cooking.
By incorporating these space-saving kitchen storage ideas and essential appliances, you’ll have a functional kitchenette that meets all your cooking needs on the road.
In the next section, we’ll discuss how to add lighting and electrical outlets to enhance your camper experience.
Add Lighting and Electrical Outlets
Brighten up your space and electrify your experience by illuminating your camper with captivating lighting and convenient electrical outlets. When it comes to adding lighting and electrical outlets to your utility trailer turned camper, proper wiring installation is key.
First, determine the power source for your camper. You have a few options: connecting to your vehicle’s battery, using a portable generator, or installing a solar power system. Once you’ve chosen your power source, it’s time to install the wiring. Begin by running the wiring through the walls and ceiling of your camper, making sure to secure it properly.
Next, install the electrical outlets strategically in areas where you’ll need them the most, such as near your bed or kitchenette. Don’t forget to include USB charging ports for your devices.
Finally, install your lighting fixtures, choosing LED lights for their energy efficiency. Place them strategically to ensure adequate lighting throughout the camper.
With your lighting and electrical outlets in place, you’re ready to decorate and personalize your camper, making it truly feel like home.
Decorate and Personalize Your Camper
Now it’s time to add our personal touch and make our camper feel like a cozy home away from home.
Customizing the exterior of your camper is a great way to showcase your unique style and make it stand out on the road. Start by choosing a color scheme that reflects your personality and preferences. Consider adding decals, stickers, or even a custom paint job to make your camper truly one-of-a-kind.
You can also add accessories such as awnings, outdoor rugs, and string lights to create a welcoming outdoor space.
Inside the camper, adding personal touches and decor is essential to make it feel like home. Start by selecting comfortable bedding and pillows that match your style. Hang curtains or blinds to add privacy and create a warm atmosphere. Consider adding wall art, photos, or a small shelf to display your favorite trinkets. Don’t forget to bring along some cozy throw blankets and rugs to make the space feel inviting and comfortable.
With the exterior and interior personalized to your liking, you’re ready to test and enjoy your DIY camper. Hit the road, explore new places, and create unforgettable memories in your home on wheels.
Test and Enjoy Your DIY Camper
Once you’ve personalized your DIY camper, it’s time to hit the road and embark on unforgettable adventures in your home on wheels. But before you set off, it’s important to test and enjoy your camper to ensure everything’s in working order.
Here are some steps to help you get started:
-
Test your modifications: Before you head out on a long journey, take some short trips to test out the modifications you’ve made to your camper. This’ll give you a chance to see if everything’s working properly and make any necessary adjustments.
-
Check for leaks: After each trip, thoroughly inspect your camper for any signs of leaks. Look for water stains or dampness around windows, doors, and seams. If you find any issues, address them promptly to prevent further damage.
-
Test your electrical system: Make sure all the lights, outlets, and appliances in your camper are functioning correctly. Test them individually to ensure they’re working as intended.
-
Inspect your plumbing: Check for any leaks or clogs in your plumbing system. Run water through all the faucets and drains to make sure everything’s flowing smoothly.
-
Practice packing and unpacking: Take some time to practice packing and unpacking your camper. This’ll help you get organized and efficient, saving you time and frustration on the road.
By following these steps, you can test and enjoy your DIY camper with confidence, knowing that you’ve prepared it for your upcoming adventures.
Frequently Asked Questions
What kind of trailer is best for converting into a camper?
When it comes to converting a utility trailer into a camper, the best trailer options depend on your specific needs and preferences. However, a versatile and spacious enclosed trailer with good insulation and sturdy construction would be a great starting point.
Essential features to consider include windows for ventilation and natural light, a comfortable sleeping area, storage space, and a functional kitchenette. By choosing the right trailer, you’ll be well on your way to creating your dream camper.
How much does it typically cost to convert a utility trailer into a camper?
When considering the cost factors of converting a utility trailer into a camper, there are a few things to keep in mind.
DIY projects tend to be more cost-effective, as you can save on labor costs. However, professional conversions offer expertise and convenience, but at a higher price.
Factors that affect the cost include materials, appliances, insulation, electrical work, and plumbing.
It’s important to research prices and create a budget based on your specific needs and preferences.
Can a utility trailer be converted into a camper without any prior experience?
Yes, a utility trailer can be converted into a camper without any prior experience. However, there are some challenges that you may face during the conversion process. It’s important to have the essential tools and materials needed for the conversion, such as insulation, flooring, electrical wiring, and furniture.
Step-by-step instructions and tutorials are available online to guide you through the process. With patience and determination, anyone can successfully convert a utility trailer into a camper.
Are there any legal requirements or permits needed for converting a utility trailer into a camper?
To legally convert a utility trailer into a camper, there are certain legal requirements and building codes that need to be followed. These requirements may vary depending on your location, so it’s important to check with your local authorities.
Building codes often include specifications for safety features, such as ventilation, electrical systems, and fire safety. Additionally, you may need to obtain permits for the conversion process.
It’s crucial to comply with these regulations to ensure a safe and legally compliant camper.
How long does the conversion process usually take?
When preparing a utility trailer for conversion, it’s important to assess its condition and make any necessary repairs. To do this, we start by thoroughly cleaning the trailer and inspecting the flooring, walls, and roof for any damage.
Next, we gather the necessary tools and materials, such as insulation, plywood, screws, and adhesive.
The conversion process typically takes several weeks to complete, depending on the complexity and customization desired.
What Steps Are Involved in Converting a Utility Trailer into a Camper?
Transforming a cargo trailer into a camper involves several key steps. Firstly, ensure a solid foundation by reinforcing the trailer’s frame and adding insulation. Next, plan the layout, incorporating sleeping, cooking, and storage areas. Install electrical wiring and outlets, along with plumbing for running water. Add insulation, flooring, walls, and ceiling materials. Lastly, outfit the camper with furniture, appliances, and personal touches to create a comfortable and functional living space.
Conclusion
In conclusion, converting a utility trailer into a camper is a rewarding DIY project that allows you to customize your own mobile living space.
By assessing the trailer’s potential, planning your layout, insulating and weatherproofing, installing ventilation and windows, building a bed and seating area, adding a kitchenette and cooking area, installing lighting and electrical outlets, and personalizing your camper, you can transform a simple trailer into a comfortable and cozy home on wheels.
So go ahead, unleash your creativity, and embark on your own camper conversion adventure!


