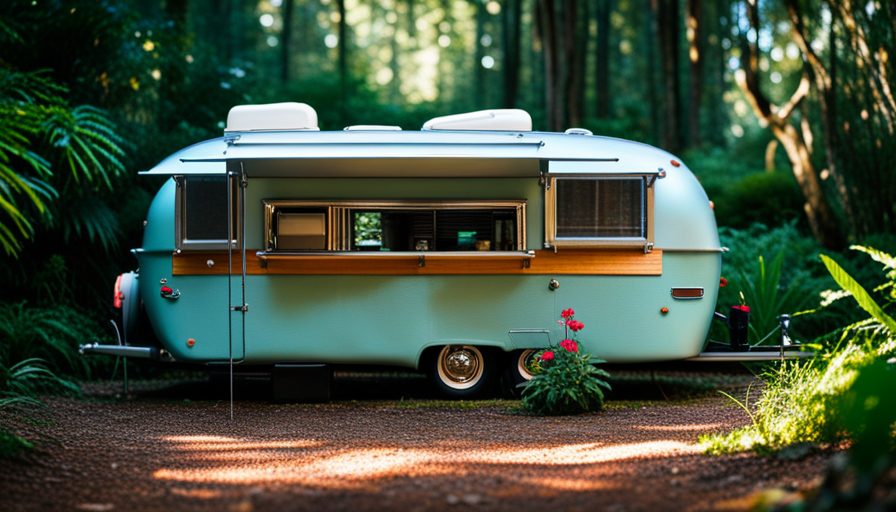
Were you aware that annually, more than 40 million Americans embark on camping trips? If you happen to be among this group and are in search of a practical and cost-effective method to relish in the beauty of nature, opting for a pop-up camper could be the ideal option for you.
In this step-by-step guide, we’ll show you how to set up your own pop-up camper and create a comfortable home away from home.
First, you’ll need to find the perfect camping spot. Once you’ve found your ideal location, it’s time to prepare the ground and assemble the frame and roof of your camper.
Next, you’ll extend and secure the camper walls, creating a sturdy and secure living space. Then, it’s time to set up the interior, arranging furniture and personal belongings to make it feel like home.
Don’t forget to test and adjust the leveling system to ensure a comfortable night’s sleep. Finally, check safety and security measures, and you’re ready to enjoy your camping experience!
So, let’s get started and learn how to set up a pop-up camper.
Key Takeaways
- Finding the perfect camping spot is crucial for setting up a pop-up camper.
- Proper ground preparation, including leveling the ground and clearing away debris, is important.
- Assembling the frame and roof securely is a key step in setting up a pop-up camper.
- Organizing the camper and utilizing storage solutions can help maximize space and efficiency.
Find the Perfect Camping Spot
Now, let’s find the perfect camping spot where we can park our pop-up camper and enjoy the great outdoors! Before heading out, it’s essential to have a camping checklist handy to ensure we have all the necessary equipment.
Once we’re ready, it’s time to start searching for remote campsites that suit our preferences. To begin, we can consult camping websites or apps that provide detailed information about different camping areas. These resources often include reviews, photos, and even GPS coordinates to help us locate hidden gems. Additionally, we can ask fellow campers or join online camping communities for recommendations. They may suggest lesser-known spots that offer a more secluded experience.
When searching for a camping spot, we should consider factors like accessibility, amenities, and natural surroundings. We might prefer a campsite near a lake for fishing or one nestled in the woods for a peaceful ambiance. It’s also crucial to check if the site allows pop-up campers and if reservations are required.
Once we’ve found the perfect spot, it’s time to prepare the ground for our pop-up camper. But before we move on to that, let’s explore how to ensure a comfortable and enjoyable camping experience for everyone.
Prepare the Ground
First, make sure the area is level and free of rocks or debris to create a comfortable and safe space for your pop-up camper. Use a carpenter’s level to check the ground. If it’s not level, use leveling blocks or ramps to raise the low side of the camper. Place the blocks or ramps under the tires or stabilizing jacks and slowly drive or crank the camper onto them until it’s level. Remember to chock the wheels to prevent any movement.
Ground preparation tools like a rake or broom will be useful to clear away rocks or debris. Sweep the area thoroughly, removing sticks, branches, or sharp objects that could damage the camper. Lay down a tarp or groundsheet to provide extra protection and keep the ground clean underneath the camper.
Now that the ground is level and clear, we can move on to assembling the frame and roof of the pop-up camper.
Assemble the Frame and Roof
To start, gather all the frame and roof components and begin the assembly process. First, lay out the roof components on a flat surface, ensuring they’re aligned properly. Connect the roof bows by sliding the ends into the corresponding brackets, making sure they’re securely in place.
Next, attach the cross members to the roof bows, using the provided screws or bolts. Make sure to tighten them firmly to ensure stability.
Once the roof assembly is complete, it’s time to focus on the frame. Start by extending the camper’s frame to its full length, using the provided mechanisms or levers. Make sure all the support legs are properly extended and locked into position. This will provide a stable foundation for the camper.
Now, align the frame with the roof assembly. Carefully lift the roof and position it onto the frame, ensuring that all the connection points align properly. This step is crucial in ensuring a secure and stable camper. Once aligned, secure the roof to the frame using the provided hardware, such as screws or clamps.
With the frame and roof assembled, we can now move on to the next step of extending and securing the camper walls.
Extend and Secure the Camper Walls
Extend and secure the camper walls with precision and proficiency.
After assembling the frame and roof, the next step in setting up a pop-up camper is to secure the walls. This involves attaching the panels to the frame and adding support bars for stability.
To secure the camper walls, start by attaching the panels to the frame. Make sure each panel is properly aligned and securely fastened. This will ensure that the walls are held in place and provide a sturdy structure for the camper.
Next, add support bars to further secure the walls. These bars help distribute the weight evenly and prevent any sagging or instability. Attach the support bars to the frame and ensure they’re tightly secured.
By securing the panels and adding support bars, you create a strong and stable structure for your pop-up camper. This will ensure that the walls stay in place even during windy conditions or when the camper’s in motion.
Now that the walls are extended and secure, it’s time to set up the interior space.
Set Up the Interior Space
Now that the walls are all secure, let’s transform the interior space into a cozy and functional living area. To maximize space and ensure efficient storage organization, follow these steps.
First, remove any loose items from the floor and countertops, and store them in designated compartments or cabinets. Utilize the built-in storage areas such as overhead cabinets, under-seat compartments, and closets for larger items. Install storage organizers like hanging shelves or collapsible bins to keep smaller items organized and easily accessible.
Next, arrange the furniture to make the most of the available space. Start by setting up the dining area, which usually consists of a table and bench seats. Place the table in the center and attach the bench seats securely to the walls. Foldable furniture is ideal for pop-up campers as it can be easily stored when not in use.
Afterward, create a comfortable sleeping area. Convert the seating area into a bed by removing the cushions and rearranging them to form a mattress. Some pop-up campers also have pull-out beds or bunk beds that can be set up. Make sure to secure the sleeping area by attaching any safety straps or bars provided.
By maximizing space and organizing storage effectively, you can transform the interior of your pop-up camper into a cozy and functional living area. Now, let’s move on to connecting utilities and hooking up to power, ensuring a comfortable camping experience.
Connect Utilities and Hook Up to Power
Once all the interior preparations are complete, it’s time to plug in and bring your pop-up camper to life by connecting utilities and tapping into the power source.
Here are the steps to connect utilities and hook up to power:
-
Locate the power hookup: Look for the electrical outlet at your campsite. It’s usually a pedestal with a designated power hookup.
-
Use the correct adapter: Depending on the power hookup, you may need an adapter to fit your camper’s electrical plug. Make sure to have the appropriate adapter on hand.
-
Connect the power cord: Take your camper’s power cord and plug it into the electrical outlet. Ensure a secure connection.
-
Test the power connection: Turn on the interior lights or plug in a small appliance to verify that the power is working correctly.
Once you have successfully connected utilities and hooked up to power, you can move on to testing and adjusting the leveling system. This ensures that your pop-up camper is stable and level, providing a comfortable camping experience.
Remember, proper setup and maintenance are crucial for an enjoyable camping trip.
Test and Adjust the Leveling System
To ensure a stable and comfortable camping experience, it’s essential to test and fine-tune the leveling system of your pop-up camper. Adjusting the leveling system and using proper stabilization techniques will help prevent any discomfort or accidents while inside the camper.
Here’s a step-by-step guide to help you with this process.
First, park your camper on a level surface. This will make it easier to adjust the leveling system accurately. Use a bubble level or an electronic leveling device to check if your camper is level. Adjust the leveling jacks or blocks accordingly to achieve a balanced position.
Next, test the stability of your camper by gently rocking it from side to side and back to front. If you notice any excessive movement, readjust the leveling system until the camper feels secure and stable.
Once you’ve achieved a stable position, it’s important to recheck the levelness of your camper. Sometimes, adjustments made during the stabilization process can affect the overall balance. Make any necessary fine-tuning to ensure the camper is perfectly level.
Now that your camper is leveled and stabilized, you can move on to the next step of arranging furniture and personal belongings. By taking the time to properly adjust the leveling system, you’ll ensure a safe and comfortable camping experience for you and your family.
Arrange Furniture and Personal Belongings
Make your camping experience truly personal and cozy by arranging the furniture and personal belongings in your pop-up camper.
One of the first things to consider is storage solutions. Utilize the available space efficiently by using collapsible storage bins, hanging organizers, and under-bed storage containers. These’ll help keep your belongings organized and prevent clutter.
Additionally, consider personalizing the space by adding decorative touches such as throw pillows, rugs, and curtains that reflect your personal style and make the camper feel like home.
When arranging the furniture, start by determining the layout that works best for your needs. Place the dining area near the kitchenette for convenience, and position the sleeping area in a comfortable spot. Consider the functionality of each piece of furniture and ensure that it can be easily folded or converted when not in use. This’ll maximize the available space and make it easier to move around inside the camper.
Once the furniture is in place, start organizing your personal belongings. Use designated storage areas for clothes, kitchen utensils, and camping gear. Label containers and drawers to make it easier to find items when needed. Remember to secure loose items during travel to prevent accidents.
Next, let’s transition to the subsequent section about checking safety and security measures.
Check Safety and Security Measures
Now that we’ve arranged our furniture and personal belongings in our pop-up camper, it’s important to check the safety and security measures before we start enjoying our camping experience. Safety should always be our top priority, so let’s take a few minutes to make sure everything is in order.
First, we need to check the emergency exits. Ensure that all windows, doors, and hatches are functioning properly and can be easily opened from the inside. It’s crucial to have a clear and accessible way to exit the camper in case of an emergency.
Next, let’s install smoke and carbon monoxide detectors. These detectors will alert us if there’s a fire or a dangerous buildup of carbon monoxide gas inside the camper. Place them in strategic locations, such as near the kitchen area and sleeping quarters, to ensure maximum safety.
Once we’ve double-checked our emergency exits and installed the detectors, we can move on to enjoying our camping experience! It’s time to relax, explore nature, and create lasting memories with our loved ones. So, let’s kick back, breathe in the fresh air, and embrace the beauty of the outdoors.
Enjoy Your Camping Experience!
Let’s savor every moment of our camping experience and soak up the great outdoors! To maximize comfort during our camping trip, it’s important to bring along some essential camping gear.
Here are a few items you should consider packing:
-
Comfortable Sleeping Gear: A good night’s sleep is essential for an enjoyable camping experience. Invest in high-quality sleeping bags or air mattresses to ensure a restful night’s sleep.
-
Camp Chairs and Tables: Having a comfortable place to sit and eat meals can make a big difference in your camping experience. Folding camp chairs and tables are lightweight and easy to transport, providing a convenient place to relax and enjoy your meals.
-
Cooking Equipment: Don’t forget to pack a portable stove, pots, pans, and utensils for cooking delicious meals in the great outdoors. Cooking over an open fire can also be a fun and memorable experience.
-
Lighting: Having proper lighting is essential for safety and convenience at the campsite. Bring along lanterns, flashlights, and headlamps to illuminate your surroundings and navigate around the campsite after dark.
By bringing these essential camping gear items, you can ensure a comfortable and enjoyable camping experience. So, let’s pack our bags and get ready to make lasting memories in the great outdoors!
Frequently Asked Questions
How do I properly level a pop-up camper?
To properly level a pop-up camper, there are a few techniques you should follow.
First, use a leveling tool to check the camper’s levelness from side to side and front to back.
Adjust the camper’s position by moving it or using leveling blocks.
Avoid common leveling mistakes such as relying on your vehicle’s suspension or using unstable materials for leveling.
Proper leveling ensures stability, prevents damage, and makes your camping experience more comfortable.
What are some tips for organizing and maximizing space in a pop-up camper?
Organizing tips and space-saving hacks are essential for making the most of your pop-up camper. To maximize space, utilize vertical storage by installing hooks or hanging organizers for items like utensils, towels, and clothes. Use collapsible containers or baskets to keep small items organized and easily accessible.
Utilize every nook and cranny by using storage bags under the seats and utilizing wall-mounted storage solutions. These tips will help you stay organized and make the most of your limited space.
How do I safely connect the propane system in a pop-up camper?
To safely connect the propane system in a pop-up camper, follow these steps.
First, ensure that the propane tanks are turned off.
Next, attach the propane hose to the tanks and tighten the connection.
Then, check for any leaks by applying a soapy water solution to the connections and looking for bubbles.
If there are no leaks, turn the propane tanks on slowly.
Finally, test the system by lighting the stove and checking for a blue flame.
Remember to always follow safety precautions when working with propane installation.
What should I do if I encounter bad weather while camping in a pop-up camper?
When encountering bad weather while camping in a pop-up camper, it’s crucial to be prepared with camping gear essentials for bad weather.
First, gather items like extra tarps, raincoats, and waterproof gear.
Next, secure and anchor the pop-up camper to prevent it from being damaged by strong winds. Use heavy-duty stakes and tie-downs to secure the camper’s corners and awning.
Finally, stay informed about the weather conditions and be ready to seek shelter if necessary.
Are there any special considerations for towing a pop-up camper?
When it comes to towing a pop-up camper, there are a few important towing tips to keep in mind.
First, make sure your vehicle is capable of safely towing the weight of the camper. Check the towing capacity of your vehicle and ensure it matches the weight of the camper.
Second, pay attention to weight distribution. Distribute the weight evenly throughout the camper and ensure it’s properly balanced. This will help with stability and handling while towing.
Conclusion
After following these step-by-step instructions, we successfully set up our pop-up camper and we’re ready to enjoy our camping experience!
It’s incredible to know that pop-up campers have been gaining popularity in recent years, with sales increasing by 15% annually.
With their versatility and affordability, it’s no wonder more and more people are choosing to embark on outdoor adventures with this convenient and comfortable option.
So go ahead, set up your pop-up camper and start creating memories in the great outdoors!

