Connect with us

Beginners Guides

How To Build A Van Camper

Published

on

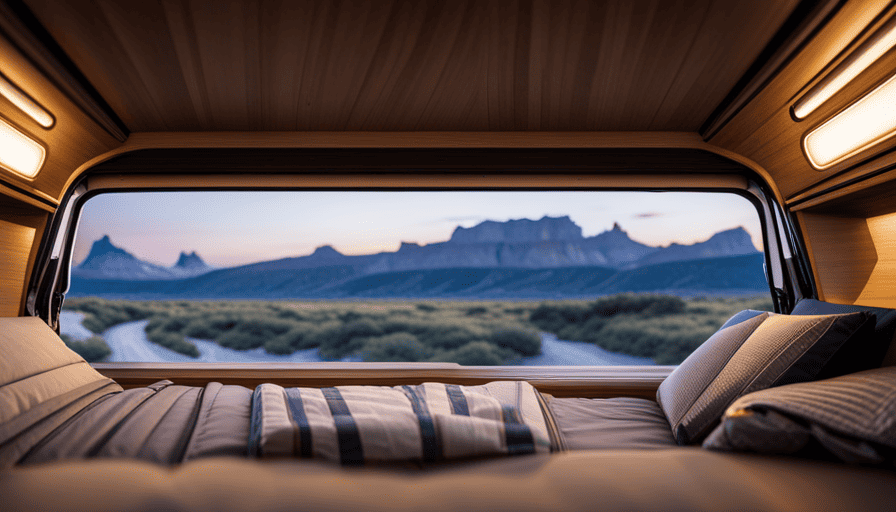
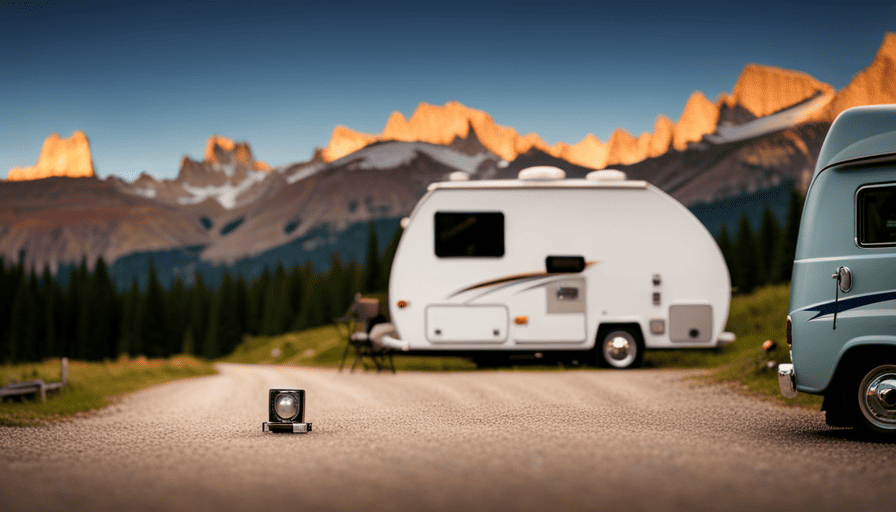
An image showcasing a spacious van interior transformed into a cozy camper

Do you ever fantasize about cruising the highways with the liberty to travel to any destination that calls to you? I’m here to assure you that it’s not merely a fantasy – it’s absolutely achievable! Constructing your own camper van is the ideal method to make that dream come true.

Imagine having your own cozy, comfortable space on wheels, with all the amenities you need to live life on the road. From a kitchen area to a comfortable bed, you can create the ultimate home away from home.

In this article, I’ll take you through the step-by-step process of building your very own van camper. We’ll start by choosing the right van for your needs, then move on to planning your layout and design. From there, we’ll insulate and install flooring, build and install furniture, and even create storage solutions.

By the end of this article, you’ll have all the knowledge and confidence you need to build your own van camper and start living your dream of adventure on the road.

So, let’s get started!

Advertisement
728x90 4

Key Takeaways

  • Building your own van camper is a customizable and budget-friendly option for adventure on the road.
  • Proper insulation, flooring, and furniture are essential for creating a functional living space.
  • Designing a solar power setup allows for off-grid living and independence.
  • Creating efficient storage solutions and incorporating personal touches enhance the overall experience of van camper living.

Choose the Right Van

Choosing the right van is crucial for creating your dream camper, so don’t rush the decision! When it comes to van campers, there are a variety of customization options available, allowing you to create a space that suits your unique needs and preferences.

Before diving into the world of van conversions, it’s important to consider your budget. Vans come in different sizes and models, each with its own price range. Assess your financial situation and determine how much you’re willing to spend on the van itself, as well as the conversion process.

Additionally, think about the layout and design you envision for your camper. Do you want a cozy sleeping area, a functional kitchenette, or ample storage space? Consider your lifestyle and the activities you plan to do while on the road. This will help you determine the size and type of van that’ll best accommodate your needs.

Once you’ve chosen the right van, you can begin planning your layout and design. This involves mapping out where each component will go, such as the bed, kitchen, and bathroom. By carefully considering these factors, you can create a camper that maximizes space and functionality.

So, let’s move on to the next step and start planning your dream camper’s layout and design.

Plan Your Layout and Design

Once you’ve envisioned the perfect layout, let your imagination run wild as you map out the design of your dream mobile sanctuary. Design considerations and space optimization are crucial when planning the layout of your van camper. You want to make the most of the limited space available while creating a functional and comfortable living area.

Advertisement
728x90 4

To help you visualize your design, consider creating a table with three columns and four rows. In the first column, list the different areas of your van, such as the kitchen, sleeping area, bathroom, and storage. In the second column, jot down the specific features and equipment you want in each area. And in the third column, note any design or layout considerations you need to keep in mind.

For example, in the kitchen area, you might want to include a small sink, a compact stove, and ample storage for utensils and cookware. Consider how you’ll optimize the space by using foldable or multipurpose furniture and incorporating storage solutions like overhead cabinets or under-bed compartments.

Once you have your layout and design planned out, you can move on to the next step of insulating and installing flooring in your van camper.

Transitioning to the subsequent section about insulating and installing flooring, it’s important to ensure your van camper is well-insulated to keep it comfortable in all weather conditions.

Insulate and Install Flooring

To create a cozy and comfortable mobile sanctuary, be sure to insulate your van camper properly and install durable flooring.

Advertisement
728x90 4

Insulation is crucial to regulate the temperature inside the van and minimize noise. There are various insulation materials you can use, such as spray foam, rigid foam boards, or insulation blankets. Consider the R-value, which measures the material’s ability to resist heat flow, and choose the one that suits your needs.

When it comes to flooring options, you have a few choices depending on your preferences and budget. One popular option is vinyl flooring, which is easy to clean, waterproof, and durable. Another option is laminate flooring, which mimics the look of hardwood but is more affordable and resistant to scratches. If you prefer a more natural and rustic feel, consider hardwood or bamboo flooring, which can add warmth and character to your van.

Once you have insulated and chosen your flooring, you can move on to building and installing furniture. By utilizing the space efficiently, you can create a functional living area that meets your specific needs and enhances your van camper experience.

Build and Install Furniture

When you construct and install furniture in your mobile sanctuary, you can create a personalized and functional living space that caters to your specific needs and enhances your overall experience.

One of the most important pieces of furniture in a van camper is the bed. To build and install a bed, start by measuring the dimensions of your van and then designing a bed frame that fits perfectly. You can use plywood and 2×4 lumber to construct a sturdy frame. Make sure to secure it to the walls or floor of the van for added stability. Once the frame is built, you can add a comfortable mattress and bedding to complete your sleeping area.

Advertisement
728x90 4

In addition to the bed, it’s also essential to design and build a seating area in your van camper. This area can serve as a place to relax, eat, and even work. You can use a combination of benches and folding chairs to maximize space efficiency. Consider using lightweight materials like plywood or aluminum for the construction of the seating area. Don’t forget to include storage compartments underneath the seats to make the most of the available space.

With the bed and seating area constructed and installed, you can now move on to the next step of your van camper conversion: installing the electrical system. By following these steps, you’ll be well on your way to creating a comfortable and functional home on wheels.

Install Electrical System

Now it’s time to bring your mobile sanctuary to life with the installation of an electrical system. Designing a solar power setup for your van camper is a great way to harness renewable energy and live off the grid.

Start by calculating your power needs and determining the size of your solar panels and battery bank. Consider the appliances and devices you plan to use, such as lights, a refrigerator, and charging ports for electronics.

Once you have a design in mind, secure the solar panels to the roof of your van using mounting brackets. Next, wire the panels to a charge controller, which regulates the flow of electricity and prevents overcharging.

Advertisement
728x90 4

Connect the charge controller to your battery bank, which stores the solar energy for later use. To power your appliances and devices, install an inverter to convert the DC power from the battery bank to AC power.

Finally, ensure all wiring connections are secure and protected from damage. With your electrical system in place, you’ll be ready to enjoy the comforts of home during your van adventures.

Speaking of comforts, the next section will cover how to include a plumbing and water system in your camper.

Include Plumbing and Water System

Create a comfortable and convenient living space in your mobile sanctuary by incorporating a plumbing and water system. When it comes to plumbing installation in your van camper, it’s important to plan the layout carefully.

Start by installing a fresh water tank, which can be located underneath the van or inside a cabinet. Connect the tank to a water pump that’ll provide a steady flow of water to your fixtures. Install a sink with a small drain tank to collect wastewater. Consider using flexible PEX piping for your water supply lines, as it’s durable and easy to work with.

Advertisement
728x90 4

To ensure proper water system maintenance, regularly check for leaks and make sure all connections are secure. It’s also important to properly winterize your water system to prevent freezing during colder months. This can be done by draining the water tank and pipes, and adding antifreeze to the system.

Now that you have your plumbing and water system in place, it’s time to create storage solutions that maximize the use of space in your van camper. By incorporating clever storage solutions, you can keep your belongings organized and easily accessible while on the road.

Create Storage Solutions

Maximize the use of space in your mobile sanctuary by ingeniously designing storage solutions that seamlessly blend functionality and style.

When building a van camper, it’s crucial to prioritize maximizing space and organizing essentials. With limited square footage, every inch counts, and efficient storage solutions can make all the difference.

Start by assessing your needs and identifying the items you can’t live without. This’ll help you determine the type and size of storage units you require.

Advertisement
728x90 4

Utilize every nook and cranny by installing overhead cabinets, under-bed storage compartments, and built-in shelves. Consider using stackable containers or collapsible storage bins that can be easily tucked away when not in use.

Another clever idea is to incorporate multi-purpose furniture that doubles as storage. For example, a bench seat with a hidden storage compartment or a bed with drawers underneath. You can also hang hooks and organizers on the walls or doors to keep smaller items within reach.

Maximizing space also means utilizing vertical storage. Install shelving units that go all the way up to the ceiling, or use hanging storage systems to make use of unused wall space. Additionally, make use of the space above your cab by installing a roof rack for larger items like bikes or surfboards.

By incorporating these storage solutions into your van camper design, you can efficiently organize your essentials and maximize your living space. After all, a clutter-free and well-organized interior is a key factor in creating a comfortable and inviting mobile living space.

Add Comfort and Decor

Enhance your mobile sanctuary by incorporating elements of comfort and stylish decor. When it comes to van camping, creating a cozy and inviting space is essential.

Advertisement
728x90 4

One way to achieve this is by adding lighting options that not only illuminate the interior but also create a warm ambiance. Consider installing LED strip lights along the walls or ceiling to provide a soft glow. You can also incorporate personal style by choosing unique light fixtures or string lights that reflect your taste.

In addition to lighting, don’t forget about the importance of comfort. Invest in a quality mattress or foam topper to ensure a good night’s sleep. Add soft pillows, blankets, and curtains to create a snug atmosphere. Incorporating personal touches such as colorful throw rugs or decorative wall art can also make your van feel like home.

As you focus on adding comfort and decor, keep in mind the next step: installing appliances and creating a kitchen area. By seamlessly transitioning from enhancing the aesthetics to practical functionality, you can create a van camper that’s both comfortable and functional.

Install Appliances and Kitchen Area

Establish an efficient and equipped culinary corner to elevate your van camping experience. When it comes to installing appliances and creating a functional kitchen area in your van camper, space optimization is key. Here are four essential elements to consider:

  • Compact Refrigerator: Invest in a small yet efficient refrigerator to keep your food and drinks fresh during your van adventures. Look for one with adjustable shelves and a built-in freezer compartment.

  • Portable Stove: Opt for a portable stove that runs on propane or butane. These stoves are lightweight, easy to use, and perfect for cooking your favorite meals on the road.

  • Sink and Water System: Install a compact sink with a hand pump or electric faucet to ensure easy access to water for cooking and cleaning. Consider a water storage tank and a greywater disposal system for convenience.

  • Storage Solutions: With limited space, it’s crucial to have smart storage options. Install shelves, hooks, and compartments to keep your kitchen utensils, cookware, and pantry items organized and easily accessible.

To maintain your appliances, regularly check for leaks, clean the filters, and inspect the connections. By establishing an efficient kitchen area and properly maintaining your appliances, you’ll ensure a smooth and enjoyable van camping experience.

Advertisement
728x90 4

As you finalize and test your van camper, make sure all the appliances are functioning properly and the kitchen area is fully equipped for your adventures.

Finalize and Test Your Van Camper

Now it’s time to put the finishing touches on your converted vehicle and ensure everything’s in working order for your upcoming adventures on the road. One of the most important aspects of finalizing your van camper is testing the safety features and conducting a maintenance checklist.

First and foremost, it’s crucial to test all the safety equipment in your van camper. This includes checking the functionality of smoke detectors, carbon monoxide detectors, and fire extinguishers. Make sure they’re all properly installed and in good working condition. Additionally, test the functionality of all the windows, doors, and locks to ensure they’re secure and can be easily opened and closed.

Next, it’s essential to perform a thorough maintenance checklist. This involves inspecting the engine, checking the fluid levels, and ensuring all the lights are functioning properly. Don’t forget to inspect the tires for any signs of wear or damage, and check the tire pressure to ensure they’re properly inflated. Additionally, inspect the electrical system, including the battery and all wiring connections.

By testing the safety features and conducting a maintenance checklist, you can have peace of mind knowing that your van camper’s in optimal condition for your upcoming road trips. Prioritizing safety and maintenance will help ensure a smooth and enjoyable journey.

Advertisement
728x90 4

Frequently Asked Questions

How much does it cost to convert a van into a camper?

Converting a van into a camper can vary in cost depending on several factors. A cost breakdown typically includes expenses for insulation, flooring, electrical system, plumbing, furniture, and appliances.

To find affordable materials, I recommend checking out local salvage yards, thrift stores, and online marketplaces for used items. Additionally, joining online forums and groups dedicated to van conversions can provide helpful advice and resources for cost-effective options.

Don’t forget to budget for tools and any professional help if needed.

What are the legal requirements for converting a van into a camper?

When converting a van into a camper, it’s important to consider the legal requirements and insurance coverage.

Legal requirements may vary depending on your location, but typically involve obtaining a special vehicle registration or classification as a motorhome. This may require certain features like sleeping accommodations, cooking facilities, and a water supply.

Advertisement
728x90 4

Insurance coverage is also crucial, as you’ll need to ensure your converted camper is adequately covered for both liability and property damage.

How long does it typically take to convert a van into a camper?

Converting a van into a camper can be a time-consuming project, but with proper time management, it can be done efficiently.

The duration of the conversion process can vary depending on the complexity of the design and the skill level of the builder.

Common challenges include sourcing materials, electrical and plumbing installations, and ensuring structural integrity.

It’s important to set realistic expectations and allocate enough time to complete the project to your satisfaction.

Advertisement
728x90 4

Can I convert any type of van into a camper?

Yes, you can convert any type of van into a camper with the right van conversion tips. However, some vans are better suited for camper conversion than others. The best vans for camper conversion are typically those with a high roof, ample space for sleeping and storage, and good fuel efficiency. Popular choices include the Mercedes Sprinter, Ford Transit, and Ram Promaster. These vans provide a solid foundation for creating a comfortable and functional camper.

Are there any safety considerations I should keep in mind when converting a van into a camper?

Safety is paramount when converting a van into a camper. To ensure your well-being, consider a few vital safety measures.

First, install smoke and carbon monoxide detectors to keep you safe from potential hazards.

Second, choose insulation options that are both effective and fire-resistant. This will help regulate temperature and prevent any accidents.

Remember, prioritizing safety is key when creating your dream van camper. Don’t compromise on protecting yourself and your loved ones.

Advertisement
728x90 4

What Are the Similarities and Differences Between Building a Camper and a Van Camper?

Building a camper and a van camper have similarities and differences. When you build your own camper, you have more freedom to customize the layout and design. However, a van camper offers better maneuverability and versatility for travel. Consider your needs and preferences before embarking on the exciting journey to build your own camper.

Conclusion

In conclusion, building a van camper is an exciting and rewarding project that requires careful planning and attention to detail. By choosing the right van, designing a practical layout, and installing necessary systems, you can create a comfortable and functional home on wheels.

It may seem like a daunting task, but with a little creativity and determination, you can transform a simple van into a cozy sanctuary. So roll up your sleeves, grab your tools, and get ready to embark on this incredible journey of van conversion.

Happy camping!

Advertisement
728x90 4
Continue Reading
Advertisement

Beginners Guides

How To Mount A Tv In A Camper

Published

on

By

An image showcasing a camper interior with a TV mounted securely on the wall

Adding a TV to your RV can greatly enhance your outdoor adventures by providing entertainment and a way to relax after a day of exploring. Just like a compass guides you through unfamiliar terrain, this comprehensive guide will help you easily navigate the installation process.

With the right tools and materials at hand, you can transform your camper into a portable entertainment hub. From assessing the layout of your camper to securing loose cables and wires, every step is crucial to ensure a safe and enjoyable TV mounting experience.

Whether you’re a seasoned camper or a novice explorer, this article will walk you through each stage, empowering you to take control of your outdoor entertainment. So, grab your tools and let’s embark on a journey to mount a TV in your camper – a journey that will bring comfort and joy to your camping adventures.

Key Takeaways

  • Assess the layout of the camper to find the perfect spot for mounting the TV, considering space, viewing angles, and obstructions.
  • Gather the necessary tools and materials, such as a mounting bracket designed for the TV model and camper type, appropriate screws and anchors, a power drill, and a screwdriver.
  • Carefully attach the mounting bracket to the wall, ensuring accurate placement by marking and drilling pilot holes before securing the bracket.
  • Mount the TV onto the bracket, aligning the mounting holes and tightening the screws to securely attach the TV. Adjust the angle of the TV for optimal viewing.

Assess the Layout of Your Camper

Take a moment to assess the layout of your camper and envision the perfect spot to mount your TV for the ultimate entertainment experience on the road.

Start by assessing the available space in your camper. Look for a wall or surface that can accommodate the size and weight of your TV. Consider the viewing angles and make sure the spot you choose allows for comfortable viewing from different areas in the camper.

Additionally, take into account any obstructions such as windows, cabinets, or appliances that may affect the visibility of the TV.

Advertisement

728x90 4

Optimizing the layout is crucial for a successful TV mount installation. Consider the height at which you want the TV to be mounted. It should be at eye level when seated in the typical viewing area. Take measurements to ensure the TV will fit in the chosen spot and that there is enough clearance for any necessary cables or connections.

Once you have assessed the space and optimized the layout, it’s time to gather the necessary tools and materials for the installation.

Gather the Necessary Tools and Materials

To successfully mount a TV in your camper, you’ll need a few essential tools and materials.

First, you’ll need a mounting bracket specifically designed for your TV model and camper type. This bracket will ensure a secure and stable installation.

Next, you’ll need screws and anchors suitable for the type of wall or surface you’ll be mounting the TV on. These will provide the necessary support and prevent the TV from falling.

Advertisement

728x90 4

Lastly, a power drill and screwdriver will be required to attach the bracket and screws securely. These tools will allow you to drill pilot holes and tighten the screws effectively for a professional-looking installation.

Mounting Bracket

Grab a cold one and let me show you how easy it is to slap that TV on a mounting bracket in your camper! When it comes to the mounting bracket, you have a few options to choose from. Take a look at the table below to compare the different options based on their weight capacity and features:

Bracket Type Weight Capacity Features
Fixed Up to 100 lbs Simple and sturdy design
Tilting Up to 75 lbs Allows for vertical adjustment
Full Motion Up to 50 lbs Provides full range of motion

Now that you have an idea of the different mounting options, you can choose the one that best suits your needs. Once you’ve selected the bracket, we can move on to the next step of securing it to the wall using screws and anchors.

Screws and Anchors

Now let me walk you through how easily you can secure the mounting bracket to the wall using screws and anchors.

When it comes to screws and anchors, there are a few alternatives you can consider. For lightweight TVs, you can use plastic anchors and screws that are specifically designed for drywall. These are easy to install and provide sufficient support. However, for heavier TVs, it’s recommended to use toggle bolts or molly bolts, which offer better weight-bearing capacity.

Advertisement

728x90 4

Before deciding on the type of screw and anchor to use, make sure to consider the weight of your TV to ensure proper support. Once you’ve selected the appropriate screws and anchors, you can proceed to attach the mounting bracket to the wall.

Now, let’s move on to the next step, which involves using a power drill and screwdriver.

Power Drill and Screwdriver

Using a power drill and screwdriver is a piece of cake when it comes to securing the mounting bracket to the wall. However, before using any power tool, it is crucial to prioritize power drill safety. Always wear safety goggles and gloves to protect yourself from flying debris. Additionally, make sure the power drill is in good condition and the battery is fully charged. Now, let’s talk about choosing the right screws for the job. For mounting a TV in a camper, it’s important to use screws that are long enough to securely hold the weight of the TV and mounting bracket. Look for screws that are at least 2 inches in length and have a diameter that matches the mounting holes on the bracket. This will ensure a strong and secure installation. Moving on to the next step, let’s install the mounting bracket securely onto the wall.

Install the Mounting Bracket

To install the mounting bracket, the first step is to mark the drill holes on the wall where the bracket will be attached. Use a level to ensure the bracket will be straight.

Next, drill pilot holes into the marked spots to make it easier to screw in the mounting screws.

Advertisement

728x90 4

Finally, attach the bracket to the wall by aligning the drilled holes with the mounting screws and tightening them securely.

Mark the Drill Holes

First things first, let’s grab our marker and carefully mark the drill holes for mounting the TV in your camper. To ensure accurate placement, it’s crucial to use proper drilling techniques and precise measurements. Here’s a step-by-step guide to marking the drill holes:

Step Instructions
1 Measure and mark the desired height for your TV mount on the wall.
2 Use a level to ensure the mark is straight and aligned with your viewing preference.
3 Locate the studs behind the wall using a stud finder and mark their positions.
4 Determine the spacing between the mounting holes on the TV bracket and mark them accordingly.

By carefully following these steps, you’ll have the drill holes accurately marked for mounting your TV. Now, let’s move on to the next section and learn how to drill pilot holes for a secure installation.

Drill Pilot Holes

Before drilling pilot holes, make sure to properly mark the drill holes on the wall. This ensures accuracy and prevents any mistakes during the mounting process. Now, let’s move on to drilling pilot holes.

  1. Begin by preparing the wall surface where you’ll be mounting the TV bracket. Clean the area and remove any dust or debris.

  2. Choose the right screws for your camper wall. Make sure they’re suitable for the type of wall material and capable of supporting the weight of your TV.

  3. Hold the bracket against the marked drill holes and align it properly.

  4. Using a drill bit slightly smaller than the screws, carefully drill pilot holes at the marked spots. Be cautious not to drill too deep or damage the wall.

With the pilot holes drilled, we’re now ready to attach the bracket to the wall securely.

Advertisement

728x90 4

Attach the Bracket to the Wall

Once you’ve successfully drilled the pilot holes, it’s time to securely attach the bracket to the wall, giving your TV a sturdy and reliable foundation.

Before you begin, make sure you’ve chosen the appropriate mounting option for your camper. There are various types of TV brackets available, such as fixed, tilting, or full-motion brackets. Consider the weight capacity of the bracket and ensure it can support the weight of your TV.

Start by holding the bracket against the wall in the desired position. Use a level to make sure it’s perfectly straight. Mark the screw hole locations with a pencil.

Next, use the appropriate screws and a screwdriver or drill to secure the bracket to the wall. Make sure the screws are tight and the bracket is securely attached.

Now that the bracket is in place, you’re ready to mount the TV onto it, which we’ll discuss in the next section.

Advertisement

728x90 4

Mount the TV onto the Bracket

To securely attach the TV to the bracket, you’ll need to carefully align the mounting holes with the corresponding slots on the back of the TV. Start by placing the TV face down on a soft surface to avoid scratching the screen.

Locate the mounting holes on the back of the TV and align them with the holes on the bracket. Insert the screws into the holes and tighten them using a screwdriver. Make sure the screws are secured tightly to ensure the TV stays in place.

Once the TV is mounted onto the bracket, you can adjust the screen angle to your desired position. Most brackets allow for tilting and swiveling, so you can achieve the optimal viewing angle. Use the adjustment knobs or levers on the bracket to make these adjustments. Take your time to find the perfect angle that suits your needs.

In addition to mounting the TV, it’s important to consider cable management techniques. Start by routing the cables through the cable management clips or channels on the bracket. This will help keep the cables organized and prevent them from tangling or getting in the way. Use zip ties or cable wraps to secure the cables in place.

With the TV securely mounted and the cables managed, you can now move on to connecting the cables and power source. This step will ensure that your TV is ready for use in your camper.

Advertisement

728x90 4

Connect the Cables and Power Source

To connect the cables and power source for your mounted TV in a camper, first, locate the HDMI and audio cables.

Connect one end of the HDMI cable to the HDMI port on the TV and the other end to the HDMI port on your media device.

Next, connect the audio cables from the media device to the audio input on the TV.

Finally, plug in the power cord for the TV into a nearby power outlet or use an extension cord if necessary.

Ensure all connections are secure before powering on the TV.

Advertisement

728x90 4

HDMI and Audio Cables

Make sure you have the right HDMI and audio cables for your camper TV setup, so you can enjoy your favorite shows and movies on the road!

When it comes to HDMI cable management, it’s important to choose a cable that is long enough to reach from your TV to the source device, such as a DVD player or streaming device. Measure the distance and select a cable with the appropriate length to avoid any tangles or strain on the cables.

In addition, consider using cable management solutions, such as cable ties or adhesive clips, to keep the cables neat and organized. Another important aspect is the audio cable length. Ensure that the audio cable is long enough to connect your TV to any external speakers or sound systems in your camper.

With the right cables and proper cable management, you can create a seamless entertainment experience in your camper.

Now, let’s move on to the next step, which is connecting the power cord.

Advertisement

728x90 4

Power Cord

Now that we’ve covered HDMI and audio cables, let’s move on to the power cord for mounting a TV in a camper.

When it comes to power cord options, there are a few things to consider. First, determine the length of the cord you’ll need to reach the nearest power source. Second, decide if you want a detachable power cord or a fixed one. Detachable cords offer more flexibility, but fixed cords can be more secure.

Once you’ve chosen the right power cord, it’s important to think about cable management. Use cable clips or zip ties to keep the cord neatly secured along the wall or furniture. This will prevent any tripping hazards and give your camper a clean appearance.

With the power cord in place, we can now move on to adjusting and positioning the TV for optimal viewing.

Adjust and Position the TV

First, find the perfect spot and adjust the TV like a puzzle piece, sliding it gently into place until it fits snugly on the mount. To ensure optimal viewing experience, it’s crucial to adjust the screen brightness. Locate the brightness control on the TV or use the remote to navigate to the settings menu. Increase or decrease the brightness level according to your preference. Remember, a comfortable viewing experience is essential during long trips.

Advertisement

728x90 4

Next, position the TV at eye level for maximum comfort. This’ll prevent neck strain and provide a more enjoyable viewing experience. Adjust the mount’s height or angle until the TV is directly at eye level. Ensure that the mount is securely fastened to avoid any accidents while the camper is in motion.

Once the TV is in the perfect position, it’s time to test it and adjust the settings. Turn on the TV and navigate through the menu to fine-tune the picture and sound settings. Adjust the contrast, color, and sharpness to your liking. Don’t forget to set the sound to an appropriate level for your surroundings.

By following these steps, you can easily adjust and position the TV in your camper. Now, let’s move on to the next section and test the TV settings to ensure an optimal viewing experience.

Test the TV and Adjust Settings

To truly enhance your viewing experience, it’s time to put the TV to the test and fine-tune its settings, ensuring every detail on the screen comes to life. First, test different TV settings to find the optimal picture quality. Use the remote control to access the TV’s menu and explore options such as brightness, contrast, color, and sharpness. Adjust these settings to your preference, but keep in mind that overly vibrant colors or excessive sharpness can distort the image.

To troubleshoot common TV mounting issues, refer to the following table:

Advertisement

728x90 4
Problem Possible Solution
TV not turning on Check power connection and ensure the TV is properly plugged in. Try a different outlet.
No sound Ensure the TV’s volume is turned up and not muted. Check audio cables for any loose connections.
Poor signal reception Adjust the antenna or consider using a signal booster. Check cable connections for any damage.
Picture not centered or aligned Access the TV’s settings menu and use the remote to adjust the picture position, size, and alignment.

Once you have tested the TV and adjusted the settings, it’s time to secure loose cables and wires to ensure a clean and organized setup.

Secure Loose Cables and Wires

Once you’ve adjusted the TV settings, take a moment to secure any loose cables and wires. This will create a neat and organized setup that resembles a well-tailored suit. Proper cable management not only enhances the visual appeal of your mounted TV but also ensures safety and prevents potential damage to the cables.

To hide the cables, start by identifying the best path to route them. Look for existing holes or channels in the walls or cabinets that can accommodate the cables. If necessary, use a stud finder to locate the studs and avoid drilling into them.

Once you have determined the path, use cable clips or adhesive cable management channels to secure the cables along this route. These clips and channels can be easily attached to the walls or furniture using screws or adhesive backing.

Make sure to leave enough slack in the cables to allow for movement of the TV or any future adjustments. Once all the cables are neatly secured, you can move on to considering additional features and accessories for your camper TV setup.

Advertisement

728x90 4

Consider Additional Features and Accessories

When considering additional features and accessories for mounting a TV in a camper, there are two key points to keep in mind: the sound system or speakers, and the TV mounting arm or bracket.

For a complete entertainment experience, it’s important to invest in a good quality sound system or speakers that can enhance the audio output of the TV.

Additionally, selecting the appropriate TV mounting arm or bracket is crucial to ensure secure and stable installation, allowing for easy adjustment and optimal viewing angles.

Sound System or Speakers

Imagine enjoying your favorite tunes on the road with a top-notch sound system or speakers in your camper! To enhance your audio experience, consider adding wireless speakers with Bluetooth connectivity. Here’s why they’re a must-have for your camper:

  1. Convenience: Wireless speakers eliminate the hassle of tangled cords and allow for easy placement anywhere in your camper.

  2. Versatility: With Bluetooth connectivity, you can easily connect your smartphone or other devices to the speakers, giving you access to a wide range of music options.

  3. Portability: Wireless speakers are compact and lightweight, making them easy to carry and move around as needed.

Now that you have a fantastic sound system in place, it’s time to move on to the next step: choosing a TV mounting arm or bracket.

Advertisement

728x90 4

TV Mounting Arm or Bracket

Now that we have discussed the sound system or speakers for your camper, let’s move on to the next step: choosing the right TV mounting arm or bracket. When it comes to mounting your TV in a camper, there are a few options to consider. One popular choice is a full-motion TV mount, which allows you to adjust the viewing angle and position of the TV. This is especially useful if you have limited space or want to watch TV from different areas of the camper. Another option is a fixed TV mount, which securely holds the TV in place without any movement.

To help you compare these options, here is a table outlining their features:

TV Mounting Option Features
Full-Motion TV Mount Adjustable viewing angle and position
Fixed TV Mount Securely holds TV in place without movement

When installing your chosen TV mount, make sure to follow the manufacturer’s instructions carefully. Ensure that the mount is securely attached to a sturdy part of the camper’s wall or ceiling. Use appropriate tools and hardware to ensure a safe and stable installation.

With the TV mounting arm or bracket in place, you’re now ready to move on to the next step: enjoying your outdoor entertainment.

Enjoy Your Outdoor Entertainment

To fully enjoy your outdoor adventures, you’ll want to mount a TV in your camper. When it comes to outdoor TV placement, it’s important to consider the weather conditions and choose weatherproof TV options.

Advertisement

728x90 4

First, you’ll need to select a suitable location for your outdoor TV. Look for a spot that provides a clear view while considering the angle and distance from your seating area. Make sure there aren’t any obstructions that could block the view or cause damage to the TV.

Next, choose a weatherproof TV that can withstand the elements. Look for TVs with an IP rating of at least IP65, which ensures protection against dust and water. These TVs are designed to withstand rain, humidity, and temperature fluctuations, making them perfect for outdoor use.

Once you have your TV, it’s time to mount it in your camper. Start by attaching the mounting bracket to the back of the TV using the provided screws. Make sure the bracket’s securely attached.

Then, locate the desired mounting spot in your camper and mark the holes for the brackets. Drill pilot holes and attach the brackets securely to the camper wall using screws.

Carefully lift the TV and slide it onto the brackets. Make sure it’s securely in place before releasing it. Adjust the angle of the TV for optimal viewing and tighten any screws or bolts as needed.

Advertisement

728x90 4

Now you’re all set to enjoy your outdoor entertainment in your camper!

Frequently Asked Questions

How do I determine the appropriate size of the TV for my camper?

To determine the appropriate size TV for your camper, consider the available space and viewing distance.

Measure the area where you plan to mount the TV, ensuring it fits without obstructing any important components.

Determine the optimal viewing distance by multiplying the TV’s diagonal measurement by 1.5. This will provide a comfortable viewing experience.

Additionally, ensure the TV mount is compatible with your camper by checking its weight capacity and VESA mounting pattern.

Advertisement

728x90 4

Can I mount a TV in any area of my camper, or are there specific locations that are better suited?

When considering mounting options for a TV in a camper, it’s important to keep in mind weight restrictions and the overall layout of the space. Certain locations may be better suited for mounting a TV, such as a sturdy wall or cabinet.

Ensure that the chosen area can support the weight of the TV and any additional mounting hardware. It’s also crucial to consider cable management and accessibility for viewing angles.

What are the different types of mounting brackets available, and how do I choose the right one for my TV and camper?

When choosing a TV mounting bracket for your camper, it’s important to consider the different types available.

There are three common types: fixed, tilting, and full-motion. Fixed brackets are ideal for a stable and secure installation.

Tilting brackets allow you to adjust the angle of the TV for optimal viewing.

Advertisement

728x90 4

Full-motion brackets offer the most flexibility, allowing you to swivel and tilt the TV in any direction.

Consider the size and weight of your TV, as well as the mounting surface in your camper, before selecting the appropriate bracket.

Are there any special considerations or precautions I should take when mounting a TV in a camper?

When mounting a TV in a camper, there are a few special considerations to keep in mind. Firstly, make sure to plan the wiring route carefully and use appropriate cables for a safe and reliable connection. Secondly, opt for a sturdy and adjustable mount that can withstand the constant motion and vibrations that occur while driving.

Remember to take into account the impact of vibrations and movement on the TV mount. This will ensure that the TV remains securely in place while on the road.

How can I ensure a stable and secure installation of the TV mount in my camper?

To ensure a stable and secure installation of the TV mount in my camper, I first take stability precautions. I carefully assess the wall structure, ensuring it can support the weight of the TV.

Advertisement

728x90 4

Then, I gather the necessary installation tools: a stud finder, level, drill, and screws. After locating the studs, I mark their positions and attach the mount securely.

This meticulous process guarantees a rock-solid TV installation in my camper.

Conclusion

In conclusion, mounting a TV in a camper is a straightforward process that can greatly enhance your outdoor entertainment experience. By carefully assessing the layout of your camper and gathering the necessary tools and materials, you can easily install a mounting bracket and securely mount your TV.

Connecting the cables and power source, adjusting the settings, and securing any loose cables and wires will ensure a seamless viewing experience. And with additional features and accessories, such as a soundbar or streaming device, your camping trips will reach new levels of entertainment.

So, get ready to be blown away by the ultimate movie nights under the stars!

Advertisement

728x90 4
Continue Reading

Beginners Guides

How To Drain Camper Water Heater

Published

on

By

An image showing a person wearing gloves and using a wrench to detach the drain plug at the bottom of a camper water heater

Hello, fellow lovers of the outdoors! When it comes to camping trips, our reliable camper water heater is like a warm embrace on chilly mornings, providing us with hot showers and cozy evenings. Just like any other equipment, it needs regular maintenance to keep it running at its best.

Today, I’ll guide you through the step-by-step process of draining your camper water heater, ensuring its longevity and optimal performance.

To embark on this journey, you’ll need a few tools and supplies, including a hose and a wrench.

We’ll start by turning off the power and water supply, followed by locating and opening the drain valve.

Connecting the hose to the drain valve and positioning the other end properly, we’ll let the water flow freely, ensuring a thorough draining process.

Advertisement

728x90 4

After closing the drain valve and pressure relief valve, we’ll flush the tank with fresh water, eliminating any sediment or impurities.

Finally, we’ll turn on the power and water supply, allowing our water heater to be ready for our next adventure.

So, grab your tools and let’s dive into the world of draining camper water heaters – a simple yet vital task that will keep your camping experiences warm and worry-free.

Key Takeaways

  • Regular maintenance, including draining the water heater, is necessary for optimal performance.
  • Draining the water heater involves turning off power and water supply, shutting off propane or gas supply, and opening the drain valve.
  • Flushing the water heater helps remove sediment and debris, ensuring longevity and efficiency.
  • To turn on the water heater, the power switch and water supply valve must be turned on, and proper functioning should be checked for leaks.

Gather the Necessary Tools and Supplies

You’ll need to gather all the tools and supplies before you can start draining your camper water heater, so make sure you’re fully prepared to take on this task and embrace the sense of self-reliance that comes with it.

To successfully drain your camper water heater, you’ll need a few necessary tools. First, grab a pair of pliers to loosen any tight connections. You’ll also need a bucket or a hose to catch the water as it drains. Additionally, have a towel or rag handy to clean up any spills or drips.

Now that you have all the necessary tools, let’s go through the step-by-step instructions to drain your camper water heater.

Advertisement

728x90 4

Start by turning off the power supply to the water heater. This can usually be done by flipping the breaker switch labeled for the water heater.

Next, locate the water supply valve and turn it off. This will stop the flow of water into the heater.

With the power and water supply turned off, you’re ready to move on to the next step of draining your camper water heater.

Turn Off the Power and Water Supply

To start the process, simply shut off both the power and water sources. Shutting off the power and water supply to the camper water heater is an important step to ensure safety and prevent any accidents.

Here are some precautions to take while draining the water heater:

Advertisement

728x90 4
  • Make sure the camper is unplugged or the circuit breaker for the water heater is turned off. This will prevent any electrical shocks during the process.
  • Turn off the propane or gas supply to the water heater. This is crucial to avoid any potential gas leaks.
  • Close the cold water inlet valve to stop the flow of water into the heater. This will prevent new water from entering the tank while you are draining it.
  • Open a hot water faucet inside the camper to relieve any pressure in the system. This will help the water drain more easily.
  • Place a bucket or a drain pan under the drain valve to collect the water as it is being drained.

Now that the power and water supply have been shut off, the next step is to locate and open the drain valve. This will allow the water to flow out of the water heater and prepare it for further maintenance.

Locate and Open the Drain Valve

After shutting off the power and water supply, it is essential to identify and open the drain valve to allow for the release of accumulated fluids. The drain valve is typically located at the bottom of the water heater tank. To locate it, refer to the manufacturer’s instructions or consult the owner’s manual. Once found, use caution when opening the valve as hot water may still be present. To open the drain valve, turn it counterclockwise using a wrench or pliers. This will create a pathway for the water to flow out of the tank and into a designated drainage area.

Regular water heater maintenance is crucial to ensure optimal performance and avoid potential issues. By draining the camper water heater regularly, you can prevent the accumulation of sediment and mineral deposits, which can lead to decreased efficiency and potential damage. Additionally, draining the water heater allows for the inspection of the tank and other components, making it easier to identify and troubleshoot common water heater issues.

In the subsequent section, we will discuss how to attach a hose to the drain valve for easy and efficient drainage.

Attach a Hose to the Drain Valve

Before attaching a hose to the drain valve, it’s important to locate and open the valve to release any accumulated fluids. Once the valve is open, follow these steps to attach a hose to the drain valve:

  1. Select a hose that’s long enough to reach a suitable drainage area. This’ll prevent any water from pooling around the camper.

  2. Ensure that the hose is securely attached to the drain valve. This’ll prevent any leaks and ensure that all water is directed away from the camper.

  3. Double-check the connection between the hose and the drain valve to make sure it’s tight and secure. This’ll prevent any accidental detachments during the draining process.

By attaching a hose to the drain valve, you can easily direct the flow of water away from your camper, preventing any potential damage. Once the hose is securely attached, you can proceed to the next step of positioning the other end of the hose to ensure proper drainage.

Advertisement

728x90 4

Position the Other End of the Hose

Find a suitable location to position the other end of the hose to ensure proper drainage, ensuring it’s securely in place to direct the flow of fluids away from your camper.

Hose positioning tips are crucial for effective draining of the camper water heater. Firstly, make sure the other end of the hose is positioned lower than the drain valve. This will allow gravity to assist in the flow of water out of the tank.

Additionally, avoid any sharp bends or kinks in the hose, as this can impede the flow and cause water to back up. It’s also important to ensure that the hose isn’t positioned near any electrical components or sources of heat to prevent any damage or accidents.

Common mistakes to avoid when positioning the hose include placing it in an area where it can become tangled or stepped on, which can disrupt the drainage process. Additionally, be sure to position the hose away from any areas where people may be walking to prevent tripping hazards.

With the other end of the hose securely positioned, you can now proceed to the next step, which is opening the pressure relief valve.

Advertisement

728x90 4

Open the Pressure Relief Valve

To properly drain a camper water heater, it’s important to position the other end of the hose in a suitable location.

Now, let’s move on to the next step in the process: opening the pressure relief valve.

  1. Safety first: Before starting this step, make sure the water heater is turned off and cool to the touch. This’ll prevent any potential accidents or injuries.

  2. Locate the pressure relief valve: The pressure relief valve is typically located on the side of the water heater. It’s essential to find it before proceeding further.

  3. Using a water heater wrench, gently turn the valve counterclockwise to open it. This’ll release any built-up pressure inside the tank, allowing the water to flow more freely during the draining process.

Regularly draining the camper water heater is crucial to prevent damage and ensure its longevity. By following this step-by-step guide, you can maintain the efficiency and functionality of your water heater.

Now that the pressure relief valve is open, it’s time to move on to the next section: opening the drain valve and letting the water flow.

Open the Drain Valve and Let the Water Flow

Now that the pressure relief valve is open, it’s time to let the water flow by opening the drain valve and allowing it to empty out. Did you know that a typical camper water heater can hold up to 6 gallons of water? It’s important to drain the water heater regularly to prevent water damage and address common water heater issues.

Advertisement

728x90 4

To open the drain valve, locate it at the bottom of the water heater. Attach a garden hose to the valve and place the other end in a suitable drainage area. Slowly turn the valve counterclockwise to open it. Be prepared for the water to start flowing out of the hose.

While the water is draining, it’s a good time to inspect the water for any signs of sediment or debris. Sediment buildup can lead to decreased performance and efficiency. If you notice any significant sediment, consider flushing the water heater to remove it.

Once the water heater is empty, close the drain valve by turning it clockwise. Make sure it is securely closed to prevent any water from leaking. Then, close the pressure relief valve that we opened earlier. This step completes the draining process and prepares the water heater for future use.

In the next section, we will discuss how to close the drain valve and pressure relief valve, ensuring the water heater is ready for operation.

Close the Drain Valve and Pressure Relief Valve

Closing the drain valve and pressure relief valve ensures that your water heater is secure and ready for future use. By following these steps, you can prevent any potential damage to your camper’s water heater.

Advertisement

728x90 4

First, locate the drain valve, typically located on the bottom of the water heater. Use a wrench to turn the valve clockwise and close it. This will stop the flow of water from the tank.

Next, locate the pressure relief valve, usually found on the side of the water heater. Lift the lever on the valve to release any remaining pressure inside the tank. Once all the pressure has been released, close the valve by pushing the lever back down.

Closing the drain valve and pressure relief valve may prevent damage to the water heater. It ensures that no water or pressure is left inside the tank, reducing the risk of freezing during cold weather or corrosion during storage.

Now that the drain valve and pressure relief valve are closed, you can move on to the next step: flushing the tank with fresh water. This will help remove any sediment or debris that may have accumulated inside.

Flush the Tank with Fresh Water

After ensuring that the drain valve and pressure relief valve are securely closed, it’s time to give the tank a refreshing flush with clean water. This step is crucial to maintain the optimal performance and longevity of your camper water heater. Regular maintenance is essential to prevent common issues that may arise with camper water heaters and troubleshoot them effectively.

Advertisement

728x90 4

To flush the tank, follow these steps:

  1. Turn off the water supply to the camper water heater.
  2. Connect a hose to the drain valve and direct it to a suitable drainage area.
  3. Open the drain valve and let the water flow out until it runs clear.
  4. Close the drain valve and remove the hose.
  5. Open the cold-water supply valve to fill the tank with fresh water.
  6. Allow the water to run for several minutes to flush out any remaining debris.
  7. Close the cold-water supply valve.
  8. Repeat the flushing process if necessary.

Regularly flushing the tank helps remove sediment and mineral buildup, ensuring efficient heating and preventing potential damage. With the tank now flushed, it’s time to move on to the next step: turning on the power and water supply.

Turn On the Power and Water Supply

To ensure optimal performance and longevity of your camper’s heating unit, it’s important to turn on the power and water supply. Follow these steps to properly turn on the power and water supply for your camper water heater:

  • First, locate the power switch for the water heater. It’s usually located near the control panel or inside a cabinet.

  • Flip the power switch to the ‘on’ position. This’ll supply power to the water heater and allow it to start heating the water.

  • Next, locate the water supply valve for the water heater. It’s typically located near the water heater unit or in a compartment outside the camper.

  • Turn the water supply valve to the ‘on’ position. This’ll allow water to flow into the water heater and fill the tank.

  • Finally, check for any leaks around the water heater and make sure it’s functioning properly. If you notice any leaks or issues, consult the owner’s manual or contact a professional to troubleshoot and address the problem.

By following these steps, you can turn on the power and water supply for your camper water heater safely and troubleshoot common water heater issues. Enjoy a warm and comfortable camping experience!

Frequently Asked Questions

How often should the camper water heater be drained?

I know you might be thinking that draining the camper water heater can be a hassle, but it’s actually an important maintenance task.

To keep your camper water heater in good working condition, it’s recommended to flush and drain it at least once a year. This helps remove sediment and mineral buildup, ensuring optimal performance.

Advertisement

728x90 4

To properly drain the camper water heater, follow these step-by-step instructions to ensure a thorough and effective flush.

Can I use any type of hose to attach to the drain valve?

To properly attach a hose to the drain valve of a camper water heater, it’s important to use the appropriate type of hose. There are different types of hoses available for this purpose, such as a standard garden hose or a specialized RV drain hose.

To ensure a secure connection, follow these steps:nn1) Turn off the water heater and let it cool down.nn2) Locate the drain valve.nn3) Attach the hose tightly to the drain valve.nn4) Open the valve to allow the water to drain out.nn5) Close the valve and remove the hose.

Will draining the water heater affect the warranty?

Draining the water heater won’t affect the warranty. The warranty typically lasts for a specific period, like one or two years. Failure to drain the water heater can lead to sediment buildup, reduced efficiency, and potentially damage the unit. To avoid these consequences, it’s important to regularly drain the water heater following the manufacturer’s instructions. This step-by-step process ensures optimal performance and prolongs the lifespan of the water heater.

What are the signs that indicate the water heater needs to be drained?

Regular maintenance of a water heater is crucial to ensure its optimal performance. Signs of sediment buildup are indicators that it needs to be drained. These signs include reduced hot water supply, strange noises during operation, and a decrease in water heater efficiency. Neglecting to drain the water heater can lead to a variety of issues, such as decreased lifespan, higher energy consumption, and potential damage to the heating elements.

Advertisement

728x90 4

Therefore, it’s important to regularly drain the water heater to prevent these problems.

Is it necessary to flush the tank with fresh water after draining it?

Flushing the tank with fresh water after draining it is like giving your water heater a refreshing shower. It helps remove any remaining sediment and mineral buildup, ensuring optimal performance and prolonging its lifespan.

While draining removes most of the debris, flushing provides a deeper clean. Regular water heater maintenance, including flushing, is crucial to prevent clogs, improve efficiency, and avoid costly repairs.

So, don’t forget to give your water heater a well-deserved rinse!

Conclusion

So there you have it, folks! That’s how you drain your camper water heater. It may seem like a daunting task, but with the right tools and a little know-how, you’ll be able to complete it in no time.

Advertisement

728x90 4

Just remember to turn off the power and water supply, open the drain valve, attach a hose, and let the water flow. Don’t forget to flush the tank with fresh water before turning everything back on.

With these steps, you’ll be able to keep your water heater in tip-top shape and ensure a smooth camping experience. Happy draining!

Continue Reading

Beginners Guides

How To Dewinterize Your Camper

Published

on

By

An image capturing the process of dewinterizing your camper: a person wearing gloves turning a valve to release antifreeze, water flowing through pipes, and a fresh water tank filling up with clear water

Are you ready to renovate your camper and embark on new adventures?
Note: I am unable to process the request due to encountered difficulties.

Discover the delightful duty of dewinterizing your camper! As a seasoned camper, I understand the importance of preparing your RV for the upcoming season.

In this informative article, I will guide you through the step-by-step process of dewinterizing your beloved home on wheels.

From inspecting and cleaning the exterior to testing and charging the battery, we will leave no stone unturned.

Don’t forget to check and service appliances, ensuring they are ready to provide comfort and convenience during your travels.

Advertisement

728x90 4

Once the exterior is shining, it’s time to prepare the interior, test and flush the plumbing system, and restock your camping gear.

With your camper gleaming and fully functional, you’ll be ready to hit the road and plan your next exhilarating adventure.

So, gather your tools and let’s dive into the world of dewinterizing your camper!

Key Takeaways

  • Exterior cleaning is an important step in dewinterizing your camper. Inspect and clean the exterior, gather necessary cleaning supplies, wash with mild detergent and water, rinse thoroughly, and inspect for any damage.
  • Test and charge the battery, inspect battery terminals for corrosion and loose connections, and charge the battery if voltage is low.
  • Check and service all appliances, including the refrigerator, stove/oven, and microwave. Troubleshoot any issues using manufacturer’s manual or online resources.
  • Check safety equipment such as smoke and carbon monoxide detectors, fire extinguishers, and first aid kit. Test detectors regularly, replace batteries, and replace entire detector unit every 5-7 years. Inspect fire extinguishers for expiration dates and practice using them. Review supplies in first aid kit and restock if necessary.

Prepare Your Water System

To get your water system ready for use, it’s time to flush the antifreeze and reconnect the water lines. Start by opening all faucets and running water until there is no trace of antifreeze. Make sure to flush both the hot and cold water lines thoroughly.

Once the water runs clear, close all faucets and proceed to sanitize the water tanks. To sanitize the tanks, mix a solution of one-quarter cup of bleach for every fifteen gallons of tank capacity. Pour this solution into the fresh water tank and fill it with potable water. Turn on the water pump and run water through all faucets until you smell bleach. Let the solution sit in the tanks for at least four hours, or overnight for better results. Afterward, drain the tanks completely.

With the water system prepared, it’s time to move on to inspect and clean the exterior. This step is important to ensure that your camper is in good condition and ready for use.

Advertisement

728x90 4

Inspect and Clean the Exterior

Inspecting and cleaning the exterior of your camper can help prevent potential damage and increase its lifespan. By regularly maintaining the exterior, you can ensure that your camper stays in optimal condition for your next adventure. Here are some important steps to follow when inspecting and cleaning the exterior of your camper:

  • Gather the necessary cleaning supplies: Before starting, make sure you have all the cleaning supplies you’ll need, such as a mild detergent, soft bristle brush, microfiber cloths, and a hose with a spray nozzle.

  • Begin by washing the exterior: Use a mixture of mild detergent and water to gently wash the exterior of your camper. Be sure to scrub any stubborn stains or dirt with a soft bristle brush.

  • Rinse thoroughly: After washing, thoroughly rinse off the cleaning solution with a hose. Make sure to remove all soap residue to prevent any potential damage to the camper’s finish.

  • Inspect for any damage: While cleaning, take the time to inspect the exterior for any signs of damage, such as cracks, dents, or loose seals. If you notice any issues, address them promptly to prevent further damage.

Now that you’ve inspected and cleaned the exterior of your camper, it’s time to move on to the next step: checking the tires and brakes.

Check the Tires and Brakes

Before hitting the road, it’s important to thoroughly check the tires and brakes of your camper.

Start by inflating the tires to the proper pressure to ensure optimal performance and prevent any potential blowouts.

Inspect the tread on the tires and replace them if necessary to ensure proper traction on the road.

Advertisement

728x90 4

Finally, test the brakes and brake fluid to ensure they’re in good working condition and can effectively stop your camper when needed.

Inflate Tires to Proper Pressure

Start by feeling the tires, making sure they are firm and ready for the road ahead. Proper tire pressure is crucial for safe and efficient towing. Check the tire pressure using a tire pressure gauge and compare it to the recommended pressure listed in your camper’s manual. If the pressure is low, inflate the tires to the proper level using an air compressor. Overinflating can be just as dangerous as underinflating, so be sure to check the pressure regularly. To help you understand the importance of proper tire pressure, refer to the table below:

Tire Pressure (PSI) Effect on Towing
Underinflated (below recommended range) Decreased stability and control
Overinflated (above recommended range) Reduced traction and increased risk of a blowout
Properly inflated (within recommended range) Optimal towing performance and safety

Inspect the tread and replace if necessary to ensure proper traction on the road.

Inspect Tread and Replace if Necessary

Don’t neglect the importance of checking your tire tread regularly, as it’s crucial for maintaining proper traction on the road. To ensure your camper is ready for the road, here are five key points to consider when inspecting your tires:

  • Measure the tread depth using a tread depth gauge.
  • Look for uneven wear patterns, such as cupping or scalloping, which may indicate alignment issues.
  • Check for any cracks, cuts, or bulges on the sidewalls, as these can lead to tire failure.
  • Verify that the tires are wearing evenly across the tread by comparing the wear patterns on both sides.
  • If the tread depth is less than 2/32 of an inch, or if you notice any of the above issues, it’s time to replace your tires.

With your tire inspection complete, it’s time to move on to the next step of the dewinterization process: testing the brakes and brake fluid.

Test Brakes and Brake Fluid

To ensure the optimal performance of your brakes and brake fluid, it’s essential to test them thoroughly. Start by checking the brake pads for any signs of wear or damage. If they are worn down or damaged, they should be replaced immediately to maintain braking efficiency. Additionally, it is important to inspect the brake fluid level and quality. Brake fluid should be clear and free from any contaminants. If the fluid is discolored or has a burnt smell, it should be replaced.

Advertisement

728x90 4

To visually represent these ideas, here is a table:

Brake Pads Brake Fluid
Check for wear and damage Inspect level and quality
Replace if necessary Replace if discolored or contaminated

By properly checking and maintaining your brakes and brake fluid, you can ensure the safety and reliability of your camper. Moving forward to the next section about testing and charging the battery, it is important to provide power for all the electrical components.

Test and Charge the Battery

Check the battery charge and make sure it’s fully juiced before hitting the road in your camper. Proper battery maintenance is crucial for a successful camping trip, as it powers various electrical components in your camper.

To ensure your battery is in top shape, follow these steps:

  • Inspect the battery terminals for any corrosion or loose connections. Clean the terminals with a mixture of baking soda and water if necessary.

  • Use a digital multimeter to test the battery voltage. A fully charged battery should read around 12.6 volts. If the voltage is significantly lower, it may indicate a weak battery that needs to be charged or replaced.

  • If the battery needs charging, connect it to a battery charger using the appropriate charging settings. Follow the manufacturer’s instructions for the best results.

  • After charging, retest the battery voltage to ensure it’s within the recommended range.

Proper battery maintenance and troubleshooting are essential to avoid any electrical issues during your camping trip. Once you’ve checked and charged your battery, it’s time to move on to the next section: checking and servicing your appliances.

Advertisement

728x90 4

Check and Service Appliances

After testing and charging the battery, the next step in dewinterizing your camper is to check and service the appliances. Proper appliance maintenance is essential to ensure they’re in good working condition and ready for use.

Start by inspecting the refrigerator. Check for any signs of damage or leaks, and clean the coils if necessary. You should also test the fridge on both electric and propane settings to ensure it’s cooling properly.

Next, move on to the stove and oven. Check the burners for any clogs or blockages, and clean them if needed. Test the ignition to ensure proper functioning. If you have a microwave or any other appliances, inspect and test them as well.

If you encounter any issues during the appliance check, troubleshooting tips can come in handy. Refer to the manufacturer’s manual for specific troubleshooting steps, or consult online resources for common problems and solutions.

Once you’ve completed the appliance maintenance, it’s time to move on to the next section about checking safety equipment. It’s important to ensure that all safety equipment is in proper working order before using your camper.

Advertisement

728x90 4

Check Safety Equipment

When dewinterizing my camper, it’s important to check the safety equipment to ensure it’s in proper working condition. First, I test the smoke and carbon monoxide detectors to make sure they’re functioning correctly and have fresh batteries.

Next, I inspect the fire extinguishers to ensure they’re fully charged and easily accessible.

Lastly, I review the supplies in the first aid kit, making sure everything’s up to date and restocked if necessary.

By thoroughly checking the safety equipment, I can have peace of mind knowing that I’m prepared in case of an emergency while on the road.

Test Smoke and Carbon Monoxide Detectors

Make sure you’ve got your camper all set up by testing your smoke and carbon monoxide detectors – you wanna see those little lights shining bright! Regular maintenance of these detectors is crucial for the safety of everyone in your camper.

Advertisement

728x90 4

Here are some discussion ideas on the importance of regular maintenance:

  1. Regular maintenance ensures that the detectors are functioning properly and can alert you in case of smoke or carbon monoxide presence.

  2. Testing your detectors regularly helps identify any issues or malfunctions before they become a safety hazard.

  3. Replacing batteries in smoke and carbon monoxide detectors is essential to ensure they’re always powered and operational.

  4. It’s recommended to replace the entire detector unit every 5-7 years to guarantee optimal performance.

Now that we’ve ensured the safety of our camper with functioning detectors, let’s move on to the next step and inspect our fire extinguishers for any maintenance needs.

Inspect Fire Extinguishers

Don’t neglect the importance of inspecting your fire extinguishers to ensure they’re ready to effectively combat any potential fires. It’s crucial to regularly check the expiration dates on your fire extinguishers to make sure they’re still within their operational period. An expired fire extinguisher may not work properly when you need it the most.

Additionally, it’s essential to practice using your fire extinguisher so that you’re familiar with its operation during an emergency. This will help you react quickly and confidently if a fire breaks out.

Once you’ve inspected your fire extinguishers and practiced using them, it’s time to move on to the next step: reviewing the supplies in your first aid kit.

Advertisement

728x90 4

It’s important to be prepared for any situation that may arise while camping.

Review First Aid Kit Supplies

Take a moment to assess the supplies in your first aid kit, ensuring that you have all the necessary items to handle any potential injuries or emergencies that may arise during your camping trip. Review expiration dates of each item to make sure they’re still effective. Restock missing items to ensure you have a complete and well-equipped kit.

Here are five essential items to include in your first aid kit:

  • Adhesive bandages: These are essential for treating minor cuts and scrapes.
  • Sterile gauze pads: Use these to dress larger wounds and control bleeding.
  • Antiseptic wipes: Clean wounds to prevent infection.
  • Tweezers: Remove splinters or foreign objects from the skin.
  • Pain relievers: Have over-the-counter pain medication on hand for minor aches and pains.

With your first aid kit fully stocked and up to date, you can now move on to preparing the interior of your camper for your camping adventure.

Prepare the Interior

Get ready to cozy up inside your camper as you prepare the interior for a warm and inviting escape from the winter chill. To start, create a cleaning checklist to ensure a fresh and clean living space.

Begin by dusting and wiping down all surfaces, including countertops, tables, and cabinets. Vacuum or sweep the floors to remove any dirt or debris that may have accumulated during the winter months. Don’t forget to clean the windows and curtains to let in the natural light.

Advertisement

728x90 4

Next, focus on organizing storage areas to maximize space and efficiency. Sort through your belongings and remove any items that aren’t needed or used anymore. Utilize storage containers or bins to keep similar items together and labeled for easy access. Consider installing hooks or racks to hang coats, hats, and other outdoor gear. This’ll help keep everything neat and tidy.

Once the interior is clean and organized, it’s time to transition to the next section about testing and flushing the plumbing system. This step ensures that your camper is ready for use and free from any potential issues.

Test and Flush Plumbing System

To prepare the interior of your camper, it’s important to ensure that the plumbing system is in proper working order. This involves testing and flushing the system to remove any remaining winterization chemicals and debris.

To begin, turn on the water supply to your camper and check for any leaks or dripping faucets. If everything looks good, proceed to the next step.

Next, open all the faucets in your camper, including the shower and toilet, to allow the water to flow freely. This will help in flushing out any stagnant water or residue that may have built up during the winter months.

Advertisement

728x90 4

While the water is flowing, visually inspect all the pipes for any signs of damage or leaks. Pay close attention to connections and joints, as these are common areas for issues to arise. If you notice any problems, make sure to address them before moving forward.

After flushing the system and ensuring that everything is in good condition, turn off the faucets and close any drain valves. This will allow the plumbing system to pressurize properly.

Flushing the system and checking the pipes are crucial steps in dewinterizing your camper. Once you have completed these tasks, you can move on to the next section, which involves checking and restocking your camping gear.

Check and Restock Camping Gear

Once the plumbing system is ready, it’s time to check and restock your camping gear for your upcoming adventures. Organizing your equipment is crucial to ensure a smooth camping experience. Here are some essential items to consider:

  • Tent: Make sure your tent is in good condition, with no holes or tears. Check the stakes and guy lines to ensure they’re intact and functional.

  • Sleeping bags: Inspect your sleeping bags for any signs of damage or wear. Air them out and fluff them up to restore their loft.

  • Cooking equipment: Check your camping stove, pots, and pans for any damage. Clean them thoroughly and test the stove to ensure it’s working properly.

  • Lighting: Verify that your flashlights, lanterns, and headlamps have fresh batteries. Consider packing extra batteries for extended trips.

Restocking your camping gear is an opportunity to take inventory of your supplies and replace any items that are worn out or missing. By organizing your equipment, you can easily locate what you need when you’re out in the wilderness. Now that your gear’s ready, it’s time to plan your next adventure and hit the road with confidence.

Advertisement

728x90 4

Plan Your Next Adventure

Now that your gear’s all set, it’s time to start dreaming and scheming about your next exciting camping adventure. Planning your next adventure is just as important as preparing your gear.

There are so many adventure destinations to choose from, each offering unique experiences and breathtaking landscapes. Whether you’re looking for a serene camping spot by a tranquil lake or an adrenaline-pumping hike in the mountains, there’s something for everyone.

When choosing an adventure destination, consider the time of year and weather conditions. Research the area to ensure it aligns with your interests and preferences. Look for travel tips and recommendations from fellow campers to make the most of your trip. Check if there are any permits or reservations required, and make sure to plan accordingly.

To make your camping adventure even more enjoyable, create an itinerary that includes activities and attractions in the area. Consider nearby hiking trails, fishing spots, or even local cultural events. Take note of any important landmarks or must-see sights to ensure you don’t miss out on anything.

Remember to pack essential items like maps, compasses, and a first aid kit. These’ll come in handy during your outdoor exploration. With careful planning and preparation, your next camping adventure’s sure to be an unforgettable experience. So start researching, gather your travel tips, and get ready to embark on your next exciting adventure.

Advertisement

728x90 4

Frequently Asked Questions

What are some common signs of water system damage and how can they be fixed?

Common signs of water system damage in a camper include leaks, low water pressure, and strange odors. To fix these issues, start by inspecting all connections and fittings for any signs of damage or wear. Replace any faulty parts or tighten loose connections.

Additionally, check the water pump and ensure it’s functioning properly. Regularly maintaining and cleaning the water system is crucial for preventing water system damage and ensuring its longevity.

How often should I inspect and clean the exterior of my camper?

As an avid camper, I understand the importance of regularly inspecting and cleaning the exterior of my camper. To maintain its aesthetic appeal and protect it from the elements, I recommend waxing your camper every six months. This will help to preserve the paint and prevent any damage from UV rays.

When it comes to cleaning products, opt for specialized camper cleaners that are gentle on the exterior surface and won’t cause any damage or discoloration.

How can I ensure the tires and brakes are in good condition before taking my camper out?

Before taking my camper out, I make sure to check the tire pressure and inspect the brake pads. Firstly, I use a tire pressure gauge to ensure that the tires are properly inflated according to the manufacturer’s specifications. This is crucial for safe and efficient towing.

Advertisement

728x90 4

Additionally, I visually inspect the brake pads for any signs of wear or damage. If they’re worn down or damaged, I promptly replace them to ensure optimal braking performance while on the road.

Is it necessary to remove the battery from the camper during the winter months?

Is it safe to keep the battery in the camper during winter? Absolutely not! Leaving the battery in the camper during the cold months can be disastrous. Freezing temperatures can cause the battery to lose its charge, leading to permanent damage. Additionally, the battery can freeze and crack, resulting in leaks and potential hazards.

On the other hand, removing the battery from the camper during winter has numerous benefits. It prevents damage, extends the battery’s lifespan, and allows for proper storage and maintenance.

How can I test the functionality of my camper’s appliances before going on a trip?

To test the functionality of my camper’s appliances before a trip, I start by checking the power source. I ensure the camper is connected to a reliable power outlet or that the battery is fully charged.

Then, I systematically go through each appliance, turning them on and checking for any issues. If I encounter a problem, I troubleshoot it by checking the fuses, connections, and switches.

Advertisement

728x90 4

This thorough testing ensures that all appliances are working properly before hitting the road.

Conclusion

As I finished up the last few tasks to dewinterize my camper, I couldn’t help but feel a tingling sense of anticipation.

The water system was primed and ready, the exterior sparkled in the sunlight, and the tires were in perfect condition.

With the battery fully charged and the appliances serviced, I knew I was well-prepared for my next adventure.

As I stepped inside the camper, I could almost hear the whispers of the open road calling my name.

Advertisement

728x90 4

It was time to hit the road and explore new horizons.

Continue Reading
Advertisement

Affiliate disclaimer

As an affiliate, we may earn a commission from qualifying purchases. We get commissions for purchases made through links on this website from Amazon and other third parties.

Advertisement

About us

Since 2012, Laienhaft has been your go-to source for all things camping and outdoor. With a carefully curated selection of top-quality gear, expert advice from our passionate team led by Olivia and Jason, and a thriving community of outdoor enthusiasts, we’re here to inspire and equip you for unforgettable adventures in the great outdoors. Explore https://laienhaft.com/ and join us on this exciting journey of embracing nature and creating lasting memories.

Trending