Are you prepared for the ultimate guide to winter-proofing your cherished camper trailer? Search no more! I’m here to offer you every little detail on how to expertly winterize your camper trailer.
From draining the water system to insulating the interior, sealing any drafts or leaks, and protecting the exterior, we’ve got you covered.
But that’s not all! We’ll also discuss how to remove and store valuables, cover or store the trailer in a dry, sheltered area, and maintain those tires.
And let’s not forget about disconnecting and storing batteries, as well as planning for regular maintenance during winter storage.
So, buckle up and get ready for an informative journey into the world of winterizing camper trailers. Let’s ensure your home away from home is well-prepared to weather the cold months ahead!
Key Takeaways
- Draining the water system completely is an important step in winterizing a camper trailer.
- Insulating the interior and sealing gaps can help keep the trailer cozy and warm during winter.
- Proper storage in a dry and sheltered area can greatly reduce the risk of damage to the camper.
- Regular maintenance, such as checking tire pressure and cleaning the interior, is necessary during winter storage.
Drain the Water System
To properly winterize your camper trailer, it’s essential to drain the water system completely, ensuring that all water is removed to prevent freezing and potential damage. Winterization tips for your camper trailer’s water system maintenance are crucial to avoid costly repairs caused by frozen pipes and fittings.
Begin by turning off the water supply and releasing the pressure in the system by opening all faucets, including both hot and cold water taps.
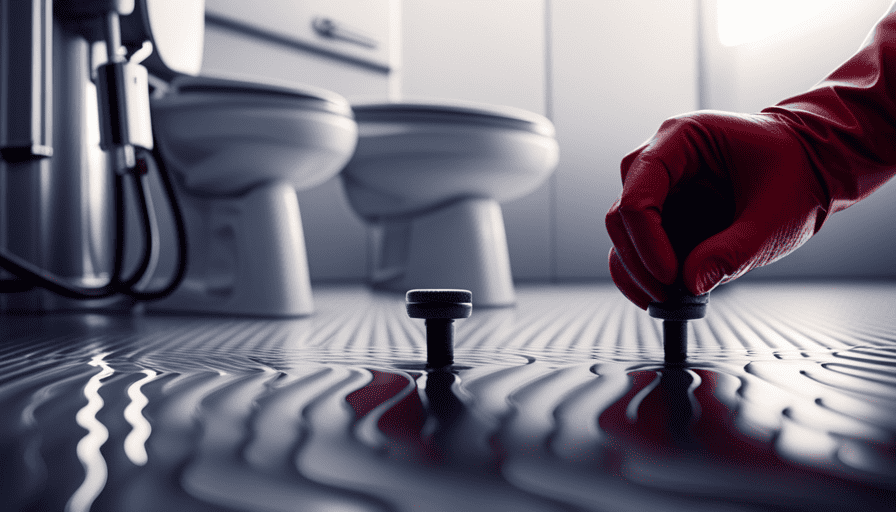
Next, locate the low point drain valves, typically found near the water heater or at the bottom of the fresh water tank. Attach a hose to the valves, directing it away from the trailer, and open them to drain the water. Don’t forget to drain the hot water tank separately by removing the drain plug.
Once the water has completely drained, open all faucets and showerheads to ensure any remaining water is expelled. Consider using compressed air to blow air through the water lines, forcing out any residual water. Be sure to follow the manufacturer’s instructions to prevent damage.
With the water system drained and protected, you can now move on to insulating the interior, which will safeguard your camper trailer against the cold temperatures and keep it cozy during the winter months.
Insulate the Interior
Insulating the interior of your camper trailer will keep you cozy and warm during those chilly winter adventures. When it comes to insulating techniques, there are a few options to consider.
Firstly, you can use foam insulation boards to cover the walls and ceiling. These boards are lightweight and easy to install, providing excellent thermal resistance. They come in various sizes, so measure your camper trailer carefully before purchasing.
Secondly, insulating the windows and doors is crucial to prevent heat loss. You can use weatherstripping tape to seal any gaps around the edges, ensuring a tight seal. Additionally, thermal curtains or window insulation film can be applied to reduce heat transfer through the glass.
Lastly, moisture control is essential to maintain a comfortable environment. Condensation can occur when warm air meets cold surfaces, leading to mold and mildew growth. To combat this, consider using a dehumidifier or moisture absorbers to keep the humidity levels in check.
By insulating the interior of your camper trailer and implementing moisture control techniques, you’ll be able to enjoy a warm and cozy winter camping experience.
Next, we’ll discuss how to seal any drafts or leaks to further enhance the insulation.
Seal any Drafts or Leaks
Once you’ve ensured a cozy interior, it’s time to tackle the pesky drafts and leaks that can sneak their way into your camper.
To seal any drafts or leaks, start by inspecting all the windows and doors for any gaps or cracks. Apply weatherstripping or silicone caulk to seal these areas and prevent cold air from seeping in.
Another area to pay attention to is the floor. Use expanding foam insulation to fill any gaps or holes in the flooring, ensuring a tight seal.
Additionally, check the roof vents and any other openings on the roof. Apply sealant or replace damaged vent covers to prevent water and cold air from entering.
Preventing condensation is also crucial during winterization. Condensation occurs when warm, moist air inside the camper comes into contact with cold surfaces. To minimize condensation, consider using a dehumidifier or moisture absorber in your camper. These devices will help remove excess moisture from the air, reducing the chance of condensation forming on windows and walls.
With the drafts sealed and condensation under control, it’s time to move on to protecting the exterior of your camper.
Protect the Exterior
Now that you’ve taken care of sealing drafts and controlling condensation, it’s time to focus on protecting the exterior of your cozy home on wheels. Winterizing your camper trailer is essential to ensure it stays in good condition during the cold months. Here are some winterizing techniques and weatherproofing tips to keep in mind:
-
Clean and wax the exterior: Start by thoroughly washing your camper trailer to remove any dirt, grime, or road salt. Once it’s clean, apply a coat of wax to protect the paint and finish from the harsh winter elements.
-
Cover the tires: To prevent damage caused by freezing temperatures and UV rays, invest in tire covers. These covers will shield the tires from cracking and extend their lifespan.
-
Insulate exposed pipes: Insulate any exposed pipes or hoses to prevent freezing. Use foam pipe insulation or heat tape to keep them warm and functional.
-
Secure loose items: Before winter sets in, make sure to secure any loose items on the exterior of your camper trailer. Strong winds and snowstorms can cause damage if items aren’t properly secured.
Now that you’ve protected the exterior of your camper trailer, it’s time to move on to the next step: removing and storing valuables.
Remove and Store Valuables
To make sure everything stays safe and sound during the winter months, it’s time to pack up and store all your valuable belongings. When it comes to winter storage tips for a camper trailer, protecting personal belongings is crucial.
Start by removing any valuables such as electronics, jewelry, or important documents. These items are susceptible to damage from freezing temperatures, moisture, and pests. Keep them in a secure location, away from extreme temperature fluctuations.
Before storing your valuables, take the time to clean and declutter the interior of the camper trailer. Remove any food items to prevent attracting rodents and insects. Wipe down surfaces, vacuum carpets, and ensure everything is dry to avoid mold and mildew growth.
Now, you can proceed to store your valuables in airtight containers or sealed bags. This will provide an extra layer of protection against moisture and pests.
By following these winter storage tips and protecting personal belongings, you can ensure that everything will be in great condition when you’re ready to hit the road again.
Moving on to the next step of the winterization process, let’s discuss how to clean and declutter the interior of the camper trailer.
Clean and Declutter the Interior
Make sure to tidy up and remove any unnecessary items from the interior of your cozy camper before storing it for the winter months. This will help prevent any damage and make it easier to prepare for your next camping adventure.
Here are some organizing tips to help you clean and declutter the interior:
-
Start by removing all personal items such as clothing, bedding, and towels. Pack them away in sealed plastic containers to protect them from moisture and pests.
-
Clean the floors, walls, and surfaces using a mild detergent and warm water. Make sure to remove any stains or spills.
-
Dust and wipe down all furniture, including tables, chairs, and cabinets. Use a vacuum cleaner with a brush attachment to remove any dirt or debris from the upholstery.
-
Don’t forget to clean the kitchen area. Remove all food items and clean the refrigerator, stove, and countertops thoroughly.
-
Lastly, organize the storage compartments. Use labeled bins or baskets to keep items like cookware, camping gear, and tools neatly organized.
To accomplish these tasks, gather the necessary cleaning supplies such as a vacuum cleaner, mop, bucket, mild detergent, cleaning cloths, and disinfectant wipes. By taking the time to clean and declutter the interior, you’ll ensure that your camper trailer remains in good condition during the winter months.
In the next section, we’ll discuss how to cover or store the trailer in a dry, sheltered area to provide additional protection.
Cover or Store the Trailer in a Dry, Sheltered Area
For optimal protection, find a dry, sheltered area to store your cozy camper during the winter months, ensuring its longevity while keeping it safe from the elements.
Did you know that storing your camper in a covered area can reduce the risk of damage by up to 80%? Winterizing your camper trailer involves taking necessary steps to protect it from the harsh weather conditions. One of the essential aspects of winterizing is finding the perfect storage facility.
When searching for a suitable storage facility, consider a few key factors. Look for a place that offers protection from rain, snow, and wind. Ensure that the facility has a solid roof and walls to prevent moisture from seeping in. Additionally, check if the facility has proper ventilation to avoid condensation buildup, which can cause mold or mildew. It’s also crucial to have access to your camper throughout the winter, so look for a facility that allows you to check on it periodically.
In terms of winterizing essentials, be sure to gather the must-have tools and supplies. This includes items such as RV covers, tarps, waterproof sealants, wheel chocks, and dehumidifiers. These tools and supplies will help protect your camper trailer and keep it in top condition during the winter months. When it’s time to hit the road again in the spring, you’ll be grateful for the care you took in storing your camper properly.
Now, let’s move on to the next step: checking and maintaining the tires.
Check and Maintain the Tires
Don’t forget to keep an eye on your cozy camper’s tires and ensure they’re in top shape throughout the winter months. Maintaining the proper tire pressure and checking the overall condition of your camper’s tires is crucial for a safe and smooth winter camping experience.
Firstly, it’s important to check the tire pressure regularly. Cold temperatures can cause the air inside the tires to contract, leading to underinflation. Use a reliable tire pressure gauge to measure the pressure and compare it to the manufacturer’s recommended level. Adjust the pressure if necessary to ensure optimal performance and fuel efficiency.
Additionally, inspect the tire condition for any signs of wear, cracks, or bulges. Cold weather can exacerbate existing tire damage, so it’s essential to address any issues before hitting the road. Replace worn-out tires or those showing signs of damage to avoid potential blowouts or accidents.
To transition into the next section about disconnecting and storing batteries, remember that proper tire maintenance is just one aspect of winterizing your camper. Another crucial step is taking care of the batteries to prevent damage during the cold months.
Disconnect and Store Batteries
Before disconnecting and storing your batteries, make sure they’re fully charged to avoid potential damage during the winter months. Battery maintenance is crucial for preserving the life and functionality of your camper trailer’s electrical system.
Start by cleaning the battery terminals with a wire brush to remove any corrosion. This will ensure a good connection and prevent power loss. Next, check the electrolyte levels in each battery cell and top them off with distilled water if necessary. Remember to wear protective gloves and goggles when handling batteries.
Once your batteries are fully charged and maintained, it’s time to disconnect and store them properly. Start by disconnecting the negative terminal first, followed by the positive terminal. This will prevent any accidental short circuits.
Store the batteries in a cool, dry place, away from any flammable materials. It’s recommended to use a battery maintainer or trickle charger to keep the batteries charged during storage. This will help prolong their lifespan and ensure they’re ready for use when you take your camper trailer out of storage.
As you plan for regular maintenance during winter storage, keep in mind that checking the batteries periodically and recharging them if needed is important. Additionally, inspect the battery cables and terminals for any signs of damage or corrosion. By taking these steps, you can ensure that your batteries stay in good condition and are ready to power your camper trailer when the winter season is over.
Plan for Regular Maintenance During Winter Storage
Make sure to plan for regular maintenance during the winter storage period so that you can prevent any potential issues and keep your camper trailer in top condition. Studies have shown that regular maintenance can increase the lifespan of electrical systems by up to 50%.
To ensure that your camper trailer remains in good shape during winter storage, here are some tips for preventing mold growth and preparing the propane system:
-
Inspect and clean the interior thoroughly before storing the trailer. Remove all food items, clean the refrigerator, and wipe down all surfaces with a mild disinfectant to prevent mold and mildew growth.
-
Consider using moisture-absorbing products, such as desiccant packs or dehumidifiers, to control humidity levels inside the trailer and prevent mold growth.
-
Empty and clean the propane tanks before storing the trailer. Make sure to turn off the propane supply and disconnect any appliances that use propane.
-
Check for any leaks or damage in the propane system. If you notice any issues, it’s essential to fix them before storing the trailer to ensure safe usage in the future.
By following these maintenance tips, you can protect your camper trailer from mold growth and ensure that the propane system is properly prepared for winter storage.
Frequently Asked Questions
How do I prevent pests from entering my camper trailer during winter storage?
To prevent pests from entering my camper trailer during winter storage, I use effective methods for pest control. Firstly, I thoroughly clean the trailer, removing any food crumbs or residue that could attract pests.
Next, I seal all entry points, such as gaps in windows and doors, with weather stripping. Additionally, I place pest repellents, like mothballs or peppermint oil, strategically throughout the trailer.
Lastly, I regularly inspect and maintain the trailer to ensure there are no potential entry points for pests.
Can I leave some water in the water system to prevent the pipes from freezing?
Yes, you can leave some water in the water system of your camper trailer to prevent the pipes from freezing during winter storage. However, it’s important to take precautions to avoid any damage.
First, make sure to drain the majority of the water from the system, leaving just a small amount in the pipes. This will allow the water to expand without causing any harm.
Additionally, insulate the pipes and use heat tape or a heating pad to prevent freezing. These winter storage tips will help protect your camper trailer’s water system during the colder months.
What should I do if I find any mold or mildew in the interior of my camper trailer?
If I find any mold or mildew in the interior of my camper trailer, I’d take immediate action to prevent further growth and ensure a healthy living environment.
First, I’d thoroughly clean the affected area using a mixture of bleach and water.
Then, I’d address any underlying moisture issues by improving ventilation and using dehumidifiers.
Regular inspections and prompt removal of any signs of mold or mildew are crucial for maintaining a clean and safe camper trailer.
Is it necessary to remove the propane tanks during winter storage?
Yes, it’s necessary to remove the propane tanks during winter storage for propane tank safety. Propane tanks should be disconnected and stored in a well-ventilated area away from any ignition sources. This prevents any potential leaks or accidents that could occur during the cold winter months.
It’s important to follow proper winter storage tips to ensure the safety of your camper trailer and its components.
How often should I check the tires during winter storage to ensure they don’t deflate?
During winter storage, it’s crucial to regularly check the tire pressure to prevent deflation. Neglecting this task is like forgetting to water your plants and expecting them to thrive.
I recommend checking the tire pressure at least once a month, using a reliable pressure gauge. If the pressure is low, inflate the tires to the recommended level.
This will ensure that your camper trailer stays firmly planted on the ground, ready for your next adventure.
How Much Antifreeze Do I Need to Winterize My Camper Trailer?
When it comes to winterizing a camper with antifreeze, determining the right amount is crucial. To protect your camper trailer from frozen pipes and potential damage, follow the manufacturer’s instructions or consult a professional. Understanding the specific volume required will ensure a thorough winterization process, safeguarding your camper during the cold winter months.
Conclusion
So there you have it, folks. Winterizing your camper trailer is a piece of cake! Just remember to drain that water system and insulate the interior. Also, seal those pesky drafts and protect the exterior. Don’t forget to remove and store your valuables and cover or store in a dry area. Additionally, check those tires, disconnect and store your batteries, and plan for regular maintenance. Easy peasy, right? Who needs a cozy, warm camper during the winter anyway? Just enjoy the freezing temperatures and icy winds while you’re at it. Happy winter camping!


