Tired of dealing with a soggy pop-up canvas camper every time it rains? Worry no more! We have the perfect solution for you – waterproofing your camper.
With this simple and effective technique, you can ensure a dry and protected camping experience, no matter the weather.
In this informative article, we will guide you through the step-by-step process of waterproofing your pop up canvas camper. From assessing the current condition of your camper to choosing the right waterproofing product, we’ve got you covered.
We’ll show you how to prepare the canvas, apply the waterproofing solution, and pay special attention to seams and sealed areas.
But our advice doesn’t stop there. We’ll also provide tips on how to test the waterproofing and maintain it over time. Plus, we’ll even suggest additional protective measures to further safeguard your camper.
So, get ready to bid farewell to wet and miserable camping trips. Let’s dive into the world of waterproofing and enjoy a dry and protected camping experience together!
Key Takeaways
- Assess the current condition of the canvas camper, inspecting seams, stitching, and the canvas itself for wear or damage.
- Choose the right waterproofing product based on the material and climate, considering factors such as durability and material compatibility.
- Prepare the canvas by cleaning it with mild soap and water before applying the waterproofing solution in multiple coats, allowing each coat to dry completely.
- Pay special attention to seams, corners, and edges, and consider alternative waterproofing methods such as spray-on solutions or waterproofing tapes.
Assess the Current Condition of Your Canvas Camper
Assessing the current condition of your canvas camper is crucial in order to determine the extent of waterproofing measures needed. Before applying any waterproofing product, it’s important to assess the overall durability of the canvas and identify any existing leaks.
Start by inspecting the seams and stitching for any signs of wear or damage. Look for loose threads or areas where the stitching has come undone. These weak points can allow water to seep through, compromising the integrity of the canvas.
Additionally, examine the canvas itself for any holes, tears, or thinning areas. These can be potential entry points for water. One effective way to check for leaks is to spray water on the canvas and observe if any areas become wet on the inside.
By thoroughly assessing the condition of your canvas camper, you can determine the specific areas that require waterproofing. Once you’ve identified any weak spots or leaks, you can move on to choosing the right waterproofing product for your canvas camper.
Choose the Right Waterproofing Product
When choosing the right waterproofing product for our canvas camper, we need to research different types of solutions available on the market. It’s important to consider the specific needs of our camper, such as the material it’s made of and the climate we’ll be camping in.
By doing our due diligence and finding the most suitable waterproofing product, we can ensure that our canvas camper stays dry and protected during our outdoor adventures.
Research different types of waterproofing solutions
To really make your pop-up canvas camper impenetrable to any kind of water, you’ll want to explore the vast array of mind-blowingly effective waterproofing solutions out there.
When it comes to waterproofing materials, there are several options to consider. Silicone-based waterproofing sprays are a popular choice due to their ability to create a protective barrier on the fabric. They’re easy to apply and provide excellent water resistance.
Another option is wax-based waterproofing products, which offer great durability but may require more effort to apply.
Additionally, there are seam sealants specifically designed to prevent leaks at seams and stitching.
Each method has its pros and cons, so it’s important to consider factors such as ease of application, longevity, and the specific needs of your canvas camper before making a decision.
By researching different types of waterproofing solutions, you can choose the one that best suits your camper’s requirements and ensure maximum protection against water.
Now, let’s consider the specific needs of your canvas camper.
Consider the specific needs of your canvas camper
Think about the unique requirements of your portable shelter and imagine the perfect solution to keep it safe and dry. When considering the specific needs of your canvas camper, it’s important to assess durability and choose materials that can withstand various weather conditions. Look for waterproofing solutions that are designed specifically for canvas, as they’ll provide the best protection against water damage.
Consider the type of fabric your camper’s made of and select a waterproofing product that’s compatible with it. Additionally, think about any additional features your camper may have, such as windows or zippers, and make sure that the waterproofing solution can effectively cover and protect these areas as well.
By carefully assessing durability and choosing the right materials, you can ensure that your canvas camper stays dry and secure in any weather.
When it comes to preparing the canvas for waterproofing, there are a few important steps to follow.
Prepare the Canvas for Waterproofing
Before you can waterproof your pop up canvas camper, it’s essential to properly prepare the canvas. This will ensure that the waterproofing solution adheres well and provides long-lasting protection.
To begin, gather the necessary tools for the task, including a soft brush or sponge, mild soap, water, and a hose. Start by cleaning the canvas thoroughly using the mild soap and water mixture. Gently scrub the surface to remove any dirt, debris, or stains. Rinse the canvas with a hose and allow it to dry completely before moving on to the next step.
Once the canvas is clean and dry, it’s time to apply the waterproofing solution. Before doing so, make sure to choose the right product for your canvas material. Read the instructions carefully and follow them accordingly. Applying multiple coats is crucial to ensure maximum protection. Use a soft brush or sponge to evenly apply the solution, making sure to cover every inch of the canvas. Allow each coat to dry completely before applying the next one.
With the canvas properly prepared, it’s time to move on to the next step: applying the waterproofing solution.
Apply the Waterproofing Solution
When applying the waterproofing solution to your canvas, it’s important to carefully follow the instructions provided with the product. This will ensure that you achieve the best results and protect your pop up camper from water damage.
To evenly coat the canvas, I recommend using a brush or roller, making sure to cover all areas thoroughly. By following these steps, you can effectively waterproof your canvas and enjoy a dry and comfortable camping experience.
Follow the instructions provided with the product
To properly waterproof your pop up canvas camper, be sure to carefully follow the instructions provided with the product, as they hold the key to achieving ultimate water resistance.
The instructions will guide you through the process of applying the waterproofing solution in the most effective way. Assess the durability of your camper’s canvas before starting, as it may need some repairs or patching before applying the waterproofing solution.
If you’re unable to find the recommended waterproofing product, you can explore alternative options that provide similar water resistance.
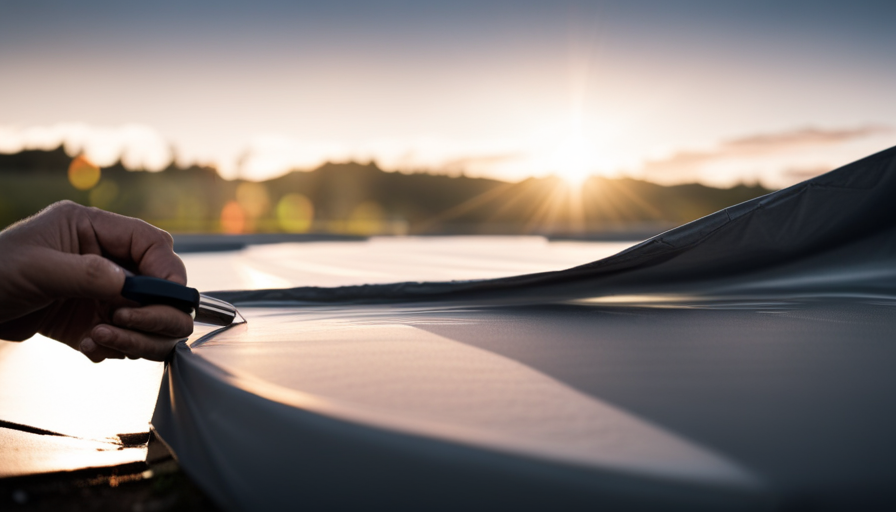
Once you have the waterproofing solution, use a brush or roller to evenly coat the canvas, ensuring that every inch is covered. This will create a protective barrier that prevents water from seeping into your camper.
Now, let’s move on to the next step of the process.
Use a brush or roller to evenly coat the canvas
Make sure you grab a brush or roller and evenly coat the canvas to achieve maximum water resistance. Here are some brushing techniques to help you get the job done right:
- Start from the top and work your way down, making sure to cover every inch of the canvas.nn2. Use long, even strokes to apply the waterproofing solution, ensuring that it penetrates the fabric.nn3. Pay extra attention to corners and edges, as these areas are more prone to water leakage.nn4. Don’t forget to brush both sides of the canvas for complete protection.
If brushing isn’t your preferred method, there are alternative waterproofing methods available, such as spray-on solutions or waterproofing tapes. These options can provide quick and easy coverage for your pop-up camper canvas.
Now that you’ve brushed the canvas, it’s time to pay special attention to seams and sealed areas to ensure no water can seep through.
Pay Special Attention to Seams and Sealed Areas
Pay special attention to the seams and sealed areas when waterproofing your pop-up canvas camper. These areas are especially vulnerable to leaks and water damage. It’s important to properly seal and maintain the seams to ensure the longevity and effectiveness of your camper’s waterproofing.
To start, inspect the seams for any signs of wear or damage. Look for loose threads or areas where the sealant may have worn off. Use a seam sealer specifically designed for canvas materials to reseal any damaged areas. Apply the seam sealer evenly along the seams, making sure to cover the entire length. This will create a watertight seal and prevent any moisture from seeping through.
In addition to the seams, pay attention to other sealed areas of your camper, such as windows and doors. These areas are also prone to leaks and should be thoroughly inspected and sealed as needed. Use a waterproofing solution or spray to coat these areas and ensure they’re well protected.
Once you’ve finished sealing the seams and other sealed areas, allow sufficient drying time before using your camper. This’ll ensure that the waterproofing products have properly adhered and dried, providing maximum protection against water damage.
Allow Sufficient Drying Time
When waterproofing a pop-up canvas camper, it’s crucial to allow sufficient drying time for the waterproofing product. Following the recommended drying time ensures that the product fully sets and provides maximum protection against water infiltration.
Additionally, before folding or storing the camper, it’s essential to ensure that it’s completely dry. This prevents any moisture from being trapped inside, which could lead to mold or mildew growth.
Follow the recommended drying time for the waterproofing product
Ensure you’re patient and let the waterproofing product fully dry, so you can confidently protect your pop-up canvas camper from water damage. Following the recommended drying time is crucial to ensure the effectiveness of the waterproofing treatment.
Each product may have different drying times, so it’s important to read the instructions carefully. Rushing the process may result in an incomplete seal, leaving your camper vulnerable to water leaks. By allowing the recommended drying time, you are giving the product enough time to create a strong barrier against moisture.
Once the waterproofing product has fully dried, you can proceed to the next step of making sure the camper is completely dry before folding or storing. This will prevent any moisture from being trapped inside and causing mold or mildew growth.
Make sure the camper is completely dry before folding or storing
Before you fold or store it, make sure to thoroughly dry your camper to prevent any moisture-related issues. Proper canvas maintenance is crucial for keeping your pop-up camper waterproof and preventing mold growth. After applying the waterproofing product and allowing it to dry according to the manufacturer’s instructions, it’s important to ensure that the entire camper is completely dry before folding it up. Any residual moisture can lead to mold or mildew growth, which can damage the canvas and create an unhealthy living environment.
Take the time to inspect all areas of the camper, including the corners and seams, and use a towel or fan to remove any remaining moisture. Once you’re confident that the camper is dry, you can proceed to the next step of testing the waterproofing to ensure its effectiveness.
Test the Waterproofing
To test the waterproofing of your pop-up canvas camper, grab a hose and give it a good dousing. This is a crucial step to ensure that your camper is truly waterproof and can withstand any weather conditions.
There are a few test methods you can use to check the effectiveness of the waterproofing. First, start by spraying water directly onto the canvas walls and roof of the camper. Pay close attention to the seams and any areas where water could potentially seep through. Observe if any water penetrates the canvas or if it simply beads up and rolls off. This will give you an idea of how well the waterproofing is holding up.
Next, check for any signs of leakage inside the camper. Look for damp spots or water stains on the walls, ceiling, and floors. If you notice any water coming through, it’s a clear indication that the waterproofing needs some attention.
In addition to the hose test, it’s also recommended to set up your camper in a controlled environment during heavy rain or simulate rain using a sprinkler system. This will provide a more realistic test of its waterproof capabilities.
Maintaining the waterproofing over time is essential to ensure the longevity of your camper.
Maintain the Waterproofing Over Time
Keeping your camper’s waterproofing in top shape is like building a strong shield against the elements that’ll stand the test of time. Ensuring long-lasting waterproofing and maintaining the integrity of the canvas are essential for a dry and comfortable camping experience.
To maintain the waterproofing over time, there are a few key steps to follow.
Firstly, regular cleaning is crucial. Remove any dirt, debris, or mildew from the canvas using a gentle brush or sponge and a mild soap solution. Rinse thoroughly and allow it to dry completely before applying any waterproofing treatments.
Next, reapply a waterproofing agent specifically designed for canvas. This’ll help restore the water repellency and maintain the fabric’s durability. Follow the instructions on the product carefully, making sure to cover the entire canvas surface evenly.
Additionally, inspect the seams and stitching regularly. If you notice any signs of wear or damage, repair them promptly to prevent water from seeping through. Reinforce weak spots with seam sealer or waterproof tape to maintain the integrity of the canvas.
By following these steps, you can ensure that your camper’s waterproofing remains effective for years to come. However, it’s also important to consider additional protective measures, which we’ll discuss in the next section.
Transitioning into the subsequent section, let’s explore some options to further enhance the durability of your camper’s waterproofing.
Consider Additional Protective Measures
If you want to take your camper’s waterproofing to the next level, it’s time to think about some extra measures to keep it protected.
Choosing protective coatings and exploring alternative methods can provide additional layers of defense against moisture and extend the lifespan of your canvas camper.
One option to consider is applying a waterproofing spray or coating specifically designed for canvas materials. These products create a barrier that repels water, preventing it from seeping through the fabric. Look for coatings that are durable, long-lasting, and easy to apply.
It’s important to thoroughly clean and dry the canvas before applying any protective coating to ensure optimal adhesion.
Additionally, consider alternative methods such as using seam sealer or waterproof tape to reinforce vulnerable areas like seams, zippers, and windows. These measures can help prevent water from seeping into the camper through potential weak points.
By choosing the right protective coatings and exploring alternative methods, you can enhance the waterproofing of your pop-up canvas camper and enjoy your dry and protected camping experience!
Enjoy Your Dry and Protected Camping Experience!
Now that we’ve taken the necessary steps to waterproof our pop-up canvas camper, we can fully enjoy our camping experience without worrying about getting wet.
With our camper protected from the rain, we can take advantage of its shelter and stay comfortable even during heavy downpours.
No more soggy sleeping bags or damp clothes – we can now relax and make the most out of every rainy camping trip.
Take advantage of your newly waterproofed canvas camper
To fully appreciate the benefits of your newly waterproofed canvas camper, simply take a moment to imagine the peace of mind that comes with knowing you can confidently venture into the great outdoors, rain or shine.
With your canvas camper now waterproofed, you can make the most of your camping trips by utilizing some camping hacks and rain gear essentials. Don’t let a little rain dampen your spirits! Pack lightweight raincoats, waterproof boots, and sturdy umbrellas to stay dry and comfortable during unexpected showers.
Additionally, invest in waterproof storage containers to protect your belongings from moisture. With these practical tips, you can enjoy your camping experience without worrying about getting wet or damaging your gear. So, stay comfortable and worry-free during rainy camping trips by taking the necessary precautions and embracing the beauty of nature, no matter the weather.
Stay comfortable and worry-free during rainy camping trips
Embrace the soothing pitter-patter of raindrops on your shelter as you effortlessly glide through rainy camping trips, feeling comfortable and worry-free. To ensure a cozy experience, pack the right camping gear and rain gear. Here are four essentials to have on hand:
-
Waterproof tent: Invest in a high-quality waterproof tent that can withstand heavy rain and keep you dry throughout the night.
-
Rainfly: Attach a rainfly to your tent to provide an extra layer of protection against the elements.
-
Waterproof clothing: Pack waterproof jackets, pants, and boots to keep yourself dry while exploring the outdoors.
-
Dry bags: Use dry bags to store your electronics, clothing, and other essentials, ensuring they stay dry and protected.
By equipping yourself with these camping gear and rain gear essentials, you can fully enjoy the beauty of rainy camping trips without worrying about discomfort or dampness.
Frequently Asked Questions
Can I use any type of waterproofing product on my canvas camper?
Sure, you can use various types of waterproofing products to protect your canvas camper. There are several effective waterproofing methods available, such as spray-on waterproofing solutions, waterproofing sealants, and waterproofing sprays. These products create a protective barrier on the canvas surface, preventing water from seeping through. It’s important to carefully read and follow the instructions provided by the manufacturer to ensure proper application and maximum effectiveness.
How often should I reapply the waterproofing solution?
We all know that prevention’s better than cure. When it comes to waterproofing your canvas camper, regular reapplication of the waterproofing solution is key.
The reapplication frequency depends on various factors such as weather conditions and usage. Generally, it’s recommended to reapply the solution every 6-12 months to ensure maximum protection. This not only extends the lifespan of your camper but also offers benefits like keeping you dry during unexpected showers and preventing mold or mildew growth.
Are there any specific areas on the canvas camper that require extra waterproofing attention?
When it comes to canvas camper maintenance, it’s important to pay extra attention to specific areas that require more waterproofing. These areas usually include seams, zippers, and windows, as they’re more prone to leaks.
Ensuring these areas are properly waterproofed will greatly enhance the longevity and effectiveness of your camper’s water resistance. Regularly inspecting and reapplying waterproofing solutions to these areas will help keep your canvas camper dry and protected from the elements.
Can I still clean my canvas camper after applying the waterproofing solution?
Yes, you can still clean your canvas camper after applying the waterproofing solution. It’s important to use cleaning techniques that are compatible with the waterproofing solution to ensure the effectiveness of the waterproofing isn’t compromised. Avoid using harsh chemicals or abrasive scrubbing tools that can damage the waterproofing. Regularly cleaning and maintaining your canvas camper will help prolong the lifespan of the waterproofing and keep it in good condition.
What should I do if I notice any leaks or water seepage after applying the waterproofing solution?
If you notice any leaks or water seepage after applying the waterproofing solution, don’t panic! It’s important to address these issues promptly to prevent further damage.
Start by identifying the source of the leak. Look for signs of water damage such as damp spots or discoloration on the canvas. Once located, you can try patching the affected area using a waterproof adhesive or sealant.
If the damage is extensive, it may be best to consult a professional for repairs.
Conclusion
So, there you have it – the secrets to waterproofing your beloved canvas camper! With a little bit of effort and the right products, you can ensure that your camping experience remains dry and protected.
Don’t let the fear of rain dampen your spirits – take control and prepare your camper for any weather conditions. By following these steps and maintaining the waterproofing over time, you can enjoy your camping adventures without worrying about leaks or water damage.
Happy camping!

