As the temperature rises and the snow begins to thaw, it’s time to bring your camper out of its dormant winter state. Just like a bear waking up from hibernation, your camper requires some special attention to prepare it for your upcoming adventures. Wondering how to dewinterize your camper? Have no fear, fellow explorers, as I am here to walk you through the process, step by step.
In this article, I will share my knowledge and experience on how to properly dewinterize your camper. From draining the water system to testing and recharging the batteries, we will leave no stone unturned.
I will provide you with detailed instructions on:
- Checking and reconnecting plumbing and water lines
- Flushing and cleaning the water tanks
- Testing and adjusting the propane system
Additionally, I will walk you through the essential safety checks and testing of all safety features.
So, grab your tools and let’s dive into the world of dewinterizing your camper. Together, we will ensure that your home on wheels is ready to hit the open road once again.
Key Takeaways
- Dewinterizing a camper involves draining the water system, checking and reconnecting plumbing and water lines, and flushing and cleaning water tanks.
- Testing and recharging batteries is necessary for reliable power in the camper.
- Inspection and cleaning of the exterior of the camper is important to ensure readiness for the next adventure.
- Checking and testing appliances and systems, performing safety checks, and ensuring a safe and enjoyable camping experience are essential steps in dewinterizing a camper.
Gather Necessary Supplies and Equipment
Now, it’s time to gather all the supplies and equipment you’ll need to get your camper ready for the warmer months ahead. As someone who understands the importance of proper camper maintenance, I can assure you that having the right tools and materials is essential for a successful dewinterization process.
First and foremost, you’ll need to gather cleaning supplies. Start by grabbing a broom, dustpan, and vacuum cleaner to remove any dirt or debris accumulated during the winter. It’s also a good idea to have all-purpose cleaner, window cleaner, and disinfectant wipes to thoroughly clean every nook and cranny of your camper.
Next, consider the organization of your camper supplies. Having bins or storage containers will help keep everything in its place and prevent clutter. Label each container for easy access and efficient storage. Additionally, don’t forget to stock up on essential items like toilet paper, trash bags, and basic kitchen supplies.
Once you’ve gathered all the necessary supplies, it’s time to drain the water system. But before we move on to that step, make sure you have a water pump bypass kit, a water heater bypass kit, and a water pressure regulator. These tools will ensure a smooth and efficient dewinterization process.
Now, let’s move on to the next step of draining the water system.
Drain the Water System
First things first, let’s empty the water system of your camper, so it’s like melting away the winter frost and getting it ready for the adventures ahead. The winterization process is crucial to protect your camper’s water system during the cold months, but now it’s time to reverse it and prepare for the camping season.
Here’s how you can drain the water system effectively:
-
Find the drain valves: Locate the low point drains and the fresh water tank drain valve. These are usually found under the camper or inside a cabinet. Open them to let the water flow out.
-
Open all faucets: Turn on all faucets, including the shower and outdoor shower, to release any remaining water. Don’t forget to flush the toilet.
-
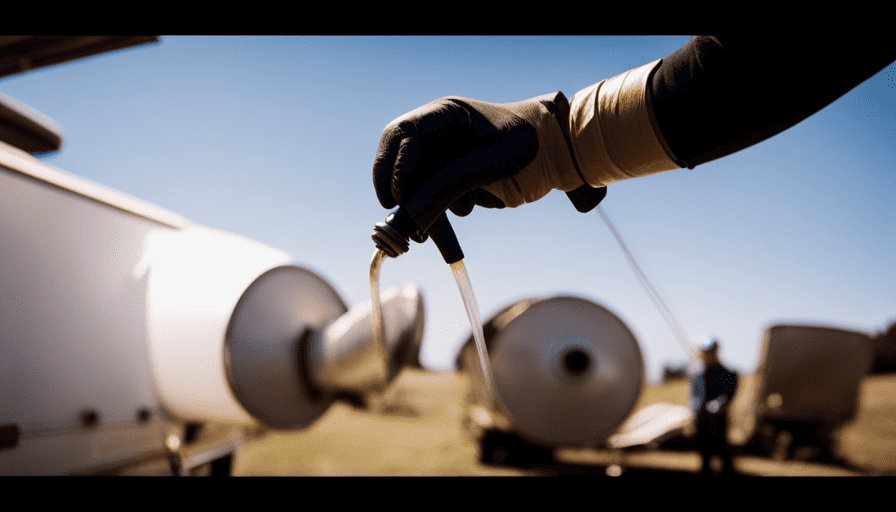
Empty the water heater: If your camper has a water heater, make sure to drain it. Find the drain valve, usually located outside, and open it until the water stops flowing.
-
Clear the water lines: Use compressed air or a hand pump to blow out any remaining water from the water lines. Start from the furthest faucet and work your way back towards the water pump.
By following these steps, you’ll ensure that your camper’s water system is properly drained and ready for water system maintenance.
Next, we’ll check and reconnect the plumbing and water lines to complete the dewinterization process.
Check and Reconnect Plumbing and Water Lines
To make the most of your camping adventures, let’s dive into the next step of reconnecting and checking the plumbing and water lines in your camper.
After draining the water system, it’s important to reconnect the plumbing and check the water lines to ensure they’re functioning properly. Start by inspecting all the connectors and fittings for any signs of damage or leaks. If you notice any issues, replace them immediately to prevent further problems down the line.
Once you’ve checked the connectors, it’s time to reconnect the plumbing. Begin by attaching the water heater bypass valve, if applicable, and then reconnect the hot and cold water lines. Make sure to tighten all connections properly, but be careful not to overtighten and cause damage.
Next, turn on the water supply and check for any leaks. It’s important to go through each faucet, shower, and toilet to ensure that water is flowing smoothly and there are no leaks. If you do find any leaks, address them promptly to prevent water damage and wasted resources.
With the plumbing reconnected and water lines checked, you can now move on to the next section about flushing and cleaning the water tanks. It’s important to keep your camper’s water system clean and sanitary for a successful camping trip.
Flush and Clean the Water Tanks
After ensuring that your plumbing and water lines are properly connected and functioning, it’s time to give attention to flushing and cleaning the water tanks in your camper. Proper maintenance of the tanks is essential for ensuring clean and safe water during your camping trips.
Here are three important steps to follow in order to effectively flush and clean your camper’s water tanks:
-
Flush the tanks: Start by emptying any remaining water from the tanks. This can be done by opening the drain valve and allowing the water to flow out. Once the tanks are empty, use a hose to flush them thoroughly, making sure to remove any sediment or debris that may have accumulated.
-
Sanitize the tanks: After flushing, it’s important to sanitize the tanks to eliminate any bacteria or contaminants. Mix a solution of water and bleach, following the manufacturer’s instructions for the correct ratio. Use this solution to fill the tanks, making sure to also run it through the plumbing lines. Let the solution sit for a few hours, then drain and rinse the tanks thoroughly.
-
Rinse again: After sanitizing, it’s crucial to rinse the tanks once more to remove any residual bleach. Fill the tanks with fresh water and drain them again to ensure all traces of bleach are gone.
Now that your water tanks are clean and ready for use, it’s time to move on to the next step: testing and recharging the batteries.
Test and Recharge the Batteries
Once your water tanks are clean and ready to go, it’s time for me to test and recharge the batteries in my camper. Battery maintenance is crucial to ensure that I have reliable power throughout my camping trip.
The first step is to inspect the batteries for any signs of damage or corrosion. If I notice any issues, I’ll need to address them before proceeding.
Next, I’ll use a multimeter to test the battery voltage. This will give me an idea of their current state of charge. If the voltage is low, it means the batteries need to be recharged. To recharge them, I’ll connect them to a battery charger and let them charge fully. It’s important to follow the manufacturer’s instructions for the charger to avoid overcharging or damaging the batteries.
Once the batteries are fully charged, I’ll disconnect them from the charger and re-install them in the camper. I’ll make sure to tighten the connections securely to ensure proper power flow.
With the batteries recharged, I can now move on to the next step and inspect and clean the exterior of the camper, ensuring it’s ready for my next adventure.
Inspect and Clean the Exterior of the Camper
Now that the batteries are fully charged, it’s time to give the exterior of the camper some TLC, ensuring it looks and feels ready for my next thrilling adventure.
The first step is to thoroughly inspect the exterior. I start by walking around the camper and carefully examining it for any signs of damage or wear. I check for any cracks, dents, or loose parts that may need attention. It’s important to address these issues before hitting the road to prevent further damage or safety hazards.
Once the inspection is complete, I move on to cleaning the exterior. I gather the necessary supplies, such as a bucket, sponge, mild detergent, and a soft-bristled brush. I start by rinsing the camper with water to remove any loose dirt or debris. Then, using the sponge and detergent, I gently scrub the surfaces, paying extra attention to areas that are prone to dirt buildup.
After thoroughly cleaning the exterior, I rinse off the soap with clean water and dry it with a soft cloth or towel. This not only gives the camper a fresh and polished look but also helps to protect it from potential damage caused by dirt and grime.
With the exterior inspection and cleaning complete, it’s time to move on to the next step of checking and testing the appliances and systems. It’s important to ensure everything is in proper working order before hitting the road for my exciting journey ahead.
Check and Test Appliances and Systems
To ensure a successful and hassle-free trip, it’s crucial to thoroughly check and test all the appliances and systems in the camper. One of the first things I do is check the gas lines to ensure they’re in good condition and free from any leaks. This is important for the safe operation of the appliances that rely on gas, such as the stove and the refrigerator. I carefully inspect the lines for any signs of damage or wear and replace them if necessary.
Next, I move on to testing the heating system. As the weather can still be chilly during the early camping season, it’s important to make sure the heating system is working properly. I turn on the furnace and let it run for a while, checking that it heats up the camper efficiently and that there aren’t any strange smells or noises coming from the unit. If I notice any issues, I address them immediately to ensure a cozy and comfortable camping experience.
After checking and testing the appliances and heating system, it’s time to move on to the next step of dewinterizing the camper, which is checking and replacing filters and ventilation systems.
Check and Replace Filters and Ventilation Systems
Ensure a breath of fresh air and clean living space by checking and replacing filters and ventilation systems in your camper. Proper ventilation is essential for a comfortable and healthy camping experience, so it’s important to inspect and maintain these components regularly.
Here are some key steps to follow:
-
Check for clogged vents: Inspect the exterior vents of your camper to ensure they’re not blocked by debris or critters. Clear any obstructions that may restrict airflow and compromise the efficiency of your ventilation system.
-
Replace air filters: Dirty air filters can hinder the performance of your ventilation system and reduce the air quality inside your camper. Remove and clean or replace the filters as recommended by the manufacturer. This simple task will help maintain a clean and fresh atmosphere inside your camper.
By checking and replacing filters and ventilation systems, you can ensure that your camper is well-ventilated and free from allergens and pollutants. This will contribute to a healthier and more enjoyable camping experience.
Now, let’s move on to the next step and test and adjust the propane system.
Test and Adjust the Propane System
As you test and adjust the propane system, breathe in the comforting warmth of a crackling fire and savor the delicious aroma of meals cooking on your camper’s stovetop.
It’s important to ensure that your propane system is functioning properly before you hit the road. Start by checking the regulator, which controls the flow of propane to your appliances. Inspect it for any signs of damage or wear, and if necessary, replace it with a new one.
Next, it’s time to test the propane pressure. Connect a pressure gauge to the system and open the valves to allow propane to flow. The pressure should be within the recommended range, typically between 11 and 14 inches of water column. If the pressure is too low or too high, adjust it using the appropriate valves on the regulator.
Once you’ve tested and adjusted the propane system, it’s crucial to perform a safety check and test all safety features to ensure everything is in working order. This includes checking for gas leaks, inspecting the propane lines, and testing the carbon monoxide and smoke detectors.
With a properly functioning propane system and all safety features in place, you can enjoy your camping adventures with peace of mind.
Perform a Safety Check and Test all Safety Features
Make sure you take the time to perform a thorough safety check and test all of the safety features on your camper, because your peace of mind is worth it. Safety should always be a top priority when it comes to using your camper, especially after it’s been winterized.
To perform a safety check, start by inspecting the exterior of the camper for any signs of damage or wear. Check the tires for proper inflation and look for any leaks or obstructions in the propane lines.
Next, test the smoke and carbon monoxide detectors to make sure they’re working. Replace any batteries if needed. Don’t forget to check the fire extinguisher and make sure it’s fully charged. Test the emergency exit windows and make sure they open smoothly.
Finally, go through the camper and test all safety features such as the propane stove, furnace, and water heater. Run each appliance for a few minutes to make sure they’re functioning properly.
Taking the time to perform a safety check and test all safety features will give you peace of mind and ensure a safe and enjoyable camping experience.
Frequently Asked Questions
How often should I dewinterize my camper?
I recommend dewinterizing your camper at least once a year, preferably before your first trip of the camping season. The best time to dewinterize your camper is when temperatures consistently stay above freezing. This is important to avoid any damage to your plumbing system. By dewinterizing regularly, you can ensure that your camper is ready for use, with all systems functioning properly and ready for a great camping experience.
Can I use regular household cleaning products to clean the water tanks?
Using regular household cleaning products to clean water tanks in a camper may seem like a convenient option, but it’s not recommended. Household cleaning products can contain harsh chemicals that may leave residue or damage the tank. Instead, consider alternative cleaning methods specifically designed for water tanks, such as using a mixture of vinegar and water or specialized RV tank cleaners.
These options are safer and more effective in maintaining the cleanliness and functionality of your camper’s water system.
Is it necessary to replace the water filters before dewinterizing the camper?
Before dewinterizing the camper, it’s highly recommended to replace the water filters. This is an essential step in ensuring clean and safe water for your camping adventures. Water filters can become clogged or contaminated during the winter months, so replacing them is crucial to maintaining the quality of your water supply.
By starting the dewinterization process with fresh filters, you can be confident that your water will be free from impurities and ready for use.
How do I test the propane system to ensure it is working properly?
To test the propane system and ensure it’s working properly, start by checking the propane tank for any leaks or damage.
Next, turn on the propane gas supply valve and light one of the burners on the stove. If the burner ignites and produces a steady flame, it indicates that the propane system is functioning correctly.
Additionally, regularly inspect and maintain the propane system to prevent any potential issues and ensure its long-term reliability.
What are some common safety features that I should test during the dewinterization process?
During the camper dewinterization process, it’s crucial to thoroughly check all safety features. This includes inspecting the electrical systems to ensure they’re in proper working order.
By following a camper dewinterization checklist, you can ensure that all safety features are tested and functioning correctly. Testing the electrical systems is of utmost importance as it ensures that all lights, outlets, and appliances are functioning properly and reduces the risk of any electrical hazards while using the camper.
Do I Need to Empty the Camper Toilet before Dewinterizing it?
Before dewinterizing your camper toilet, it is crucial to address the issue of emptying camper toilet. This task cannot be overlooked, as failure to do so may lead to unpleasant odors and potential damage. Make sure to empty the camper toilet thoroughly before starting the dewinterization process to ensure a clean and fresh start for your camping adventures.
Conclusion
As I carefully went through the process of dewinterizing my camper, I couldn’t help but appreciate the symbolism behind it.
Just like the camper, we too go through seasons of hibernation, where we retreat and gather our strength. But now, it’s time to emerge from our cocoon and embrace the world once again.
Dewinterizing is a ritual of renewal, a reminder that we have the power to awaken our senses and embark on new adventures. With each step, I felt a surge of excitement, knowing that I was preparing for a journey that would be filled with memories and experiences.
So, as I finished the last task and closed the camper door, I couldn’t help but feel a sense of anticipation and readiness for the road ahead.

