Connect with us

Pop Up Campers

How to Install a Battery on a Pop-Up Camper – Power Your Adventures

Start your journey to powering your pop-up camper with essential battery installation tips that will enhance your outdoor adventures—discover more inside!

Published

on

installing battery on camper

To install a battery on your pop-up camper, start by choosing the right type based on your power needs, like deep cycle or AGM batteries. Find an accessible location that's away from heat sources and guarantees good weight distribution. Gather your tools, disconnect shore power, and connect the battery following correct polarity—red to positive and black to negative. Secure the battery in a proper box and check all connections for corrosion. Finally, test the system with a multimeter to confirm it's working. Keeping these tips in mind sets you up for success, and there's even more to explore!

Key Takeaways

  • Choose the right battery type (deep cycle, AGM, or lithium-ion) based on your camper's electrical needs and usage patterns.
  • Ensure proper battery placement for accessibility, ventilation, and balanced weight distribution to maintain towing stability.
  • Use the correct gauge wire (6 or 8 AWG) for safe connections, and connect positive terminals first to minimize spark risks.
  • Regularly inspect battery connections for corrosion and wear, and maintain proper water levels for lead-acid batteries to prolong lifespan.

Understanding Battery Types

When choosing a battery for your pop-up camper, it's important to understand the different types available and how they can meet your energy needs. The most common options are deep cycle lead-acid batteries and AGM (Absorbent Glass Mat) batteries.

Deep cycle lead-acid batteries range from 70 to 220 amp-hours, making them a reliable choice for powering lights, water pumps, and other camper equipment during your off-grid adventures.

On the other hand, AGM batteries are known for their lower self-discharge rates and spill-proof design. While they can be pricier than traditional lead-acid batteries, their advantages might make them worth the investment.

Additionally, consider the emerging popularity of lithium-ion batteries, which are lightweight and boast a longer lifespan. They offer a higher energy density but come at a steeper price.

Ultimately, it's vital to match the battery type with your camper's electrical system and your specific usage needs. Pay attention to factors like discharge rates, charging requirements, and overall power consumption to guarantee you choose the right battery for your adventures.

Advertisement
Meet the all new Kndle Family scaled

Choosing the Right Location

Selecting the right location for your battery in a pop-up camper is essential for guaranteeing easy access and ideal performance. Typically, the front storage compartment is the best choice. Make certain to mount the battery securely in a battery box to prevent movement during travel. Here's a quick reference table to help you consider important factors:

FactorRecommendationImportance
AccessibilityChoose a location easy to reachMaintenance and monitoring
Heat SourcesKeep away from the furnacePrevent overheating
Weight DistributionBalance placement for towingStability during travel
VentilationGuarantee proper airflowSafety with lead-acid
Power Cord PositioningPlan for convenient access to the cordEasy setup and usage

When you position your battery, remember to verify that it's not near heat sources. This helps prevent any potential failure. Also, think about the battery's weight; a balanced setup will make your towing experience smoother. Finally, guarantee proper ventilation to minimize safety hazards, particularly with lead-acid batteries.

Preparing for Installation
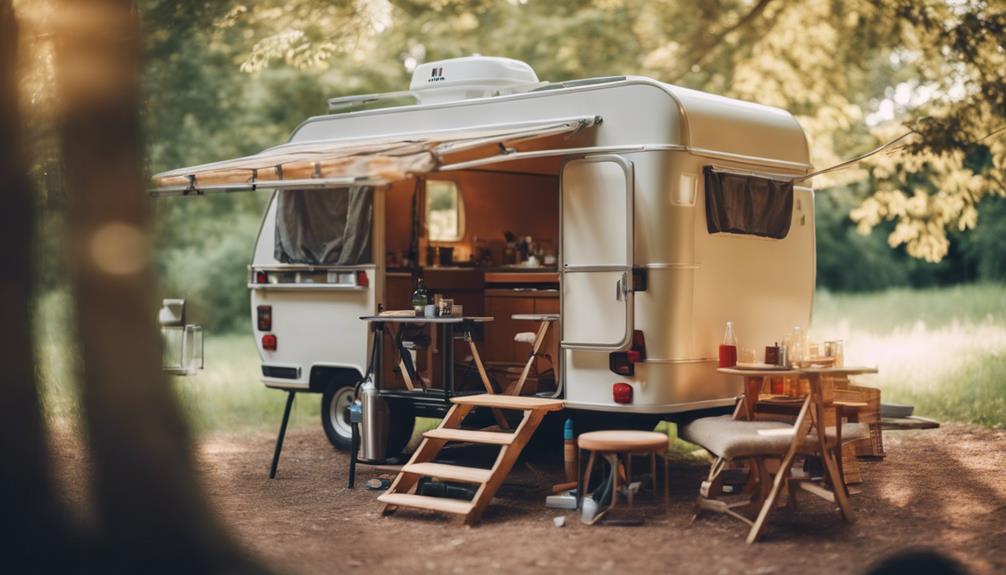
installation preparation steps

Before you start the installation, make sure you've got all the necessary tools ready, like a wrench and wire cutters.

Don't forget to wear safety gear to protect yourself during the process.

Gather Necessary Tools

Gathering the right tools is vital for a smooth battery installation on your pop-up camper. First, make certain you have a wrench or socket set for connecting the battery terminals, along with a screwdriver to secure the battery tray. Safety gloves are also important to protect your hands during the process.

Next, you'll need a multimeter to check voltage levels and diagnose any electrical issues before hooking up the battery. This tool guarantees you're working with a fully functional system.

Advertisement
Meet the all new Kndle Family scaled

Don't forget to obtain a battery box or tray; it'll securely hold the battery in place and prevent movement while you're on the road.

Having a battery charger on hand is wise, especially if you're using a deep cycle battery for extended off-grid camping. This will help maintain the battery's charge and guarantee reliability during your adventures.

Safety Precautions First

Making certain of your safety is essential when preparing to install a battery on your pop-up camper. Start by disconnecting the camper from any shore power to prevent electrical shock or short circuits. Safety precautions are vital, so be sure to wear protective gear like gloves and safety glasses. This will help protect you from battery acid and potential sparks that can occur during installation.

Next, double-check the polarity of the battery terminals. Connect positive to positive and negative to negative to avoid damaging your electrical system. Having a fire extinguisher on hand is also a smart move, just in case an accidental short circuit or electrical fire arises during the process.

Before you engage, familiarize yourself with the location of the kill switch and battery breaker. Knowing where these are can save valuable time if you need to disconnect power quickly.

Advertisement
Meet the all new Kndle Family scaled

Connecting the Battery

Now that you're ready to connect the battery, it's essential to choose the right battery type and understand the wiring connections.

You'll also need to take some safety precautions to guarantee everything runs smoothly.

Let's break down these key points to get your pop-up camper powered up safely.

Battery Type Selection

Selecting the right deep cycle battery, like a Group 24 or Group 27, is vital for effectively powering your pop-up camper's systems. These batteries are designed to handle multiple discharge and recharge cycles, making them ideal for dry camping where you might rely solely on battery power. A minimum of 12 volts is essential for operating your camper's important systems, such as lights, water pumps, and furnaces.

When choosing your battery, consider these key points:

Advertisement
Meet the all new Kndle Family scaled
  • Capacity: Look for batteries with ample amp hours to suit your needs.
  • Weight: Verify your camper can handle the battery's weight without compromising balance.
  • Safety Features: Select batteries with built-in safety mechanisms to prevent overcharging.

Don't forget to use appropriate 6-gauge battery cables for safe connections and consider installing a battery disconnect switch. This will help you cut off power when not in use, preventing unwanted battery drain.

Regularly check the battery's charge level, and connect it to your tow vehicle or shore power when parked for best maintenance.

Wiring Connections Explained

To connect the battery to your pop-up camper, start by using the correct gauge wire, typically 6 or 8 AWG, to handle the current load safely.

First, verify that the battery kill switch is in the 'on' position; this allows power to flow to the camper's electrical system.

Next, take a red wire and connect it from the positive terminal of the battery to the camper's positive power input. Then, use a black wire to connect the negative terminal to the camper's ground.

Before you finalize the connections, check that the battery breaker is functional and hasn't tripped. A tripped breaker can prevent your camper from receiving power, which could hinder your adventures.

Advertisement
Meet the all new Kndle Family scaled

Once everything is connected, it's a good idea to inspect the wiring regularly for any signs of corrosion or wear. This maintenance helps verify efficient power delivery and extends battery life.

If you plan to use shore power, remember that your camper's electrical system should seamlessly switch between battery and shore power, so keep your connections clean and secure for peak performance.

Safety Precautions Required

Before connecting the battery, verify the camper's disconnected from shore power to prevent electrical shocks or damage.

Following essential safety precautions is vital for a smooth and safe battery installation. Here are some key steps you should always take:

  • Use insulated tools to avoid accidental short circuits when working near battery terminals.
  • Connect the positive (red) terminal first, followed by the negative (black) terminal to minimize the risk of sparks.
  • Regularly inspect battery connections for corrosion or loose terminals, cleaning them as needed to guarantee a solid connection.

Securing the Battery Compartment
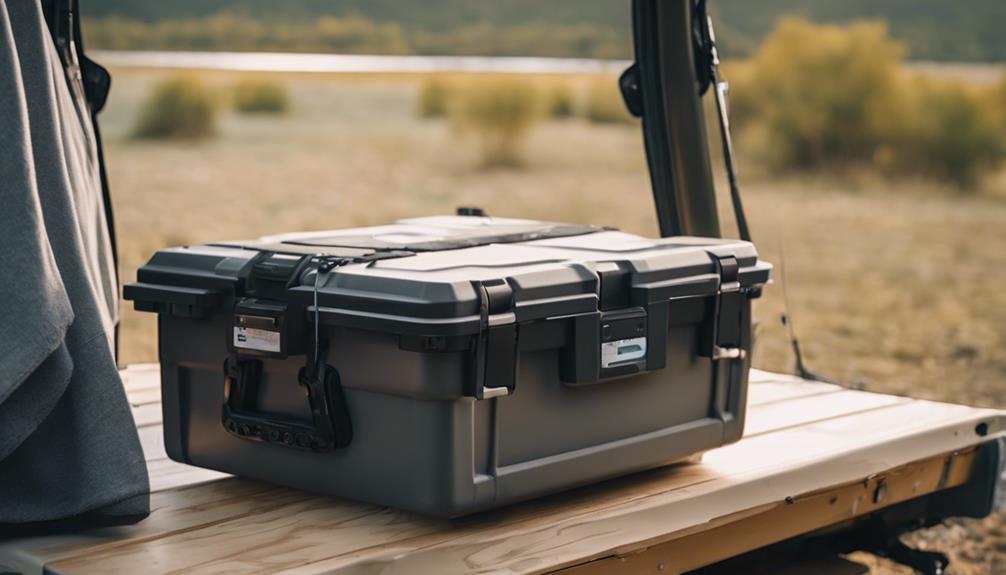
battery compartment safety measures

A clean and debris-free battery compartment is vital for securely installing your battery in a pop-up camper. Start by clearing out any dirt, dust, or debris to create an ideal environment for your battery.

Next, use a battery box or tray specifically designed for pop-up campers. This protects your battery from movement and environmental elements while guaranteeing it remains securely in place.

Advertisement
Meet the all new Kndle Family scaled

Once you've placed the battery in the box, make sure to secure it with appropriate straps or fasteners. This step is essential to prevent the battery from shifting during travel, as movement can lead to damage to the connections.

Check that the battery terminals are easily accessible for maintenance while also being protected from accidental short circuits. Cover them when not in use to guarantee safety.

Regularly inspect the battery compartment for signs of corrosion or wear on connections. It's important to verify that all components are tightly secured to maintain ideal performance.

Testing the Electrical System

Testing the electrical system of your pop-up camper guarantees everything runs smoothly and helps you catch potential issues before they become major problems.

Start by using a multimeter to check your battery's voltage, confirming it's around 12.6 volts when fully charged. This is a vital step in testing the electrical system.

Advertisement
Meet the all new Kndle Family scaled

Next, inspect these key components:

  • Kill switch: Located under the galley lift system, a faulty switch can block power to your camper's electrical components.
  • Battery breaker: Look for any tripped switches, especially if the system isn't powering on; these are common failure points.
  • Converter box: Verify it's functioning properly by checking for any tripped household-type breakers affecting AC power distribution to the outlets.

Maintenance Tips for Longevity
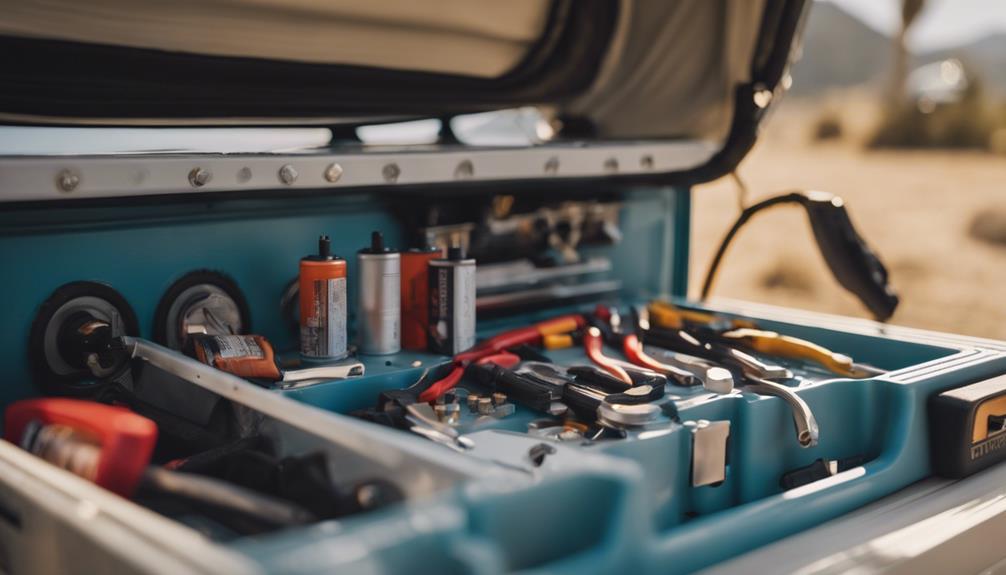
extend lifespan with maintenance

Regular maintenance guarantees your pop-up camper's battery remains in peak condition, extending its lifespan and reliability.

Start by regularly inspecting and cleaning the battery terminals to prevent corrosion. Solid connections are essential for peak power delivery. For lead-acid batteries, check and maintain the water levels to avoid damage; this step is critical for prolonging battery life.

When your camper's not in use, store the battery in a cool, dry place. Extreme temperatures can severely impact battery performance and lifespan, so make this a priority. During long periods of inactivity, utilize a battery maintainer or charger to keep the battery topped off and healthy. This will help confirm you're ready for your next adventure without any surprises.

Additionally, carry out periodic load tests to monitor battery health. These tests can help identify potential issues early on, allowing you to address them before they lead to failure.

Troubleshooting Common Issues

Troubleshooting common issues with your pop-up camper's electrical system can save you from unexpected problems on your trips. If you find yourself without power, here are a few steps to follow:

Advertisement
Meet the all new Kndle Family scaled
  • Check the kill switch: It's typically located under the galley lift system. If it's off, your camper won't receive power.
  • Reset the battery breaker: Sometimes, you'll need to reset it to restore functionality to your electrical system.
  • Inspect tripped breakers: Look in the converter box for any tripped household-type breakers and reset them if necessary.

Regular maintenance checks can help prevent these issues.

If your rooftop air conditioner isn't working on shore power, confirm the service is within the required 20-30 amp range, as it won't operate on a 15 amp outlet.

Frequently Asked Questions

How to Hook up Battery to Pop-Up Camper?

To hook up your battery, find the compartment, clean it, and connect the positive terminal to the red cable and the negative to the black. Verify secure connections and check for any fuses needing attention.

What Kind of Battery Do I Need for My Pop-Up Camper?

Did you know a typical deep cycle battery can last over 1,500 cycles? For your pop-up camper, opt for a 12-volt lead-acid or AGM battery, ideally between 100 to 200 amp-hours, based on your power needs.

Does Plugging in a Pop-Up Camper Charge the Battery?

Yes, plugging in your pop-up camper charges the battery. When connected to shore power, the converter box replenishes the 12-volt battery while providing AC power, ensuring you're ready for your off-grid adventures.

Does a Camper Battery Charge When the Camper Is Plugged In?

Yes, your camper battery charges when plugged in, thanks to the converter box. Just make certain the shore power connection is strong enough, and check that any kill switch is set to 'on' for effective charging.

Advertisement
Meet the all new Kndle Family scaled

Can a Generator Replace the Need for a Battery on a Pop-Up Camper?

Yes, you can hook up generator to camper to power the appliances and electronics without using a battery. This allows for continuous power supply, especially when dry camping. However, it’s important to ensure the generator is compatible with the camper’s electrical system for safety and efficiency.

Conclusion

Installing a battery on your pop-up camper opens up a world of convenience and freedom on your adventures. You might worry about the complexity of the process, but with a little guidance, it's a straightforward task.

Imagine the joy of lighting up your campsite and powering your devices, all while feeling secure and self-sufficient. Don't let concerns hold you back—embrace the thrill of exploration and make unforgettable memories with reliable power at your fingertips.

Continue Reading
Advertisement

Pop Up Campers

How to Winterize a Pop-Up Camper – Off-Season Prep

Keep your pop-up camper safe this winter with essential winterization tips that could save you from costly repairs—discover the crucial steps now!

Published

on

By

winterizing a pop up camper

To winterize your pop-up camper, start by draining the fresh water tank and hot water heater. Use an air compressor to clear out the plumbing, then pump RV antifreeze through until it appears at all fixtures. Turn off all appliances and secure the LP tank valve. Clean the interior thoroughly, removing food and moisture, and storing linens in airtight containers. Inspect the exterior for damage and confirm seals are tight. Finally, choose a safe storage spot, ideally indoors, to protect your camper. If you want a detailed guide, there's more information on confirming your camper's longevity and protection.

Key Takeaways

  • Drain fresh water tanks and hot water heaters thoroughly to prevent freezing damage.
  • Use an air compressor to expel remaining water from the plumbing system.
  • Pump RV antifreeze through the plumbing until it appears at all fixtures.
  • Clean and ventilate appliances, ensuring the refrigerator door remains open.

Importance of Winterization

Winterizing your pop-up camper is vital to prevent costly repairs and secure its longevity. When temperatures drop, the water system in your camper can freeze, leading to burst pipes and extensive damage. By properly winterizing, you protect your investment from these harsh conditions. Using antifreeze in your water system is a fundamental step in this process, as it helps safeguard against freezing.

Regular maintenance during the winter months is important. If you skip winterization, you may face expensive repairs and extensive damage in the spring. In addition, failing to winterize can invite mold and mildew, creating an unhealthy environment for your next camping adventure.

Thinking long-term, winterizing your camper not only saves you money on repairs but also guarantees it remains in good condition for years to come. You can save between $90 and $210 in initial costs, with future DIY expenses dropping considerably.

Water System Preparation

To protect your pop-up camper's water system from freezing damage, start by draining all water from the fresh water tank and hot water heater. Next, use an air compressor to connect to the city water inlet and expel any remaining water from the plumbing system. This guarantees thorough drainage.

Bypass the hot water heater using the internal valve to prevent antifreeze waste. Then, pump antifreeze through the plumbing system until it appears at all faucets, sinks, and toilets. Don't forget to pour antifreeze into the P traps of sinks and showers to protect them from freezing. Also, confirm all waste tanks are emptied and treated with antifreeze.

Advertisement

Meet the all new Kndle Family scaled

Here's a quick reference table to help you with the steps:

Step Action Notes
1. Drain Fresh water tank & heater Prevents freezing
2. Use air compressor Expel remaining water Guarantee thorough drainage
3. Bypass heater Internal valve Avoid antifreeze waste
4. Pump antifreeze Plumbing system Check all faucets
5. Sanitize Fresh water tank in spring Eliminate bacteria/odors

With these steps, you're set to winterize your camper's water system effectively!

LP System and Appliance Care

home appliance maintenance services

After securing the water system, it's important to focus on the LP system and appliances to guarantee they're properly winterized and protected from potential damage. Follow these steps for effective care:

  1. Turn Off and Secure: Make certain all appliances are completely turned off. Securely close the LP tank service valve to prevent leaks during storage.
  2. Clean and Protect: Clean the LP regulator and cover it to keep out moisture and debris. Disarm the leak detector and plug the service valve outlet to confirm safety.
  3. Inspect and Test: Examine the LP cylinders for any damage and confirm all connections to the regulator assembly are secure. Conduct a leak test on the fittings to verify everything is safe.

Don't forget to clean the refrigerator thoroughly and leave the door open for air circulation.

Also, confirm all range appliances are cleaned.

Finally, blow out the burner area in the water heater and vacuum around the combustion chamber inside the furnace to eliminate any buildup.

Taking these precautions will help keep your LP system and appliances in great shape for your next adventure!

Advertisement

Meet the all new Kndle Family scaled

Electrical Systems Maintenance

When winterizing your pop-up camper, you'll need to focus on maintaining the electrical systems.

Start by properly caring for the batteries and ensuring your generator is in top shape.

Don't forget to inspect the entire electrical system to keep everything safe and functional for next season.

Battery Care Procedures

Proper battery care is vital for keeping your pop-up camper's electrical system in top shape during the winter months. Following a few key procedures can help guarantee your battery remains functional and lasts longer.

  1. Fully Charge: Before disconnecting the battery for storage, make certain it's fully charged. This helps maintain its capacity throughout the off-season.
  2. Disconnect and Protect: Disconnect the battery and tape off the wire ends to prevent accidental short circuits and corrosion during storage.
  3. Climate-Controlled Storage: Store the battery in a climate-controlled area, protecting it from extreme temperatures that can reduce its lifespan.

While in storage, remember to recharge the battery every couple of months to keep it performing well. Consider using a trickle charger or a smart battery maintainer to keep it topped off without overcharging.

Regular maintenance is essential to avoid issues when you're ready to hit the road again. By following these battery care procedures, you'll guarantee your pop-up camper is ready for your next adventure.

Advertisement

Meet the all new Kndle Family scaled

Generator Maintenance Steps

To keep your generator running smoothly through the winter, follow these essential maintenance steps before storing it away.

Start by fully charging the generator's battery to maintain its lifespan and performance.

Next, add fuel stabilizer to the gas supply and run the generator for 30 minutes. This guarantees even distribution and prevents gas breakdown.

Now, it's time to change the oil and replace all filters. This keeps your generator in peak working condition for the next use.

Don't forget to inspect the shoreline cord for any damage; a damaged cord can lead to safety hazards.

Advertisement

Meet the all new Kndle Family scaled

While you're at it, verify the polarity of the 120V AC system to guarantee safe operation when you need it next.

Electrical System Inspections

Start your winter preparations by thoroughly inspecting the electrical system of your pop-up camper to verify everything is in top shape for the next adventure. A well-maintained electrical system is vital for your safety and the camper's overall performance.

Here are three key areas to focus on:

  1. Battery Maintenance: Fully charge your camper's battery before winter storage. Disconnect it and tape off the wire ends to prevent corrosion and accidental discharges.
  2. Shoreline Cord Inspection: Clean and inspect the shoreline cord for any damage or dirt. A damaged cord can compromise electrical connectivity and safety, so confirm it's in good condition.
  3. Ground Fault Interrupter (GFI) Testing: Test the GFI to confirm it's operational. This is an essential safety feature that protects against electrical shock, so don't skip this step!

Lastly, if you're using a generator, run it for 30 minutes after adding fuel stabilizer. Don't forget to perform an oil change and replace all filters to keep it reliable during off-season storage.

Pop-Up Camper Specific Steps

pop up camper setup guide

Draining all water from the fresh water tanks and hot water heater is essential to prevent freezing and damage during storage. Start your winterization process by guaranteeing all the water is drained completely.

Next, use an air compressor to blow out the plumbing system; connect it to the city water inlet and clear any remaining water from the pipes. Bypass the hot water heater using the internal valve, then pump RV antifreeze through the plumbing system until it flows from all faucets and the toilet. This helps protect the pipes from freezing temperatures.

Don't forget to adequately treat the Porta Potty's holding tank with antifreeze to guarantee it remains functional when spring arrives.

Advertisement

Meet the all new Kndle Family scaled

After you've addressed the plumbing, turn your attention to the appliances. Clean them thoroughly and leave the refrigerator door open to promote air circulation, which helps prevent unpleasant odors during the off-season.

Exterior Maintenance Tips

It's crucial to inspect the roof seams of your pop-up camper for any signs of wear or damage to prevent leaks this winter. Reseal any areas that need attention to keep moisture out and maintain your camper's integrity.

Here are three key exterior maintenance tips to keep your camper in top shape:

  1. Clean and Dry Awnings: Thoroughly clean your awnings and confirm they're dry before storing them. This prevents mold and mildew growth while rolling them up correctly avoids damage.
  2. Check Tires: Inspect your tires for proper inflation and overall condition. Flat tires can develop flat spots if stored for too long. Consider using tire covers for additional protection against the elements.
  3. Seal Vents and Openings: Make sure all vents and openings are sealed properly. This helps prevent moisture accumulation and keeps pests out during storage, avoiding costly repairs down the line.

Interior Cleaning and Protection

thorough interior cleaning services

To protect your pop-up camper during the winter, start by giving the interior a thorough deep clean. This includes removing any food items that could attract pests and ensuring all surfaces are spotless.

After that, focus on moisture and pest prevention techniques to keep your camper in top shape until spring.

Deep Clean Interior Surfaces

Start by thoroughly cleaning all interior surfaces of your pop-up camper, including walls, tables, and floors, to eliminate dirt and prevent mold growth during storage. A deep clean not only enhances your camper's appearance but also helps remove moisture that could lead to mildew and pests.

Advertisement

Meet the all new Kndle Family scaled

Here's how to get started:

  1. Wash linens and towels: Confirm all camper-specific items are fresh and free from moisture before packing them away.
  2. Remove food items: Clear out all food items and perishables to avoid attracting pests and causing odors.
  3. Use airtight containers: Store remaining items in airtight containers with cedar chips or dryer sheets to deter pests and absorb moisture.

After you've completed these steps, consider utilizing moisture absorbers, like silica gel packets, in various areas of the camper.

This preventative measure will help maintain a dry environment throughout winter storage. By taking the time to deep clean and prep your pop-up camper, you'll confirm it's ready for your next adventure without the worry of mold or unwanted guests.

Moisture and Pest Prevention

Preventing moisture and pests in your pop-up camper requires a strategic approach to cleaning and storing your belongings.

Start by thoroughly cleaning all surfaces inside the camper. Remove any food residue or spills that can attract pests and create unpleasant odors during storage. Once cleaned, store linens, cushions, and other fabric items in moisture-proof bags to guard against mildew and moisture damage.

To further combat humidity, use moisture-absorbing packets or desiccants in various areas of the camper. These will help reduce moisture levels and deter mold and mildew formation. Make certain to seal all windows and vents tightly, as this creates barriers against both moisture accumulation and pest entry during the off-season.

Advertisement

Meet the all new Kndle Family scaled

Lastly, consider including lightly-scented dryer sheets in your storage areas. They'll not only provide a fresh scent but also repel pests.

Storage Location Considerations

Choosing the right storage location for your pop-up camper is fundamental, as it directly impacts its protection from theft, vandalism, and harsh winter conditions. Here are three key considerations to keep in mind:

  1. Secure Storage Location: Opt for a rented lot with security features to minimize risks.
  2. Indoor Storage Options: Whenever possible, choose indoor storage to shield your camper from the winter elements. This can prolong its lifespan and reduce maintenance costs.
  3. Outdoor Storage: If you must store it outdoors, make certain it's in a well-drained area and free from overhanging branches. This helps prevent water accumulation and potential damage.

Additionally, it's important to check local regulations regarding RV storage to avoid fines or conflicts with neighbors.

While your camper is in storage, perform periodic checks, especially if it's outdoors, to monitor for signs of water intrusion or pest infestations.

Remember to properly winterize your camper before storing it, as this step is crucial in preventing damage during the cold months.

Additional Winter Storage Tips

maximize winter storage efficiency

To keep your pop-up camper in top condition during winter storage, seal any openings in the underside to block animals from nesting inside. Storing your camper in a secure location, like a storage facility, can protect it from harsh weather and theft.

Using moisture-absorbing packets inside the camper minimizes humidity and helps prevent mold. Don't forget to check tire pressure regularly—tires can lose air during long periods of storage.

Advertisement

Meet the all new Kndle Family scaled

Consider using a breathable cover to protect from UV rays while allowing for proper air circulation, which can prevent condensation buildup.

Here's a quick reference table for your winter storage tips:

Task Purpose
Seal openings Block animals from nesting
Use moisture-absorbing packets Minimize humidity and prevent mold
Check tire pressure Maintain tire integrity
Use breathable cover Protect from UV rays and allow air circulation

Frequently Asked Questions

How to Prep a Camper for Winter Storage?

To prep your camper for winter storage, drain all water systems, clean the interior, disconnect the battery, seal openings, and cover it. This'll protect your camper from freezing temps and pests during the off-season.

Should You Cover a Pop-Up Camper in the Winter?

Think of your pop-up camper like a cozy blanket on a cold night; covering it in winter is essential. It protects against harsh elements, ensuring your camper remains in great shape for future adventures.

How Do You Flush Antifreeze Out of an Rv?

To flush antifreeze out of your RV, drain all water tanks, connect a water source, and open all faucets until the water runs clear. Then, refill the fresh water tank and check the drains for proper flow.

Advertisement

Meet the all new Kndle Family scaled

How to Store a Pop-Up Camper Outside in Winter?

Oh sure, just leave your pop-up camper outside in winter like it's a snowman! Instead, drain the water, cover vents, lower the tongue, block wheels, and seal holes to keep it safe and snug.

Conclusion

Winterizing your pop-up camper is like wrapping a gift—proper preparation guarantees that your investment stays safe and ready for the next adventure.

By taking the time to care for your water system, LP appliances, and electrical systems, you're setting the stage for joyful journeys ahead.

Don't forget to clean the interior and protect the exterior.

When spring arrives, you'll unwrap your camper, excited to hit the road again, knowing you did everything right.

Advertisement

Meet the all new Kndle Family scaled
Continue Reading

Pop Up Campers

How to Waterproof Pop-Up Camper Canvas – Stay Dry

Before you head out on your next adventure, discover essential tips to keep your pop-up camper canvas waterproof and ready for any weather!

Published

on

By

waterproofing pop up camper canvas

To waterproof your pop-up camper canvas, start by thoroughly cleaning it to remove dirt and mildew. Use mild soap and a soft brush, then rinse well. Once dry, apply beeswax or a fabric guard like 303 High Tech Fabric Guard to the seams and surfaces for extra protection. Make certain to inspect and reseal seams regularly, especially after heavy use. Seasonal maintenance, including checking for wear and tear, guarantees your camper stays dry. Follow these steps, and you can enhance your camper's integrity while enjoying your adventures. There's more to learn about effective waterproofing techniques as you prep!

Key Takeaways

  • Clean the canvas using a mild soap solution and soft brush, rinsing thoroughly to remove dirt and residue.
  • Apply waterproofing products like 303 High Tech Fabric Guard or beeswax to seams and high-stress areas for effective moisture protection.
  • Regularly inspect seams for wear and reapply seam sealers annually or biannually to maintain waterproof integrity.
  • Ensure the camper is completely dry before applying waterproofing solutions to prevent trapping moisture.

Cleaning Preparation and Process

Before you start cleaning your pop-up camper canvas, assess its condition to determine if a light cleaning will suffice or if you'll need to tackle tougher dirt with a scrub brush and a Woolite detergent solution.

If the canvas appears relatively clean, a simple rinse with water may do the trick. However, for more significant dirt buildup, you'll want to prepare a cleaning solution.

To clean and maintain your canvas effectively, mix a capful of Woolite in a 5-gallon bucket filled halfway with water. This solution is particularly recommended for Sunbrella fabric.

Using a sponge or soft brush, gently scrub the canvas to wash the canvas, focusing on any stubborn spots. For tougher stains, consider using 303 Multi Surface Cleaner.

After scrubbing, it's vital to rinse thoroughly with a garden hose to guarantee no soap residue remains, which can attract dirt over time.

Advertisement

Meet the all new Kndle Family scaled

Regular cleaning is essential for keeping your canvas in top condition, preventing costly replacements. Allocate about two hours for the entire cleaning process to guarantee you get the best results and maintain your pop-up camper's canvas effectively.

Mildew and Stain Treatment

Mildew and stains can quickly tarnish your pop-up camper canvas, making prompt treatment essential for preserving its integrity.

To effectively tackle mold and mildew, mix dish soap, bleach, and water, applying it directly to the affected areas. This solution not only eliminates mildew but also helps remove odors. Be sure to clean up any overspray immediately to prevent discoloration on your canvas or vinyl.

For those seeking commercial options, Bass Pro Shops mildew cleaner is known for its effectiveness, while 303 Multi Surface Cleaner can tackle tougher stains on your canvas. Regular maintenance is key; if you notice no mildew, light cleaning is usually sufficient. However, if mildew is present, stronger solutions will be necessary.

Additionally, natural remedies like a mixture of peroxide and water or white vinegar can be beneficial for treating mildew and restoring your canvas to its original state.

Advertisement

Meet the all new Kndle Family scaled

Waterproofing Application Techniques

effective waterproofing methods explained

When it comes to waterproofing your pop-up camper canvas, you'll want to contemplate various application techniques to guarantee maximum protection.

You'll find that using the right methods for wax application, seam sealing, and choosing the best products can make a significant difference.

Let's explore these options to keep your camper dry and ready for your next adventure.

Wax Application Methods

Applying wax to the seams of your pop-up camper not only enhances waterproofing but also extends the life of the canvas by creating a robust barrier against moisture.

To start, choose beeswax or candle wax for your wax application. Heating the wax improves coverage and makes it easier to work with. Before you apply the wax, wet the threads; this causes them to swell and lock in moisture when dried, forming a better seal.

Make certain to apply wax during both winterizing and spring opening to maintain protection throughout the seasons. For ideal results, cover the entire seam area evenly with wax, as this helps prevent leaks and enhances durability.

Advertisement

Meet the all new Kndle Family scaled

It's important to remember that regular inspections are key. Check for wear and exposure to the elements, and reapply wax as needed. This proactive approach guarantees long-lasting waterproof protection for your camper.

Seam Sealing Options

Seam sealing is essential for protecting your pop-up camper canvas from leaks, and you have several effective options to choose from, including beeswax, candle wax, and latex-based sealers. Each option offers unique benefits that can enhance your waterproofing efforts.

Here are three important considerations for effective seam sealing:

  1. Preparation: Always verify the canvas is clean and free of debris. This maximizes adhesion and guarantees effective waterproofing.
  2. Application Conditions: Apply seam sealers in dry conditions. Wet or humid environments can hinder the sealers' effectiveness and durability.
  3. Maintenance: Regularly inspect seams after heavy use or exposure to moisture. Catching wear early allows for timely repairs, helping you avoid leaks during your next adventure.

When using wax, remember that heating it can improve coverage and effectiveness. Additionally, wetting the threads beforehand can help them swell and lock in place as they dry.

Reapplication of seam sealers may be necessary annually or biannually, especially after extensive outdoor use or significant weather events. By following these seam sealing practices, you can keep your pop-up camper dry and ready for your next trip.

Product Recommendations Overview

To effectively waterproof your pop-up camper, consider using 303 High Tech Fabric Guard for breathable fabrics and 303 Aerospace Protectant for vinyl surfaces. These products guarantee your camper canvas remains dry and protected from the elements.

Advertisement

Meet the all new Kndle Family scaled

Here's a quick comparison of the products:

Product Name Best For
303 High Tech Fabric Guard Breathable fabrics
303 Aerospace Protectant Vinyl surfaces
Seam Sealer Preventing leaks at seams
Spray Bottle Small area application
Paintbrush Large area application

When applying these products, use a spray bottle for smaller areas and a paintbrush for larger sections to guarantee even coverage. Remember, the canvas should be fully dry before application, as moisture can reduce effectiveness. Additionally, it's wise to conduct spot checks on your waterproofing every year, especially after prolonged exposure to rain or sun. By following these guidelines and using the right products, you'll keep your pop-up camper canvas in great shape, guaranteeing a dry and enjoyable camping experience.

Essential Waterproofing Products

When it comes to keeping your pop-up camper canvas dry and protected, choosing the right waterproofing products is vital. Here are three must-have items to guarantee your camper stays dry and safe from the elements:

  1. 303 High Tech Fabric Guard: This product is designed for breathable fabrics, providing lasting protection against water and mildew, which is important for your camper's canvas.
  2. Marine Goop: Perfect for sealing seams and addressing those tricky problem areas, especially around corners where leaks can sneak in. It's a great way to tackle potential vulnerabilities in your setup.
  3. Beeswax or Candle Wax: For those seams that need extra attention, applying melted wax can create an effective waterproof barrier. It's a simple yet effective method for enhancing your camper's resistance to moisture.

Make certain to conduct regular spot checks and reapply these waterproofing products at least once or twice a year, especially after heavy rain or damp conditions.

This proactive approach will help maintain your camper's integrity and keep you dry during your adventures.

Vinyl Care and Protection

vinyl maintenance and preservation

To keep your pop-up camper in top shape, you need to protect the vinyl from sun exposure and moisture.

Using the right cleaning techniques and maintenance products will help preserve its integrity.

Advertisement

Meet the all new Kndle Family scaled

Let's explore how you can effectively care for your vinyl surfaces to guarantee they last longer.

Sun Exposure Protection

Protecting the vinyl areas of your pop-up camper from sun exposure is essential for preventing fading and damage over time.

Regular maintenance not only keeps your camper looking great but also extends the life of the vinyl components.

Here are three key steps you should follow for effective sun exposure protection:

  1. Use UV Protectants: Apply a quality UV protectant like 303 Aerospace Protectant, which has an SPF rating of 40. This helps shield vinyl surfaces from harmful UV rays.
  2. Inspect Regularly: Make it a habit to inspect the vinyl areas often. Catching potential issues early can save you from more significant problems down the line.
  3. Cover During Treatment: When applying waterproofing solutions to your camper's canvas, tape off or cover any vinyl parts. Overspray can lead to discoloration, so take this extra step to maintain the integrity of your vinyl.

Cleaning Techniques Overview

Maintaining your pop-up camper's vinyl requires regular cleaning techniques that not only preserve its appearance but also enhance durability.

Start by using a gentle soap solution to clean the vinyl areas, making sure you remove dirt and grime without causing damage. Rinse thoroughly and let it dry completely before applying any protectants.

Advertisement

Meet the all new Kndle Family scaled

It's vital to avoid overspray when treating the canvas; tape off vinyl areas to prevent any discoloration from cleaning solutions. Products like 303 Aerospace Protectant are excellent for providing UV protection and maintaining the integrity of your camper's vinyl surfaces.

Apply this protectant regularly to keep your vinyl looking fresh and to prolong its lifespan.

Don't forget about the screens, which are often made of vinyl too. Treat them with appropriate protectants to make certain they remain intact and functional.

Regular cleaning and protection won't only improve the aesthetic of your camper but also support its overall functionality. By investing a little time in proper care, you can enjoy many worry-free camping trips while keeping your pop-up camper's canvas and vinyl in top condition.

Recommended Maintenance Products

Choosing the right maintenance products is vital for keeping your pop-up camper's vinyl surfaces protected and looking their best. Regular care not only extends the life of your camper but also guarantees it maintains its aesthetic appeal.

Advertisement

Meet the all new Kndle Family scaled

Here are three recommended maintenance products you should consider for your pop-up camper:

  1. Protect All: This highly recommended product effectively maintains and protects vinyl surfaces. You can easily find it at retailers like Wal-Mart and Amazon.
  2. 303 Aerospace Protectant: With an SPF rating of 40, applying this product regularly is essential for preventing sun damage to your vinyl-coated canvas and screens.
  3. Vinyl-Specific Cleaners: Use products designed specifically for vinyl care instead of those meant for breathable fabrics. This will guarantee proper cleaning without causing damage.

Remember to avoid overspray from cleaning or waterproofing solutions on vinyl components, as it can lead to discoloration. Using tape or covers can help with this.

Maintenance Practices for Longevity

Regular inspections and timely repairs are vital for guaranteeing your pop-up camper canvas lasts through many adventures. Start by checking seams and fabric for early signs of leaks; catching these issues early allows for prompt repairs before they worsen.

Cleaning your camper canvas at least once a year with a mild soap solution helps remove dirt and maintains its waterproofing capabilities.

It's essential to apply waterproofing products like 303 High Tech Fabric Guard before your trips, and don't forget to reapply mid-season for peak moisture protection. After each use, make sure your camper is completely dry before storage to prevent mold and mildew growth, which can severely damage the fabric.

Seasonal preparation is also key; thoroughly clean and treat your canvas before winterizing it. By following these maintenance practices, you'll greatly enhance the longevity and integrity of your camper canvas.

Advertisement

Meet the all new Kndle Family scaled

Regular attention to these details not only keeps your camper in top shape but also guarantees you can enjoy your outdoor adventures without worry. So, make these practices a part of your routine, and your pop-up camper will reward you with years of reliable service.

Community Insights and Tips

collective knowledge and advice

Community members often share valuable insights on how to effectively waterproof pop-up camper canvas, reinforcing the importance of proactive maintenance practices. Regular inspections are essential to catching potential leaks early.

Here are some key tips from the community to enhance your waterproofing efforts:

  1. Use Quality Products: Many users recommend 303 High Tech Fabric Guard for breathable fabrics and 303 Aerospace Protectant for vinyl-coated components. These products can greatly improve the waterproofing of your pop-up campers.
  2. Clean Before Treatment: Forum discussions highlight effective cleaning methods. Use mild soaps and soft brushes to maintain the canvas before applying any waterproofing solutions. This step guarantees better adhesion and effectiveness of the products.
  3. Dry Thoroughly: Always dry your camper in sunlight after cleaning and before applying waterproofing treatments. This practice helps prevent mold and mildew growth, which can compromise the integrity of your canvas.

Seasonal Preparation Steps

Before the camping season kicks off, you'll want to give your pop-up camper canvas a thorough cleaning and inspection to guarantee it's ready for any adventure.

Start by washing the vinyl with a mild soap solution and a soft brush to remove dirt and debris. This step is essential for securing proper adhesion of waterproofing products.

Next, inspect all seams and fabric for signs of wear or damage. If you find any issues, repair them before applying waterproofing to prevent leaks during your trips.

Once you've completed the repairs, allow the camper canvas to dry completely in sunlight for at least 2-3 hours. This guarantees no moisture remains, which could lead to mold growth after you apply waterproofing.

Advertisement

Meet the all new Kndle Family scaled

Now, apply a suitable waterproofing solution specifically designed for camper fabrics. Make certain to cover the seams and high-stress areas evenly.

It's also wise to schedule periodic checks for waterproofing effectiveness throughout the camping season. Reapply as needed to maintain peak protection against moisture, keeping your camping experience dry and enjoyable.

Troubleshooting Common Issues

resolving frequent technical problems

Identifying common issues with your pop-up camper canvas can save you from unexpected leaks and discomfort during your trips. To guarantee your canvas remains effective in waterproofing, keep an eye out for these key problems:

  1. Wear and Damage: Regularly check for small tears or weak seams. These can lead to leaks if not repaired promptly, so don't wait until it's too late.
  2. Moisture Before Treatment: Make sure your canvas is completely dry before applying any waterproofing products. Moisture can trap mold and mildew, ruining the effectiveness of your treatment.
  3. Cleaning Before Waterproofing: Use a soft brush to clean your canvas and remove any debris. Dirt can prevent the waterproofing agent from properly adhering, leading to less effective protection.

Always test waterproofing products on a small, inconspicuous area first to avoid any potential damage or discoloration.

After heavy rains or prolonged exposure to moisture, inspect your canvas and reapply waterproofing agents as needed.

Frequently Asked Questions

How to Keep Moisture Out of a Pop-Up Camper?

To keep moisture out of your pop-up camper, regularly inspect seams and fabric, clean thoroughly, and store it dry. Apply a suitable waterproofing treatment and perform spot checks during rain for any leaks.

How to Maintain Pop-Up Camper Canvas?

To maintain your pop-up camper canvas, clean it annually with mild soap, inspect seams for damage, apply a waterproofing product yearly, and make certain it's completely dry before storing to prevent mold and mildew.

Advertisement

Meet the all new Kndle Family scaled

What Can You Put on Canvas to Make It Waterproof?

You can apply products like 303 High Tech Fabric Guard or beeswax for waterproofing canvas. Regularly inspect and reapply treatments to guarantee lasting protection, especially after heavy rain or extended outdoor use.

How Do You Keep Canvas Waterproof?

To keep canvas waterproof, you should regularly apply a quality waterproofing product, clean the surface before application, inspect seams for damage, and store it in a dry place when not in use.

Conclusion

Keeping your pop-up camper canvas waterproof is like nurturing a garden; with the right care and attention, it'll flourish through any storm.

By regularly cleaning, treating stains, and applying waterproofing solutions, you'll protect your investment and enjoy countless dry adventures.

Remember to maintain it with simple practices and heed community tips for even better results.

Advertisement

Meet the all new Kndle Family scaled

With these steps, your camper will stand resilient, ensuring every trip is a comfortable escape from the rain.

Continue Reading

Pop Up Campers

How to Wash Pop-Up Camper Canvas – Cleaning Tips

Discover essential tips for washing your pop-up camper canvas to keep it pristine and functional – learn the secret to long-lasting fabric care!

Published

on

By

cleaning pop up camper canvas

To wash your pop-up camper canvas, start by gathering mild cleaners, a soft brush, sponges, and a hose. Choose a well-ventilated area with concrete or gravel to avoid grass contamination. Begin by sweeping off loose debris, then use a mild soap solution to gently scrub stubborn stains. Rinse thoroughly to eliminate soap residue. For mildew, a mix of dish soap, bleach, and warm water can help. After cleaning, apply a waterproofing treatment to maintain fabric integrity. By following these steps, you'll keep your canvas looking great and functional for your next adventure, and there's even more to explore.

Key Takeaways

  • Regularly clean your pop-up camper canvas to prevent dirt accumulation and long-term damage, enhancing both aesthetics and functionality.
  • Always consult the owner's manual for specific cleaning product recommendations and to avoid harmful substances that may damage the canvas.
  • Gather essential supplies, including a mild cleaner, soft scrub brush, and safety gear, for an efficient cleaning process.
  • Use a gentle scrubbing technique with mild soap, rinse thoroughly, and air dry to prevent mildew growth after cleaning.

Importance of Regular Cleaning

Regularly cleaning your pop-up camper canvas is essential to prevent dirt and debris from causing long-term damage to the fabric. When you neglect to clean, dirt can accumulate, leading to caked-on gunk that can damage the exterior. As you deploy and retract the camper, the friction from those dirty surfaces increases wear and tear, further compromising the integrity of the canvas.

Additionally, if you store wet and dirty canvas, you're setting the stage for mildew growth. This not only affects the appearance of your camper but can also lead to costly replacements if the fabric deteriorates too much. By committing to regular cleaning, you maintain the camper's aesthetics and enhance your overall camping experience.

A clean pop-up camper canvas not only looks great but also functions better, allowing you to enjoy your adventures without worrying about potential damage.

Consult the Owners Manual

When it comes to cleaning your pop-up camper, your owner's manual is an essential resource.

It outlines specific cleaning product recommendations to keep your camper safe and identifies any products you should avoid.

Advertisement
Meet the all new Kndle Family scaled

Plus, you'll find detailed cleaning steps that help guarantee you maintain your camper properly.

Cleaning Product Recommendations

Consult your owner's manual for specific cleaning product recommendations tailored to your pop-up camper's canvas material to guarantee you use safe and effective solutions. Each manufacturer may have different guidelines, so it's vital to refer to your manual before starting. It often highlights products that are safe to use and those you should avoid, helping you steer clear of harsh chemicals that could damage the fabric.

For cleaning the canvas, many manufacturers suggest using non-detergent soap or specially formulated cleaners like Woolite. These products effectively tackle stubborn stains without compromising the integrity of the material. If you're dealing with tough spots, check your manual for any specific tips on addressing those issues.

Regularly reviewing the owner's manual can also provide insights into the best cleaning techniques and maintenance practices for your camper. Following the manufacturer's advice guarantees your canvas remains in excellent condition, extending its lifespan and preventing costly repairs or replacements.

Avoiding Damaging Products

Your owner's manual is the best resource for identifying products that could harm your pop-up camper's canvas, helping you avoid damaging materials. It provides essential information on recommended cleaning products and techniques specifically designed for your camper. Harsh chemicals or abrasive cleaners can seriously damage the fabric and its protective coatings, so it's important to steer clear of these.

Advertisement
Meet the all new Kndle Family scaled

By consulting your owner's manual, you'll find guidance on safe cleaning techniques that not only keep your canvas looking great but also maintain its integrity. Following these instructions guarantees you avoid voiding any warranties that might be in place. Regularly reviewing the manual helps you stay updated on any new recommendations from the manufacturer, which can be significant for effective maintenance.

When cleaning your pop, remember that using the right products is key to preserving the canvas's appearance and longevity. Always prioritize the manufacturer's advice, as it's tailored specifically for your camper model. By doing so, you'll make sure that your pop-up camper remains in excellent condition for many adventures to come.

Specific Cleaning Steps

Regularly checking the owner's manual reveals specific cleaning steps tailored to effectively care for your pop-up camper's canvas. Start by identifying the recommended cleaning products listed in the manual; these are designed to work safely with your canvas materials. You'll find that different stains may require unique approaches, so pay attention to any outlined procedures.

Follow the manufacturer's guidelines closely to avoid using harmful agents that could damage the fabric or its coatings. For instance, if the manual suggests a particular mild soap, use it with a soft sponge to gently scrub away dirt and grime. Rinse thoroughly to verify no soap residue remains.

In addition, the manual might include tips for addressing various stains, whether they're from food, mildew, or tree sap. It's crucial to act quickly on stains to maintain proper maintenance and prevent permanent damage.

Advertisement
Meet the all new Kndle Family scaled

After cleaning, allow the canvas to air dry completely before packing away your camper. Regularly reviewing the manual not only enhances the longevity and appearance of your camper's canvas but also keeps your warranty intact.

Gather the Supplies

collect necessary materials

Before you start cleaning your pop-up camper canvas, you'll need to gather some essential supplies.

This includes a mild cleaner, sponges, a broom, and safety gear to keep yourself protected.

Having everything ready will make the cleaning process smoother and more efficient.

Essential Cleaning Supplies

What supplies do you need to guarantee effective cleaning of your pop-up camper's canvas? First, gather your cleaning supplies to confirm you're fully prepared. You'll want a mild cleaner, like non-detergent soap or an oxygen cleaner, to protect the canvas. A soft scrub brush is essential for tackling stubborn stains, while sponges will help scrub surfaces gently.

Here's a quick overview of what you'll need:

Advertisement
Meet the all new Kndle Family scaled
Cleaning SuppliesPurposeQuantity
Mild CleanerTo clean without damaging1 bottle
Soft Scrub BrushFor stubborn stains1
SpongesFor gentle scrubbing2-3
Clean WaterFor rinsing1 bucket + hose
ClothFor detailed cleaning1-2
Safety Gear (gloves, safety glasses)To protect yourself1 set

Don't forget a broom for removing loose debris. Organizing these items in advance will streamline your cleaning process and confirm you have everything you need on hand.

Recommended Cleaning Products

Choosing the right cleaning products is essential for effectively maintaining your pop-up camper's canvas. Start with mild cleaners, like non-detergent soap or oxygen cleaners such as Woolite. These options guarantee you clean without damaging the fabric.

For tougher stains or mildew, consider products like Bass Pro Shops mildew cleaner, which is specifically formulated to tackle those stubborn issues. A good mildew stain remover can be a game changer in preserving your camper's appearance.

To apply these cleaning products, gather essential tools like a soft scrub brush, sponges, and a broom for removing dirt and debris. Always have a bucket filled with fresh water and a hose handy for rinsing off any soap residue after cleaning.

Remember, before you plunge in, it's smart to test any cleaning product on a small, inconspicuous area of the canvas. This way, you can ascertain that the cleaner works effectively without causing any damage.

Advertisement
Meet the all new Kndle Family scaled

Using the right cleaning products and techniques won't only keep your pop-up camper looking great but also extend the life of the canvas, making your camping experience more enjoyable.

Preparation for Cleaning

To guarantee a thorough and efficient cleaning process for your pop-up camper canvas, gather all the necessary supplies beforehand. Start with essential cleaning supplies like a mild cleaner—non-detergent soap or Woolite works well.

You'll need sponges, a broom, a bucket, and a hose connected to a fresh water source for effective cleaning. Don't forget a soft scrub brush and cloth; these tools are vital for tackling stubborn stains that require extra scrubbing power.

Safety gear is also important. Make sure you have gloves and safety glasses to protect yourself from any harsh chemicals or cleaning solutions.

Preparing a well-ventilated area is key, as it can help streamline the cleaning process and make it more efficient.

Advertisement
Meet the all new Kndle Family scaled

Before you engage, consider the weather conditions. Ideally, you want to clean your canvas in dry conditions. This guarantees that the canvas after cleaning dries quickly, preventing any potential mold or mildew growth.

With all your supplies ready and the right conditions in place, you're set to tackle that pop-up camper canvas with confidence!

Pick the Right Spot

Selecting the right spot for cleaning your pop-up camper canvas is essential for an effective and efficient process. You'll want to take into account several factors to guarantee a successful cleaning experience.

  1. Surface Type: Choose concrete or gravel surfaces to prevent contamination of grassy areas from cleaners and dirt. This helps maintain the integrity of your environment while you clean.
  2. Drainage: Make certain the location has adequate drainage. This prevents water pooling during the cleaning process, allowing for a more thorough and efficient clean.
  3. Ventilation and Water Access: Opt for a well-ventilated area that allows the canvas to dry properly. This reduces the risk of mildew growth after cleaning. Additionally, make sure you have easy access to a fresh water supply for rinsing the canvas and cleaning materials.

Cleaning Techniques

Begin by sweeping off any loose debris from the pop-up camper's canvas to prevent scratching and guarantee a clean surface for washing. Once you've done that, you can tackle any stubborn mildew stains. Use a soft scrub brush along with a mild cleaner, like Woolite, to treat these areas effectively.

After scrubbing, rinse the canvas thoroughly with a garden hose to remove all soap residue. This step is vital, as leftover cleaner can lead to mildew growth. For lighter stains, mix a vinegar solution with 70% water and 30% vinegar. Lightly scrub with a sponge to remove mildew and deep stains without damaging the fabric.

Before applying any cleaning product, always test it on a small, inconspicuous area of the canvas to verify no adverse reactions occur.

Advertisement
Meet the all new Kndle Family scaled
Cleaning MethodNotes
Soft scrub brush + WooliteEffective for stubborn stains
Vinegar solutionGentle on fabric, good for light stains
Rinse with waterEssential to prevent mildew growth
Test productsAlways check on a small area first

Mildew and Stain Treatment

Mildew and stubborn stains on your pop-up camper canvas can be effectively treated with the right cleaning solutions and techniques.

To tackle mold and mildew stains, follow these steps:

  1. Prepare the Cleaning Solution: Mix dish soap, bleach, and warm water in a bucket. Alternatively, consider using Bass Pro Shops mildew cleaner for a powerful option.
  2. Scrub the Affected Area: Using a scrub brush, gently scrub the stained area with your cleaning solution. Be thorough, but avoid damaging the canvas fibers. If you encounter tough stains, 303 Multi Surface Cleaner can be beneficial.
  3. Rinse and Dry: After scrubbing, thoroughly rinse the area with a garden hose to remove all soap residue. Use a clean cloth to dab the area dry and prevent further moisture retention.

Waterproofing Application

effective waterproofing techniques applied

To keep your pop-up camper canvas in top shape, regularly applying a waterproofing treatment is vital for protection against the elements. After thoroughly cleaning your canvas, it's time to waterproof your canvas using a reliable product like 303 High Tech Fabric Guard. This treatment not only restores waterproofing but also enhances the fabric's durability against rain and sun exposure.

Ideally, you should treat your camper's fabric once or twice a year. The initial application might require a 16 oz. spray bottle, while subsequent applications could need a larger quantity based on wear and exposure. Remember, regular waterproofing is important because it greatly reduces the risk of mold and mildew, which can compromise your camper's functionality.

After applying the waterproofing treatment, conduct spot checks for leaks during heavy rain to guarantee everything's working effectively. Proper application of the waterproofing product will improve the visual appearance of your canvas and extend its lifespan, making your camping trips more enjoyable.

Follow these cleaning tips to maintain your camper's integrity, and you'll be ready for many adventures ahead!

Advertisement
Meet the all new Kndle Family scaled

Community Support Resources

Finding support from fellow pop-up camper owners can greatly enhance your cleaning and maintenance efforts. Engaging with the community provides you with invaluable cleaning guidance, insights into cleaner products, and personal experiences that can save you time and trouble.

Here are three ways to tap into community support resources:

  1. Join Online Forums: Platforms like Pop Up Portal offer a wealth of advice and shared experiences from both new and seasoned owners. You'll find tips specifically tailored to cleaning and maintaining your camper.
  2. Follow Blogs: Blogs such as The Pop Up Princess focus on cleaning guidance and personal stories related to camper upkeep. They often share practical tips that you can easily implement.
  3. Participate in Discussions: Actively engaging in online discussions allows you to learn from others' mistakes and successes. You might discover niche cleaning solutions and products that aren't widely known, enhancing your overall camper care.

Frequently Asked Questions

What Is the Best Cleaner for Camper Canvas?

For camper canvas, you'll find Woolite detergent effective for general cleaning. For tougher stains, try Folex carpet cleaner or a homemade mix of vinegar and water. Always test cleaners on a small area first.

How to Remove Mold and Mildew From Pop-Up Camper Canvas?

To remove mold and mildew from your pop-up camper canvas, mix dish soap and bleach with water, test in a small area, and rinse thoroughly. Consider using specialized mildew removers for tougher stains.

What Is the Best Cleaner for Pop up Tents?

When choosing the best cleaner for your pop-up tent, consider Woolite for general dirt, Bass Pro Shops Mildew Stain Remover for mildew, or 303 Multi Surface Cleaner for tough stains. Always test on a small area first.

How to Clean the Outside of a Pop-Up Camper?

To clean the outside of your pop-up camper, start by sweeping away debris. Then, use a mild cleaner and sponge to scrub surfaces, rinsing thoroughly. Don't forget to clean vinyl areas with appropriate products.

Advertisement
Meet the all new Kndle Family scaled

Can I Use the Same Cleaning Tips for Deep Cleaning and Regular Cleaning of Pop-Up Camper Canvas?

When it comes to maintaining your pop-up camper canvas, it’s important to have comprehensive popup camper cleaning tips for both deep cleaning and regular cleaning. Using the same cleaning techniques for both will ensure that your canvas stays in top condition, ready for your next adventure.

Conclusion

Now that you're armed with cleaning tips, imagine your pop-up camper's canvas gleaming under the sun, free from dirt and mildew.

With each scrub and rinse, you're not just preserving its beauty, but also ensuring countless adventures ahead.

So, roll up your sleeves, gather your supplies, and transform that tired canvas into a fresh, inviting space.

Your next trip awaits, and with a little effort, your camper will feel like a cozy retreat in the great outdoors.

Advertisement
Meet the all new Kndle Family scaled
Continue Reading
Advertisement

Affiliate disclaimer

As an affiliate, we may earn a commission from qualifying purchases. We get commissions for purchases made through links on this website from Amazon and other third parties.

Advertisement

Vetted

top camping flashlights reviewed top camping flashlights reviewed
Vetted3 months ago

15 Best Flashlights for Camping: Illuminate Your Outdoor Adventures

Harness the power of light with our top 15 camping flashlights that promise to illuminate your adventures—discover which one is...

top portable camping toilets top portable camping toilets
Vetted3 months ago

15 Best Portable Camping Toilets for a Comfortable Outdoor Experience

See our top picks for the 15 best portable camping toilets that ensure comfort and convenience, perfect for enhancing your...

top camping power banks top camping power banks
Vetted3 months ago

15 Best Power Banks for Camping: Stay Charged on Your Outdoor Adventures

Join us as we explore the 15 best power banks for camping that will keep your devices charged, ensuring you...

portable ac units camping portable ac units camping
Vetted3 months ago

15 Best Portable AC Units for Camping: Stay Cool in the Great Outdoors

Wondering which portable AC units will keep you cool on your camping adventures? Discover the top 15 options that promise...

top camping solar panels top camping solar panels
Vetted3 months ago

15 Best Solar Panels for Camping: Power Up Your Adventures in 2024

Discover the top 15 solar panels for camping in 2024 and find the perfect power solution for your adventures—can you...

top motorcycle camping tents top motorcycle camping tents
Vetted3 months ago

15 Best Tents for Motorcycle Camping: Durable, Lightweight, and Road-Ready

In search of the perfect tent for motorcycle camping? Discover the 15 best options that combine durability, lightweight design, and...

comfortable camping mattress pads comfortable camping mattress pads
Vetted3 months ago

15 Best Camping Mattress Pads for a Comfortable Night's Sleep Under the Stars

Prepare for your next adventure with the 15 best camping mattress pads that promise unparalleled comfort—discover which ones made the...

top camping chair retailers top camping chair retailers
Vetted3 months ago

15 Best Places to Buy Camping Chairs for Your Next Outdoor Adventure

You won't want to miss the top 15 places to find the perfect camping chair for your next outdoor adventure!

camping coffee brewing techniques camping coffee brewing techniques
Vetted3 months ago

15 Best Ways to Make Coffee While Camping – Brew the Perfect Cup in the Great Outdoors

Amidst the wilderness, discover innovative methods to brew the perfect cup of coffee while camping—your mornings will never be the...

top camping mattresses reviewed top camping mattresses reviewed
Vetted3 months ago

15 Best Camping Mattresses for a Comfortable Night Under the Stars

Find the perfect camping mattress for a restful night under the stars—discover which options will elevate your outdoor sleeping experience!

top camping vehicles 2024 top camping vehicles 2024
Vetted3 months ago

15 Best Camping Vehicles for Your Next Outdoor Adventure in 2024

Kickstart your outdoor adventures with the 15 best camping vehicles for 2024—discover which ride will elevate your next escape!

top camping wifi devices top camping wifi devices
Vetted3 months ago

15 Best Portable WiFi Devices for Camping Adventures in 2024

Discover the top 15 portable WiFi devices for camping in 2024 that promise reliable connectivity—find out which one suits your...

About us

Since 2012, Laienhaft has been your go-to source for all things camping and outdoor. With a carefully curated selection of top-quality gear, expert advice from our passionate team led by Olivia and Jason, and a thriving community of outdoor enthusiasts, we’re here to inspire and equip you for unforgettable adventures in the great outdoors. Explore https://laienhaft.com/ and join us on this exciting journey of embracing nature and creating lasting memories.

Trending