Connect with us

Survival

SHTF Survival Lessons – How To Administer First Aid

Published

on

SHTF Survival Lessons How To Administer First Aid

In a survival scenario, being armed with knowledge could mean the difference between surviving and not. Being proficient in first aid is crucial for those aiming to navigate through a SHTF (Shit Hits The Fan) situation while maintaining their health. As an experienced expert in both shtf survival and first aid, I’m acutely aware of how vital it is to possess these abilities – which is why I’m eager to pass on the valuable first aid tips I’ve acquired for handling emergencies.

In this article, I’ll cover everything from assessing the severity of injuries or illnesses to identifying signs of shock and beyond. With my help, you won’t just survive – you’ll have the confidence to take charge of any medical emergency that arises during times of crisis. You have within yourself all that’s necessary for true liberation; let me show you how to access it!

No matter what kind of chaotic world we’re living in, if you equip yourself with the right tools, there’s no limit to what you can do. Let’s get started on our journey towards self-reliance by taking a closer look at effective methods for dealing with medical emergencies in SHTF scenarios.
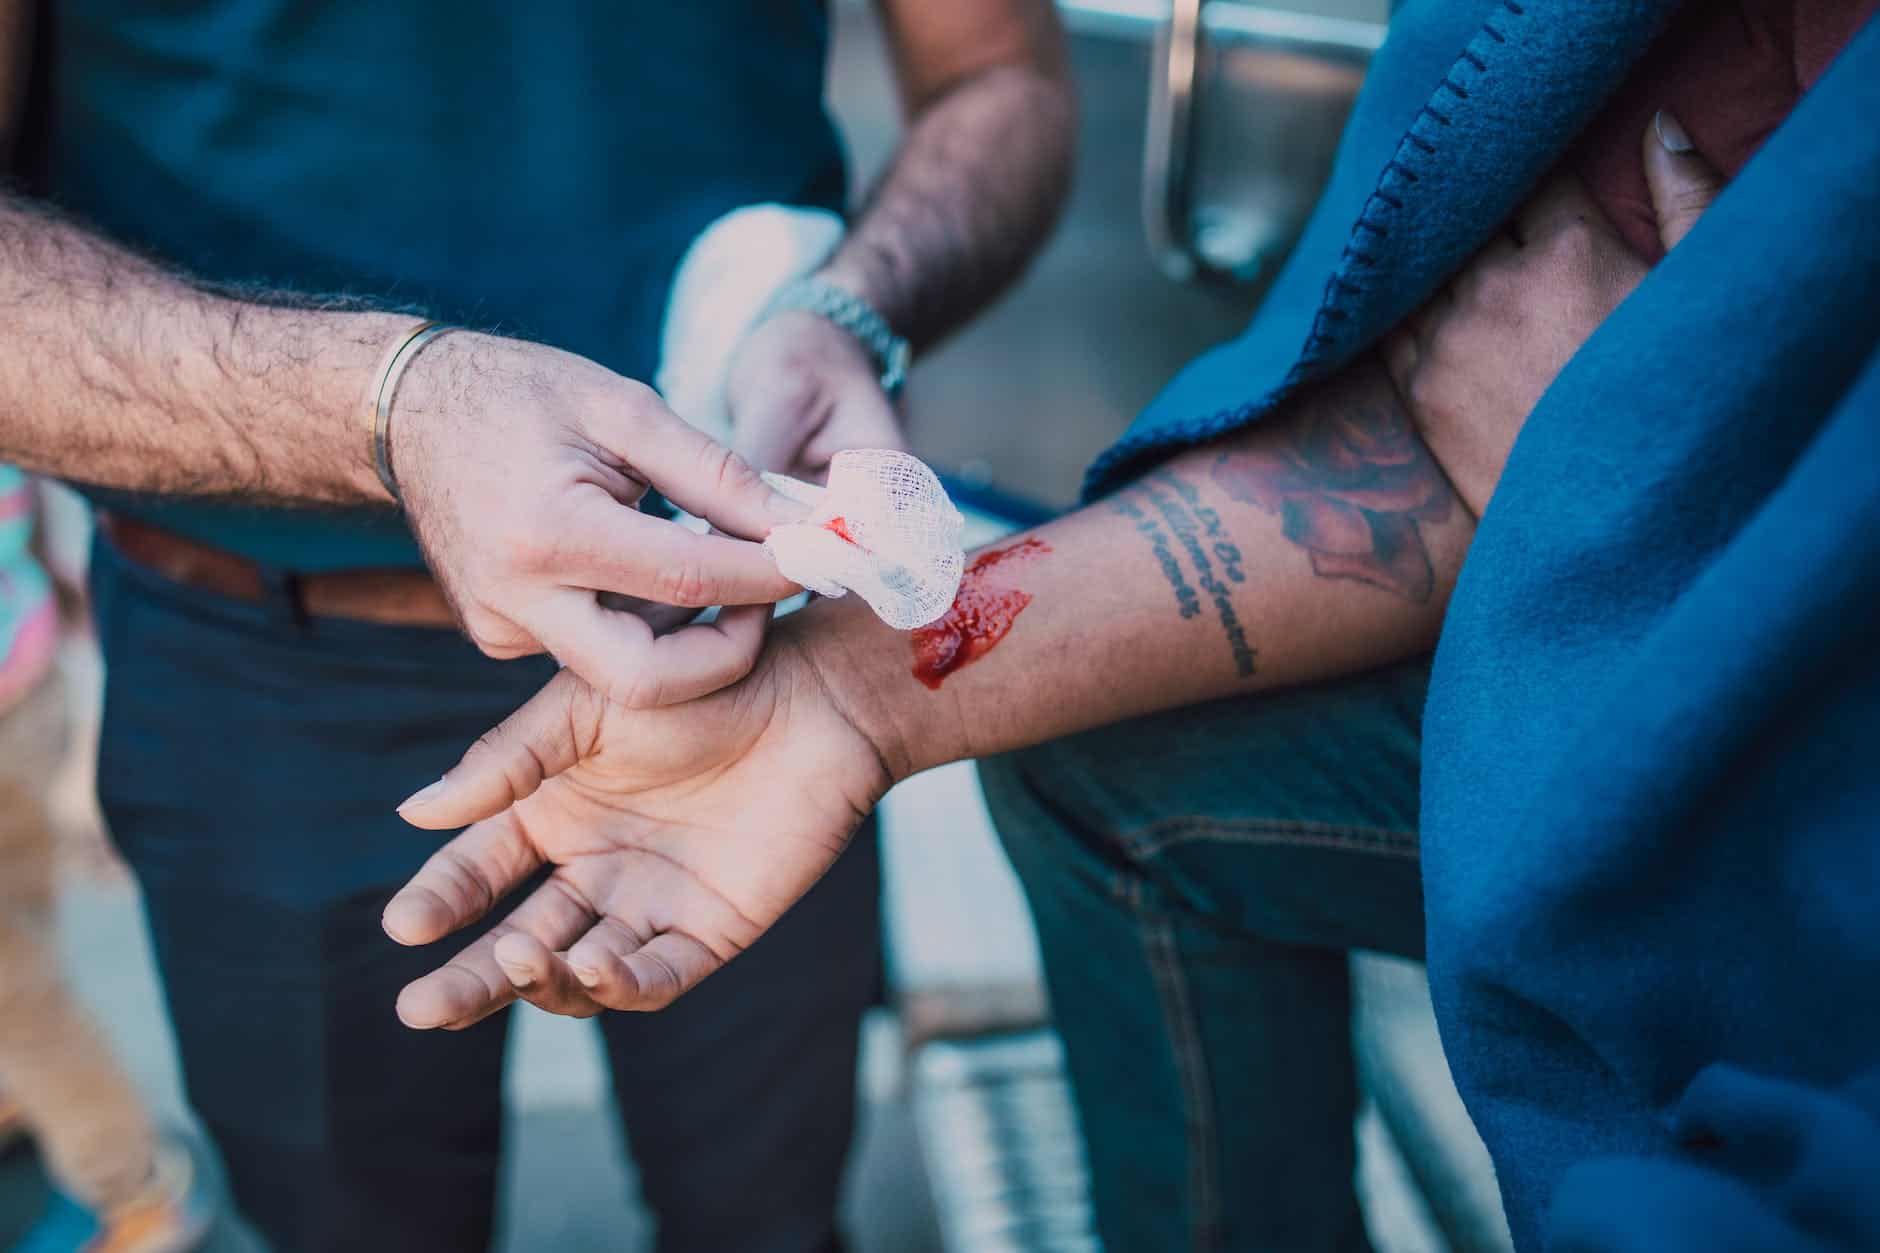
man administering first aid
Photo by RODNAE Productions on Pexels.com

Definition Of SHTF

Have you ever heard the term “SHTF” and wondered what it meant? It stands for “Shit Hits the Fan”, a phrase commonly used to describe an unpredictable and potentially catastrophic event.

In this particular context, SHTF implies an emergency situation in which normal life has been disrupted by some disaster. This could be natural disasters like floods or hurricanes, man-made disasters such as terrorist attacks or pandemics, economic collapse, civil unrest – anything that threatens to disrupt daily life as we know it.

When SHTF, people must rely on their own resources to stay safe. That means having a basic understanding of first aid principles can save lives if medical professionals are unavailable or overwhelmed. In order to do this effectively, however, one needs to understand the basics of first aid and how they apply in different scenarios.

Basic Principles Of First Aid

When it comes to administering first aid in a SHTF situation, there are some basic principles you should keep in mind. Here’s what you need to know:

  • Be prepared for any emergency by having the right medical supplies and equipment on hand at all times.
  • Stay calm and assess the situation before taking action. Don’t panic!
  • Pay close attention to safety protocols when providing treatment to avoid further injury or harm.
  • Know how to recognize signs of shock, breathing problems, and other life-threatening conditions so you can respond quickly and appropriately.
  • Remember that proper hygiene is important; wear protective gear such as gloves, masks, gowns, etc., if available.

It’s also essential to understand how your body works—the anatomy of different organs and systems—so that you can administer appropriate care based on an individual’s symptoms. Knowing which parts of the body are most vulnerable in a crisis (e.g., head injuries), can help you identify potential risks early on and take steps to limit them where possible. Finally, it’s critical that you stay up-to-date with changes in medical technology, advances in treatments and therapies, as well as current best practices for first aid administration so that you’re equipped with the knowledge necessary for success during a disaster scenario. As we move onto discussing types of wounds and treatment options next, remember these key points about administering first aid during SHTF situations: be prepared with the right supplies; remain calm; pay attention to safety protocols; recognize signs of distress; practice good hygiene; have a basic understanding of human physiology; and stay informed about changes in medicine.

Types Of Wounds And Treatment

Now that we’ve discussed the basic principles of first aid, it’s time to dig into more specific techniques. Treating different types of wounds requires understanding how they differ and what type of treatment will best help them heal. In this section, let’s take a look at the various kinds of wounds and which treatments are most effective for each one.

Types Of WoundsTreatment
AbrasionClean with soap & water, apply antibiotic ointment or cream, cover with bandage, use cold compress if needed
Laceration/CutStop any bleeding by applying direct pressure; clean wound with soap & water, close wound using butterfly strips or sutures; use antiseptic solution on skin around wound; cover with sterile dressing and secure in place w/tape or bandage; seek medical care if necessary
Puncture WoundClean area thoroughly with soap & water, apply antibiotic ointment or cream & cover with sterile gauze pad secured in place w/bandage; seeking professional medical attention is recommended
Types Of Wounds And Treatment

When dealing with any kind of open wound – whether it be an abrasion, laceration, or puncture wound – it’s important to remember that proper cleaning and sanitization is essential. This helps prevent infection from developing while also helping speed up the healing process. It’s equally as important to keep the affected area covered until fully healed to avoid further injury and contamination. With these tips in mind, you’ll have all the tools necessary to administer appropriate first aid for common injuries encountered during an SHTF situation. Now let’s explore infection prevention techniques that can be implemented when administering first aid.

Infection Prevention Techniques

In a shtf situation, it is especially important to prevent infection. Infection can set in quickly and cause serious complications if left untreated. To help keep your loved ones safe during an emergency, here are some tips for preventing infection when administering first aid:

First and foremost, be sure to clean the wound with soap and water or an antiseptic solution as soon as possible. Wounds should also be covered with gauze or bandages that have been sterilized before use. This will help protect them from dirt and other organisms that could lead to infection.

Additionally, you should always wear gloves when handling any kind of bodily fluids or open wounds. Gloves provide a barrier between you and potential contaminants, reducing the risk of spreading germs or bacteria. Additionally, they should be disposed of properly after each use to avoid cross-contamination.
Infection Prevention Techniques
SHTF Survival Lessons - How To Administer First Aid 12

For more severe injuries such as deep cuts or burns, antibiotic ointment may also be applied to reduce the chances of infection taking hold. With these simple steps in mind, you’ll be on your way towards providing effective first aid while keeping yourself and those around you safe from harm. And now let’s move on to discussing bandaging and splinting techniques…

Bandaging And Splinting Techniques

Now that we’ve discussed the practicalities of infection prevention, let’s turn our attention to another key aspect of first aid – bandaging and splinting. This is a vital skill for any prepper or shtf survivor who wishes to be prepared for medical emergencies.

When it comes to dealing with injuries such as broken bones and deep cuts, having the right supplies on hand can make all the difference between life and death. Having an understanding of proper bandage technique is essential if you want to provide effective care in a survival situation. Bandages serve two purposes: they help reduce bleeding by applying direct pressure to wounds, and they protect injured areas from further damage while allowing them to heal. Additionally, when used correctly they can also immobilize fractured limbs, reducing the risk of additional injury or pain.

Splints are an important tool in providing emergency care for fractures and dislocations. They help limit movement until professional medical care can be obtained, thus preventing further injury. The most common types of splints you will encounter in a survival setting are improvised slings made from cloth or rope, wooden sticks tied together with twine, inflatable air casts and commercial rigid splints. Knowing how to construct each type quickly and safely could save someone’s limb in the event of an accident or attack during SHTF conditions! With these techniques at your disposal, you’ll be well-equipped to handle many traumatic incidents should they arise in your day-to-day life after TEOTWAWKI (The End Of The World As We Know It). Now let’s move onto discussing CPR and airway management…

CPR And Airway Management

When it comes to administering first aid, one of the most important skills you can learn is CPR and airway management. Knowing how to perform these two life-saving techniques could mean the difference between life and death in a survival situation.
CPR stands for Cardiopulmonary Resuscitation, and its purpose is to keep oxygenated blood circulating through the body until medical help arrives. To properly administer CPR, you must ensure your patient’s airways are clear and their chest is moving up and down with each compression. You should also be sure to use correct technique while performing compressions: interlock your fingers over the center of the patient’s chest and push hard enough that they move around an inch or so into their ribcage. Remember, you don’t want to apply too much force as this could cause more harm than good!

Airway management involves ensuring there are no obstructions blocking the flow of oxygen from reaching the lungs. You will need to check for foreign objects such as vomit or food particles in order to achieve this. If any obstruction is found, gently remove it using suitable tools such as tweezers or suction devices if available. Additionally, make sure to adjust the head position of your patient by tilting it back slightly; this helps open up their airways so oxygen can reach them easier.

By taking proper precautions when giving CPR and managing an individual’s airway effectively, you can give them a fighting chance at making it out alive in even the direst shtf situations. These vital skills require practice however, so be sure not to wait until disaster strikes before learning them! With diligent preparation now, you’ll be better prepared if ever faced with a real-life emergency scenario later on down the line. Now let’s take a look at shock treatment – another important skill that all survivalists should know…

Shock Treatment

When SHTF, administering first aid to those in shock can be a frightening task. But it doesn’t have to be – with knowledge of the necessary steps and supplies, you’ll be prepared for whatever life throws at you. To illustrate this point, imagine if your best friend was out on a hike and came across someone injured from an accident: Would you know how to help?

Here are 5 key tips for treating shock:

  • Establish safety by making sure there is no further danger or risk of harm.
  • Monitor breathing rate and pulse, while providing comfort through words and reassurance that help is coming soon.
  • Keep affected person warm; use extra clothing or blankets if available.
  • Elevate legs above heart level to reduce blood pooling in lower extremities.
  • If possible, give small amounts of water or other fluids every 15 minutes until medical attention arrives.

Shock treatment isn’t something we want to think about when all is right in the world – but being prepared can make all the difference during chaotic times. By staying informed and having the right supplies on hand before disaster strikes, you’ll be able to provide swift assistance should anyone need it. Now let’s move onto what necessary supplies are needed to put together your ultimate first aid kit…

Necessary Supplies For First Aid Kit

Having the right supplies on hand is essential for administering first aid in a SHTF situation. It’s important to invest in quality medical products, as well as items that will be useful in an emergency. Here are some of the top must-haves in your survival kit:

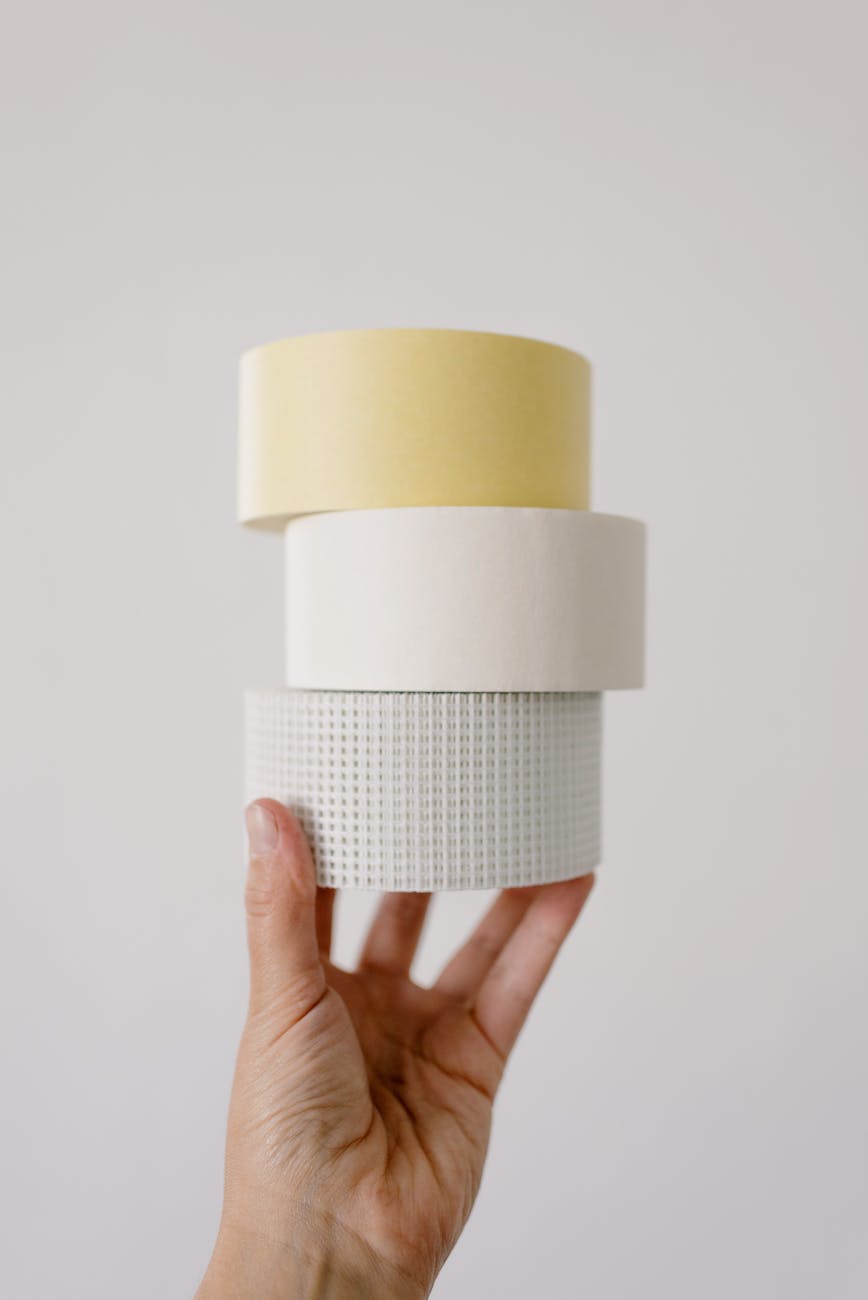
  • First and foremost, you need basic bandages and wound dressings. This includes gauze pads, adhesive tape, cotton swabs, sterile gloves, and antiseptic wipes or cream. Additionally, it would be best to have antibiotic ointment and hydrogen peroxide to cleanse cuts and scrapes. You may also want to include a suture kit if you can use one safely.
  • Next, it’s vital to stock up on medications like aspirin or ibuprofen for pain relief; antihistamines for allergies; antibacterial cream for skin infections; topical ointments for burns and rashes; epinephrine for allergic reactions; eye drops and saline solution for eye injuries; laxatives for constipation relief; oral rehydration salts or sugar water to treat dehydration; cough medicine; cold medicines like decongestants; antacids such as Tums or Maalox tablets.
  • Finally, having an eyeglass repair kit can come in handy when someone needs their glasses fixed during an emergency situation.


It’s also wise to keep a few extra items such as tweezers, a thermometer, scissors with rounded tips (to avoid poking people), safety pins, needle-nose pliers (for removing splinters) and other small tools that might come in handy while treating wounds or illnesses. With these supplies ready at all times, you’ll be better prepared when the unexpected happens. As we move forward into discussing improvising with limited resources…

Improvising With Limited Resources

When SHTF, you have to be prepared to make do with whatever resources are available. Even if your first aid kit is limited or non-existent, there are still ways to administer effective medical care. It’s all about using what you have and being resourceful.

First, if supplies are scarce, prioritize using anything that can help stop bleeding quickly and effectively. This could include clothing items such as t-shirts or towels for compressing a wound. If necessary, plastic bags and tape can also be used in order to create an airtight seal around a bandage. For example, if someone has a deep cut that won’t stop bleeding no matter how much pressure is applied to it – try wrapping the wound tightly with a baggie filled with ice cubes secured by duct tape before applying direct pressure to it again in order to slow down blood flow from the wound area.

Lastly, getting creative when improvising with limited resources during SHTF scenarios can save lives! Be sure to stay informed on the different possibilities and always think through the entire process carefully before attempting any kind of medical procedure without proper training or experience. In some cases, even something seemingly simple like creating a makeshift sling out of a shirt may not be enough – so take into account any other possible solutions too! With preparation and practice ahead of time, anyone can become adept at administering basic first aid should they ever find themselves in an emergency situation where every second counts.

Mental Health Considerations

Mental health is an important consideration during a shtf scenario. It’s essential to understand the impact that stress and fear can have on your mental state, so you can be prepared to help yourself and others.

One of the most important things that individuals should do in order to prepare for a shtf event is to take steps to manage their own mental well-being. This includes self-care activities such as getting enough sleep, eating nutritious foods, exercising regularly, and managing stress levels. Additionally, it’s beneficial to practice relaxation techniques like meditation or deep breathing exercises in order to stay calm in difficult situations.

Another key factor when considering mental health during a shtf situation is understanding how best to support those around you who may be struggling with stress or difficult emotions. Providing emotional support by listening actively, offering comfort, and providing reassurance are all ways we can offer assistance without judgement or criticism. Ultimately, looking out for our own wellbeing will allow us to better look out for others too.

In addition to being aware of the psychological effects of survival scenarios on ourselves and others, having knowledge about administering first aid is also vital. Knowing basic emergency medical procedures like CPR could save lives if needed; equipping yourself with this type of information can ensure that you’re ready for whatever comes your way.

Frequently Asked Questions

What Is The Best Way To Store A First Aid Kit?

When a survival situation arises, it is important to be prepared with the right knowledge and resources. Knowing how to store your first aid kit effectively can mean the difference between life and death in an emergency. As a shtf survival and first aid expert, I’d like to share some tips on how best to keep your supplies accessible without sacrificing safety or efficacy.

Having access to quality medical care during an SHTF situation isn’t always guaranteed, so being able to administer first aid correctly is of utmost importance. For this reason, it’s essential that you have all of the materials needed for treating injuries easily at hand when disaster strikes. Here are a few things you should consider when storing your first aid kit:

  • Look for waterproof containers – Even if stored indoors, water-resistant cases will help protect against moisture damage and contamination from other substances.
  • Make sure items are organized – Very often people don’t think about organizing their supplies until they need them. It pays off immensely if you take time beforehand to group related items together for quick retrieval during emergencies.
  • Store only what you need – Don’t clutter up your space by stocking unnecessary items; make sure every item has its purpose and can be used quickly in case of an emergency.

The most important part of keeping a well-stocked first aid kit is having easy access to necessary tools such as bandages, ointments and tweezers while still protecting these delicate instruments from dust and humidity exposure over long periods of time. This way, you’ll feel better knowing that even though there may be chaos outside, inside your home remains a haven where nothing stands in between you and true liberation in times of distress.

How Long Should I Expect A Wound To Take To Heal?

When you’re out in the wilderness, administering first aid is an important skill to have. One of the most common questions I get asked is how long should a wound take to heal? This can vary depending on several factors, and it’s important to know what those factors are so that you can provide your patient with the best care possible.

First, let me say that healing times will depend largely upon where the injury was sustained, its severity and size, and if there were any foreign objects such as splinters or glass embedded into the skin. Additionally, other considerations include:

  • The person’s overall health;
  • If they’re taking any medications;
  • Their age;
  • And even their lifestyle habits such as smoking or drinking alcohol regularly.

Then that for smaller cuts and scrapes which don’t involve deep tissue damage – these may only need basic cleaning and bandaging before healing relatively quickly between 5-7 days. However deeper wounds may require stitches and more careful monitoring of your patient due to infection risk being much higher. In this instance, expect a minimum recovery time of 10 days up to 4 weeks depending on the injury’s severity.

Knowing what signs to look out for during a patients recovery period is key too: swelling around the area could indicate infection; redness beyond normal healing process might suggest inflammation; excessive fluid discharge from the wound site should be treated immediately etc., These are just some things to consider when assessing how long it’ll take someone to recover from their injuries while outdoors – knowledge which can prove invaluable in providing effective first aid treatment!

What Is The Best Way To Treat A Major Cut Or Laceration?

When it comes to treating a major cut or laceration, the best thing you can do is to act fast. Minor cuts may require some basic first aid such as cleaning and bandaging, but more serious injuries need immediate attention in order to prevent further complications. Coincidentally, having an understanding of how to treat these kinds of wounds properly could be crucial during a SHTF scenario when medical resources are scarce.

Firstly, the wound should be thoroughly cleaned with clean water and mild soap or cleanser. This will help reduce the risk of infection while also preventing debris from entering the wound. If possible, apply pressure with a sterile gauze pad or cloth to stop any bleeding that may occur. Afterward, using either butterfly strips or surgical tape and gauze pads, bind the edges of the cut together overlying each other until secure enough to have them stay shut without additional support.

Next step would be to use an antibiotic ointment on top of the wound for added protection against bacteria and other contaminants which might cause an infection. The dressing should then be changed every few days depending on how quickly it heals up – this helps ensure that no dirt gets inside the wound and speeds up healing time. Finally, make sure that you check your stitches periodically; if they start coming undone, reapply them as soon as possible so that there’s minimal chance of re-injury or infection. With proper care and regular monitoring, even deeper lacerations can heal relatively quickly under ideal circumstances – although not nearly as fast as minor cuts!

What Is The Best Way To Respond To A Medical Emergency In A Remote Location?

When it comes to responding to medical emergencies in remote locations, the best thing you can do is be prepared. Being properly equipped with the right supplies and knowledge can make all the difference during a crisis. Here are some tips for making sure you’re as ready as possible:

  • Have a well-stocked first aid kit on hand at all times, including bandages, gauze pads, antiseptic wipes, pain relievers and any other items necessary for treating wounds or minor illnesses.
  • Take time to familiarize yourself with basic first aid principles such as how to perform CPR and proper wound care techniques. It’s also important to have an emergency plan in place so that everyone knows what steps to take if there’s an accident or injury.
  • Remember that help may not always be available when you need it most, so recognizing signs of shock or treating severe bleeding is essential. Knowing when it’s appropriate to evacuate someone from the scene and get them immediate medical attention could save their life.

Being prepared for a medical emergency in a remote location means having the right tools and knowledge at your disposal. Access to these resources will give you peace of mind knowing that you can handle whatever situation comes your way without risking anyone else’s safety. From stocking up on survival gear before heading out into unknown terrain to learning about wilderness first aid protocols – taking the initiative now can ensure that you’re ready no matter what happens down the line.

What Is The Most Important Safety Consideration When Administering First Aid?

When it comes to administering first aid, safety should always come first. It’s important for anyone attempting to provide medical assistance in a remote or challenging environment to be aware of their own limitations and the potential risks before taking action. Here are some key considerations when providing emergency care:

  • Ensure your surroundings are safe – Before beginning any medical treatment, you must assess if the area is secure from further harm. This includes checking for hazards such as dangerous animals, falling objects or hazardous terrain.
  • Assess the patient’s condition – Quickly determine if there is an immediate threat to life and decide how best to respond. If necessary, use basic lifesaving techniques such as CPR and First Aid until more advanced help arrives.
  • Use proper technique – Follow all instructions carefully when carrying out any treatments; even small mistakes can lead to worse injury or infection. Make sure that bandages are applied correctly and wound dressings changed regularly with clean materials.
  • Minimize stress levels – Stress can worsen injuries, so try to stay calm and reassure the patient by speaking clearly about what you’re doing and why. Taking time for deep breaths throughout will keep you focused and encourage those around you who may have become panicked during the situation.

The success of administering first aid depends heavily on making sound decisions quickly while minimizing risk of harm both to yourself and others involved. While it takes training and experience to handle these situations responsibly, following these guidelines will ensure that everyone stays safe while helping in an emergency scenario.

What Are Some Multi-Purpose Tools That Can Be Used for First Aid in Survival Situations?

Having multi-purpose survival tools in a survival situation is crucial. Some key tools include a Swiss Army knife, which includes a variety of tools like scissors and screwdrivers, and a tactical pen, which can be used for self-defense and breaking glass. A multitool like a Leatherman can also come in handy, with features like pliers, saws, and can openers. These tools are versatile and can be a lifesaver in first aid emergencies.

Conclusion

When dealing with medical emergencies in a survival situation, it is important to be prepared and ready. Having the right first aid supplies on hand can make all the difference in treating injuries quickly and effectively. Storing your kit properly will help ensure that you have access to it when you need it most. Knowing how to treat major cuts or lacerations and what safety considerations are necessary during treatment are essential skills for anyone looking to survive an SHTF scenario.

This basic knowledge can give someone peace of mind while dealing with a medical emergency in a remote location. It also gives them the confidence they need to administer effective first-aid treatments and increase their chances of prosperous recovery times. Responding swiftly and calmly to any medical situation is key if one hopes to stay alive in hostile environments.

In short, having the proper knowledge about SHTF survival lessons and administering first aid is paramount for those who wish to endure extreme situations unscathed. With just a little bit of preparation and practice, such life-saving skills can be developed easily by anyone willing to learn them – keeping us safe from harm no matter what kind of disaster we may face along our journeys!

Continue Reading

Survival

SHTF Survival Lessons – How To Start And Use A Fire For Survival

Published

on

By

SHTF Survival Lessons How To Start And Use A Fire For Survival

Are you prepared to take charge of your survival in a SHTF scenario? Understanding the art of starting and utilizing a fire for survival purposes is critical, and it’s a skill every prepared individual must possess. As someone who has navigated through SHTF situations, I can attest that becoming proficient in this essential skill can be the deciding factor between surviving or not in any emergency. So, if you’re determined to be ready for any challenge, keep reading!

In this article, I’ll be sharing my personal tips and tricks for starting and using a fire for survival. We’ll cover everything from gathering supplies to creating fuel sources, so by the end of it all, you’ll know exactly what it takes to build yourself a blazingly hot campfire – even in harsh conditions. Plus, we’ll add in some bonus advice on how to get creative with fire-building techniques so that you can truly feel liberated while surviving off the grid.

So don’t miss out on these essential lessons; they may give you the edge needed when SHTF. With me as your guide, let’s explore everything there is to know about starting and using fires for survival!

Definition Of SHTF

The term SHTF stands for ‘Shit Hits The Fan’. It’s a phrase used to describe a fast-changing, chaotic situation where everyday life as we know it has suddenly come to an end. It could be caused by natural disasters such as floods or earthquakes, economic collapse, civil unrest, war and other unforeseen events. In any case, the effects of SHTF can be devastating and long-lasting if you’re not prepared.

In order to survive during these times of extreme turbulence and instability, one must become self-reliant and resourceful in all aspects of their lives. This includes having access to essential survival gear that will help keep you safe while also making sure that your basic needs are met. Knowing how to start and use a fire is an important part of this preparation process. With the right knowledge and supplies at hand, you’ll be able to stay alive no matter what comes your way.

Having the ability to build and maintain fires when SHTF is incredibly important because it allows you to cook food, purify water, provide light and heat in cold temperatures, signal for help in an emergency situation, and much more. While many people think they already know how to make a fire from scratch, there are some key tips that everyone should know before attempting this task during challenging conditions. Moving on…

Essential Survival Gear

Starting a fire is essential for survival in many different SHTF scenarios. The ability to stay warm and cook food can give us an edge during times of desperation. That’s why having a few essential items on hand can make all the difference in the world when it comes to starting and maintaining a fire.

The first thing you’ll need is something called tinder, which is any material that will easily catch flame such as dry grass, wood shavings or leaves. You may also want to consider carrying some kindling like small pieces of bark or twigs so your fire will have fuel once you get it started. And don’t forget about matches or lighters – these are lifesavers if you find yourself without flint or another way to start a blaze!

Finally, you should always bring along at least one shelter item with you, just in case things go south quickly. This could be anything from a wool or synthetic fabric blanket to an emergency bivy sack – both of which provide warmth and protection against the elements while keeping your clothes dry and clean. With these items by your side, no matter what situation arises you’ll be prepared to create a lasting source of heat and light in order to keep yourself safe until help arrives.

Safety Tips For Starting A Fire

Starting a fire in an emergency situation can be a tricky task and needs to be done safely. I always remind myself of these three important guidelines when prepping for a fire: prepare the location, use proper materials, and keep safety in mind at all times.

When preparing the location, it’s essential to pick an area that is clear from any flammable items or hazardous material. You’ll also want to ensure that you’re not building your fire too close to anything combustible like trees or shrubs. Additionally, try to find an open space with enough room for air circulation so that your flames don’t spread out of control quickly.

Safety Tips For Starting A Fire
SHTF Survival Lessons - How To Start And Use A Fire For Survival 21

Using the right kind of materials will help get your fire going faster and safer. Gather dry tinder such as small twigs and leaves along with larger pieces of wood like sticks and logs to feed the flames once they start growing. Make sure you have matches on hand or some other form of ignition source, but never use gasoline or kerosene; these substances are highly flammable and could cause serious harm if used incorrectly.

Finally, stay safe throughout this process by keeping children away from the burning embers until they’re extinguished completely. It’s also important to make sure there is a sufficient water supply nearby should things go south during your attempt at starting a fire. With just a few simple precautions, you can rest assured knowing that your efforts will pay off in the end! Now let’s move onto gathering and preparing fuel sources for our survival fire!

Gather And Prepare Fuel Sources

Now that you’ve chosen your spot, it’s time to gather and prepare fuel sources. Fuel is the key component in starting a fire and keeping it going, so this step should not be overlooked. To begin gathering fuel, look around for materials such as dried grasses, leaves, twigs, and even pine needles. These are all combustible substances which will help create an ember when ignited with a spark or flame source.

Gather And Prepare Fuel Sources 1
SHTF Survival Lessons - How To Start And Use A Fire For Survival 22

In addition to these natural materials found in your immediate area, also consider adding other items like paper products (such as newspaper), cardboard boxes, wood shavings from lumber piles or sawdust bags of kindling material typically used for camping trips. Here’s a markdown list of some common materials to collect:

  • Natural Materials:
  • Dried grasses
  • Leaves
  • Twigs
  • Pine Needles
  • Manmade Materials:
  • Newspaper
  • Cardboard boxes
  • Wood shavings/sawdust
  • Kindling material (typically used for camping)

Once you have gathered your supplies together properly into manageable pieces that can fit within your fire pit area, it’s time to start organizing them into layers and configurations that will allow oxygen flow through efficiently while still burning steadily. This could include anything from small stacks of larger logs arranged in alternating directions at the base of the pit up to smaller sticks laid over one another on top of those logs in crisscross patterns. With practice, building an efficient fire will become second nature!

Building Techniques For A Fire

Building a fire is one of the most important aspects of survival. You need to know how to construct a safe and effective fire if you want to survive in an austere environment. There are several techniques for building a fire, but it’s important that you understand the basics first before attempting any advanced methods.

The first step in constructing a successful fire is choosing the right location. Find an open area with plenty of room around your fire pit so that you can easily access wood and other supplies without putting yourself at risk from heat or smoke inhalation. Once you’ve chosen your spot, start gathering kindling – small twigs, dry leaves, and other combustible material – and arrange them in a tepee-like structure near the center of your pit.

Next, add larger pieces of wood such as logs or branches over the top of your kindling pile. Make sure there is enough air circulation between each piece so that they will ignite quickly when lit. For best results, use only seasoned (dried) hardwood like oak or hickory rather than green wood which takes longer to burn and produces more smoke. Finally, light the edges of your kindling pile using tinder or another type of igniting material such as matches or lighter fluid. Once ignited, adjust the size and shape of your flame by adding or removing fuel as necessary until it reaches its desired intensity level.

Now that you have successfully started your fire it’s time to learn about extinguishing and controlling it safely . Extinguishing and controlling a fire safely involves using the appropriate fire extinguisher or smothering the fire with dirt, sand, or a fire blanket. Additionally, you should always remember to wear protective gear, such as thick gloves and goggles, when attempting to extinguish a fire.

Extinguishing And Controlling The Fire

When it comes to dealing with fire, part of being a prepared survivor is understanding how to put out and control the flame. Having the ability to extinguish your fire in an expeditious manner can be lifesaving when SHTF.

The first thing you should remember is that if there’s no reason for keeping the fire going then don’t wait too long before putting it out. Being able to quickly smother or divert the oxygen supply away from your fire is paramount in some situations. Don’t forget about safety either; never leave a burning campfire unattended until you are certain all embers have been extinguished.

To ensure your fire has been doused, cover any remaining hot spots with dirt or sand – this will help prevent them from reigniting later on. Make sure that every spark has stopped smoking and all embers are completely cold before leaving the campsite – taking any necessary precautions as needed along the way!

With these tips in mind, you’ll be ready to control and manage fires while surviving during times of distress. Transitioning into using a fire safely in emergency scenarios requires keen knowledge, so stay tuned for subsequent section where we discuss how best to use a campfire in survival mode!

Uses Of Fire In An Emergency

Now that you know how to safely start, extinguish and control a fire for survival purposes, it is important to understand the many uses of fire in an emergency. Fire can be used to keep warm, cook food and signal for help. It also has psychological benefits as its warmth provides comfort during stressful times.

In a SHTF situation, having the ability to create a hot meal quickly will provide nourishment and reduce stress levels. You can use any type of fuel such as wood, twigs or dried leaves to build your Campfire Cooking Stove. This small stove allows you to boil water and prepare nutritious meals over a campfire with minimal effort.

Additionally, signaling fires are one of the most reliable methods of attracting attention when lost in the wilderness or trying to locate other survivors. A large bonfire placed on high ground is often visible from miles away at night making it perfect for calling out for help or finding companionship during difficult times.

Fire can bring us together even in the darkest hours by providing light and heat that offers both physical and mental relief from uncertainty and fear. With proper preparation and safety measures, using fire for survival should become second nature so if faced with disaster you can confidently make use of this invaluable resource! Having explored all the main ways fire can be useful in emergency situations, let’s now turn our attention towards cooking and heating with fire.

Cooking And Heating With Fire

I’m sure we all know how important fire is for survival in a SHTF situation. But it’s not just about starting a fire and keeping it going – you also have to be able to use the heat of that fire for cooking meals and heating your shelter. Let me share with you my tips for making the most out of your campfire!

AdvantagesDisadvantages
VersatileSlow
PortableDangerous
EfficientUnpredictable
Cooking And Heating With Fire

When it comes to cooking, I recommend bringing an array of tools like Dutch ovens, skillets, griddles, or even an open-flame grill. Each has its own advantages and disadvantages depending on what kind of food you’re cooking and where you are camping. For example, a skillet gives you more control over the temperature of your meal while giving off less smoke than other methods. Dutch ovens are great when baking because they retain heat better than any other tool. Open flame grills let you cook large amounts quickly but require careful monitoring as they can get hot very fast. Whichever method you choose, always remember that safety comes first! Have patience and practice common sense when working with open flames; never leave them unattended and keep combustible items away from the area at all times.

No matter where your travels take you during a SHTF scenario, having some way to cook your food will make life much easier. Fire offers so many opportunities to prepare tasty dishes while simultaneously providing warmth and comfort in harsh conditions. With these simple tips in mind, you’ll be ready to take full advantage of this incredible resource wherever your journey leads!

Signaling With Fire

The importance of being able to signal for help in an emergency situation cannot be underestimated. Fire can provide a powerful, visible way to call attention to your location and attract the attention of rescuers. With some knowledge and practice on how to effectively use fire as a signaling tool, you can increase your chances of surviving any type of disaster or SHTF event.

When it comes to using fire as sign language, there are several methods that work best. The most effective is smoke signals because they can often be seen from far distances. If possible, try to set up two large fires with plenty of fuel so that you can create thick plumes of smoke at regular intervals. You should also build them high enough above the ground so that their smoke rises higher into the air and is more easily seen by potential rescue teams or airplanes flying overhead. In addition, if you have access to bright colored materials like clothing or blankets, tie these items onto branches near one of the fires so they will catch the eye even better than just plain smoke.

Another great option for signaling is having a bonfire since this produces light which stands out in darkness much easier than normal flames do during daylight hours. Make sure you pay attention when building your bonfire – not only does it need lots of combustible material but make sure it’s placed somewhere where its light will stand out against surrounding terrain (like on top of a hill). Once lit, continuously monitor your bonfire so that it doesn’t get too big or spread beyond control! By following these tips and making sure you always carry necessary safety equipment such as matches and lighters, you’ll dramatically improve your chances for rescuing yourself successfully when stranded in an emergency situation caused by SHTF events.

Long-Term Fire Maintenance

We’ve discussed the basics of lighting and maintaining a fire. But what do you need to know if you want your fire to last for an extended period of time? In this section, I’ll discuss some important tips on how to keep your fire burning long-term when SHTF.

1) Start with plenty of fuel: To ensure that your fire lasts throughout the night, start off by adding a good amount of tinder and larger pieces of wood. Don’t go overboard as it can cause flames to become too large and difficult to control. Make sure there’s enough fuel for at least 4 hours – then add more once it starts getting low.

2) Monitor oxygen levels: Oxygen is essential for keeping any flame alive. Without enough oxygen, even the best fires will eventually die out. Keep an eye on wind direction and use small sticks or other debris to adjust air flow accordingly so that oxygen continues flowing into the center of your blaze.

3) Adjust size according to need: If you’re looking for just a small source of heat without creating a lot of smoke, ensure you don’t let the fire get too big; reduce its size by removing logs or breaking them down into smaller pieces if necessary. On the other hand, if you need more light or warmth than usual, increase the size of your fire by adding additional kindling or larger pieces of wood.

By following these simple steps, you should be able to maintain a strong and dependable campfire no matter what situation arises! Just remember that safety always comes first – never leave your fire unattended and always have a bucket full water nearby if things get out of hand.

Frequently Asked Questions

What Is The Best Type Of Wood To Use For A Fire?

Wood is a great source of fuel for any type of fire you’re trying to start. But not all types of wood are created equal when it comes to survival fires! Knowing which type of wood will give your fire the best chance at success is key. That’s why I’m here, to help you out and show you what kind of wood can make starting and maintaining a fire easier in an SHTF situation.

First off, let’s talk about tinder. This would be anything from dry grasses, small twigs and bark that catches easily on fire with just one spark or flame. You should always look for dead branches or sticks that have been drying outside – this makes them much easier to light than fresh, wet wood. If it’s raining hard enough, try using some cedar tree shavings as they catch flames even faster if dampened by rainwater. And if there isn’t any tinder around, don’t worry: use old cardboard boxes or newspaper instead!

Now once the tinder has caught flame, it’s time to add larger pieces of wood into the mix. The most important thing when selecting logs is picking ones that aren’t too big but also aren’t too small; having both sizes gives the fire better airflow and creates more heat (which means longer burning!). Hardwoods like oak and maple are usually good choices because they burn slowly and steadily over hours – perfect for cooking meals or keeping warm overnight! Soft woods like pine may work well in emergency situations since they tend to ignite quickly with little effort required from you.

No matter what type of wood you choose for your survival fire, making sure its dry and seasoned is essential for creating a successful blaze—so never underestimate the importance of gathering quality fuel before striking up a match!

What Is The Most Efficient Way To Build A Fire?

It’s estimated that up to 80% of all fire-related deaths are due to incorrect fire building techniques. Knowing how to build a fire efficiently is an essential skill for any SHTF survivalist. It can mean the difference between life and death in an emergency situation, so let’s take a closer look at the most efficient way to make one.

First, you’ll need some kindling material such as small twigs, thin tree bark strips, or even dry leaves. Place these materials on top of each other in a cross formation inside your campfire pit; then add larger pieces of wood like sticks and logs around them. The key here is to create an air gap between the fuel source and the flame – this will allow oxygen to reach the burning materials more easily which will help sustain your fire.

The next step is lighting the fire using either matches or a lighter. Make sure there’s plenty of airflow around your kindling pile before attempting to light it otherwise your efforts may be futile! Once lit, keep adding larger logs gradually until you have a steady flame going. This should provide enough heat for cooking food or keeping yourself warm throughout the night – both essential skills for surviving in harsh weather conditions during SHTF scenarios.

No matter what type of wood you use, following these simple steps will ensure you get maximum efficiency from your campfire without wasting too much time trying to get it started. With practice and experience comes mastery – eventually you’ll be able to quickly start fires with minimal fuss!

How Can I Use Fire As A Distress Signal?

Using fire as a distress signal has been an essential survival skill for centuries. In times of dire need, it’s one of the most reliable ways to get help when other methods have failed. As with any other SHTF survival tactic, there are some key points you should know about using fire as a distress signal in order to ensure your safety and increase your chances of being rescued. Here is a list of practical tips on how to use fire effectively:

  1. Choose the right location: Make sure you pick an open area that can be seen from far away such as hilltops or ridges so that potential rescuers will spot it sooner.
  2. Gather materials: Collect larger logs and fuel sources that burn longer and hotter. Also, make sure to prepare several piles of wood around the main flame source so that more smoke can be generated quickly if needed.
  3. Start a big blaze: A large fire will create much more smoke than a small one, making it easier for people to see from further away. To do this, stack up kindling in layers until all the pieces form into a tepee-like structure – this will provide plenty of oxygen for the flames to grow bigger and brighter.
  4. Signal regularly: Distress signals should be sent out continuously throughout the day in order for them to be noticed by passing aircrafts or boats – try sending three sets of smoke bursts every 15 minutes during daylight hours (if possible) and once per hour at night time (when visibility is lower). This way, potential rescuers won’t miss your call for help!

Making effective use of these simple tactics significantly increases your chances of being found faster by search parties or helicopters flying over head. Fire also provides additional benefits like keeping warm in cold environments and helping you cook food; both necessary components for staying alive in harsh conditions where resources are scarce. Just remember – practice makes perfect! With enough preparation, knowledge and experience you’ll be able to master even the toughest challenges associated with surviving off-the-grid scenarios like SHTF situations

What Should I Do If The Fire Gets Out Of Control?

If you find yourself in a situation where your fire gets out of control, it’s important to act quickly and decisively. The first thing you should do is assess the situation – look around and see what kind of resources are available that can help contain or extinguish the flames. If there’s plenty of water nearby, use buckets or other containers to pour it over the fire until it’s extinguished. Or if there’s sand nearby, you can create a barrier by piling up sand between the fire source and any combustible material like brush or leaves.

You also need to be aware of how quickly wind can spread a fire, so don’t hesitate to relocate if necessary (but make sure your new spot isn’t vulnerable to an uncontrolled blaze). It may be tempting to try and move large logs away from the fire with bare hands, but this will only increase its intensity – instead use sticks or branches as leverage. And remember: safety comes first! Don’t risk getting hurt trying to put out a wildfire; better leave it for professionals who know their way around these kinds of situations.

In some cases, such as when camping outdoors, you might want to set off a distress signal using your blazing inferno – just make sure not to compromise your own safety while doing so. Always have at least two exits planned before setting one off – ideally one on each side of the campfire – and keep them clear of obstacles at all times. That way, no matter which direction the wind takes the flame, you’ll always have a safe escape route ready. Make sure everyone within range knows about it too; otherwise they won’t realize they’re in danger until it’s too late.

How Can I Make Sure The Fire Will Last For A Long Time?

When it comes to using a fire as part of your shtf survival strategy, one of the most important things you need to know is how to make sure it will last for a long time. Whether you’re in an emergency situation or simply camping outdoors, having a reliable source of heat can be essential.

There are several tactics that can help you get more out of your fire, and many of them require minimal effort. For example:

  • Gather Dry Wood: Always use wood that is dry and well seasoned – if possible, find wood with low moisture content (under 20%). If the wood is too wet, it won’t burn as efficiently and may put off excessive amounts of smoke.
  • Make sure there’s plenty of tinder and kindling on hand so that getting the fire started doesn’t take too much effort.
  • Don’t forget about larger pieces of fuelwood; these should be arranged into a loose stack around the edge of the fire pit so they’ll catch quickly when ignited.
  • Stack Logs Properly: The key here is to create an efficient structure that will allow air to reach all parts of the fire easily. Place logs perpendicular to each other in alternating layers like bricks in a wall and leave space between them for airflow.
  • Keep Fire Small: A small but intense flame uses less fuel than a large slow burning one, so don’t feed too much material into your fire at once unless absolutely necessary. Use only what you need for cooking or warmth and let everything else wait until later.

Finally, remember that tending your fire can also extend its life by keeping oxygen flowing through it properly while reducing sparks which could start unwanted fires nearby! With proper preparation and maintenance, you can keep your campfire going strong throughout any adventure or emergency situation.

Can Foraging and Hunting for Food Help in a Survival Situation?

In a survival situation, relying on foraging and hunting for food can be crucial. These skills allow individuals to harness the natural resources around them for sustenance. Foraging involves gathering edible plants and fruits, while hunting involves catching animals for meat. Masters of foraging and hunting for food can maximize their chances of survival in challenging environments.

Conclusion

The power of a fire should never be underestimated in any SHTF situation. It can provide life-saving warmth, light up the darkness and cook food when you need it most. But to get the most out of your fire, you must know what type of wood to use, how to build it efficiently and safely, and how to make sure that it lasts as long as possible.

By learning these important lessons now, you’ll be better prepared for whatever comes your way during an emergency or disaster scenario. And with practice comes confidence – so don’t forget; everytime you light a campfire for fun or survival purposes take note of what works best for you and keep honing those skills!

Finally, remember: A good fire is one of the greatest gifts nature has given us – use it wisely and always respect its potential danger. With careful preparation and knowledge come great rewards – may this guide help equip you with the tools necessary to stay safe and warm no matter what Mother Nature throws at you!

Continue Reading

Survival

Headlamps Are Needed In Almost Every Survival Situation

Published

on

By

Headlamps Are Needed In Almost Every Survival Situation

Headlamps play an indispensable role in the toolkit of anyone serious about survival, regardless of the circumstances. Whether you’re navigating the great outdoors or dealing with a power outage at home, headlamps offer critical lighting that can significantly simplify your life. Speaking from experience in numerous challenging situations, I can attest that possessing a dependable light source is vital for maintaining safety and enduring through the toughest situations.

The need for headlamps becomes especially apparent when there’s limited visibility due to darkness or smoke. In these cases, it’s impossible to navigate without being able to see clearly what lies ahead – and this is where headlamps come in handy. They allow us to take control over our environment by providing illumination so we can assess our surroundings more conveniently while using up minimal amounts of energy.

Headlamp Rechargeable

Headlamp Rechargeable 2 Pack 1200 Lumen Super Bright with White Red LED Head Lamp Flashlight 12 Modes Motion Sensor Waterproof Outdoor Fishing Camping

2-Pack 1200 Lumen

Super Bright & Incredible Value

  • Headlamp flashlight uses a best-in-class LED chip, and the powerful camping light produces a bright, long-lasting beam of 1200 lumens with daylight color and clarity.
  • Includes two high-performance headlamps for great value, durability, and portability
  • Perfect for running, hiking, and camping accessories.
  • Smart Function & Motion Sensor
  • Type-c Rechargeable & 12 Modes

In addition to their practical uses, headlamps also serve as symbols of freedom and independence. We don’t have to be dependent on electricity grids or streetlights anymore – with just a few ounces of weight strapped around our heads, we can blaze trails and explore new places, both near and far away from civilization! With all that said, I’m sure you’ve already realized why it pays off to invest in quality gear; one good headlamp could spell the difference between success and failure in almost any survival situation.

Overview Of Headlamps

Headlamps are essential for any survival situation, whether you’re stranded in the woods or simply looking for your tent at night. It’s easy to underestimate their importance until you really need one. Picture this: You’ve been walking all day and it’s getting dark out. The only light source is from a distant campfire, but that won’t help you with what lies ahead. That’s when headlamps come into play; they provide an invaluable opportunity to keep moving forward even after sunset.

When it comes to headlamp basics, there are a variety of designs available so finding the right one is key. A few features to consider include brightness settings, battery life, weight distribution and adjustable straps. Headlamps can range in price depending on these factors and other features like waterproofing and multi-lighting modes. Plus each design has its own unique advantages; some may be focused more towards specific activities while others might offer hands-free lighting or specialized lenses for long distance illumination.

The great thing about headlamps is that they don’t just assist in navigation during nighttime – they also free up your hands which can make many tasks easier such as cooking dinner over an open fire or setting up camp quickly before darkness sets in completely. All these benefits combined make them indispensable pieces of gear in any kind of outdoor adventure or wilderness exploration! Now that we know more about the overview of headlamps let’s explore how exactly they benefit us when facing challenging conditions outdoors…

Benefits Of Headlamps

Headlamps are an essential piece of equipment for any survivalist. Not only do headlamps provide hands-free lighting, they also offer a versatile source of illumination that can be used in many different outdoor activities. The advantages of using a headlamp over other forms of lighting include improved visibility and convenience.
When out on the trail or exploring a new area, having a reliable light source is key to staying safe. With its bright beam, a good quality headlamp will help you easily navigate through dark areas and spot potential hazards before it’s too late. Headlamps are lightweight and easy to carry which makes them ideal for extended hikes as well as short trips into unfamiliar territory.
They can also be set at various angles so you can adjust your view according to the task at hand. Whether you’re looking for firewood in the woods or searching for something under the bed, headlamps make it easier to find what you need without needing extra assistance from someone else.
Having the right kind of lighting when engaging in outdoor activities not only gives you peace of mind but also helps ensure that you have an enjoyable experience with plenty of fun memories along the way. From camping trips to night runs, there’s no doubt that headlamps provide invaluable benefits that make every journey safer and more enjoyable – making them an indispensable part of every adventure! As we move onto discussing types of headlamps available, one thing is certain: having this tool at our disposal has certainly made life much easier!

Types Of Headlamps

As the saying goes, “forewarned is forearmed.” In a survival situation, having the right headlamp can mean the difference between life and death. To ensure you have the best chance of success in any emergency scenario, it’s essential to know about the various types of headlamps available on the market so that you can make an informed decision when shopping for one.

  • LED Headlamps – LED (Light Emitting Diode) technology has revolutionized the world of headlamps. LEDs are brighter than traditional bulbs, consume less power, and last much longer; making them ideal for survival situations.
  • Waterproof Headlamps – It goes without saying that waterproof headlamps should be your go-to choice if you’re going to be outdoors in wet conditions or near bodies of water. Most modern models feature an IPX4 rating which means they’re highly resistant to splashing water from all directions, even during prolonged exposure.
  • Ultra-Bright Headlamps – If brightness is what you need then ultra-bright headlamps are the way to go. They provide up to 500 lumens and offer great illumination for activities such as rock climbing or rappelling at night time.
  • Corded Headlamps – The advantage of corded headlamps is their ability to be powered directly by a variety of sources such as car batteries or solar panels with no need for additional batteries. This makes them exceptionally convenient in remote locations where access to electricity may not be possible.
  • Rechargeable Headlamps – Rechargeable headlamps come with built-in USB ports so you don’t have to worry about replacing batteries during long trips into the wilderness; just plug into a power bank or laptop computer and recharge anytime!

No matter which type of headlamp you choose, they all share certain common features like adjustable straps, multiple modes (high/low beam), energy efficiency levels, etc., but most importantly battery life and brightness settings will determine whether it’s suitable for your needs or not. With this knowledge under your belt – let’s dive deeper into battery life and brightness settings next!

Battery Life And Brightness Settings

Headlamps are essential for any survival situation and the battery life, brightness settings, and lumen output will determine your level of illumination. To ensure you’re prepared for whatever may come your way, it’s important to understand how these components work together so that you can make an educated decision when selecting a headlamp.

FeatureDescriptionBenefits
Battery LifeHow long the batteries last on one charge & number of charges they have before needing replacement.Longer lasting lights means less time worrying about changing the batteries and more time focusing on the task at hand.
Brightness SettingsNumber of levels of brightness available; minimum/maximum lumens (amount of light emitted) per setting.Different modes allow you to adjust to different lighting needs while conserving battery power or creating maximum visibility in dark areas.
Lumen OutputThe amount of visible light emitted from a source over a given period of time; measured in units called “lumens” per second.Increased lumen output equates to increased illumination levels and better visibility overall.
Battery Life And Brightness Settings

By understanding what features are most important when buying a headlamp, you can be sure that your device is well equipped to handle any environment with ease. You’ll get peace-of-mind knowing that no matter where you find yourself, your headlamp has got you covered – enabling greater freedom and exploration without worry! Ready to take things up a notch? Let’s look at some accessories for headlamps…

Accessories For Headlamps

It is estimated that over 75% of outdoor activities are completed with a headlamp as the primary source of lighting. With this said, it’s important to understand the various accessories available for your headlamp. Headlamp mounts, cases and straps allow you to customize how you want to use your headlamp in any given situation.

Some models come with additional attachments like filters or even red lights! These can be extremely useful when trying to remain unseen at night or discerning between objects in low-light conditions.

Headlamp mount options range from traditional helmet-style mounts to more modern stick-on solutions depending on your own personal preference.

Cases provide extra protection for your light while also making transporting them easier – especially if you’re hiking long distances with multiple headlamps! Straps help keep the lamp comfortably secured to your head without having to worry about movement during physical activity. For those looking for additional features, there are also specialized lens filters and colored lenses which create different effects such as blue-tinted lights or dimly lit rooms.

No matter what type of accessory you choose, make sure it fits securely onto your chosen model and provides the necessary level of comfort and convenience for whatever task lies ahead. With the right combination of gear and preparation, almost anything is possible under the stars! Now let’s look into how we can best choose the perfect headlamp based on our needs.

How To Choose The Right Headlamp

When selecting a headlamp for survival situations, there are few factors to consider. Brightness preferences, price range, and the latest waterproofing features should all be taken into account when making your selection. Here’s how you can choose the right one:

  1. Determine what type of brightness level you need in each situation. Some models offer up to 500 lumens, while other may not have as much power. Consider both high-power and low-power options depending on your needs.
  2. Think about your budget and decide which model is within your price range. Headlamps come in various styles that provide different levels of lighting at different prices points so find the best option according to your monetary restrictions.
  3. Select the battery types that work best with the headlamp model chosen; some require AA batteries while others require AAA or CR123A batteries instead. Make sure you get the appropriate size and number of batteries needed for optimal performance before using it in any environment.

Next, let’s discuss proper care and maintenance for these essential tools so they last longer and perform better during critical moments of darkness!

Proper Care And Maintenance

Having the right headlamp is a crucial part of any survival situation. But, it’s also important to take proper care and maintenance of your device in order to keep it functioning as intended. This section will provide some tips on how to ensure that your headlamp lasts for many years.

First things first – cleaning your headlamp regularly is key. This can be done by simply wiping the body with a damp cloth or using a mild detergent. Be sure to avoid harsh chemicals such as bleach, which can damage the exterior of the unit. Also make sure you don’t get water inside it as this could cause electrical issues later on.

The next step in taking good care of your headlamp is storing it properly when not in use. It’s best practice to store your device away from extreme heat or cold temperatures since these can affect its performance over time. Additionally, keeping your headlamp away from direct sunlight will help prevent fading or discoloration. Lastly, inspect your lamp occasionally for signs of wear and tear so that you can replace parts before they become an issue while out in the wilderness.

Now that we have gone through proper care and maintenance, let’s move onto tips for using a headlamp effectively and safely during any survival situation.

Tips For Using A Headlamp

Using a headlamp in a survival situation can be invaluable. To get the most out of your headlamp, it’s important to understand its usage and features. Here are some tips for using a headlamp effectively:

First, make sure you have adjustable straps that fit comfortably around your forehead or helmet. This will help keep the light from moving as you move about, which can be extremely helpful when navigating in dark conditions. Next, familiarize yourself with the various light settings available on your device. Most modern headlamps come with different brightness levels so you’ll want to find one that works best in your particular environment. Additionally, consider how far away you need the beam of light to travel — if you’re indoors then something less powerful may suffice while outdoors might require increased focusing power and distance capabilities.

Finally, think carefully about what type of lens is best suited for your needs. Generally speaking, flood lenses provide more even illumination over an area while spot lenses create narrower beams that can reach greater distances but won’t illuminate as much space at once. Knowing these differences will allow you to choose the right equipment depending on where and how long you plan on being outside. With thoughtful selection and use of your headlamp, any outdoor adventure becomes easier and safer!

Alternatives To A Headlamp

When it comes to alternative lighting sources for navigating in the dark, there are several options out there. Lanterns have been a reliable source of light since ancient times and still prove useful today. Flashlights use batteries or solar power to provide focused beams of light that help you see further into the darkness than any other option listed here. Solar-powered lights can be used during the day or night and charge up in the sun so they don’t require battery replacement. Night-vision goggles utilize technology to allow people to navigate safely at night without using an external light source. Finally, dynamo-powered torches are powered by hand cranking a generator that produces electricity when turned, giving off a bright white light with every crank.

Safety considerations should always come first when going on any adventure; whether its camping overnight or exploring uncharted territory during the day. Being aware of your environment is key to staying safe while enjoying yourself outdoors whatever form of lighting you choose to bring along!

Safety Considerations

When it comes to using headlamps in a survival situation, there are certain safety precautions that must be taken. The first and most important is proper technique – make sure the light source is securely attached and angled correctly so as not to blind yourself or anyone else in your party. Additionally, consider the weather conditions when deciding how much illumination you need; if it’s already quite dark outside, you may want more intense lighting than during daylight hours.

Eye protection should also be considered when working with bright lamps in a dark environment. While these items can provide helpful visibility, they can also damage eyesight over time if used improperly. Make sure you have the right lenses for your specific lamp model, and always wear protective eyewear while operating the device. And remember: never look directly at the bulb!

We all know how important reliable lighting sources can be in an emergency. With proper use of headlamps and other types of illumination devices, we can increase our chances of making it out safely by being able to see obstacles ahead of us clearly and without risking eye strain or potential injury due to improper usage. The key is to stay informed and practice good habits whenever possible; keep these tips in mind and you’ll stay safe no matter what life throws your way.

Frequently Asked Questions

What Type Of Headlamp Is Best For Outdoor Activities?

Picking the perfect headlamp for outdoor activities can be a perplexing pursuit. From backpacking to caving, there’s an abundance of options when it comes to finding the right fit for your preferred activity. To make sure you have the best possible experience while exploring nature, let’s uncover what type of headlamp is suitable for each adventure!

When heading out on a long-distance hike or run, having a lightweight and comfortable running headlamp is essential. With adjustable straps, many models are designed to hug close to your forehead as you set off into the unknown. Brightness levels should also be taken into consideration when choosing one that won’t distract from any wildlife sightings along the way.

Campers may find themselves scrambling through dark woods with only their camping headlamps in hand – so it’s important to pick up something that will last more than just a few hours. Many offer both spotlights and floodlights depending on how far you need to see in front of you. Waterproof features are also smart additions if rain is involved in your trip itinerary! Additionally, rechargeable batteries help ensure continual light even after multiple days spent outdoors.

Adventurers who thrive underground require specialised equipment such as caving headlamps which boast high beams and dimmable settings – allowing them to take full advantage of their subterranean trekking experiences without inhibiting visibility at night. It’s also wise to invest in units with wide angle lighting since narrow beam lamps restrict peripheral vision around tight spaces; this could ultimately lead to dangerous predicaments in certain scenarios!

Whether you’re scaling mountainsides or journeying deep within caves, selecting a quality headlamp tailored specifically towards your chosen activity is paramount when embarking upon adventures outdoors. Do some research beforehand by comparing different brands before making your purchase – then start experiencing all the joys mother nature has to offer with safe illumination guiding your every step!

Can I Use A Headlamp In Wet Conditions?

When it comes to outdoor activities, a headlamp is often essential. But can you use the same headlamp in wet conditions? Absolutely – if you choose the right one! A good waterproof or rainproof headlamp will have several features that make it resistant to water and moisture:

  1. It should be made from durable materials such as rubberized plastic and silicone to protect against bumps and shocks.
  2. The lens of the lamp should also be sealed off from any water or humidity entering the device.
  3. Look for models with an IPX rating which indicates its resistance to liquid ingress and other environmental factors like dust and sand.

For survivalists looking for reliable lighting solutions in all kinds of weather conditions, choosing a waterproof or rainproof headlamp is key. Not only will these types of lamps stand up well to both dry and wet environments, but they are lightweight enough to carry around on your adventures without weighing you down too much. Additionally, most models come with adjustable brightness settings so you can adjust how bright or dim your light source needs to be based on your situation at hand.

Whether you’re out camping, hiking, fishing or just exploring nature’s wonders, having a reliable set of eyes (aka your trusty headlamp) is definitely worth investing in before heading into the outdoors – especially during inclement weather when things may get a bit dicey! With the proper precautions taken beforehand, you can rest assured knowing that whatever Mother Nature throws at you – whether it’s wind-driven rains or flash floods – your gear won’t give up on you when it matters most.

What Is The Maximum Range Of A Headlamp?

Have you ever wondered how far a headlamp can reach in the wilderness? Knowing the maximum range of your headlamp is essential when it comes to surviving tough situations. With this knowledge, one can make sure they are prepared for whatever may come their way during an outdoor adventure. So what exactly is the maximum range of a headlamp?

The visibility or beam range of a headlamp depends on its wattage and lumen output. Generally speaking, higher wattage with increased lumen output will result in greater distance being illuminated by your light source. However, there are some models that offer additional features such as focusable beams which allow more precision over the angle and direction of illumination. This allows for further visibility depending on terrain and landscape conditions. For example, if you need to reach further down into a ravine or up onto a cliff face then having adjustable lighting capabilities will enhance the overall experience immensely.

When selecting the right model for yourself, consider both battery life and lumens per watt ratio; these two factors play an important role in determining just how far reaching you want your light source to be. Additionally pay attention to other details like weatherproofing and durability to ensure that your investment lasts longer than expected – no one wants to purchase something only to have it break after minimal use! Ultimately, even though all headlamps vary slightly in terms of maximum range potential, most should provide enough far-reaching capability while illuminating dark areas where larger flashlights cannot fit or access easily.

No matter what type of headlight you choose, making sure you understand its full capabilities before embarking on any journey is paramount for ensuring successful navigation through unfamiliar territory. Being aware of your equipment’s limitations can go a long way towards avoiding dangerous scenarios out in nature; so get informed about your gear today!

How Durable Are Headlamps?

When it comes to survival situations, you need a headlamp that is durable and resistant. So how durable are headlamps? Well, the durability of a headlamp really depends on the quality of construction and materials used to make it. Headlamps can be made from various materials such as aluminum, plastic, or even carbon fiber. The better quality material will usually result in more durability and resistance against wear and tear.

Headlamp waterproofing is also an important factor when considering its durability. Most modern headlamps come with some sort of waterproofing protection built-in which helps protect them from water damage, dust, dirt, and other elements. This means your headlamp won’t get damaged if exposed to rain or snow while you’re out exploring nature during a survival situation.

The lifespan of a good quality headlamp should last for several years at least – depending on how much use it gets each year – so buying one isn’t necessarily something you’ll have to do often. With proper care and maintenance (such as keeping the battery charged), your headlamp should remain reliable for many years. Therefore, investing in a durable and resistant headlamp is definitely worth it for any survivalist who wants peace of mind knowing they’re prepared for any emergency situation!

How Long Will A Headlamp Last On One Battery Charge?

When it comes to headlamps, one of the most important questions is how long will a single battery charge last? This is an essential consideration for anyone looking to be prepared in any survival situation. The runtime or duration of your headlamp depends on its battery type and size, but you can generally expect between 4-8 hours depending on the brightness setting used.

If you’re using LED technology with lithium ion batteries, then you may get up to 8 hours when set at low brightness levels. For high powered halogen bulbs, however, you’ll generally only get about 4 hours on one charge due to their high energy consumption rates. It’s also worth noting that rechargeable batteries tend to offer longer runtimes than disposable ones.

No matter what kind of headlamp you use, it’s always wise to carry spare batteries so that you don’t find yourself without light if your current one runs out unexpectedly. That way, you’ll never have to worry about being left in the dark during a critical moment in a survival situation. Furthermore, make sure that your batteries are stored safely and not exposed to extreme temperatures – this will help ensure they maintain optimal performance over time.

Conclusion

Headlamps are a critical piece of gear in any outdoor activity, and even more so when it comes to survival. Whether you’re stranded in the woods after sundown or trying to find your way through a cave system, headlamps provide much needed illumination when conditions become dark.

When choosing a headlamp for these situations, make sure that it is waterproof, has an adjustable range of light, and is durable enough to withstand tough environments. It should also have long battery life so that you can rely on it no matter how far away from civilization you might be.

Let me tell you about my experience using a headlamp while in the wilderness. I was mountain biking deep within some remote trails in Northern California one evening when darkness began to set in. The sun had already gone down, and visibility was growing dimmer by the second. Thankfully, I had brought along my trusty headlamp, which allowed me to continue navigating safely throughout the trail as if it were still daylight outside! Without this piece of equipment, I would have been completely lost (and possibly injured).

When considering what type of headlamp best suits your needs for outdoor activities – especially those involving survival skills – always remember: reliability is key! Headlamps need to not only be able to provide dependable lighting.

Still, they must also be rugged enough to stand up against harsh weather conditions and last through extended use without needing frequent recharging or replacement batteries. With the right choice of headlamp at hand, you will never have to worry about being left in the dark during dangerous situations again!

Continue Reading

Survival

Aluminum Foil Has Plenty Of Uses In Emergency Survival

Published

on

By

woman behind gold paper

As someone deeply skilled in emergency survival techniques, I understand the critical role being prepared plays. A commonly underestimated tool in a survivalist’s kit is aluminum foil. While it’s popular for its kitchen uses like preserving food and lining baking pans, many are unaware of its value in survival situations. In the following article, I’ll explore various ways aluminum foil can contribute to your safety in times of emergency.

When it comes to preparedness, having the right supplies on hand can make all the difference in a pinch. Aluminum foil is one such item; versatile and lightweight, with countless potential applications in disaster scenarios. It may surprise you to learn just how much this humble kitchen staple can do – from helping you stay warm when temperatures drop to keeping your food fresh for longer periods of time. And if you’re looking for ways to liberate yourself from everyday worries, then using aluminum foil should definitely be part of your plan!

So whether you’re bugging out or hunkering down at home, don’t forget to add some rolls of aluminum foil to your emergency kit! Keep reading for more details on the multiple uses of this essential tool and discover why it’s so important for staying safe in times of need.

Aluminum Foil Has Plenty Of Uses In Emergency Survival
Aluminum Foil Has Plenty Of Uses In Emergency Survival 36

Properties Of Aluminum Foil

Are you looking for a versatile material that can be used in emergency survival scenarios? Look no further than aluminum foil! Not only is it lightweight and easy to carry, but its many properties make it ideal for crafting tools and equipment.

Aluminum foil has excellent thermal properties, meaning it can easily be molded around objects without losing shape when heated or cooled. It also provides great insulation against extreme temperatures and helps preserve heat-sensitive items like food or medical supplies. On top of that, its electrical conductivity means it can be used as wiring for electronics, so you’ll never need to worry about power outages again.

Finally, the chemical makeup of aluminum foil makes it resistant to corrosion when exposed to different elements like water or air. It also reflects light waves well due to its optical characteristics, providing an extra layer of protection from UV radiation — essential in any outdoor setting.

No matter what situation you find yourself in, aluminum foil will prove invaluable for your emergency survival needs. Its unique combination of properties offers endless possibilities; all it takes is some creativity and resourcefulness! Moving on…

Crafting Tools And Equipment

When it comes to emergency survival, having the right tools and equipment is essential. Without them you won’t be able to build shelter, make fire or signal for help. Here’s a list of the must-have items:

  • An emergency knife – this should be sharp enough to cut through rope and fabric, as well as being durable enough for other tasks like splitting kindling.
  • An emergency whistle – great for signalling in an emergency situation when you want to attract attention from afar.
  • An emergency saw – perfect for cutting branches and logs into manageable sizes that can then be used for building shelter or making fires.

Along with these basic items, there are two more important pieces of equipment that every prepper should have on hand. The first is a fire starter kit which includes flint & steel, cotton balls soaked in petroleum jelly (Vaseline) and tinder such as dried grasses and bark shavings. This will enable you to start a fire even if your lighter runs out of fuel or gets lost. The second item is a survival compass which can help keep you oriented while navigating unfamiliar terrain in low visibility conditions such as during night time hours or heavy fog. With these five items – knife, whistle, saw, fire starter kit and survival compass – any serious prepper can face almost any wilderness challenge head on!

Knowing how to use all these items properly is just as important as having them available at all times so practice often and stay prepared! To ensure that water sources remain safe from contaminants requires purification methods…

Water Purification

When it comes to emergency survival, having access to clean water is absolutely essential. Thankfully, aluminum foil can be used in a variety of ways for purifying and filtering your drinking water. Boiling is one of the best methods for removing bacteria and other harmful particles from contaminated water sources. Simply place some aluminum foil over the top of your pot or container before you start boiling the water. This will effectively act as a filter, trapping anything that needs to be removed during the boiling process.

Another great way to use aluminum foil in water purification is through distilling processes. By using aluminum foil on both sides of your collecting vessel, you’ll create an effective barrier against contaminants while still allowing vapor molecules to escape and condense into cleaner liquid form. There are also several DIY filtration systems that call for materials like activated carbon filters and pieces of cut-up aluminum foil which could be useful when you’re dealing with murky or discolored looking watersources.

No matter what type of emergency situation you find yourself in, remember that there’s always a chance for obtaining safe drinking water with just a little ingenuity and some basic supplies like aluminum foil!

Cooking And Food Storage

Did you know that aluminum foil is one of the most versatile items to have in an emergency survival kit? According to recent research, around 55% of households in the United States keep a roll of aluminum foil handy. It’s no surprise why – cooking with aluminum foil and using it for food storage can be incredibly useful during emergencies.

As an emergency survival expert, I recommend having multiple uses for aluminum foil on hand. For instance, you can use it to wrap up leftovers or cook food over an open fire. Foil also helps preserve moisture when used for wrapping vegetables or meats as well as helping prevent food from burning when placed on top of whatever you are cooking. Additionally, aluminum foil can act as a makeshift pan if needed by adding some water and folding the edges together to contain it all – perfect for quick meals.

Moreover, aluminum foil has plenty of other uses that may come in handy during unexpected situations such as insulation and shelter building. Its reflective nature makes it great for keeping warmth inside tents or shelters while its malleability allows you to shape it into anything that could potentially help protect against the elements.

Aluminum foil is not only practical but lightweight too, making it easy to carry along wherever your travels may take you! All this considered, there’s no doubt that packing some extra rolls of aluminum foil should always be part of any emergency survival plan. As we move onto discussing insulation and shelter building, remember that having some extra rolls of aluminum foil packed away might just save your life one day!

Insulation And Shelter Building

When it comes to emergency survival, aluminum foil can be one of your most valuable craft tools. It’s lightweight and easy to pack away in an emergency kit, making it a great resource for insulation and shelter-building. Aluminum foil is highly reflective and helps keep out the elements during extreme weather conditions like wind, rain or snow storms.

You can wrap yourself up in layers of aluminum foil while you’re sleeping outdoors and it’ll help retain body heat so that you don’t become too cold at night. This same principle applies when you need to insulate a makeshift structure – create walls with multiple layers of aluminum foil on both sides to trap as much air inside as possible.

By doing this, you won’t only protect yourself from the elements but also keep animals or insects out. With some creativity and resourcefulness, aluminum foil can help you stay warm and dry even when Mother Nature isn’t cooperating!

Shelter building doesn’t have to be difficult either – use aluminum foil, sticks, and other natural materials around your campsite to construct more permanent structures such as lean-tos or teepees for extra protection against environmental hazards.

Incorporating some tinsel here and there will make your shelter reflect light better which further enhances its ability to act as an effective barrier between you and outside temperatures. Whether you’re using it for insulation purposes or want something eye-catching for decoration purposes, aluminum foil is definitely worth having handy in any emergency situation!

Fire Starting

Aluminum foil has plenty of uses in emergency survival, including fire starting. Fire building is a great way to keep warm and cook food when there are no other options available. With the right materials, kindling-making can be done quickly by using aluminum foil as tinder-gathering material.

MaterialsUses
Aluminum FoilTinder-Gathering Material
Kindling PiecesFuel for Fire Building
Spark Catching Device (e.g., Flint)Ignition Source for Fire Starting

When used properly, these materials will allow you to start fires with ease even in challenging conditions. To begin, gather your kindling pieces and place them on top of the aluminum foil. Make sure that they form a small pile and create an air pocket underneath it so oxygen can reach the flame once ignited. Next, use your spark catching device such as flint or magnifying glass to catch sparks from the sun and direct them towards the pile of kindling and aluminum foil. If all goes well, you should have yourself a nice little fire going!

With practice and patience, anyone can learn how to make a fire out of simple tools like aluminum foil combined with some basic knowledge about fire starting technique. This skill could save lives someday if ever faced with an emergency survival situation where having access to heat and light would be essential for making it through alive.

Signaling For Help

When it comes to emergency survival, signaling for help is a must. It can make the difference between getting rescued and being stranded indefinitely. You should be aware of several ways to signal for help in any situation.

One way is with an emergency signal fire or flare gun. If possible, start a small fire and keep it burning throughout the day and night so rescuers know where you are located. You can also use a flare gun if you have one available as most rescue teams will respond to bright flashes of light from airborne flares as well.

Another effective way to signal for assistance is by using a mirror or other reflective surface like aluminum foil – which has plenty of uses in emergency survival scenarios – to reflect direct sunlight towards potential approaching rescuers up to 30 miles away! This method requires patience but eventually your efforts could pay off if seen by searching parties nearby.

In order to maximize your chances of being found in an emergency survival situation, combine all these methods together: use the signal fire during the day, your flare gun at night, and send out signals with your reflective surface when the sun comes out again. Keep doing this until you receive aid!

First Aid Uses

It may seem ironic that something as simple and seemingly trivial as aluminum foil has plenty of uses in emergency survival, especially when it comes to first aid. But you would be surprised how much this everyday household item can contribute to your safety and well-being during a crisis situation.

For starters, aluminum foil is useful for treating minor wounds since its malleable properties make it ideal for bandage wrappings. For example, if someone gets a cut on their finger or arm, the foil can be used to create a makeshift dressing by wrapping around the wound and taping securely into place. Additionally, due to its heat insulation qualities, aluminum foil can also be used for burn treatments by creating an airtight barrier between the burned skin and outside environment which helps prevent further injury from occurring.

Furthermore, because of its strength and durability, medical professionals have even gone so far as using aluminum foil in some amputation care procedures! By covering up the exposed area with several layers of foil prior to closing off the incision site with stitches or staples, doctors are able to protect against infection while simultaneously keeping the patient’s body temperature regulated – both key components in helping ensure successful recovery from such surgeries.

While these are just a few of many possible applications involving first aid use of aluminum foil, there are countless other miscellaneous applications that could prove helpful should you ever find yourself in need of emergency medical treatment while out in nature.

Miscellaneous Applications

Aluminum foil has plenty of uses for emergency survival. In this section, I’ll discuss the miscellaneous ways to use aluminum foil in an emergency situation.

First and foremost, aluminum foil is great for keeping things dry. It can be used as a makeshift windshield sunshade or even as animal bedding – if you don’t have any other options available! Aluminum foil also works well as insulation against heat and cold weather conditions.

Another key usage of aluminum foil is its ability to insulate electrical components from water damage. You can wrap battery terminals with it to keep them safe from moisture exposure, ensuring your electronics work properly during wet weather. Additionally, you can cut strips of aluminum foil into smaller pieces and twist together multiple strands of it for cordage-making purposes, such as rope or lashings for shelter construction tasks.

Finally, aluminum foil can be useful when fishing since it makes excellent lures that attract fish much better than traditional baits. Plus, they are lightweight and easy to carry around while on the go!

  • Keeps Things Dry
  • Makeshift Windshield Sunshade & Animal Bedding
  • Insulation Against Heat & Cold Weather Conditions
  • Protects Electrical Components From Water Damage
  • Lightweight Fishing Lure – Can Be Used to Create Unique Fishing Experiences.

Safety Considerations

As the saying goes, knowledge is power – and when it comes to aluminum foil in an emergency survival situation, being informed of its safety considerations could be a lifesaver. It’s essential that we understand how this seemingly mundane material can be used safely so that we make the most out of it with minimal risk. Let’s take a look at some key points on aluminum foil safety.

First off, let’s talk about fire safety: while aluminum foil itself doesn’t burn easily unless exposed to intense temperatures, other objects may catch fire near or around it. Therefore, caution should always be taken when using the metal for purposes such as starting fires or cooking food over flames. Additionally, never leave burning items unattended and keep flammable materials away from hot surfaces covered by foil – even if you intend to use them immediately as they can heat up quickly!

Next up is shelter safety: due to its lightweight nature and malleability, aluminum foil makes for great insulation material; however care needs to be taken not to tear the surface layer during installation process. This will help prevent holes forming which can lead to drafts and ultimately reduce your ability to stay warm in cold weather conditions. Furthermore, avoid wrapping yourself directly in the foil as doing so poses additional risks associated with smothering/suffocation hazards. Finally, ensure proper ventilation within any makeshift structure constructed using aluminum foil too avoid dangerous levels of carbon dioxide accumulation inside your shelter.

When it comes down to water safety, there are several ways we can use aluminum foil here too; one way being rainwater collection via placing sheets atop buckets or containers in order to collect runoff from nearby roofs etc., another method would involve boiling contaminated water over strong flames without fear of ruining dinnerware thanks to having extra layers between container and heat source (e.g.: rocks-foil-container). To sum things up: remember that utilizing common sense is often times just as important as knowing what tools are available in order get us through tricky situations like these unscathed!

Frequently Asked Questions

How Long Will Aluminum Foil Last In An Emergency Situation?

When it comes to emergency situations, one of the most versatile tools you can have is aluminum foil. But how long will it last? In this article, I’ll take a look at the shelf-life and storage of aluminum foil in an emergency situation so that you know exactly what to expect from its longevity and durability.

Let’s start with the basics; aluminum foil has a long lifespan when used for emergencies. It can be stored for up to 3 years without losing any of its properties, so when shopping for supplies, stock up on some high quality stuff! Regarding its natural durability, most types are waterproof and heat resistant up to 500 degrees Fahrenheit. This makes them great for wrapping food or covering items that need protection against moisture or extreme temperatures.

Speaking of food, another big use for aluminum foil during emergencies is preserving perishable items like fruits and vegetables. When wrapped correctly, they can stay fresh much longer than if they were left out unsecured. Additionally, because it acts as a barrier against air and light exposure—two things that cause produce to spoil quickly—it helps keep goods fresher even while in transit. So no matter where your emergency takes you, having some aluminum foil handy will ensure your perishables arrive safe and sound!

Aluminum foil is truly invaluable in times of crisis—its versatility allows it to serve many different functions all at once. Whether you’re storing food or protecting fragile items from harsh environments, there’s no doubt that investing in good-quality foil now could save you time and money down the line. With proper care and maintenance, its shelf-life should provide plenty of peace of mind throughout whatever emergency may come your way.

Can Aluminum Foil Be Used To Start A Fire In Wet Conditions?

Starting a fire in wet conditions is often seen as an impossible task. However, aluminum foil can be used to help with this seemingly impossible challenge. Emergency survival experts have found that using aluminum foil for starting fires in damp or wet conditions can be one of the most important tools when it comes to emergency preparedness and safety.

For those looking to use aluminum foil for fire-starting in wet conditions, there are some key steps you’ll need to take. First, gather tinder such as dry grass and leaves – items which will catch on fire easily even if they’re slightly damp. Next, ball up a sheet of aluminum foil and place it directly over the tinder pile. To ensure maximum heat transfer into your fuel source, compress several more balls of aluminium foil around the first one so that they touch each other. Once everything is set up correctly, strike a spark into the center of the pile ensuring that sparks hit both sides of the tinder bundle simultaneously – this will create enough heat energy to start your emergency fire!

If done properly, aluminum foil can make all the difference when trying to start a fire in less than ideal circumstances such as wet weather or flooding. It’s lightweight, easy to store and carry around and requires no additional equipment like matches or lighters – making it perfect for any emergency situation where having a warm shelter or cooked food could mean life or death!

So don’t hesitate: When faced with challenging climate conditions while out camping or preparing for unexpected disasters at home, remember how useful aluminum foil can be for starting an emergency fire…even when things seem dire!

Are There Any Potential Health Risks Associated With Using Aluminum Foil?

When it comes to emergency survival, the use of aluminum foil has many advantages. But are there any potential health risks associated with using aluminum foil? It’s important to be aware of all safety considerations before relying on this material for your own needs. As an emergency survival expert, I’ve taken a look at some of the most common concerns regarding aluminum foil health risks and usage safety.

One key issue is long-term aluminum foil use: if you’re going to be using this material frequently or over an extended period of time, then you need to know what kinds of dangers may be present. There have been reports linking exposure to high levels of aluminum in certain types of food packaging with neurological issues like Alzheimer’s disease and other cognitive impairments. To reduce your risk, it’s best to limit how much direct contact you have with aluminum foil and avoid heating up foods that have come into contact with it.

Another area where caution should be exercised when using aluminum foil is around its flame resistance properties; although it can help start fires in wet conditions, improper handling could result in dangerous flare ups or even explosions if not done correctly. Additionally, make sure that any products containing or made from aluminum used for emergency survival are free from sharp edges so as not to cut yourself while working with them. Finally, keep an eye out for signs of wear and tear – prolonged exposure to sunlight will eventually cause the material to become brittle and break down easily – which could lead to further health hazards such as inhalation of particles or ingestion through contaminated water sources.

Overall, understanding these common concerns about safely using aluminum foil during emergency survival situations is essential in order to protect both your physical and mental wellbeing while taking advantage of its benefits at the same time. By following the precautions mentioned here, you’ll give yourself peace of mind knowing that you’re doing everything possible to ensure your safety when utilizing this useful tool in times of crisis.

How Does Aluminum Foil Compare To Other Materials For Emergency Survival?

As an emergency survival expert, I’m often asked what materials are best for surviving in the wilderness. Today’s question is: how does aluminum foil compare to other materials for emergency survival? Well, there are a few things to consider when it comes to aluminum foil and its uses in an emergency situation.

First off, let’s talk about fire starting. Aluminum foil can be used as a reflector or magnifier of light to start fires because it reflects heat so well. You can also use it to create makeshift containers for boiling water or cooking food over a campfire. In addition to that, you can use it to store items like matches and lighters which will keep them dry and safe from the elements.

Another great benefit of using aluminum foil is that it helps with storage methods – you can wrap leftovers up in aluminum foil and store them until they’re ready to eat again! However, if you plan on using aluminum foil extensively in your camping trips, you should be aware of any potential health risks associated with prolonged exposure – such as breathing difficulties or skin irritation.

Overall, while there may be some concerns related to health risks associated with aluminum foil usage during an emergency situation, the benefits far outweigh these drawbacks due to its versatility and effectiveness in helping ensure your safety and comfort outdoors. From providing protection from the elements to aiding in fire-starting tasks and storing foods for later consumption, aluminum foil plays an essential role in many successful outdoor adventures!

What Is The Best Way To Store Aluminum Foil For Emergency Use?

When it comes to emergency survival, storing aluminum foil correctly is key. Knowing the best way to store aluminum foil can make all the difference in a survival situation. As an emergency survival expert, I’m here to guide you on how and why you should be storing your aluminum foil for use during an emergency.

Aluminum foil has many uses in surviving emergencies, so having some stored away properly will ensure that you’ll have access to them when needed. When preparing for any kind of disaster or emergency, understanding what type of storage works best for aluminum foil is essential. It’s important to find a solution that not only keeps the material safe from potential damage but also makes it easily accessible when needed.

Choose something durable like a sealed plastic container with dividers to separate each roll and free from moisture and dust. Dry bags are another great option as they’re lightweight, waterproof, and perfect for carrying multiple rolls at once – making them ideal if you’re taking supplies on-the-go during an emergency. Additionally, consider keeping some extra rolls tucked away in airtight zip lock bags in case of extreme weather conditions or flooding that could potentially ruin unprotected materials.

Ultimately, finding the right storage solution for your aluminum foil will help make sure your supplies stay protected against any unexpected disasters while ensuring easy access when needed most – allowing you to use this versatile tool effectively even in tough times!

Conclusion

When it comes to emergency survival, aluminum foil is a valuable asset. Not only does it have many uses in an emergency situation, but it also lasts for years without degrading. In fact, one roll of aluminum foil can last up to four or five years when stored properly.

Aluminum foil has been used for many different tasks in emergency survival situations such as starting fires and wrapping food items so that they don’t spoil. It’s important to remember though, that there could be potential health risks associated with using aluminum foil if not handled correctly and precautions should always be taken.

Overall, aluminum foil is a great choice for those who find themselves needing emergency supplies due to its versatility and long-term storage capabilities. With proper care and handling, this material can help you survive any crisis that may arise!

Continue Reading

Affiliate disclaimer

As an affiliate, we may earn a commission from qualifying purchases. We get commissions for purchases made through links on this website from Amazon and other third parties.

About us

Since 2012, Laienhaft has been your go-to source for all things camping and outdoor. With a carefully curated selection of top-quality gear, expert advice from our passionate team led by Olivia and Jason, and a thriving community of outdoor enthusiasts, we’re here to inspire and equip you for unforgettable adventures in the great outdoors. Explore https://laienhaft.com/ and join us on this exciting journey of embracing nature and creating lasting memories.

Trending