Getting your RV ready for the winter season is crucial to keep it in top shape and functioning properly during the cold months. As devoted RV enthusiasts, we understand the importance of protecting our beloved vehicles from harsh weather conditions. That’s why we have created a comprehensive guide on winterizing an RV, based on our own experiences and expertise.
In this article, we will walk you through the step-by-step process of winterizing your camper, from preparing the plumbing system to conducting regular maintenance checks. By following our tried-and-true techniques, you can rest assured that your camper will be well-insulated, leak-free, and in optimal condition when spring arrives.
We will cover essential tasks such as:
- Draining the water tanks
- Insulating the camper
- Sealing any leaks or drafts
- Disconnecting and storing batteries
Additionally, we will provide tips on how to:
- Protect the tires
- Properly store food and appliances
- Empty and clean the interior.
So, join us as we delve into the world of camper winterization and equip you with the knowledge and skills to keep your camper safe and sound during the chilly winter season.
Let’s get started!
Key Takeaways
- Draining water tanks and introducing antifreeze into plumbing lines is crucial for preventing frozen pipes.
- Insulating the camper with materials like foam board, fiberglass, and reflective insulation helps keep it warm and comfortable.
- Sealing leaks and drafts is important for maximum insulation efficiency.
- Disconnecting and storing batteries, cleaning and covering the exterior, and properly storing food and appliances are essential steps for winterizing a camper.
Prepare the Plumbing System
To properly winterize your camper, you’ll need to prepare the plumbing system. This is essential to prevent frozen pipes and potential damage to your camper.
One of the key steps in winterizing is using antifreeze. Antifreeze is a solution that lowers the freezing point of water, preventing it from solidifying in your pipes.
Start by draining all the water from your camper’s fresh water tank, as well as the gray and black water tanks. Once the tanks are empty, it’s time to introduce the antifreeze.
Attach a hose to the intake of the water pump and place the other end into a container filled with antifreeze. Turn on the pump and open all the faucets in your camper, one at a time, until you see the antifreeze flowing out. Don’t forget to flush the toilet as well. This will ensure that the antifreeze reaches all the plumbing lines, preventing any water left in the system from freezing.
With the plumbing system properly prepared, the next step is to drain the water tanks, which we’ll cover in the next section.
Drain the Water Tanks
First, make sure you empty all the water tanks in your cozy home on wheels. This is an essential step in preparing your camper for winter. By draining the water tanks, you’ll prevent any leftover water from freezing and causing damage to your plumbing system.
Here’s a winterizing checklist to guide you through the process:
- Locate the drain valves or plugs for each water tank.
- Open the valves or remove the plugs to let the water flow out.
- Use a pump or gravity to help drain the tanks completely.
- Once drained, close the valves or replace the plugs to prevent any water from entering the tanks.
By following this checklist, you’ll effectively prevent frozen pipes and potential damage to your camper during the winter months.
Now that you’ve emptied the water tanks, it’s time to move on to insulating the camper to ensure maximum warmth and protection.
Insulate the Camper
After draining the water tanks, it’s time to cozy up your home on wheels by insulating it for the winter months. Insulating your camper is crucial to keep it warm and comfortable during cold weather.
There are various insulating materials available that can effectively trap heat and prevent it from escaping. The most commonly used materials include foam board insulation, fiberglass insulation, and reflective insulation.
When it comes to the installation process, it’s important to start with the walls and ceiling. Measure the dimensions of your camper’s interior and cut the insulation materials accordingly. Apply adhesive to the back of the insulation panels and press them firmly onto the walls and ceiling. Make sure to cover every inch of the surface to minimize heat loss.
Next, focus on insulating the windows and doors. Use weatherstripping to seal any gaps around the frames, ensuring a tight seal. This will prevent cold air from seeping in and warm air from escaping. Additionally, consider using thermal curtains or blinds to further enhance insulation.
Now that your camper is well-insulated, it’s time to seal any leaks or drafts. By doing so, you’ll prevent cold air from entering and warm air from escaping, ensuring maximum insulation efficiency.
Seal any Leaks or Drafts
Now that you’ve insulated your camper, it’s essential to address any leaks or drafts to optimize the insulation efficiency.
The first area to check is the windows. Inspect each window for any cracks or gaps where cold air can enter. If you notice any damage, you can repair it using a specialized window repair kit. This kit typically includes a clear adhesive that bonds to the glass and a patch that seals the crack or gap. Apply the adhesive and place the patch over the damaged area, pressing firmly to ensure a tight seal.
Next, focus on the doors of your camper. Check the weatherstripping around the edges and bottom of each door. Over time, weatherstripping can wear out or become loose, allowing drafts to penetrate the camper. Replace any damaged weatherstripping with new ones, making sure to choose a type that’s suitable for outdoor use and provides a tight seal when the door is closed.
By addressing any leaks or drafts in your camper, you can maximize the effectiveness of the insulation you’ve installed.
Now, let’s move on to the next step: disconnect and store batteries.
Disconnect and Store Batteries
To ensure the longevity of your power source, it’s time to unplug and safely stow away the batteries. Battery maintenance is crucial during winterizing your camper to avoid damage caused by freezing temperatures. Here are some important steps to follow for battery storage:
-
Disconnect the batteries: Start by disconnecting the batteries from the camper’s electrical system. This will prevent any power drain during the winter months.
-
Clean the batteries: Before storing them, clean the battery terminals and cables with a mixture of baking soda and water to remove any corrosion. Rinse thoroughly and let them dry completely.
-
Check the charge level: Use a battery tester or voltmeter to check the charge level of each battery. If it’s low, recharge them before storing. This will help maintain their health and prevent them from freezing.
-
Store in a cool, dry place: Find a suitable storage location that is cool and dry. Extreme temperatures can damage the batteries, so avoid areas that are exposed to freezing temperatures.
By following these steps, you can ensure the proper maintenance and storage of your camper’s batteries during the winter months. Once the batteries are safely stored, it’s time to move on to the next step: cleaning and covering the exterior to protect it from the harsh winter conditions.
Clean and Cover the Exterior
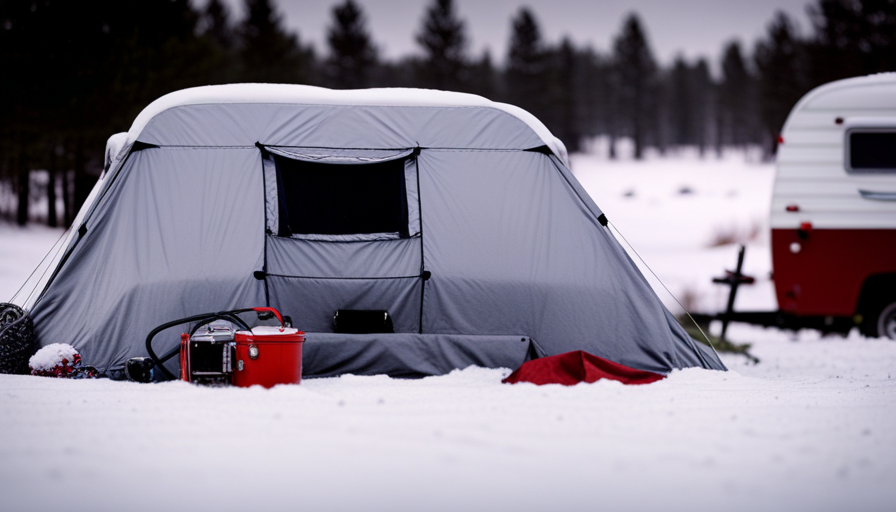
Ensure the longevity and protection of your outdoor adventure vehicle by giving its exterior a thorough clean and covering it to shield it from the harsh winter elements. Proper maintenance of the cover is essential to keep your camper in top condition during the winter months.
Start by inspecting the cover for any tears or damage and repair them promptly. Clean the cover with mild soap and water, removing any dirt or debris that may have accumulated. This will prevent any stains or damage to the surface of the camper. Once the cover is clean, ensure it’s securely fastened to the camper, using straps or bungee cords to prevent it from being blown away by strong winds.
In addition to covering the exterior, it’s important to winterize the equipment on the camper. This includes draining and cleaning the water tanks, removing any food or perishable items, and disconnecting the propane tanks. These steps will prevent any damage caused by freezing temperatures or pests.
After the exterior is clean and covered, it’s time to protect the tires. This involves inflating them to the recommended pressure, checking for any signs of wear or damage, and placing tire covers over them to shield them from the cold weather.
By following these steps, you can ensure that your camper is properly winterized and ready for storage until your next outdoor adventure.
Protect the Tires
Don’t let Jack Frost ruin your tires, give them some TLC and protect them from the icy grip of winter. Proper tire maintenance is crucial to ensure the longevity and performance of your camper’s tires during the winter months.
Start by thoroughly inspecting the tires for any signs of wear or damage. Check the tread depth and look for any cracks or bulges on the sidewalls. If any issues are found, it’s important to address them before winterizing your camper.
Once you’ve inspected the tires, it’s time to protect them with tire covers. These covers are specifically designed to shield the tires from the harsh winter elements, such as snow, ice, and freezing temperatures. They provide a barrier that prevents moisture from seeping into the rubber, which can cause cracking and deterioration.
When choosing tire covers, make sure to select ones that are the correct size for your camper’s tires. They should fit snugly and securely, covering the entire tread and sidewall area. Additionally, opt for covers made from durable, weather-resistant materials that can withstand the rigors of winter.
By properly maintaining and protecting your camper’s tires with tire covers, you can ensure their longevity and performance throughout the winter season.
Now that we’ve covered tire maintenance, it’s time to move on to the next step: emptying and cleaning the interior of your camper.
Empty and Clean the Interior
Get ready to transform your cozy home away from home into a sparkling sanctuary by emptying and cleaning the interior. As you follow your winterizing checklist, it’s crucial to focus on the interior of your camper to ensure its protection during the colder months.
Start by removing all food, drinks, and perishables from your refrigerator and cabinets. Thoroughly clean all surfaces, including countertops, tables, and floors, using mild soap and water. Don’t forget to pay attention to hidden nooks and crannies where dust and dirt may accumulate.
Next, it’s time to tackle the storage areas. Remove any bedding, linens, and towels, and make sure they’re dry before storing them away. Utilize vacuum-sealed bags to save space and keep your items safe from moisture and pests. For larger items, consider using storage bins that can easily be stacked and secured.
As you clean and empty the interior, take note of any repairs or maintenance that may be needed before the winter season. This is the perfect time to fix any leaks, replace worn-out parts, or address any other issues that may have arisen during your camping trips.
By emptying and cleaning the interior of your camper, you’re taking important steps to ensure its longevity and functionality. Now that the interior is ready, let’s move on to the next section about how to store food and appliances properly, ensuring they’re in optimal condition when you’re ready to hit the road again.
Store Food and Appliances Properly
To properly store food and appliances, you’ll want to consider the best methods for preserving freshness and preventing damage during the colder months.
When it comes to storing food, it’s crucial to maintain a proper temperature to prevent spoilage. Make sure your refrigerator and freezer are set to the appropriate temperature recommended by the manufacturer. Additionally, remove all perishable items and clean out any leftover food or spills to avoid attracting pests.
To prevent damage to your appliances, start by unplugging them and thoroughly cleaning each one. Empty and clean the refrigerator, making sure to remove any food remnants or spills. Once clean, leave the refrigerator door slightly ajar to allow for proper air circulation.
When it comes to small appliances, such as microwaves or coffee makers, clean them thoroughly and store them in a dry and secure location. Wrap cords neatly and store them separately to prevent tangling or damage.
By properly storing your food and appliances, you’ll ensure they stay in good condition throughout the winter months. Once you’ve completed these steps, it’s important to conduct regular maintenance checks to ensure everything is still in working order.
Conduct Regular Maintenance Checks
Make sure you regularly check and maintain your appliances to ensure they continue to work efficiently throughout the winter months. Regular maintenance checks are important because they help identify any potential issues before they become major problems.
One common issue to look out for during maintenance checks is a faulty thermostat. A malfunctioning thermostat can cause uneven heating or cooling, which can lead to discomfort inside the camper. It’s essential to check the thermostat’s accuracy and replace it if necessary.
Another common issue is a clogged air filter. A dirty air filter can restrict airflow, making the appliances work harder and less efficiently. It’s recommended to clean or replace the air filter regularly to maintain optimal performance.
Additionally, inspect the gas lines for any leaks or damage. Gas leaks can be hazardous and need to be addressed immediately.
Lastly, check the electrical connections to ensure they’re secure and free from corrosion. Loose connections or corroded wires can cause electrical issues and potentially lead to fires.
By conducting regular maintenance checks, you can prevent these common issues and ensure your appliances work efficiently throughout the winter season.
Frequently Asked Questions
How do I properly clean and maintain the camper’s propane system during winterization?
To properly clean and maintain the camper’s propane system, we need to follow a few important steps. First, make sure to turn off the propane supply and all appliances connected to it.
Then, carefully inspect the system for any leaks or damage. Clean the propane tank and regulators using a mild soap solution and a soft brush.
Lastly, test the system for proper functionality before reactivating it. Regular cleaning and maintenance ensure the safe and efficient operation of the propane system throughout the winterization process.
What steps should I take to prevent mice and other pests from entering the camper during the winter months?
To prevent mice and other pests from entering the camper during winter, we must take a few precautionary steps. Firstly, seal any openings or cracks with caulk or expanding foam.
Additionally, install mesh screens over vents and openings to keep pests out while still allowing for ventilation.
Properly insulate the camper to prevent condensation and reduce temperature fluctuations.
Finally, use mouse traps or repellents to further deter pests from entering the camper.
Is it necessary to remove all bedding and cushions from the camper before winterizing?
No, it’s not necessary to remove all bedding and cushions from the camper before winterizing. Winterizing without removing furniture involves taking certain steps to protect the camper from snow and ice.
To do this, make sure all windows and doors are properly sealed. Cover the exterior with a weather-resistant tarp or RV cover, and insulate any exposed pipes or water lines.
By following these precautions, you can effectively winterize your camper while keeping the furniture intact.
How often should I check on the camper during the winter to ensure everything is in good condition?
During the winter, it’s important to regularly check on your camper to ensure everything is well-maintained. The frequency of these checks will depend on various factors such as the climate and storage conditions. However, a general guideline is to inspect the camper at least once a month.
This allows you to identify any issues that may have arisen during the winter months, such as leaks, damage, or pest infestations. Regular checking will help ensure that your camper remains in good condition throughout the winter season.
Are there any specific steps I should take to winterize the camper’s electrical system and prevent any potential damage?
To winterize the camper’s electrical system and prevent potential damage, there are a few steps we should take. Firstly, disconnect the battery and store it in a dry place.
Next, check all electrical connections for any signs of corrosion or damage. Apply dielectric grease to protect the connections.
Additionally, insulate any exposed wiring to prevent freezing.
Lastly, consider using a specialized RV cover to protect the camper exterior from harsh winter elements.
What Steps Should I Take to Winterize My Camper?
When preparing your camper for winter, it’s essential to follow the proper unwinterize camper techniques. This includes thoroughly inspecting the plumbing and water systems for any potential damage, draining all fluids, and adding antifreeze. Additionally, covering the exterior and storing the camper in a dry, protected area can help prevent winter damage.
Conclusion
In conclusion, winterizing a camper requires careful preparation and attention to detail. By following the steps outlined in this guide, we can ensure the longevity and functionality of our beloved home on wheels.
From draining the water tanks to insulating the camper and sealing any leaks, every action taken contributes to protecting our investment and ensuring a cozy and comfortable winter camping experience.
So let’s take the time to properly winterize our campers and enjoy the peace of mind that comes with knowing we’re prepared for the colder months ahead.

