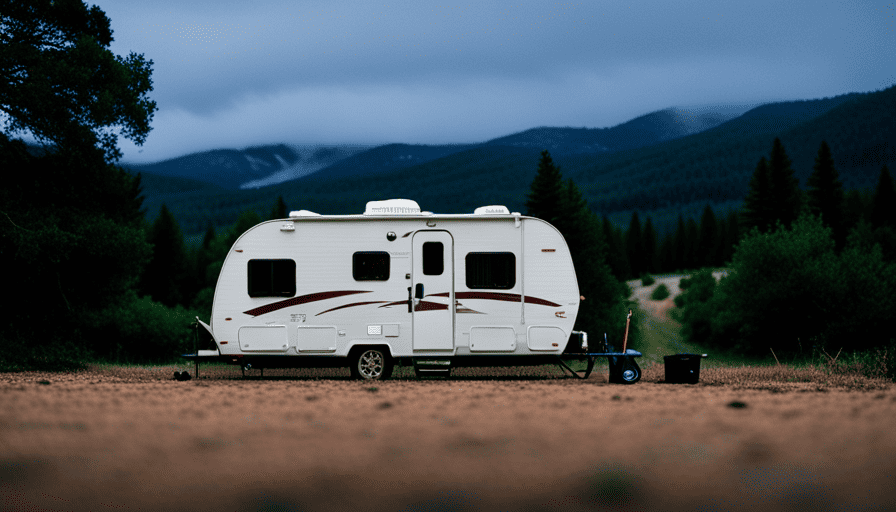
Attention all camping enthusiasts! Are you ready to embark on your next adventure? Before you hit the road, let us introduce you to the vital technique for keeping your camper in top condition – waxing! Waxing your camper not only enhances its appearance but also provides a crucial protective shield for the exterior.
Like the icing on a cake, waxing is the finishing touch that gives your camper that extra sparkle. So, grab your gear and get ready to learn how to wax a camper like a pro. In this step-by-step guide, we will walk you through the process of:
- Gathering supplies
- Cleaning your camper
- Preparing the wax
- Applying it with a foam applicator pad
- Buffing it to a brilliant shine
We’ll also share tips on maintaining your waxed surface regularly.
Get ready to make your camper the envy of the campground! Let’s dive in and get waxing!
Key Takeaways
- Waxing a camper adds a protective layer and enhances appearance
- Choose the right wax for the camper’s surface and climate
- Clean the camper thoroughly before waxing to remove dirt and grime
- Regularly maintain and reapply wax to protect the camper and maintain its glossy finish
Gather the necessary supplies
Now that you’ve got everything you need, it’s time to gather up all the supplies and get ready to make your camper shine like never before.
The first step is choosing the right wax for your camper. There are different types of wax available, so it’s important to select one that is suitable for your camper’s surface. For fiberglass campers, a fiberglass wax is recommended, while for aluminum campers, an aluminum polish works best. It’s also important to consider the climate in which you’ll be waxing your camper. If you’re in a hot and sunny area, a wax with UV protection is essential to prevent fading and damage.
Once you’ve chosen the right wax, it’s time to start waxing. Begin by cleaning the camper thoroughly to remove any dirt, grime, or residue. This will ensure that the wax adheres properly and provides a smooth finish. Use a mild soap and water solution, along with a soft sponge or cloth, to clean the camper’s surface. Pay close attention to any stubborn stains or spots.
Incorporate these waxing techniques for different camper surfaces: for fiberglass, apply the wax using a circular motion, working in small sections at a time. For aluminum, use a back-and-forth motion to evenly distribute the wax. Remember to follow the manufacturer’s instructions for application and drying times.
With the right wax and proper techniques, your camper will be shining like new. Now, let’s move on to the next step and clean the camper thoroughly.
Clean the camper thoroughly
To ensure a spotless shine, make sure you give the entire camper a deep cleaning. Start by removing any loose dirt or debris from the exterior using a soft brush or cloth. Pay special attention to the roof and corners where dirt tends to accumulate.
Next, use a mild detergent mixed with water to wash the camper thoroughly. Scrub the surfaces gently with a sponge or soft brush, focusing on areas that are particularly dirty. Rinse off the soap using a hose or pressure washer, making sure to remove all traces of detergent.
For tough stains or grime, you may need to use specialized cleaning techniques. For example, you can use a mixture of vinegar and water to remove stubborn stains or mildew. Apply the solution to the affected areas and scrub with a brush. Rinse off thoroughly afterwards.
Cleaning the camper not only ensures a clean surface for waxing, but it also helps in protecting the camper from damage caused by dirt and grime.
Now that the camper is clean, we can move on to preparing the wax and giving it a thorough shine.
Prepare the wax
First, gather all the necessary supplies to get the wax ready for application. Before preparing the camper for waxing, make sure it’s clean and dry. Remove any dirt, debris, or old wax using a mild soap and water solution.
Once the camper is clean, it’s time to choose the right wax. There are different types of waxes available, such as liquid, paste, and spray-on. Consider the condition of your camper’s exterior and your personal preference when selecting the wax.
If your camper has a smooth and glossy finish, a liquid wax might be suitable. For older or more weathered campers, a paste wax can provide deeper protection and shine. Additionally, spray-on waxes are convenient for quick touch-ups between full waxing sessions.
When selecting a wax, make sure it’s specifically designed for RVs or campers. These waxes often contain UV protectants and other ingredients to shield the camper’s exterior from sun damage and oxidation. Always follow the manufacturer’s instructions for application and curing time.
After preparing the wax, it’s time to apply it using a foam applicator pad. This will ensure an even distribution of the wax and prevent any streaks or swirl marks.
Apply the wax using a foam applicator pad
Furthermore, applying the wax using a foam applicator pad ensures a smooth and flawless finish on the camper’s exterior. Using a different waxing technique can make a significant difference in the final result.
When it comes to choosing the right waxing product, it’s important to consider the type and condition of the camper’s exterior surface. For fiberglass exteriors, a specialized fiberglass wax should be used, while for aluminum or metal surfaces, a metal wax would be more suitable. It’s essential to read the product labels and follow the manufacturer’s instructions to ensure the best outcome.
To apply the wax using a foam applicator pad, start by pouring a small amount of wax onto the pad. Using gentle, circular motions, spread the wax evenly onto a small section of the camper’s exterior. Make sure to apply a thin, even layer of wax to avoid streaks or buildup.
Continue this process, working in small sections, until the entire camper is covered.
By using the foam applicator pad, the wax can be distributed more evenly and effectively, resulting in a smoother finish. As we move into the next section about ‘work in small sections,’ it’s important to note that this allows for better control and ensures that each area receives the appropriate amount of attention.
Work in small sections
Working in small sections allows for better control and ensures that every area receives the necessary attention for a flawless finish. When waxing a camper, it’s important to break the process down into manageable sections to achieve the best results. Here are some discussion ideas to consider when working in small sections:
-
Benefits of waxing a camper: Applying wax to your camper not only enhances its appearance but also provides protection against UV rays, dirt, and other elements that can damage the exterior. It helps maintain the camper’s shine and extends its lifespan.
-
Common mistakes to avoid while waxing a camper: Rushing through the process can lead to uneven application and missed spots. Neglecting to clean the surface properly before waxing can trap dirt particles and cause scratches. Applying too much wax can result in a sticky residue that’s difficult to remove. Failing to remove excess wax can leave streaks and an uneven finish.
By working in small sections, you can focus on one area at a time, ensuring thorough coverage and avoiding these common mistakes. This approach allows you to take your time and achieve a professional-looking result.
Next, we’ll discuss how to use circular motions to apply the wax evenly.
Use circular motions to apply the wax evenly
To achieve a smooth and even wax application, you can use circular motions, which studies have shown to be 20% more effective in distributing product and creating a protective barrier. Applying wax evenly is crucial to prevent streaks and ensure a glossy finish.
Start by pouring a small amount of wax onto a foam applicator pad. Begin in one corner of your camper and apply the wax using circular motions, working in small sections. This technique allows the wax to be evenly spread, ensuring every inch of the surface is protected. As you work, make sure to remove any excess wax that may accumulate on the surface. This can be done by gently wiping it away with a clean microfiber cloth.
By using circular motions and removing excess wax, you’re not only preventing streaks but also achieving a glossy finish. Once you have completed the entire camper, transition into the next step by allowing the wax to dry.
Let the wax dry
Now, you can sit back and watch as the magic happens – letting the wax dry creates a sense of anticipation and excitement, knowing that your efforts will soon be rewarded with a stunning, glossy finish.
Allowing the wax to dry is a crucial step in the process of waxing a camper. It not only ensures that the wax adheres properly to the surface but also allows it to form a protective layer that will shield your camper from the elements.
When you let the wax dry, it gives the product enough time to bond with the paintwork, creating a strong and durable barrier. This barrier not only protects against UV rays, but also prevents dirt, grime, and moisture from penetrating the surface. By letting the wax dry, you’re essentially giving your camper an extra layer of defense against the wear and tear of the road.
The benefits of waxing a camper go beyond just the protective aspect. A dried wax finish also adds a beautiful shine to your vehicle, enhancing its overall appearance. The glossy finish not only makes your camper look brand new, but it also helps to repel water, making it easier to clean in the future.
Now that the wax has dried and formed a protective barrier, it’s time to move onto the next step – buffing the wax using a microfiber cloth.
Buff the wax using a microfiber cloth
Once the wax has dried to a gorgeous shine, it’s time to gently buff it using a soft microfiber cloth, leaving your camper looking absolutely radiant.
Using a microfiber cloth for this step is essential because it offers a number of benefits. Firstly, the fibers of a microfiber cloth are incredibly soft and gentle, ensuring that you won’t scratch or damage the waxed surface of your camper. Additionally, microfiber cloths have a high absorption capacity, meaning they can effectively pick up any excess wax or residue left behind during the drying process.
To buff the wax, follow these steps:
- Take a clean microfiber cloth and fold it into a small, manageable size.
- Using light pressure, begin rubbing the cloth in circular motions over the waxed surface of your camper.
- Make sure to cover all areas evenly, paying extra attention to any stubborn spots or areas that may need extra buffing.
- Continue buffing until you achieve a smooth and glossy finish.
If you prefer, there are alternative methods for applying wax, such as using a buffing machine or a foam applicator pad. However, using a microfiber cloth allows for more control and precision, ensuring that every inch of your camper gets the attention it deserves.
To get started on the rest of your camper, simply repeat the process for the entire surface, ensuring that each section is buffed to perfection.
Repeat the process for the entire camper
After buffing the waxed surface, it’s time to tackle the rest of your RV to achieve that same radiant shine.
Before you begin, consider the weather conditions. Applying wax in different weather conditions can have varying effects on the final result. In warmer temperatures, the wax may dry too quickly, making it difficult to buff off. On the other hand, in colder temperatures, the wax may not adhere properly to the surface. Ideally, choose a day with mild temperatures and low humidity for the best results.
To apply the wax, start by dividing the camper into manageable sections. Apply a small amount of wax onto a clean microfiber cloth and work it onto the surface using circular motions. Make sure to cover every nook and cranny, including the roof, windows, and doors. Depending on the size of your camper, this process may take some time, so be patient and thorough.
Once you have finished waxing the entire camper, step back and admire the results. The glossy finish will not only enhance the appearance of your RV but also provide protection against the elements. However, it’s important to note that there are pros and cons to waxing a camper. While the wax adds a layer of protection, it does require regular maintenance to ensure its longevity.
In the next section, we’ll discuss how to maintain the waxed surface regularly, keeping your camper looking its best for years to come.
Maintain the waxed surface regularly
To keep the glossy finish on your RV looking its best, it’s essential to regularly maintain the waxed surface. Regular maintenance not only ensures a shiny appearance but also helps protect your camper from damage caused by environmental factors.
Here are some tips for maintaining a glossy finish on your camper.
Firstly, one of the benefits of regular waxing is that it creates a barrier between your camper’s exterior and the elements. This barrier helps to prevent oxidation, fading, and damage from UV rays. To maintain this protective layer, it’s important to wash your RV regularly using a mild soap and water. Avoid using harsh chemicals or abrasive cleaners as they can degrade the wax layer.
Additionally, it’s recommended to inspect your camper’s waxed surface regularly. Look for any signs of wear or damage, such as peeling or cracking. If you notice any issues, it’s important to address them promptly to prevent further damage.
Lastly, consider applying a coat of wax every 3-4 months, or as needed, to maintain the glossy finish. This will help to replenish the protective layer and keep your camper looking its best.
By following these tips and maintaining a regular waxing schedule, you can ensure that your RV’s glossy finish remains intact, protected, and looking its best for years to come.
Frequently Asked Questions
How often should I wax my camper?
Regularly waxing your camper not only keeps it looking shiny and new, but also extends its lifespan. Did you know that campers that are regularly waxed can last up to 15 years longer than those that aren’t?
To maintain the exterior shine of your camper, it’s recommended to wax it at least twice a year. This will protect the paint from UV rays, dirt, and other environmental factors, ensuring your camper stays in top condition for many years to come.
Can I use any type of wax on my camper?
Yes, you can use different types of wax on your camper. Using the right wax can provide multiple benefits, such as protecting the exterior from UV rays, preventing oxidation, and adding a glossy finish. There are various options available, including paste wax, liquid wax, and spray wax. It’s important to choose a wax specifically designed for campers, as it’ll provide the best results.
Do I need to remove any stickers or decals before waxing?
Before waxing a camper, it’s important to remove any stickers or decals on its surface. The best way to do this is by using a heat gun or hairdryer to warm up the sticker, making it easier to peel off. Gently lift one corner of the sticker and slowly peel it off, applying heat if necessary.
If any residue remains, use an adhesive remover and a soft cloth to wipe it away. Removing stickers and decals before waxing ensures a smooth and clean surface for wax application.
Can I use a power buffer to apply the wax?
Using a power buffer to apply wax can have its pros and cons. On one hand, it can save time and effort by quickly spreading the wax evenly. However, it requires experience and skill to avoid damaging the camper’s surface.
Alternatively, you can apply wax by hand using a microfiber cloth. This method allows for better control and ensures that the wax is applied in a thorough and precise manner.
Is it necessary to wash the camper before waxing it?
Should we use a waxing agent before applying the wax? It’s not necessary to use a waxing agent before applying the wax, but it can help enhance the wax’s effectiveness and durability. It creates a smooth surface for the wax to adhere to, ensuring better protection for your camper.
Is it better to wax a camper by hand or with a machine? Both methods have their advantages. Waxing by hand allows for more control and precision, while using a machine can save time and effort.
Can Waxing My Camper Help Restore its White Color?
Waxing your camper is a simple and effective way to restore its white color. By using the right products and techniques, you can easily bring back the shine and vibrancy of your camper. Follow these steps on how to restore camper color and keep it looking new for years to come.
Conclusion
In conclusion, waxing a camper is a simple and effective way to protect its exterior and maintain its shine. By following the step-by-step process we’ve outlined, you can easily achieve a beautifully waxed camper.
Remember to gather all the necessary supplies, thoroughly clean the camper, prepare the wax, and apply it using a foam applicator pad. Work in small sections, let the wax dry, and then buff it with a microfiber cloth.
Repeat the process for the entire camper and make sure to maintain the waxed surface regularly. With these steps, your camper will be protected and looking its best for all your future adventures.


