Greetings, fellow explorers!
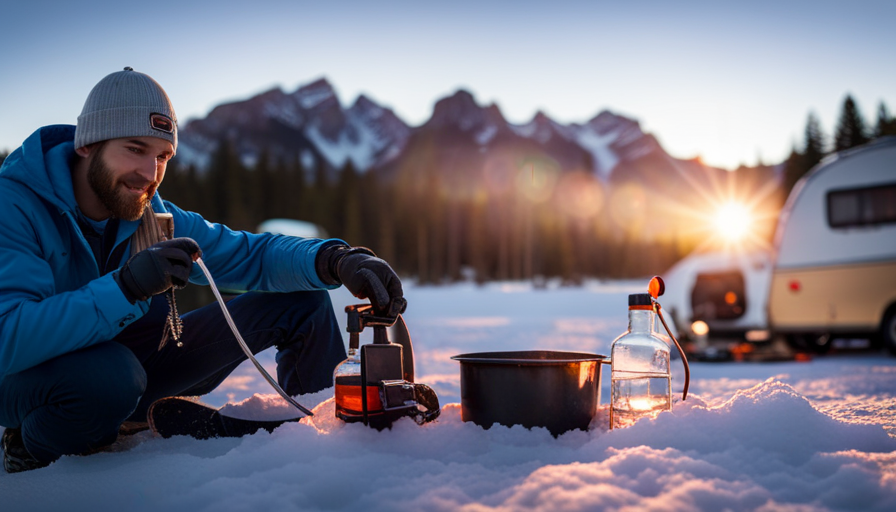
As the chilly grip of winter begins to loosen its hold, it’s time to awaken our trusty campers from their hibernation. Just like a bear emerging from its den, our campers need a little TLC to shake off the winter blues and get ready for the open road.
In this article, we will guide you through the process of un-winterizing your camper, transforming it from a dormant beast into a roaring machine of adventure. Think of it as a spring awakening for your beloved home on wheels.
We will provide you with detailed instructions, step by step, on how to prepare your camper for the upcoming camping season. From draining the water system to inspecting and cleaning the exterior, we’ve got you covered.
So, grab your tools and supplies, and let’s dive into the exhilarating world of un-winterizing your camper!
Key Takeaways
- Gather all necessary supplies and tools before starting the un-winterization process.
- Drain the water system and remove the antifreeze from the plumbing.
- Clean and sanitize the water tanks and test the water system for leaks.
- Inspect and clean the exterior of the camper, including the roof and awnings, and check for any damage or leaks.
Gather your supplies and tools
Now, let’s gather all your supplies and tools so you’re ready to un-winterize your camper in no time.
Before starting the un-winterization process, it’s important to have all the necessary items handy to avoid any common mistakes. Firstly, you’ll need a fresh water hose and a city water connection or a water tank fill attachment. These will ensure you have access to water during the un-winterization process. Additionally, grab a water pressure regulator to prevent any damage to your camper’s plumbing system caused by high water pressure.
To efficiently and organizedly un-winterize your camper, gather a set of basic hand tools such as pliers, screwdrivers, and an adjustable wrench. These tools will come in handy when accessing and working on various parts of your camper. Don’t forget to have a supply of RV-specific antifreeze as well, as this will be used later in the process to protect your plumbing system.
Lastly, keep a bucket or a large container nearby to catch any excess water during the un-winterization process. This will help prevent any mess and make the overall process smoother.
With all your supplies and tools ready, you can now move on to draining the water system.
Drain the water system
First, it’s essential to empty the water system of any remaining liquid. To do this, start by turning off the water supply to the camper.
Next, open all the faucets, including the hot and cold water taps, as well as the showerhead. This will allow any water in the lines to drain out completely. Make sure to also flush the toilet several times to remove any water from the system.
Once the water has been drained from the faucets and toilet, it’s time to remove the water filters. Locate the filters, which are typically located near the water pump or in the storage compartment. Unscrew the filters and remove them from the system. This will prevent any water that may be trapped in the filters from freezing and causing damage during the winter months.
With the water lines flushed and the filters removed, we can now move on to the next step of removing the antifreeze from the plumbing. This is an important step in preparing the camper for the upcoming camping season.
Remove antifreeze from the plumbing
To get the plumbing ready for the camping season, it’s time to bid farewell to the antifreeze and let the water flow freely again. Here are three key steps to preparing the plumbing and flushing out the antifreeze:
-
Turn off the water heater: Start by turning off the water heater and allowing it to cool down. This will prevent any damage to the system when flushing out the antifreeze.
-
Open all the faucets: Next, open all the faucets, both hot and cold, to release any remaining antifreeze. Be sure to do this one faucet at a time, starting from the highest point in the system and working your way down.
-
Flush the system: Once all the faucets have been opened, connect a fresh water source to the camper and run water through the entire plumbing system. This will help flush out any remaining antifreeze and ensure that clean water is flowing through the pipes.
Now that the antifreeze has been removed from the plumbing, it’s time to move on to the next step: cleaning and sanitizing the water tanks.
Clean and sanitize the water tanks
Make sure your water tanks are clean and safe for use by following these simple steps. Cleaning and sanitizing your water tanks is an important part of un-winterizing your camper and ensuring that your water system is in good working condition.
First, start by draining all the water from your tanks. Open the drain valves and let the water flow out completely.
Next, mix a solution of bleach and water in a ratio of 1/4 cup of bleach per 15 gallons of water. Fill your tanks with this solution and let it sit for at least one hour. This’ll help to kill any bacteria or contaminants that may be present.
After the solution has sat for the recommended time, drain it out completely and rinse the tanks thoroughly with fresh water. Repeat this rinsing process until there’s no smell or taste of bleach remaining.
Finally, reconnect and test the water system to ensure that everything’s working properly and there’re no leaks.
Reconnect and test the water system
Now that you’ve cleaned and sanitized your water tanks, it’s time to reconnect and test your water system. Make sure to check for any leaks and ensure that all connections are secure and properly sealed. If needed, use plumbing tape to prevent leaks.
Once the water lines are reconnected, it’s important to test the water pressure. Turn on the water pump and open all the faucets in your camper to allow the water to flow freely. Check for any signs of leaks or weak water pressure. If you notice any issues, inspect and tighten the connections as necessary.
To test the water pressure, use a water pressure gauge. Attach it to an outdoor faucet or the camper’s city water connection. Open the faucet or turn on the city water supply and observe the pressure reading on the gauge. The ideal water pressure for a camper is around 40-60 psi. If the pressure is too low or too high, you may need to adjust the pressure regulator.
Once you’ve reconnected and tested the water system, you can move on to the next step of checking and refilling your propane tanks.
Check and refill propane tanks
Once you’ve reconnected and tested your water system, it’s time to check and refill those propane tanks to ensure a seamless camping experience. Propane tank safety is of utmost importance, so it’s crucial to follow proper procedures when handling and maintaining them. Here’s what you need to know:
-
Inspect the tanks: Start by visually examining the tanks for any signs of damage or corrosion. Look for dents, rust, or leaks. If you notice any issues, it’s best to replace the tank.
-
Check the valves: Ensure that the valves are tightly closed before you begin. This prevents any propane from escaping during the refill process.
-
Refill the tanks: Take your tanks to a certified propane filling station. They’ll have the necessary equipment and expertise to safely refill your tanks. Remember to follow their instructions and never overfill the tanks.
-
Test for leaks: Once the tanks are refilled, use a propane leak detector or soapy water solution to check for any leaks. Apply the solution to the valve and connection areas. If bubbles form, there’s a leak that needs to be addressed immediately.
-
Store the tanks properly: When not in use, store the propane tanks in a well-ventilated area away from heat sources and direct sunlight. This helps prevent any potential hazards.
After ensuring the propane tanks are in good condition, it’s time to inspect and clean the exterior of the camper to maintain its overall appearance and functionality.
By following these propane tank safety and maintenance guidelines, you can enjoy a worry-free camping experience. Now, let’s move on to inspecting and cleaning the exterior of the camper.
Inspect and clean the exterior of the camper
Before you start exploring the great outdoors, take a moment to inspect and freshen up the outside of your camper. It’s important to ensure that the exterior is in good condition and free from any damage that may have occurred during winter storage.
Start by carefully inspecting all the exterior surfaces, including the roof, sidewalls, and windows, for any signs of damage such as cracks, leaks, or dents. Check the seams and seals for any signs of wear or deterioration, as these can lead to water leaks and further damage. If any damage is found, make sure to address it promptly to prevent further issues.
Once the inspection is complete, it’s time to clean the exterior surfaces of your camper. Use a mild soap and water solution to gently wash away any dirt, stains, or residue that may have accumulated over the winter months. Pay special attention to the roof and awnings, as these areas are more prone to mold and mildew growth. Rinse thoroughly and allow the camper to dry completely before moving on to the next step.
Now that the exterior of your camper is inspected and cleaned, it’s time to test all electrical and mechanical systems to ensure everything is in proper working order.
Test all electrical and mechanical systems
Make sure you don’t accidentally electrocute yourself while testing all the fancy electrical and mechanical systems in your snazzy little home on wheels. Here are some important steps to follow to ensure a safe and thorough testing process:
-
Test Electrical Components:
- Start by checking the battery voltage using a multimeter. If it’s low, recharge or replace it.
- Inspect the power inverter and converter for any signs of damage or loose connections.
- Turn on all interior and exterior lights to confirm they’re functioning properly.
- Test all outlets and switches using a voltage tester to ensure they’re wired correctly.
-
Check Mechanical Systems:
- Test the air conditioner and heater to verify their functionality.
- Inspect the water pump and ensure it’s working correctly by running water through all faucets.
- Test the refrigerator by plugging it in and verifying that it cools properly.
- Check the propane system for leaks and ensure the stove and oven are working.
After testing all electrical and mechanical systems, it’s time to restock and organize your camper for your next adventure.
Restock and organize your camper
Get ready to replenish and arrange your home on wheels, transforming it into a cozy and well-stocked sanctuary for your upcoming adventures.
Restocking essentials is crucial when un-winterizing your camper. You should always have a supply of non-perishable food, water, and toiletries. Stock up on canned goods, pasta, and snacks that have a long shelf life. Don’t forget to bring a first aid kit, extra batteries, and a camping stove for cooking. It’s also important to have fresh bedding, towels, and cleaning supplies on hand.
To maximize space in your camper, efficient organization is key. Use storage bins and collapsible containers to neatly pack away your belongings. Utilize hanging organizers for shoes, toiletries, and kitchen utensils. Install hooks or racks on the walls to hang jackets, hats, and other items. Consider using vacuum-sealed bags to compress bulky items like bedding and clothing.
Now that your camper is restocked and organized, it’s time to hit the road and enjoy your camping adventures! Explore new destinations, meet fellow travelers, and create unforgettable memories. Remember to perform regular maintenance checks and stay safe on the road. So pack your bags, load up the camper, and get ready for an incredible journey ahead.
Hit the road and enjoy your camping adventures!
Now that we’ve restocked and organized our cozy home on wheels, it’s time to hit the road and embark on epic camping adventures!
Before we start, let’s make sure we have all the necessary camping gear. It’s essential to have a well-equipped camper to ensure a comfortable and enjoyable trip.
First, let’s check our camping gear. Make sure to pack essentials such as sleeping bags, cooking utensils, a camping stove, and a cooler for food storage. Don’t forget to bring a first aid kit, bug spray, and sunscreen to stay safe and protected during your outdoor activities.
Once you have all your gear ready, it’s time to choose the perfect campsite. Consider factors such as location, amenities, and activities available. Look for campsites that offer access to hiking trails, fishing spots, or beautiful views. It’s also important to check if the campsite has water and electricity hookups if needed.
When selecting a campsite, be mindful of any restrictions or regulations in place. Some campsites might require reservations or have specific rules regarding pets or campfires. Take note of these details to avoid any inconvenience during your stay.
Now that you’re prepared with the right camping gear and have chosen a suitable campsite, it’s time to hit the road and enjoy your camping adventures! Stay safe, have fun, and create unforgettable memories in the great outdoors.
Frequently Asked Questions
How do I know which supplies and tools I need to un winterize my camper?
To determine the supplies and tools needed for un-winterizing your camper, follow a step-by-step process.
First, assess the condition of your camper’s plumbing system. This includes the water heater, pipes, and tanks.
Based on this evaluation, you may require items such as a water pump, water hose, wrench, antifreeze, and a battery.
Additionally, check for any specific manufacturer recommendations or guidelines to ensure a successful un-winterization process.
Can I use regular household cleaning products to sanitize the water tanks?
Yes, you can use regular household cleaning products to sanitize the water tanks in your camper. However, it’s important to choose products that are safe for use in drinking water systems. Look for cleaning products that are labeled as safe for potable water or specifically designed for water tank sanitation. Follow the instructions on the product for the correct dosage and application method. Rinse the tanks thoroughly after sanitizing to remove any residual cleaning solution.
How often should I clean and sanitize the water tanks?
To keep our water tanks sparkling clean and safe, it’s crucial to regularly clean and sanitize them. How often, you ask? Well, it’s like giving our tanks a refreshing shower – we should do it at least once every three months.
Properly sanitizing the tanks involves using a solution of bleach and water, following a thorough rinsing. This ensures that any lurking bacteria or contaminants are eliminated, leaving us with clean and fresh water for our camping adventures.
Is it necessary to inspect and clean the exterior of the camper before un winterizing?
Before un-winterizing a camper, it’s necessary to inspect and clean the exterior thoroughly. Start by checking for any damages such as cracks, leaks, or loose parts. Next, clean the exterior using a gentle soap and water solution, paying attention to areas prone to dirt and grime buildup.
This will ensure that the camper is in good condition and ready for use. Additionally, cleaning the interior is also important to remove any dust, mold, or mildew that may have accumulated during the winter months.
How can I ensure that all electrical and mechanical systems are functioning properly after un winterizing?
To ensure all electrical and mechanical systems are functioning properly after un-winterizing, it is crucial to inspect seals and test the propane system. Inspecting seals ensures there are no leaks or damage that could compromise the camper’s performance. Testing the propane system ensures safe and efficient operation of appliances like the stove and water heater. By taking these precautions, we can guarantee a hassle-free camping experience and avoid any potential issues down the road.
What Should I Look for When Buying a Camper from a Private Seller?
When buying a camper privately, there are a few crucial factors to consider. First, carefully inspect the vehicle’s overall condition, including its engine and interior features. Secondly, request maintenance records to gauge its history. Additionally, verify the camper’s title, registration, and any outstanding liens to avoid legal complications. Lastly, negotiate a fair price by researching the market value of similar campers.
Conclusion
And there you have it, fellow campers! We’ve successfully un-winterized our camper and we’re ready to hit the open road, where adventure awaits us like a hidden treasure.
With our water system flowing smoothly, our tanks clean and refreshed, and our electrical and mechanical systems tested and ready, we can confidently embark on our camping escapades.
So pack your bags, gather your loved ones, and let’s explore the great outdoors, where memories are made and stories unfold. Happy camping!

