Are you tired of dealing with the frustrating issue of dampness in your RV? Don’t worry, because we have the ideal solution for you!
Moisture can be a real nuisance, causing mold, mildew, and unpleasant odors. But don’t worry, we’re here to help you put an end to this problem once and for all.
In this article, we will share with you our expert knowledge and practical tips on how to stop moisture in your camper. From identifying the source of moisture to improving ventilation and using moisture-absorbing materials, we’ve got you covered.
We’ll also teach you how to properly insulate your camper, check for leaks, and avoid drying wet clothes inside. Plus, we’ll give you handy tricks for removing excess moisture from cooking and showering.
So, get ready to bid farewell to moisture-related issues and enjoy a dry, comfortable camping experience. Let’s dive in and make your camper moisture-free!
Key Takeaways
- Enhance ventilation by installing roof vents, window vents, using fans, and utilizing door vents.
- Use moisture-absorbing materials like silica gel packets, moisture-absorbing crystals, and bamboo charcoal.
- Properly insulate the camper for temperature control and energy efficiency.
- Regularly inspect and fix any leaks in the camper to prevent water intrusion.
Identify the source of moisture
You need to figure out where that pesky moisture is coming from, so you can finally put an end to it and reclaim your dry and comfortable camper. The first step in stopping moisture in your camper is to identify the source of the problem.
One common culprit is condensation, which occurs when warm air inside the camper meets cold surfaces, such as windows or walls. To prevent condensation, it’s important to control the humidity levels inside your camper. This can be achieved by using a dehumidifier or by opening windows to let fresh air circulate.
Another potential source of moisture is leaks in the roof or windows. Check for any signs of water damage or weak spots that could be allowing water to seep in.
Lastly, poor ventilation can also contribute to moisture buildup. Improving ventilation in your camper, such as installing vents or fans, can help to remove excess moisture and prevent mold and mildew growth.
By addressing these common sources of moisture, you can take the necessary steps to keep your camper dry and comfortable for years to come.
Improve ventilation in your camper
To enhance air circulation and prevent excess humidity buildup, consider boosting the camper’s ventilation system like a breath of fresh air. Improving air circulation is crucial in eliminating moisture inside your camper. Investing in a roof vent can significantly help in improving the airflow. A roof vent allows hot air to escape and fresh air to enter, creating a continuous flow of air throughout the space. This not only helps in reducing humidity levels but also eliminates any musty odors.
In addition to a roof vent, there are other ways to improve ventilation in your camper:
-
Install window vents: Window vents can be easily installed and provide additional airflow when the windows are closed. They allow fresh air to enter while keeping rain and insects out.
-
Use a fan: A portable fan can be a great addition to your camper. It can be placed strategically to circulate air and create a cooling effect.
-
Utilize door vents: Door vents can be installed to allow air to flow freely when the door is closed. They’re especially useful during rainy days when opening windows may not be an option.
Improving ventilation is an essential step in reducing moisture in your camper. By investing in a roof vent and utilizing other ventilation options, you can create a comfortable and moisture-free environment.
Next, let’s explore how to use moisture-absorbing materials to further combat moisture-related issues.
Use moisture-absorbing materials
Enhance the atmosphere inside your camper by incorporating moisture-absorbing materials for a drier and more comfortable experience. Proper moisture control techniques are essential to prevent condensation and mold growth.
One effective solution is to use DIY moisture-absorbing materials. Silica gel packets, commonly found in packaging, can be placed strategically in areas prone to moisture buildup. These packets absorb excess moisture from the air, helping to maintain a dry environment.
Another option is using moisture-absorbing crystals, which can be placed in containers or pouches and placed around the camper. These crystals are designed to attract and trap moisture, reducing humidity levels.
Additionally, bamboo charcoal is a natural moisture absorber that can be placed in small bags and distributed throughout the camper. Its porous structure allows it to absorb excess moisture and unpleasant odors.
When using moisture-absorbing materials, it’s important to regularly monitor and replace them as needed to ensure their effectiveness. By incorporating these DIY solutions, you can significantly reduce moisture levels and create a more comfortable living environment inside your camper.
Transitioning into the next section, it’s also crucial to properly insulate your camper to further prevent moisture-related issues.
Insulate your camper properly
Imagine creating a cozy and comfortable oasis inside your camper by properly insulating it for optimal temperature control and energy efficiency. Camper insulation tips can make a significant difference in keeping moisture at bay and maintaining a pleasant environment.
Here are three essential tips for insulating your camper effectively:
-
Use foam insulation: Foam insulation is one of the best materials for camper insulation. It provides excellent thermal resistance and helps prevent condensation buildup. Installing foam insulation panels on the walls, ceiling, and floor can create a barrier against outside temperature fluctuations.
-
Seal all gaps and cracks: Insulation alone isn’t enough if there are gaps or cracks in your camper’s structure. These openings can let moisture in and undermine the effectiveness of your insulation efforts. Use weatherstripping and caulk to seal any gaps around windows, doors, and vents.
-
Consider reflective insulation: Reflective insulation, like radiant barriers, can help reflect heat away from your camper during hot summer days and prevent condensation from forming. Install reflective insulation on the roof and walls to enhance the overall insulation performance.
By following these camper insulation tips and using the best materials, you can significantly reduce moisture and improve the overall comfort of your camper.
Now, let’s transition into the next section and explore how to check for and fix any leaks without delay.
Check for and fix any leaks
Seek out and swiftly seal any sneaky leaks in your camper to safeguard against unwanted water intrusion. Preventive measures are crucial to ensure a dry and comfortable camping experience. Moisture can find its way into your camper through various common problem areas, such as windows, doors, vents, and seams. Check these areas regularly and address any issues promptly.
Inspect the window frames for cracks or gaps, and apply silicone caulk to seal them. Weatherstripping around doors should be in good condition to prevent water from seeping in. Ensure that roof vents and plumbing vents are properly sealed with waterproof sealant. Pay close attention to seams and seams where water can seep through, and use RV sealant or tape to seal any gaps.
Additionally, be mindful of potential leaks in the exterior walls and flooring. Check for any signs of water damage, such as soft spots or discoloration, and repair them immediately. It’s also a good idea to inspect the exterior of your camper after heavy rain to identify and fix any new leaks.
By taking these preventive measures and promptly fixing any leaks, you can significantly reduce the risk of moisture intrusion in your camper. This will lay the foundation for the subsequent section about using dehumidifiers or moisture absorbers to further combat moisture-related issues.
Use dehumidifiers or moisture absorbers
To effectively combat excess humidity, you may consider utilizing dehumidifiers or moisture absorbers in your recreational vehicle. These devices can be incredibly beneficial in preventing moisture-related issues and keeping your camper dry and comfortable.
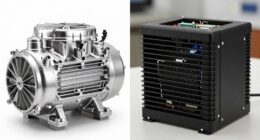
Dehumidifiers are specifically designed to remove excess moisture from the air. They work by pulling in the humid air, extracting the moisture, and releasing the dry air back into the environment. By maintaining optimal humidity levels, dehumidifiers help prevent the growth of mold, mildew, and bacteria, which can thrive in damp conditions. Additionally, they can help eliminate musty odors and improve air quality inside the camper.
Moisture absorbers, on the other hand, are passive devices that work by absorbing excess moisture from the air. They typically come in the form of moisture-absorbing crystals or moisture-absorbing bags. These products are easy to use and require little to no maintenance. Simply place them in areas prone to moisture, such as closets, cabinets, or near windows, and they will gradually absorb the excess moisture, helping to prevent condensation and mold growth.
By utilizing dehumidifiers or moisture absorbers, you can effectively combat excess humidity and prevent moisture-related problems in your camper. These methods are practical, affordable, and easy to implement. However, it’s important to note that while these devices can help control humidity levels, it’s also crucial to address any underlying leaks or sources of moisture. By doing so, you can create a dry and comfortable environment inside your camper, promoting a more enjoyable camping experience.
Next, let’s discuss how to avoid drying wet clothes inside the camper.
Avoid drying wet clothes inside the camper
Avoid hanging your damp laundry inside the cramped quarters of your RV, unless you enjoy the delightful aroma of mildew and the challenge of navigating around clotheslines in your living space. Drying wet clothes indoors in a confined space can lead to excess moisture in the air, which creates the perfect environment for mold growth.
To prevent this, it’s essential to dry your clothes outdoors whenever possible. When drying your clothes outside, make sure to choose a sunny and breezy day. Hang them on a clothesline or use a portable drying rack. This allows the moisture to evaporate quickly, preventing it from lingering inside your camper.
Additionally, ensure that your clothes are thoroughly wrung out before hanging them up, as this will speed up the drying process.
By drying your clothes outdoors, you not only prevent mold growth but also reduce the humidity levels inside your camper. This is especially important in small, enclosed spaces where excess moisture can quickly build up.
In the next section, we’ll discuss how to remove excess moisture from cooking and showering, which will further help in keeping your camper dry and comfortable.
Remove excess moisture from cooking and showering
Combat the damp and stuffy atmosphere in your RV by taking simple steps to eliminate the excess moisture generated from cooking and showering. Preventing condensation buildup is crucial to maintaining a dry camper. When cooking, be mindful of steam escaping from pots and pans. Covering them with lids can help to trap moisture and prevent it from spreading throughout the space. Additionally, use exhaust fans while cooking to effectively remove steam and humidity from the air.
Showering in an enclosed space like a camper can also produce a significant amount of moisture. To combat this, open windows or vents to allow for proper ventilation. Utilize portable fans for improved air circulation to further aid in drying out the space. Place fans strategically near areas prone to moisture buildup, such as the bathroom or kitchen, to ensure maximum effectiveness.
By addressing the excess moisture generated from cooking and showering, you can significantly reduce the overall humidity in your camper. This will create a more comfortable and healthier living environment.
In the next section, we’ll discuss how to store items properly to prevent moisture buildup, ensuring the longevity of your camper.
Store items properly to prevent moisture buildup
Properly storing items in your RV is essential for preventing moisture buildup and maintaining a dry and fresh environment. By implementing proper storage techniques, you can effectively minimize the risk of moisture-related issues in your camper.
To begin, it’s crucial to organize your belongings in a way that maximizes airflow and minimizes the potential for condensation. Avoid cramming items together and ensure that there’s sufficient space between them. Additionally, consider using moisture-absorbing products such as desiccant packs or moisture absorbers to help control humidity levels inside your RV.
When storing items, it’s important to keep them off the floor. Utilize shelves, hooks, or hanging storage solutions to elevate your belongings and allow air to circulate freely. This prevents moisture from accumulating underneath items and causing dampness.
Furthermore, be mindful of the types of materials you store in your RV. Avoid packing damp or wet items, as they can introduce excess moisture into the environment. Opt for breathable storage containers or bags that allow air to flow through, reducing the chances of moisture buildup.
By implementing these proper storage techniques and moisture prevention methods, you can create a dry and fresh environment in your RV. This will not only ensure the longevity of your camper but also provide a comfortable living space for your adventures.
In the next section, we’ll discuss how regularly inspecting and maintaining your camper can further prevent moisture issues.
Regularly inspect and maintain your camper to prevent moisture issues
Now that we’ve learned about the importance of storing items properly to prevent moisture buildup in our camper, let’s move on to the next step in maintaining a moisture-free environment. Regularly inspecting and maintaining your camper is essential to prevent moisture issues and ensure a comfortable living space during your travels.
To effectively keep moisture at bay, there are a few key areas to focus on:
-
Appliance Check: Regularly inspect and maintain all the appliances in your camper, such as the refrigerator, air conditioner, and dehumidifier. Make sure they’re functioning properly and free from any leaks or malfunctions that could contribute to excess moisture.
-
Ventilation: Adequate airflow is crucial in preventing moisture buildup. Clean and inspect all vents, making sure they’re clear of any debris or obstructions. Also, consider using vent covers to allow for ventilation even during inclement weather.
-
Mold Prevention: Mold growth can be a serious issue in campers. Regularly check for any signs of mold or mildew, especially in areas prone to moisture, such as the bathroom and kitchen. Clean and disinfect these areas regularly using appropriate products to prevent mold growth.
By following these maintenance practices and keeping a vigilant eye on your camper’s appliances and ventilation system, you can effectively prevent moisture issues and maintain a comfortable and mold-free living space.
Frequently Asked Questions
What are some common signs of moisture buildup in a camper?
Common signs of moisture buildup in a camper include condensation on windows, musty odors, damp or wet walls, and mold or mildew growth. These issues can be caused by factors such as poor ventilation, leaks in the roof or plumbing, or high humidity levels.
To prevent moisture buildup, it’s important to ensure proper ventilation by using exhaust fans or opening windows. Additionally, regularly inspecting and repairing any leaks can help keep your camper dry and free of moisture issues.
Can a camper be completely moisture-free even with proper maintenance?
Absolutely! While it’s difficult to achieve a completely moisture-free camper, proper maintenance can significantly reduce and manage moisture buildup. Think of it like trying to stay completely dry in a rainstorm – you may still get a little damp, but you can take steps to minimize the impact.
By implementing moisture prevention methods such as using dehumidifiers, sealing windows and doors, and regularly checking for leaks, you can create a drier and more comfortable environment. Additionally, a well-designed ventilation system can greatly enhance the effectiveness of moisture control in your camper.
Is it necessary to insulate the camper if it is only used during the summer?
Insulating a camper, even if it’s only used during the summer, can provide several benefits. Firstly, insulation helps regulate the temperature inside the camper, keeping it cooler during hot summer days and warmer during chilly nights.
Secondly, insulation acts as a barrier against moisture, preventing condensation and reducing the risk of mold and mildew growth.
Lastly, insulation can also improve energy efficiency by reducing the need for constant cooling or heating.
Overall, insulating your camper can offer comfort and protect it from potential moisture issues.
How often should the camper be inspected for potential moisture issues?
As seasoned campers, we know the importance of regularly checking our camper for potential moisture issues. To prevent camper moisture, it’s crucial to inspect it at least once every few months.
By doing so, we can identify any leaks or condensation build-up early on, preventing costly and extensive damage. Regular inspections allow us to address these issues promptly, ensuring a dry and comfortable camping experience every time.
Are there any specific types of dehumidifiers or moisture absorbers recommended for campers?
There are several dehumidifier options available for preventing moisture in campers. One popular option is a portable electric dehumidifier, which can be placed in the camper to remove excess moisture from the air.
Another option is moisture absorbers, such as silica gel packets or activated charcoal, which can be placed in closets, cabinets, and other small spaces to absorb moisture. These options can help to prevent mold and mildew growth, and keep the camper dry and comfortable.
Are the Methods for Stopping Moisture in Camper Effective for Keeping Condensation Out?
When it comes to keeping camper condensation at bay, there are various methods available. One effective approach is to ensure proper ventilation by opening windows or using vents. Additionally, utilizing dehumidifiers can help remove excess moisture from the air, preventing condensation build-up. Insulation is another crucial factor, as it helps maintain a consistent temperature inside, reducing the likelihood of condensation forming on surfaces. Regularly checking and addressing any leaks or sources of moisture can further contribute to keeping condensation out of your camper.
Can Keeping Mice Out of My Camper Help Prevent Moisture Build-Up?
Yes, keeping mice out camper can help prevent moisture build-up. Mice can bring in moisture from the outside, as well as create their own moisture through urine and feces. By sealing up entry points and using deterrents, you can keep mice out and reduce the risk of moisture issues in your camper.
Conclusion
In conclusion, by following these practical steps, we can effectively prevent moisture issues in our camper.
Improving ventilation, using moisture-absorbing materials, and insulating the camper properly are all essential.
Additionally, regularly inspecting and maintaining the camper will ensure long-term prevention.
Did you know that according to a study by the National Association of Home Builders, 70% of water damage in homes is caused by moisture issues?
By taking these preventive measures, we can avoid costly repairs and enjoy a comfortable, moisture-free camping experience.


