You may be thinking, “Why should I learn how to ignite the pilot light on my RV’s water heater? Isn’t that something best left to the professionals?”
While it’s true that maintaining and repairing your camper can sometimes be best left to the experts, lighting the pilot light on your water heater is actually a simple task that any camper owner can handle. In fact, knowing how to light the pilot light can save you time and money, especially when you’re out on the road and don’t have immediate access to professional help.
In this article, I will guide you through the step-by-step process of lighting the pilot light on your camper water heater. With a few basic tools and a little bit of knowledge, you’ll be able to ensure a hot and comfortable shower no matter where your camping adventures take you.
Key Takeaways
- Lighting the pilot light on a camper water heater is a simple task that any owner can handle.
- Gathering necessary tools and supplies is important for lighting the pilot light (long lighter or matchstick, flashlight, small adjustable wrench).
- Locating the pilot light and gas control knob is crucial for troubleshooting (check owner’s manual, remove access panels).
- Safety precautions should be taken, such as clearing the area of flammable materials and having a fire extinguisher nearby.
Familiarize Yourself with the Water Heater
Get ready to dive into the world of camper water heaters and familiarize yourself with the ins and outs of this essential component. When it comes to camper water heaters, familiarity brings many benefits. Knowing how your water heater works and being able to troubleshoot common issues will save you time and money in the long run.
To get started, let’s take a closer look at how a camper water heater operates. These heaters typically use propane gas to heat the water, ensuring you have hot water for showers, washing dishes, and other daily activities. Understanding the basic mechanics of the water heater, such as the pilot light and the gas control valve, will help you troubleshoot any problems that may arise.
One troubleshooting tip is to check the pilot light. If the pilot light goes out, the water heater won’t work. This can happen due to a variety of reasons, such as a gust of wind or a malfunctioning thermocouple. By knowing how to relight the pilot light, you can quickly address this issue and get your water heater back up and running.
Now that you’re familiar with the water heater and its troubleshooting tips, it’s time to gather the necessary tools and supplies for the next steps.
Gather the Necessary Tools and Supplies
Make sure you have all the tools and supplies needed to ignite the flame in your camper’s hot water system.
When it comes to camper water heater maintenance, it’s important to be prepared for troubleshooting common issues that may arise. To properly light the pilot light on your camper water heater, you’ll need a few essential items.
First, grab a long lighter or matchstick that can reach the pilot light area. This will allow you to safely ignite the flame without getting too close to the burner.
Additionally, have a flashlight handy to provide adequate lighting in the water heater compartment. A small adjustable wrench will also come in handy for adjusting the gas control knob if necessary.
These tools and supplies are essential for a successful pilot light ignition and will ensure that you can troubleshoot any common issues that may arise.
With all the necessary items in hand, you’re ready to move on to the next step and locate the pilot light and gas control knob.
Locate the Pilot Light and Gas Control Knob
To successfully ignite the flame in your camper’s hot water system, you’ll be amazed at how easily you can locate the hidden pilot light and effortlessly adjust the gas control knob.
As part of regular camper water heater maintenance, it’s important to familiarize yourself with the location of the pilot light and gas control knob. Here are some steps to help you troubleshoot pilot light issues:
-
Start by checking the owner’s manual or manufacturer’s website for specific instructions on locating the pilot light and gas control knob for your particular camper water heater model.
-
Once you’ve located the water heater, remove any access panels or covers to gain access to the pilot light assembly.
-
Look for a small metal tube that extends from the gas control valve. This is where the pilot light flame will ignite.
-
Next, locate the gas control knob. It’s usually labeled and can be found near the bottom of the water heater.
-
Gently turn the gas control knob to the ‘pilot’ position and press down. This’ll allow gas to flow to the pilot light assembly.
By following these steps, you’ll be able to easily locate the pilot light and gas control knob, ensuring a well-maintained camper water heater. Now that you’ve successfully located the pilot light, it’s time to learn how to turn off the gas supply.
Turn off the Gas Supply
Now, it’s time for you to shut off the gas supply to ensure the safety and maintenance of your camper’s hot water system. Turning off the gas safely is a crucial step in the process of lighting the pilot light on your camper’s water heater. By following these steps, you can avoid any potential accidents or issues that may arise.
To begin, locate the gas control knob on your water heater. This knob is typically found near the bottom of the unit and is labeled with "On," "Off," and "Pilot." Rotate the knob to the "Off" position to cut off the gas supply to the water heater.
To further ensure that the gas supply is completely turned off, it is recommended to check the gas valve located near the water heater. This valve should be perpendicular to the gas line when it is fully closed. This step is important for troubleshooting common issues with the pilot light, such as a weak or inconsistent flame.
By safely turning off the gas supply, you are taking the necessary precautions to avoid any potential hazards. Now that the gas supply is shut off, we can move on to preparing the water heater for lighting in the next section.
Prepare the Water Heater for Lighting
Once you’ve ensured the gas supply is turned off, it’s time to get the water heater ready for ignition. Before lighting the pilot light on your camper water heater, it’s important to take a few precautions and familiarize yourself with some common mistakes that can occur.
First and foremost, make sure the water heater is completely cool before attempting to relight the pilot light. This will prevent any accidental fires or injuries. Additionally, double-check that the water heater’s control knob is set to the ‘off’ position.
Next, inspect the area around the water heater for any signs of gas leaks. Look for a strong odor similar to rotten eggs, as this could indicate a gas leak. If you suspect a leak, don’t proceed with lighting the pilot light and contact a professional immediately.
When attempting to light the pilot light, be sure to follow the manufacturer’s instructions carefully. Avoid using excessive force when turning the control knob to the pilot position, as this can cause damage to the ignition system.
If you’re experiencing trouble lighting the pilot light, there are a few troubleshooting tips you can try. Ensure that the gas supply valve is fully open and that there’s sufficient gas pressure. Additionally, check for any obstructions or debris in the pilot light assembly that may be preventing ignition.
With the water heater properly prepared, it’s time to move on to the next step: lighting the match or lighter.
Light the Match or Lighter
After preparing the water heater for lighting, it’s time to move on to the next step: lighting the match or lighter.
This is a crucial step in the process, as it requires a specific lighting technique to ensure the pilot light ignites successfully.
Before proceeding, it’s important to remember that safety should always be the top priority. Ensure that the area around the water heater is clear of any flammable materials and that there aren’t any gas leaks present. Additionally, make sure to have a fire extinguisher nearby, just in case.
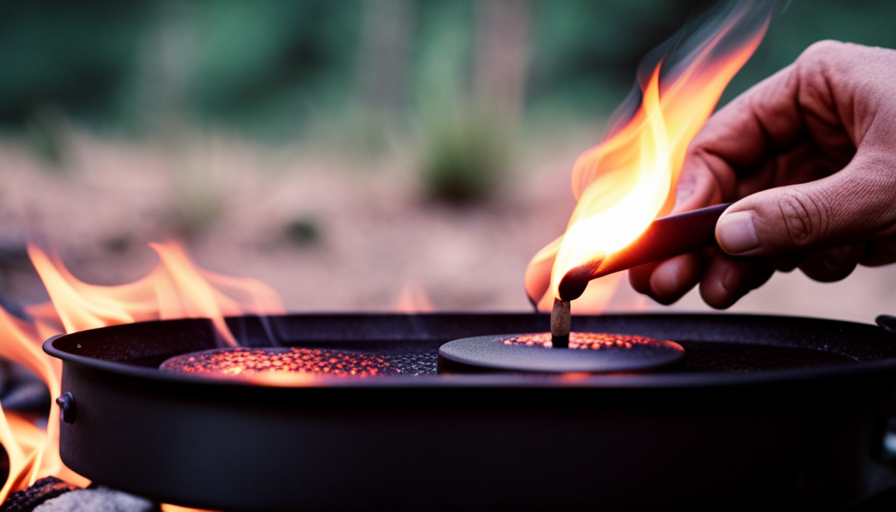
To begin, hold the match or lighter in one hand and carefully bring it towards the pilot light. Keep a firm grip on the match or lighter to prevent any accidents. Slowly move the flame towards the pilot light, making sure it’s close enough for ignition but not too close to cause any damage.
Once the flame is in the correct position, carefully ignite the pilot light by holding the flame near the opening. Be patient and observe closely for any signs of ignition. If the pilot light doesn’t ignite within a few seconds, you may need to repeat the process again.
Now that the match or lighter has been successfully used to ignite the pilot light, we can move on to the next step: holding the flame to the pilot light and ensuring it stays lit.
Hold the Flame to the Pilot Light
To maintain a steady flame, keep the match or lighter close to the burner. This is crucial when lighting the pilot light on a camper water heater.
When troubleshooting pilot light issues, it’s important to understand the common reasons for pilot light failure. One of the main culprits is a dirty or clogged pilot orifice. If the orifice becomes blocked, the flame won’t ignite or stay lit. In this case, using a small wire brush or compressed air to clean the orifice can often solve the problem.
Another common issue is a faulty thermocouple. The thermocouple is a safety device that senses whether the pilot light is lit and allows gas to flow to the burner. If the thermocouple is malfunctioning, it may not send the correct signal to keep the gas flowing, causing the pilot light to go out. In such cases, replacing the thermocouple is necessary.
Now that we’ve covered how to troubleshoot pilot light issues, let’s move on to the next step: keeping the pilot light lit.
Keep the Pilot Light Lit
Keeping the flame alive is like holding onto a tiny flickering star in the night sky. When it comes to camper water heaters, it’s crucial to keep the pilot light lit for a steady supply of hot water. To prevent the pilot light from going out, there are several troubleshooting techniques to keep in mind.
-
Check for drafts: Ensure that there aren’t any drafts near the water heater by sealing any gaps or cracks. Drafts can extinguish the pilot light, so it’s important to eliminate them.
-
Clean the pilot assembly: Over time, the pilot assembly can accumulate dust and debris, which can hinder the flame’s stability. Regularly clean the assembly using compressed air or a soft brush to maintain an efficient pilot light.
-
Verify the gas supply: Low gas pressure can cause the pilot light to go out. Check the gas supply valve to ensure it’s fully open and providing an adequate flow of gas.
Transitioning into the next section about turning on the gas supply, it’s crucial to ensure a steady flow of gas to keep the pilot light lit.
Turn on the Gas Supply
Make sure you ignite the flame by turning on the gas supply, allowing the steady flow of fuel to warm your camper’s water. Before you do so, it’s important to ensure gas supply safety.
Start by checking that the gas valve is in the closed position. This’ll prevent any gas from escaping while you work on the water heater.
Next, inspect the gas line for any leaks or damage. A simple way to do this is by applying a mixture of soapy water to the connections and observing for any bubbles. If you notice any bubbles forming, there may be a leak that needs to be addressed before proceeding.
Once you have confirmed the gas supply is safe, you can proceed to turn on the gas supply. Locate the gas valve and turn it to the open position. You should hear the sound of gas flowing through the line. If you don’t hear any gas flowing, double-check that the gas valve is fully open and that the gas supply is connected properly.
Troubleshooting common issues with the gas supply can include checking for clogs or obstructions in the gas line, ensuring the propane tank has enough fuel, and inspecting the gas regulator for any issues. If you encounter any problems, consult the manufacturer’s instructions or seek professional assistance.
With the gas supply turned on, you’re now ready to test the water heater.
Test the Water Heater
Now that the gas supply’s safely turned on, it’s time to give the water heater a test run.
Before we dive into troubleshooting common issues, it’s important to understand the importance of regular maintenance for your camper water heater. Neglecting maintenance can lead to inefficiency, reduced lifespan, and potential safety hazards.
To ensure your water heater’s operating optimally, follow these steps:
-
Check the temperature setting: Verify that the thermostat’s set to the desired temperature. Adjust it if necessary.
-
Inspect the vent system: Ensure that the vent pipe’s free from obstructions and properly connected to the water heater. Any blockages can affect the performance of the heater.
-
Test the pressure relief valve: Lift the lever on the valve to release some water. This action verifies that the valve’s functioning correctly and prevents excessive pressure buildup.
Troubleshooting common issues:
-
No hot water: If the water doesn’t heat up, check the pilot light and gas supply. Ensure the pilot flame’s lit and the gas valve’s open.
-
Insufficient hot water: A possible cause is sediment buildup inside the tank. Regularly flushing the tank can prevent this issue.
Remember, regular maintenance and troubleshooting are vital for keeping your camper water heater in top shape. By following these steps, you can enjoy a reliable and efficient source of hot water during your camping adventures.
Frequently Asked Questions
How often should I light the pilot light on my camper water heater?
Relighting the pilot light on your camper water heater depends on a few factors, such as the frequency of use and the type of fuel source. Generally, it’s recommended to check and relight the pilot light at the beginning of each camping season or after a long period of inactivity. The best method to light the pilot light is to follow the manufacturer’s instructions carefully, ensuring a safe and efficient ignition.
Can I use any type of match or lighter to light the pilot light?
Yes, you can use any type of match or lighter to light the pilot light on your camper water heater. However, it’s important to ensure that the match or lighter is long enough to reach the pilot light safely.
Additionally, always exercise caution when working with open flames and flammable materials. It’s recommended to refer to the manufacturer’s instructions for proper maintenance and troubleshooting of pilot light issues in camper water heaters.
What should I do if the pilot light keeps going out after I light it?
If the pilot light keeps going out after I light it, there are several troubleshooting steps I can take. Common causes of a pilot light going out include a dirty or faulty thermocouple, a blocked or insufficient gas supply, or a malfunctioning gas valve.
To address these issues, I would first ensure that the thermocouple is clean and properly aligned. Then, I would check the gas supply and make sure it’s sufficient and not blocked. If the problem persists, it may be necessary to have a professional inspect and repair the gas valve.
Is it safe to light the pilot light if I smell gas?
Is it safe to light the pilot light if I smell gas? Absolutely not.
If you detect the odor of gas, it’s crucial to prioritize your safety and take immediate action. Igniting the pilot light in the presence of a gas smell can lead to a dangerous situation, such as a fire or explosion. It’s highly recommended to seek professional help to assess and fix the issue before attempting to relight the pilot light.
Are there any additional safety precautions I should take when lighting the pilot light?
When lighting the pilot light on a camper water heater, it’s important to follow additional safety measures and best practices.
First, ensure that there isn’t any gas smell or leakage in the area.
Next, make sure to turn off the main gas valve before attempting to light the pilot light.
Additionally, use a long-handled lighter or match to avoid any potential burns.
Lastly, carefully read and follow the manufacturer’s instructions for your specific camper water heater model.
Conclusion
In conclusion, lighting the pilot light on a camper water heater is a necessary skill for any avid camper. By familiarizing yourself with the water heater and following the steps outlined in this article, you can ensure a successful ignition.
Remember to gather the necessary tools and supplies, turn off the gas supply, and hold the flame to the pilot light. With practice, you’ll become a master at keeping the pilot light lit, allowing you to enjoy hot water while on your camping adventures.

