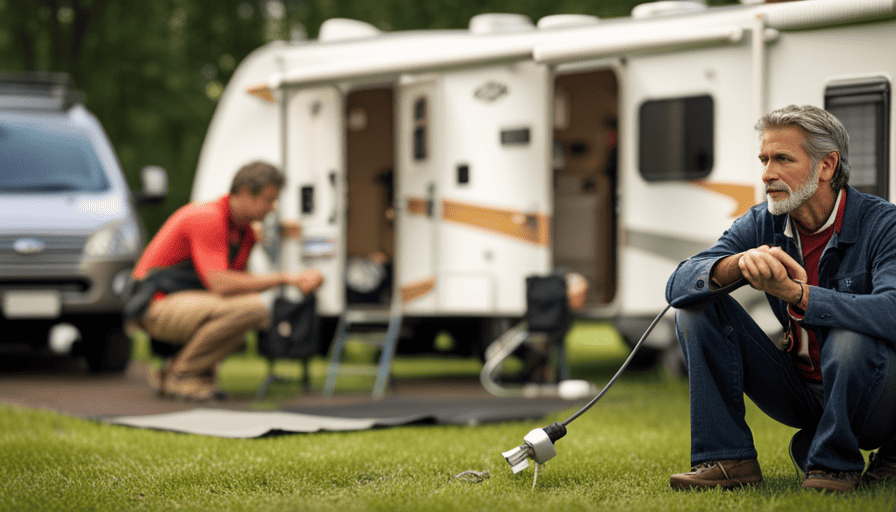
Think of your camper as a vessel, prepared to embark on a magnificent quest. However, before you set off on your expedition, it’s essential to verify that your vessel is securely fastened to a reliable anchor.
In this case, your anchor is your house, providing the necessary power and resources to keep your camper running smoothly. So, how do you hook up a camper to a house?
In this article, I will guide you through the step-by-step process, equipping you with the knowledge and tools to make this connection seamless. From assessing power requirements to connecting electrical and water systems, I will provide you with all the technical details you need.
So, grab your toolkit and let’s get started on this exciting journey of hooking up your camper to your house!
Key Takeaways
- Assess power usage and gather necessary tools and equipment
- Connect electrical and water systems properly
- Ensure proper grounding and safety measures throughout the process
- Follow safety guidelines for a smooth and worry-free camping experience
Gather the Necessary Equipment
Now you’re ready to gather all the equipment you’ll need to hook up your camper to your house and start your incredible adventure!
The first step is to assess the power usage of your camper. This will help you determine the type and amount of equipment you’ll need. Start by checking the power requirements of all the appliances and devices in your camper. Make a list of everything that will need electricity and note down their voltage and amperage ratings. This will give you an idea of how much power you’ll need to provide.
Next, gather the necessary tools for the job. You’ll need a heavy-duty extension cord that is suitable for outdoor use. Make sure it is long enough to reach from your house to your camper. Additionally, you may need a power adapter or converter if your camper has different electrical requirements than your house. It’s also a good idea to have a surge protector to protect your camper’s electrical system from power surges.
Assessing the power requirements and gathering the necessary tools are crucial steps in hooking up your camper to your house. Once you have all the equipment you need, you can move on to the next step of the process: assessing the power requirements. This will ensure that your camper has the necessary power supply to run all your appliances and devices smoothly.
Assess the Power Requirements
First, figure out the electrical needs for your camper when connecting it to your home. To do this, you need to calculate the power consumption of your camper. Start by making a list of all the electrical appliances and devices that you plan to use while hooked up to your house. Note down their wattage or amperage ratings. Add up the total wattage or amperage to determine the power requirements for your camper.
Once you have calculated the power consumption, the next step is to determine the power supply capacity of your home. You need to ensure that your home’s electrical system can handle the additional load from the camper. Check the circuit breaker panel to find out the available amperage. Make sure that it is sufficient to meet the power requirements of your camper. If not, you may need to upgrade your electrical system or consider using a generator.
With the power requirements and supply capacity assessed, you can now move on to locating the hookup points for your camper. This will involve identifying the electrical outlets or connections in your home that are suitable for connecting your camper.
Locate the Hookup Points
One possible concern you might have is finding suitable electrical outlets or connections in your home to connect your camper. In order to locate the hookup points, you’ll need to identify potential obstacles and ensure proper grounding.
Begin by examining the exterior of your house for any existing electrical outlets or connections that could be used for the camper hookup. Look for outlets with a compatible voltage and amperage rating. Keep in mind that the hookup points should be located in close proximity to where you plan to park your camper.
If there are no suitable outlets available, you may need to install new ones. Consult with a licensed electrician to determine the best location and to ensure that the installation meets all safety codes and regulations.
Once you have identified the hookup points and ensured proper grounding, you can proceed to the next step of connecting the electrical system of your camper to your house. This’ll allow you to power your camper using the electricity from your home.
Connect the Electrical System
To power your camper using the electricity from your home, you’ll want to make sure you connect the electrical system properly. Here are three important steps to consider:
-
Assess electrical capacity: Before connecting your camper to the house, it’s crucial to assess your home’s electrical capacity. Check with a qualified electrician to ensure that your electrical panel can handle the additional load. This step is crucial to prevent overloading the system and causing potential hazards.
-
Choose appropriate wiring: Once you’ve determined that your electrical capacity can handle the camper’s electrical needs, it’s important to choose the appropriate wiring. Use a heavy-duty extension cord or have a dedicated RV outlet installed by a professional electrician. This will ensure that the electrical connection is safe and reliable.
-
Install a transfer switch: To ensure the safety of your camper and prevent backfeeding, it’s highly recommended to install a transfer switch. This device allows you to safely switch between the camper’s electrical system and the house’s power supply. A transfer switch will provide proper grounding and protect both your camper and your home.
With the electrical system properly connected, you can now move on to connecting the water system. This will allow you to enjoy all the comforts of home while camping in your camper.
Connect the Water System
To connect the water system in my camper, I start by attaching the water hose to the camper’s water inlet. Then, I connect the other end of the hose to the water source, ensuring a secure and tight connection.
Once everything is connected, I test the water connection by turning on the faucet inside the camper and checking for a steady flow of water. I also carefully inspect the connections for any leaks and make sure to use a water pressure regulator to prevent any damage to the camper’s plumbing system.
Attach the water hose to the camper
Attach the water hose to the camper, making sure to secure it tightly to prevent any leaks; this connection is crucial as it allows an average of 60 gallons of water to flow into the camper per minute.
To ensure optimal water pressure, follow these steps:
- Begin by inspecting the hose attachment on the camper, ensuring it’s clean and free from debris.
- Align the threads on the water hose with the camper’s attachment, making sure they’re properly aligned.
- Rotate the hose clockwise until it’s tightly secured, ensuring a watertight connection.
- Test the connection by turning on the water supply and checking for any leaks or drips.
Once the connection is secure, move on to connecting the other end of the hose to the water source.
By following these steps, you’ll have successfully attached the water hose to the camper, providing a reliable water supply for your camping adventure.
Now, let’s move on to connecting the other end to the water source.
Connect the other end to the water source
With a firm grip, I slide the hose onto the faucet’s nozzle, ensuring a snug fit as the water source comes to life.
Using a water filter is crucial to prevent any contaminants from entering the camper’s water system. Before connecting the hose, I attach the water filter to the end of the hose, ensuring that it’s securely in place.
Choosing the right water source is important to ensure a clean and safe water supply. I make sure to connect the hose to a potable water source, such as a dedicated RV hookup or a well-maintained municipal water supply.
Once the hose is connected, I turn on the water and check for any leaks or irregularities in the water flow.
With the water connection established, it’s time to test the water quality and pressure inside the camper.
Test the water connection
Now that the water hose is securely connected to the camper, it’s important to test the water connection to ensure proper functionality. First, turn on the water supply at the house and gradually increase the water pressure. Keep an eye on the water connection stability, making sure there aren’t any leaks or water spurting out.
If the connection is stable and the water pressure is adequate, proceed to the next step. To enjoy this process, focus on the following sub-lists:
- Enjoy the satisfaction of a properly connected water supply.
- Appreciate the convenience of having a stable water flow to the camper.
It’s crucial to ensure that the water pressure is consistent and that there aren’t any leaks before moving on to the next step. A steady flow of water and a secure connection will ensure a hassle-free camping experience. Speaking of which, the next section will discuss how to check for leaks in the camper’s water system.
Check for leaks
Once the water connection is secure, you’ll want to check for any leaks to ensure a worry-free camping experience. Start by turning on the water supply and carefully inspect all the connections, joints, and fittings for any signs of water leakage.
Pay close attention to the hose connections, as they’re often the most vulnerable areas for leaks. Use a flashlight if necessary to thoroughly examine the entire system. If you notice any drips or water seeping out, tighten the connections or replace faulty parts immediately.
Preventing leaks is crucial to avoid water damage and potential flooding inside your camper. Once you’ve confirmed that there are no leaks, you can proceed to the next step of using a water pressure regulator to protect your camper’s plumbing system.
Use a water pressure regulator
To ensure the safety of your plumbing system, protect it from high water pressure by using a water pressure regulator. A water pressure regulator is a crucial component when hooking up a camper to a house.
Here are some pros and cons of using a water pressure regulator:
-
Pros:
- Prevents damage to your plumbing system from high water pressure.
- Extends the lifespan of your pipes, faucets, and appliances.
- Ensures a consistent and safe water flow throughout your camper.
- Easy to install and adjust according to your needs.
-
Cons:
- Requires periodic maintenance and inspections to ensure proper functioning.
- May restrict water flow if set at a low pressure.
- Can be an additional expense in the setup process.
- Different regulators may have varying levels of accuracy and reliability.
When choosing the right water pressure regulator for your camper, consider factors such as the desired pressure range, compatibility with your plumbing system, and the regulator’s quality and reputation.
Now, let’s move on to the next section and connect the sewer system.
Connect the Sewer System
First, you’ll need to connect the camper’s sewer system to your house. Can you imagine the convenience of easily disposing of waste without any hassle?
To start, make sure you have a sewer hose that’s long enough to reach from your camper to the house’s sewer hookup. Attach one end of the hose securely to the camper’s sewer outlet, ensuring a tight seal to prevent any leaks.
Next, locate the sewer hookup on your house, which is usually found near the main water hookup. Remove the cap from the sewer hookup and insert the other end of the sewer hose into it, making sure it fits securely. This connection will allow the waste from your camper to flow directly into your house’s sewer system. It’s important to note that some campers may require adapters to fit different sewer hose sizes.
Once the connection is secure, you can proceed to the next step of leveling and stabilizing the camper.
Now that the sewer system is connected, it’s time to level and stabilize the camper.
Level and Stabilize the Camper
Now that you’ve connected the sewer system, it’s time to make sure your camper is level and stable for a comfortable camping experience. Leveling your camper is essential to prevent any discomfort while inside and to ensure that appliances, such as the refrigerator, work properly.
Here are three important leveling techniques to follow:
-
Use leveling blocks: Place leveling blocks under the tires on the low side of the camper. Gradually drive the camper onto the blocks until it is level. This method allows you to adjust the height easily.
-
Check the bubble level: Most campers have a built-in bubble level. Use this to determine if the camper is level from side to side and front to back. Adjust the leveling blocks accordingly.
-
Stabilize the camper: Once the camper is level, it’s time to stabilize it. Extend the camper’s stabilizing jacks and firmly place them on the ground. These jacks will prevent the camper from rocking or swaying while you’re inside.
By following these leveling techniques and securing the camper with stabilizing jacks, you’ll ensure a comfortable and stable camping experience.
Now, let’s move on to the next step: hitching the camper to the vehicle.
Hitch the Camper to the Vehicle
Once you’ve secured your camper on level ground, it’s time to connect it to your vehicle, ensuring a smooth and safe journey ahead.
Hitching the camper to the vehicle requires careful attention to hitching safety and securing the connection. Start by aligning the hitch ball on your vehicle with the coupler on the camper. Make sure the coupler is in the fully open position. Lower the coupler onto the hitch ball and ensure it’s seated properly. Insert the hitch pin through the hole in the coupler and secure it with a clip or lock.
Next, attach the safety chains from the camper to the vehicle. Cross the chains under the hitch and connect them to the appropriate points on the vehicle. This provides an extra layer of security in case the hitch fails.
After securing the chains, plug the electrical connector from the camper into the corresponding outlet on the vehicle. This’ll enable the camper’s lights, brakes, and turn signals to function properly.
Visually inspect all the connections to ensure they’re secure and tight. Give the camper a gentle tug to confirm that it’s properly hitched to the vehicle.
With the camper securely hitched to the vehicle, you’re now ready to move on to the next step: testing and checking for safety before hitting the road.
Test and Check for Safety
Ensure your journey is smooth and worry-free by giving your camper and vehicle a thorough safety test before hitting the road. Testing the electrical system is essential to ensure everything’s working properly. Start by checking the connection between the camper and the vehicle. Make sure the electrical plug is securely attached and there aren’t any loose wires. Test the brake lights, turn signals, and running lights to ensure they’re functioning correctly.
It’s also important to check the water pressure in your camper. Connect the water hose to the camper’s water inlet and turn on the water supply. Check for any leaks or abnormal water pressure. If everything looks good, you’re ready to enjoy your camping experience without any concerns. Remember to always prioritize safety and perform regular maintenance checks to ensure a hassle-free trip.
Transitioning into the subsequent section about ‘enjoy your camping experience,’ it’s important to have peace of mind knowing that you’ve taken the necessary precautions to ensure a safe and enjoyable journey.
Enjoy Your Camping Experience
When it comes to enjoying your camping experience, there are a few key points to keep in mind.
First and foremost, it’s important to properly set up your campsite, ensuring that you have a level and stable surface for your camper.
Once set up, take the time to relax and enjoy the outdoors, taking in the sights and sounds of nature.
Remember to always follow safety guidelines, such as keeping a safe distance from campfires and using caution when exploring unfamiliar areas.
Lastly, when it’s time to leave, make sure to disconnect your camper properly, ensuring that all electrical and water connections are safely disconnected before hitting the road.
Set up your campsite
To fully immerse yourself in the camping experience, it’s essential to set up your campsite with all the necessary amenities.
When it comes to camping essentials, one of the first decisions you need to make is whether you’ll be using a tent or a camper. Tents offer a more traditional camping experience, allowing you to feel closer to nature. On the other hand, campers provide more comfort and convenience with their built-in sleeping quarters, kitchenette, and bathroom facilities.
Once you’ve made your choice, find a level and clear spot to set up your tent or park your camper. Make sure to have a sturdy and waterproof tent, or ensure that your camper is properly leveled and connected to utilities.
Once your campsite is set up, you can relax and enjoy the outdoors, surrounded by the beauty of nature.
Relax and enjoy the outdoors
Kick back, unwind, and savor the great outdoors while basking in the tranquility of nature. There’s nothing quite like the feeling of relaxation that comes with camping.
To enhance your outdoor experience, try campfire cooking. Gather some firewood, start a cozy fire, and cook up a delicious meal right at your campsite. Whether you prefer roasting hot dogs or grilling burgers, campfire cooking adds a special touch to your camping adventure. It’s a great way to bond with family and friends while enjoying the beautiful scenery around you.
Additionally, make sure you have the right camping gear recommendations. From a sturdy tent to comfortable sleeping bags, having the right equipment can make all the difference.
So, kick back, enjoy the outdoors, and remember to follow safety guidelines to ensure a memorable camping experience.
Follow safety guidelines
Make sure you’re well-prepared and follow safety guidelines for a worry-free and memorable camping experience. When hooking up a camper to a house, it’s important to prioritize electricity safety and water pressure control.
Firstly, ensure that your electrical connection is compatible with your camper’s power requirements. Use a properly rated extension cord and avoid overloading circuits. Before plugging in, switch off the breaker to prevent any power surges.
Additionally, always use a pressure regulator to control the water pressure coming into your camper. This will prevent any damage to your plumbing system and ensure a steady flow of water.
By following these guidelines, you can enjoy a safe and comfortable camping trip.
Now, let’s discuss how to disconnect properly when leaving, to ensure a smooth transition.
Disconnect properly when leaving
When departing, it’s essential to ensure a seamless transition by disconnecting the camper properly. To do this, there are proper safety precautions and tips for maintaining camper connections that should be followed.
Firstly, before disconnecting any electrical connections, make sure to turn off all power sources and unplug any cords from the house. This will prevent any potential electrical hazards.
Secondly, ensure that all water and sewer connections are properly disconnected. Empty and clean the holding tanks before disconnecting the sewer hose, and turn off the water supply before detaching the hose.
Additionally, it’s crucial to properly secure all stabilizing equipment and retract any slide-outs or awnings before leaving. This will prevent any damage during transit.
Lastly, double-check all connections and ensure that everything is securely stowed away before hitting the road.
By following these proper safety precautions and tips for maintaining camper connections, you can ensure a safe and hassle-free departure from your house.
Frequently Asked Questions
Are there any specific safety precautions I need to take when connecting the camper to the house?
When connecting a camper to a house, it’s important to take specific safety precautions to ensure the electrical requirements are met.
First, make sure to use a properly rated extension cord that can handle the load.
Additionally, install a ground fault circuit interrupter (GFCI) to protect against electrical shocks.
It’s also recommended to have a licensed electrician inspect the electrical system to ensure it meets all safety standards.
These precautions will help ensure a safe and reliable connection between the camper and the house.
How do I determine the power requirements for my camper?
Determining the power requirements for my camper involves considering various factors. First, I need to assess the electrical appliances and systems onboard, such as air conditioning, refrigerator, and lighting.
Then, I should calculate the total power needed, taking into account the voltage and amperage requirements of each device.
Finally, I must choose the appropriate power source options, such as a generator, battery, or shore power connection, to meet the camper’s power demands efficiently.
What should I do if I can’t find the hookup points on my camper or house?
If you’re having trouble finding the hookup points on your camper or house, don’t worry, there are alternative hookup options available for camper troubleshooting.
One option is to use an adapter or extension cord to connect your camper to a standard electrical outlet.
Another option is to use a generator to provide power to your camper. Just make sure to follow safety guidelines and consult the manufacturer’s instructions for your specific camper model.
Is it possible to connect multiple campers to one house? If so, what are the additional steps?
Connecting multiple campers to one house is possible, but it requires careful consideration of the electrical capacity of the house.
The first step is to ensure that the house’s electrical system can handle the additional load. An electrician should be consulted to assess the capacity and make any necessary upgrades.
Once the electrical system is ready, a separate electrical panel can be installed for each camper, allowing for individual connections.
It’s crucial to follow local regulations and safety guidelines throughout the process.
Are there any specific maintenance tasks I should perform on the camper before connecting it to the house?
Before connecting my camper to the house, I ensure that I perform necessary maintenance tasks to ensure safety and proper functioning.
Firstly, I inspect the electrical connections and ensure they’re clean and in good condition. I check the power cord for any wear or damage and replace it if necessary.
Additionally, I clean and tighten all battery connections and inspect the fuses and circuit breakers.
These steps help ensure a smooth and secure connection when hooking up the camper to the house.
Are the Steps to Hook Up a Fifth Wheel Camper the Same as Hooking Up a Camper to a House?
When it comes to hooking up a fifth wheel camper, the steps involved differ from hooking up a camper to a house. While both processes involve connecting electrical and plumbing systems, a fifth wheel camper requires a special hitch to attach it to a truck bed, whereas a camper is typically hooked up using stabilizing jacks. Understanding these distinctions is essential to ensure a successful and secure connection for your fifth wheel camper.
Conclusion
In conclusion, hooking up a camper to a house requires the right equipment, careful assessment of power requirements, and proper connection of electrical and water systems. By following these steps and ensuring safety measures are in place, you can enjoy a seamless camping experience right in your own backyard.
For example, let’s say John and his family decided to hook up their camper to their house for a weekend getaway. With the right knowledge and equipment, they were able to connect their electrical and water systems, level and stabilize the camper, and hitch it to their vehicle, creating a comfortable and convenient camping experience.

