Connect with us

Beginners Guides

How To Get Rid Of Mice In A Camper

Published

on

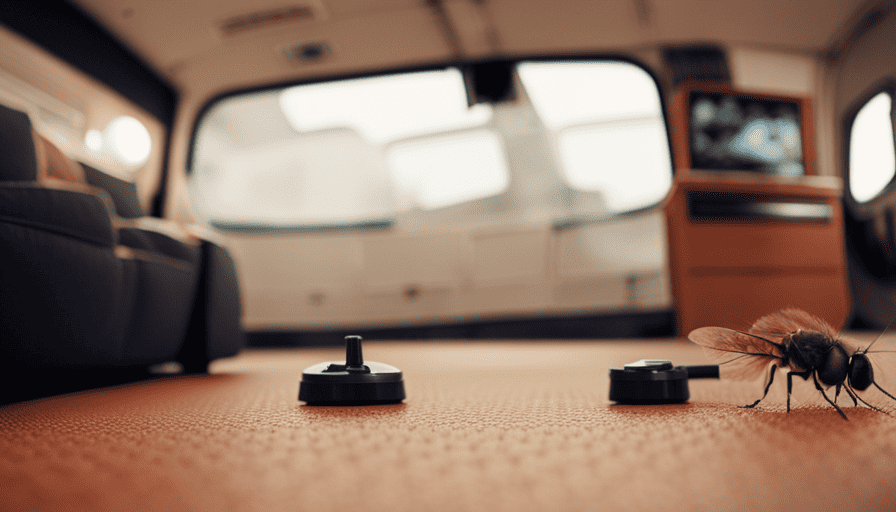
An image that showcases a camper interior with strategically placed mouse traps, sealed cracks, and a hanging pouch of peppermint leaves

Imagine this: you’re relishing a tranquil camping expedition in the comfort of your snug camper, encircled by the splendor of nature. However, out of nowhere, your calm getaway is disrupted by uninvited visitors – mice! These annoying pests have the potential to transform your blissful camping adventure into a distressing ordeal. But worry not, for I have just the solution for you.

In this article, I will share my tried and true methods for getting rid of mice in a camper. We’ll start by identifying and sealing entry points to ensure those little intruders can’t find their way in. Then, we’ll eliminate any food sources that may be attracting them. I’ll also show you how to use natural repellents and set traps effectively.

But it doesn’t stop there! I’ll guide you through cleaning and decluttering your camper, as well as calling in professional exterminators if needed. Finally, I’ll share some tips for preventing future infestations.

So, let’s dive in and make sure those mice never ruin your camping adventures again!

Key Takeaways

  • Identify and seal entry points to prevent mice from entering the camper
  • Remove food sources and properly store food to eliminate attractants for mice
  • Use natural repellents and traps with bait to deter and capture mice
  • Consider professional extermination services for thorough inspection, effective techniques, and valuable prevention advice

Identify and Seal Entry Points

Now it’s time to start hunting down those sneaky little mice and plugging up any holes or cracks they may be using to get inside your cozy camper.

Rodent proofing techniques are essential to keep these unwanted guests out. First, inspect your camper thoroughly, looking for any possible entry points. Common entry points for mice in campers include gaps around pipes and wiring, damaged screens or vents, and even small cracks in the walls or floors.

Advertisement

Once you’ve identified these areas, it’s time to seal them up. Use a combination of materials such as steel wool, caulk, and expanding foam to fill in any openings. Pay close attention to areas where different materials meet, as these are often vulnerable points. Remember, mice can squeeze through tiny openings, so be meticulous in your efforts.

By taking the time to seal off these entry points, you’ll greatly reduce the chances of mice finding their way inside your camper. Now that your camper is secure, let’s move on to the next step: removing food sources.

Remove Food Sources

To effectively eliminate mice in a camper, it’s crucial to remove any food sources that may attract them. Mice are opportunistic creatures and will be drawn to any available food. Here are some steps you can take to remove food sources and discourage mice from entering your camper:

  • Proper waste disposal: Make sure to dispose of garbage promptly and properly. Store trash in sealed containers and dispose of it regularly to prevent mice from accessing food scraps.

  • Eliminating standing water: Mice need water to survive, so it’s essential to eliminate any standing water sources in or around your camper. Check for leaks, fix any plumbing issues, and ensure that there’s no stagnant water nearby.

  • Keep food stored securely: Store all food in airtight containers or in the refrigerator. Avoid leaving any food out on countertops or tables where mice can easily access it.

  • Clean up spills and crumbs: Regularly clean up any spills or crumbs that may attract mice. Use a vacuum or broom to remove any food particles from the floor and surfaces.

  • Seal food containers: Ensure that all food containers are properly sealed to prevent mice from chewing through them.

By following these steps and removing food sources, you can significantly reduce the likelihood of mice infestation in your camper.

In the next section, we’ll discuss natural repellents to further deter these pests.

Advertisement

Use Natural Repellents

One great way to keep those pesky critters away from your camper is by using natural repellents. DIY mouse deterrents are a cost-effective and safe option to repel mice.

There are several natural ways to repel mice that you can try. One effective method is to use peppermint oil. Mice are repelled by the strong scent of peppermint, so simply soak cotton balls in peppermint oil and place them around your camper.

Another natural repellent is vinegar. Mix equal parts of vinegar and water in a spray bottle and spray it around areas where mice are likely to enter, such as doors and windows. The strong smell will deter them from coming inside.

Additionally, cloves and cayenne pepper are also known to repel mice. Sprinkle these spices around your camper to create a barrier that mice will avoid.

By using these natural repellents, you can create an inhospitable environment for mice and keep them away from your camper.

Advertisement

Now, let’s move on to the next step: setting traps.

Set Traps

Before we proceed, it’s important to address the issue of trapping those pesky critters in your camper. Setting traps is a highly effective method to get rid of mice and prevent further infestations.

When it comes to bait selection, opt for something that’s highly appealing to mice, such as peanut butter, chocolate, or dried fruit. These baits have a strong scent that’ll attract the mice and increase the chances of trapping them.

Proper trap placement is crucial for success. Place the traps in areas where mice are commonly seen, such as near food storage areas, under sinks, or along walls. Make sure to set the traps perpendicular to the wall, as mice typically run along walls. Additionally, place the traps in secluded areas to avoid startling the mice and reducing their likelihood of approaching the trap.

Once you’ve successfully trapped the mice, it’s important to clean and declutter the camper to prevent future infestations. By removing any potential food sources, such as crumbs or open food containers, you can discourage mice from returning to your camper. Additionally, decluttering the camper will eliminate hiding spots for mice, making it more difficult for them to establish a presence.

Advertisement

Clean and Declutter the Camper

Cleaning and decluttering your camper is essential for keeping those pesky critters away. Not only will a clean and organized space make it less inviting for mice to make a home, but it’ll also help you identify and eliminate any potential hiding spots.

Here are some organizing essentials and cleaning hacks to help you in your battle against mice:

  1. Start by removing all unnecessary clutter from your camper. Mice love to hide in piles of clothes, stacks of paper, and other cluttered areas. Keep your belongings organized in storage bins or drawers to minimize hiding spots.

  2. Vacuum and mop regularly to eliminate any food crumbs or spills that might attract mice. Don’t forget to clean under and behind furniture, as well as inside cabinets and drawers.

  3. Seal up any cracks or holes in your camper. Mice can squeeze through tiny openings, so it’s important to inspect your camper thoroughly and use caulk or steel wool to seal any entry points.

  4. Use natural deterrents such as peppermint oil or dryer sheets to repel mice. These scents are unpleasant to them and can help keep them away.

By following these cleaning and organizing tips, you’ll create an environment that’s less appealing to mice.

In the next section, we’ll discuss how to use ultrasonic devices to further deter these unwanted guests.

Use Ultrasonic Devices

To keep those unwanted critters away, try using ultrasonic devices in your camper. Ultrasonic devices are electronic devices that emit high-frequency sound waves that are inaudible to humans but can be disturbing to pests like mice. The idea behind these devices is that the sound waves will create an uncomfortable environment for the mice, causing them to leave the area.

Advertisement

But do ultrasonic devices really work? Well, the effectiveness of these devices in repelling mice is a topic of debate. Some people swear by them, claiming that they’ve successfully kept mice away from their campers. Others, however, are skeptical and believe that these devices are nothing more than a gimmick.

The truth is, the effectiveness of ultrasonic devices can vary depending on the specific situation. Factors such as the size of the camper, the severity of the mouse infestation, and the layout of the space can all play a role in determining whether or not these devices will work.

If you’ve tried using ultrasonic devices and are still dealing with a mouse problem in your camper, it may be time to consider calling in professional exterminators. These experts have the knowledge and tools to effectively eliminate mice from your camper and prevent them from returning.

Call in Professional Exterminators

If all else fails, it’s time to bring in the experts and let professional exterminators take care of the persistent pests infiltrating your cozy camper. When it comes to getting rid of mice, calling in professional exterminators is a smart choice. Here are the benefits of professional extermination services:

  • Thorough Inspection: Professional exterminators are trained to conduct a comprehensive inspection of your camper to identify all the areas where mice might be hiding. This ensures that no corner is left unchecked and all potential entry points are sealed off.

  • Effective Treatment: Exterminators use specialized techniques and products that are highly effective in eliminating mice. They know the best methods to eradicate the current infestation and prevent future ones.

  • Safe and Environmentally Friendly: Professional extermination services prioritize the safety of your family and the environment. They use eco-friendly products and methods that are not harmful to humans or pets.

When it comes to cost-effective ways to prevent mouse infestations, professional exterminators can provide valuable advice. They can recommend sealing any gaps or cracks, keeping food properly stored, and maintaining cleanliness to discourage mice from returning.

Advertisement

By hiring professional exterminators, you can ensure a mice-free camper and have peace of mind. However, preventing future infestations is equally important. So, let’s explore some preventative measures to keep those pesky critters away for good.

Prevent Future Infestations

One interesting statistic to consider is that 90% of mouse infestations can be prevented by properly sealing entry points and keeping food stored in airtight containers. To keep mice out of your camper, it’s crucial to identify and seal any potential entry points. Mice can squeeze through tiny openings, so it’s important to inspect and seal gaps around windows, doors, vents, and pipes. Use steel wool or caulk to seal these openings and prevent mice from entering.

Another way to keep mice out is by eliminating their access to food. Mice are attracted to easily accessible food sources, so it’s important to store your food properly. Always store food in airtight containers made of glass or metal, as mice can easily chew through plastic or cardboard. Additionally, keep your camper clean and free of crumbs or spilled food, as these can also attract mice.

Signs of a mouse infestation include droppings, gnaw marks, and the presence of nesting materials. If you notice any of these signs, it’s important to take immediate action to prevent the infestation from spreading. By sealing entry points and properly storing food, you can significantly reduce the chances of a mouse infestation in your camper.

Moving on to the next section about storing food properly…

Advertisement

Store Food Properly

To prevent future infestations of mice in your camper, it’s important to take steps to eliminate their access to food. Proper food storage is essential in keeping these pesky rodents away. By storing your food properly, you can significantly reduce the chances of attracting mice into your camper.

One effective way to store food is by using airtight containers. These containers create a barrier that mice cannot penetrate, keeping your food safe and secure. Additionally, avoid leaving any food out in the open, as this will only entice mice to come inside. Instead, store all food items in sealed containers or in the refrigerator.

To provide a visual representation of these ideas, here is a table outlining proper food storage techniques:

Proper Food Storage Techniques
Use airtight containers
Store food in sealed containers or in the refrigerator
Avoid leaving food out in the open

By following these proper food storage techniques, you can greatly reduce the likelihood of attracting mice into your camper. To further protect your camper from infestations, it’s important to regularly inspect and maintain the camper. Transitioning into the subsequent section, let’s explore how to do just that.

Regularly Inspect and Maintain the Camper

Regularly inspecting and maintaining your camper is crucial for ensuring a pest-free and comfortable environment. Not only will it help keep mice away, but it will also extend the lifespan of your camper and prevent any potential damage. By following a few simple steps, you can effectively inspect your camper for mouse infestations and take necessary actions to get rid of them.

Advertisement

One of the first things you should do is to check for any holes or gaps in the exterior of your camper. Mice can squeeze through tiny openings, so make sure to seal off any potential entry points with caulk or steel wool.

Additionally, inspect the underside of your camper for signs of rodent activity, such as chew marks or droppings.

Inside the camper, pay close attention to the areas where food is stored or prepared. Clean up any crumbs or spills immediately and store food in airtight containers. Check cabinets, closets, and other hidden spaces for signs of mouse nests, such as shredded paper or insulation.

Regularly inspecting your camper and taking preventative measures will greatly reduce the chances of a mouse infestation. By sealing off entry points and maintaining a clean environment, you can enjoy your camper without the unwanted company of pests. Remember, early detection and proactive maintenance are key to keeping mice away from your camper.

Frequently Asked Questions

What are some signs that indicate a mouse infestation in a camper?

Some signs that indicate a mouse infestation in a camper include finding droppings, chewed wires or insulation, and gnaw marks on furniture or food containers. You may also notice a strong, unpleasant odor.

Advertisement

To prevent mice from entering a camper, seal any gaps or holes with steel wool or caulk, store food in airtight containers, and keep the camper clean and clutter-free. Regularly inspecting and maintaining the camper can help identify and address any potential entry points for mice.

Can mice chew through metal or plastic to gain entry into a camper?

Yes, mice can indeed chew through metal or plastic to gain entry into a camper. They have sharp teeth that can gnaw through various materials. To prevent this, it’s important to use mouse control methods and prevention techniques.

This includes sealing any gaps or cracks in the camper with metal mesh or caulk, storing food in airtight containers, and keeping the camper clean and clutter-free. By taking these steps, you can minimize the risk of mice entering your camper.

Is it safe to use chemical repellents in a camper to get rid of mice?

Using chemical repellents in a camper to get rid of mice may not be the safest option. Instead, I recommend exploring chemical-free alternatives and natural ways to deter mice. These methods are not only safer for you and your camper, but they’re also effective.

Consider using peppermint oil, which mice dislike, or placing cotton balls soaked in vinegar around the camper. Additionally, sealing any possible entry points and keeping the camper clean and free of food sources will help prevent mice from entering in the first place.

Advertisement

How long does it typically take for traps to catch a mouse?

Typically, it doesn’t take long for traps to triumph over tricky mice. Homemade mouse traps can be made using household items like cardboard tubes or buckets. These traps can be baited with cheese or peanut butter to entice the critters.

To prevent mice from entering your camper, seal any cracks or openings they may use as entry points. Additionally, keep food stored in airtight containers and maintain cleanliness to discourage their presence.

Are there any specific cleaning products that are effective in removing mouse droppings and urine from a camper?

To effectively remove mouse droppings and urine from a camper, I recommend using natural alternatives to chemical cleaning products. One effective technique is to mix equal parts vinegar and water in a spray bottle and thoroughly clean the affected areas. This solution not only removes the odor but also acts as a deterrent for mice.

Additionally, you can sprinkle peppermint oil or place cotton balls soaked in peppermint oil around the camper to prevent mice from entering.

Conclusion

In conclusion, getting rid of mice in a camper can be a frustrating experience, but with the right techniques, it’s absolutely possible. Here are the steps you can take:

Advertisement
  • Identify and seal entry points.
  • Remove food sources.
  • Use natural repellents.
  • Set traps.
  • Clean and declutter the camper.
  • Call in professional exterminators.
  • Take steps to prevent future infestations.

Remember to store food properly, regularly inspect and maintain the camper, and take proactive measures to keep mice at bay. With these solutions in place, you can enjoy a mouse-free camper experience.

Continue Reading
Advertisement

Beginners Guides

How To Ground A Camper

Published

on

By

An image capturing a serene campsite scene with a camper parked on level ground, showcasing the precise placement of leveling blocks, chocks, and stabilizing jacks, complemented by the surrounding landscape and a clear blue sky

During a camping excursion last summer, an unexpected thunderstorm emerged. The downpour and overhead flashes of lightning made me concerned for my camper’s safety. It was at this moment I understood the significance of properly grounding and shielding my camper against electrical surges.

Grounding a camper is crucial for the safety of both the vehicle and its occupants. It ensures that any electrical faults or surges are safely directed into the ground, reducing the risk of fire or electric shock. But where do you start? How do you properly ground a camper?

In this article, I will guide you through the step-by-step process of grounding your camper. From gathering the necessary tools and materials to connecting the grounding wire to the camper’s electrical system, I’ll provide detailed instructions to help you ensure a secure and effective grounding connection.

But it doesn’t stop there. I’ll also share tips on regular inspection and maintenance of the grounding system, and the benefits of using a surge protector. And if you ever find yourself in doubt, I’ll advise you to consult a professional for expert guidance.

So let’s dive in and learn how to ground your camper, ensuring a safe and worry-free camping experience.

Advertisement

Key Takeaways

  • Grounding a camper is crucial for safety and prevents electrical faults or surges.
  • Proper grounding diverts excess electrical current into the ground, reducing the risk of fire or electric shock.
  • Grounding provides stability and balance to the electrical system, preventing power surges and damage to sensitive equipment.
  • It reduces the risk of electrical fires by neutralizing potential faults.

Understand the Importance of Grounding

You’ll want to understand the importance of grounding when it comes to setting up your camper. Proper grounding is essential for the safety and functionality of your camper. Without it, you run the risk of electrical malfunctions and potential hazards.

The importance of proper grounding cannot be emphasized enough. It ensures that any excess electrical current is safely diverted into the ground, preventing damage to your camper’s electrical system and appliances. Additionally, grounding helps protect you and your loved ones from the risk of electric shock.

A well-grounded camper offers numerous benefits. Firstly, it provides stability and balance to the electrical system, ensuring that all components are functioning properly. This helps prevent power surges and fluctuations that could damage sensitive equipment, such as your refrigerator or air conditioner.

Secondly, grounding reduces the risk of electrical fires, as any potential electrical faults are immediately neutralized. Lastly, a well-grounded camper allows for efficient and safe operation of electrical appliances, giving you peace of mind during your camping adventures.

Now that you understand the importance of grounding, it’s time to gather the necessary tools and materials for the task at hand.

Gather the Necessary Tools and Materials

Once you’ve got all the required tools and materials ready, it’s amazing how quickly you can transform a simple vehicle into a cozy home away from home. To properly ground a camper, you’ll need a few essential items.

Advertisement

First, gather materials such as a grounding rod, copper wire, wire cutters, and a grounding clamp. These items will ensure a safe and effective grounding setup for your camper.

Next, determine the location where you’ll install the grounding system. Look for a spot near your camper that has good conductivity, such as moist soil or a grassy area. Avoid areas with rocks or concrete, as they may hinder proper grounding. Once you’ve found the ideal location, drive the grounding rod into the ground using a hammer or mallet until it’s secure and stable.

To connect the grounding rod to your camper, use the copper wire and grounding clamp. Cut a length of copper wire that will reach from the grounding rod to the camper. Strip the ends of the wire and attach one end to the grounding rod using the grounding clamp. The other end should be securely connected to a metal part of your camper, such as the chassis.

By gathering the necessary tools and materials and determining a suitable location for grounding, you’ll be one step closer to having a properly grounded camper. Now, let’s move on to the next section and learn how to locate a suitable grounding point.

Locate a Suitable Grounding Point

To find the perfect spot for grounding, simply explore the surrounding area and discover a location with ample conductivity and natural beauty. Choosing the right grounding point is crucial to ensure the safety and stability of your camper. Look for a spot that is close to the electrical source and has good conductivity, such as a metal rod or stake driven into the ground. It’s important to avoid areas with underground pipes or cables to prevent any damage.

Advertisement

To help you visualize the process, here is a table that outlines the key factors to consider when selecting a grounding point for your camper:

Factor Consideration
Conductivity Look for areas with moist soil or near a body of water, as they tend to have better electrical conductivity.
Distance from Power Source The closer the grounding point is to the power source, the more effective it will be in dissipating electrical charges.
Accessibility Choose a location that is easily accessible, as you may need to inspect or maintain the grounding connection in the future.
Natural Beauty Consider a spot that offers a pleasant view or is surrounded by nature, as it will enhance your camping experience.

Ensuring proper grounding techniques is essential for the safety of your camper and its occupants. Once you have chosen the ideal grounding point, you can proceed to the next step of preparing the grounding wire.

Now, let’s move on to preparing the grounding wire and completing the grounding process.

Prepare the Grounding Wire

As you embark on the next step of the grounding process, get your creative juices flowing and prepare the wire that’ll connect your camper to the earth, like a lifeline tethering your mobile sanctuary to the natural world. Understanding grounding techniques is crucial to ensure the safety and functionality of your camper’s electrical system.

Here’s how you can properly install the grounding wire:

Advertisement
  • Choose the right wire: Opt for a copper grounding wire that’s sturdy and durable, ensuring effective conductivity.

  • Measure and cut: Determine the length of wire needed to reach from the grounding point to the camper’s electrical system. Cut the wire accordingly, leaving some extra length for flexibility.

  • Strip the ends: Strip off about an inch of insulation from both ends of the wire using wire strippers, exposing the bare metal.

  • Attach the wire: Connect one end of the wire to the grounding point, such as a metal rod securely driven into the ground. Use a grounding clamp or secure it tightly with a suitable fastener.

  • Route the wire: Safely route the wire along the underside of the camper, away from any moving parts or potential hazards.

With the grounding wire prepared, it’s time to connect it to the camper’s electrical system, ensuring a solid and reliable connection for optimal grounding.

[Connect the grounding wire to the camper’s electrical system.]

Connect the Grounding Wire to the Camper’s Electrical System

Now that you have your grounding wire all set, it’s time to make the vital connection to your mobile sanctuary’s electrical system. Ensuring a secure and reliable connection is crucial for the safety and proper functioning of your camper. Let’s explore the connectivity options and grounding safety precautions to follow.

To begin, let’s take a look at the available connectivity options. Most campers have a dedicated grounding point designed specifically for this purpose. It is typically a metal rod or plate that is securely attached to the frame of the camper. This grounding point provides a direct path for any electrical currents to safely dissipate into the ground. Before proceeding, make sure to locate this grounding point on your camper.

To help you better understand the connection process, let’s use a table to illustrate the steps:

Advertisement
Step Procedure
1 Locate the grounding point on your camper’s frame
2 Strip the end of the grounding wire
3 Attach the stripped end of the wire to the grounding point

When connecting the grounding wire, it is essential to take grounding safety precautions. Ensure that the wire is firmly attached and tightly secured to the grounding point. Avoid any sharp bends or kinks in the wire, as this can weaken the connection and compromise its effectiveness.

With the grounding wire successfully connected to the camper’s electrical system, we can now move on to the next step of securely attaching the grounding wire to the grounding point. This ensures a solid and reliable connection, providing peace of mind and ensuring the safety of your camper’s electrical setup.

Securely Attach the Grounding Wire to the Grounding Point

Securing the grounding wire tightly to the dedicated grounding point on your mobile sanctuary’s frame is crucial for maintaining a safe and reliable electrical connection. This ensures that any potential electrical currents can safely dissipate into the ground. For example, imagine a camper owner who neglected to securely attach the grounding wire, resulting in an unstable connection that could lead to electrical malfunctions and potential safety hazards.

To attach the grounding wire, follow these steps:

  • Locate the designated grounding point on your camper’s frame. This is typically a metal stud or bolt specifically designed for grounding purposes.
  • Strip the end of the grounding wire to expose the bare copper strands.
  • Place the stripped end of the wire onto the grounding point, ensuring that it makes direct contact with the metal surface.
  • Use a wrench or pliers to tighten the grounding wire securely onto the grounding point. Make sure it’s tightly fastened to prevent any accidental disconnections.

By securely attaching the grounding wire to the grounding point, you’re establishing a reliable electrical connection that prioritizes safety. Once this step is completed, it’s essential to test the grounding connection to ensure its effectiveness and reliability.

Test the Grounding Connection

To ensure the safety and effectiveness of your electrical connection, it’s time to put your grounding connection to the test. Testing the grounding connection is crucial to ensure that your camper is properly grounded and protected from electrical hazards.

Advertisement

To test the grounding connection, you’ll need some essential test equipment and use troubleshooting techniques.

One of the most common and effective ways to test the grounding connection is by using a multimeter. Set the multimeter to the resistance or continuity mode and connect one lead to the grounding wire and the other lead to a known good ground source. The multimeter should display a low resistance or continuity reading, indicating a good grounding connection.

If the multimeter shows a high resistance or no continuity reading, it indicates a problem with the grounding connection. In such cases, you may need to recheck the connection at the grounding point, inspect for any loose or damaged wires, or consult a professional for further troubleshooting.

Regularly inspecting and maintaining the grounding system is essential to ensure its continued effectiveness. By checking the grounding connection periodically and addressing any issues promptly, you can maintain a safe and reliable electrical system in your camper.

Regularly Inspect and Maintain the Grounding System

Make sure to regularly check and maintain the grounding system in order to keep your electrical setup safe and reliable. Inspecting the grounding system is essential to ensure it’s functioning properly.

Advertisement

Here are some techniques to help you inspect your camper’s grounding system:

  • Visual Inspection: Examine the grounding connections for any signs of corrosion or damage. Make sure the connections are tight and secure.

  • Continuity Testing: Use a multimeter to check for continuity between the grounding conductor and the earth. This’ll help verify if the grounding system is intact.

  • Resistance Testing: Measure the resistance between the grounding conductor and the earth. A low resistance indicates a good grounding system.

Maintenance tips for the grounding system:

  • Clean Connections: Regularly clean the grounding connections to prevent corrosion and ensure proper conductivity.

  • Tighten Connections: Periodically check and tighten all grounding connections to maintain a secure and reliable connection.

  • Replace Damaged Parts: If any components of the grounding system are damaged, such as wires or clamps, replace them promptly to maintain the system’s effectiveness.

By regularly inspecting and maintaining your grounding system, you can ensure the safety and reliability of your camper’s electrical setup. As you consider using a surge protector, it’s important to have a well-maintained grounding system as it plays a crucial role in protecting your camper from electrical surges.

Consider Using a Surge Protector

Don’t forget to protect your precious electrical setup by considering the use of a surge protector. It’s like having a superhero shield that defends against electrical surges! Surge protectors offer numerous benefits when it comes to grounding your camper.

First and foremost, they safeguard your electrical system from power surges, which can occur due to lightning strikes or fluctuations in the power grid. By diverting excess voltage away from your camper, surge protectors prevent damage to your appliances, electronics, and wiring.

Advertisement

Moreover, they provide peace of mind, knowing that your equipment is protected even during severe weather conditions.

When it comes to surge protector installation, there are a few tips to keep in mind. Firstly, choose a surge protector with the appropriate voltage rating for your camper. Additionally, consider purchasing a surge protector with built-in diagnostic features, such as LED indicators, that alert you to potential issues.

It’s also important to install the surge protector close to the power source, ideally at the electrical pedestal, to ensure maximum protection.

Remember, while surge protectors are an essential part of grounding your camper, it’s always wise to consult a professional if needed. They can assess your specific situation and provide expert advice on the best surge protector for your camper’s electrical system.

So, let’s delve into the next section and explore the importance of consulting a professional for a safe and effective grounding setup.

Advertisement

Consult a Professional if Needed

If you want a worry-free and effective grounding setup, it’s always a good idea to seek professional advice. Consulting a professional can provide you with the expertise needed to ensure that your camper is properly grounded.

They will have the knowledge and experience to assess your specific situation and recommend the most appropriate grounding solution. When it comes to grounding a camper, there are several factors to consider. A professional can help you understand the electrical requirements of your camper and determine if any modifications are necessary.

They can also advise you on the type of grounding system that will work best for your camper and the specific campground or location where you will be staying.

Here are a few reasons why consulting a professional is important when grounding a camper:

  • Expertise: Professionals have in-depth knowledge of electrical systems and can provide expert advice on grounding solutions.
  • Safety: Proper grounding is essential for the safety of both you and your camper. A professional can ensure that all safety standards are met.
  • Compliance: Consulting a professional will help you ensure that your grounding setup meets all relevant codes and regulations.

By seeking professional expertise, you can have peace of mind knowing that your camper is properly grounded and that you have taken all necessary precautions for a safe and worry-free camping experience.

Frequently Asked Questions

How can I tell if my camper is properly grounded?

To check if my camper is properly grounded, I use a multimeter to measure the electrical connection. I ensure that the ground wire is securely connected to a metal stake in the ground.

Advertisement

One interesting statistic to note is that according to a study by the National Fire Protection Association, improper grounding of campers can increase the risk of electrical fires by 50%. If a camper isn’t properly grounded, it can lead to electric shocks, damage to appliances, and even fires.

Can I use any type of wire for grounding?

Yes, it’s important to use the proper grounding wire for your camper to ensure safety. There are different types of grounding wire options available, such as copper wire or aluminum wire. It’s recommended to use a wire that’s specifically designed for grounding purposes, as it’s made to withstand outdoor conditions and provide a reliable connection. Using the correct wire will help protect against electrical hazards and ensure that your camper is properly grounded.

Is it necessary to ground a camper if I’m only using battery power?

I can understand the temptation to skip grounding when using battery power alone in a camper. However, let me assure you that grounding is still necessary for the longevity of your battery and the safety of your camper.

By having a grounding system in place, you can prevent electrical issues, protect your appliances, and ensure proper battery maintenance. So, even though you may not be connected to a shore power source, grounding is still vital for a smooth and safe camping experience.

What are the potential risks of not grounding a camper?

Not properly grounding a camper can pose potential risks. Without proper grounding, there’s an increased chance of electrical shocks, especially if there’s a fault in the electrical system. This can be dangerous for anyone inside the camper, as well as nearby individuals.

Advertisement

Additionally, not grounding a camper can also increase the risk of electrical fires, as the excess electrical energy has nowhere to go. Therefore, it’s crucial to prioritize the importance of proper grounding to ensure safety while using a camper.

Can I install a grounding system myself or do I need to hire a professional?

Grounding system installation for a camper is a task that can be done by a knowledgeable DIY enthusiast. However, it’s essential to emphasize the importance of a proper camper grounding inspection. Hiring a professional for this task ensures that all necessary grounding for battery power is in place, reducing the risks associated with not grounding a camper. Using suitable wire for grounding is crucial, and the benefits of a grounding system outweigh the cost of professional help.

Conclusion

In conclusion, grounding your camper is essential for safety and proper functioning of the electrical system. By following the steps outlined in this article, you can ensure that your camper is properly grounded and protected from electrical hazards.

Remember to regularly inspect and maintain the grounding system to keep it in top condition. And don’t forget to consider using a surge protector for added protection against power surges.

If you’re not confident in your abilities, don’t hesitate to consult a professional for assistance.

Advertisement

Happy camping!

Continue Reading

Beginners Guides

How To Heat A Pop Up Camper Without Electricity

Published

on

By

An image showcasing a cozy pop-up camper interior at night, with a wood-burning stove emitting a warm glow, casting flickering shadows on the walls

Fed up with your toes turning into icicles on your camping trips? Worry no more, as I bring you some electrifying advice to stay cozy in your pop-up camper without the need for electrical power! Believe me, these tricks are so powerful, you’ll think you’re soaking up the heat in a lush tropical getaway.

From insulating your camper to investing in alternative heating methods, I’ll show you how to turn your chilly camper into a cozy haven. With a portable propane heater or even a wood-burning stove, you’ll be toasty warm no matter how frigid the weather gets. And don’t forget about thermal blankets, layers, and thermal clothing – they’re your secret weapons against the cold.

So, whether you’re a seasoned camper or just starting out, get ready to heat up your pop up camper like a pro. Say goodbye to shivering nights and hello to a camping experience that’s as warm and inviting as a crackling fireplace.

Let’s dive right into the electrifying world of heating your pop up camper without electricity!

Key Takeaways

  • Insulate the camper to retain heat and keep cold air out
  • Use energy efficient heating options like portable propane heaters, electric heaters, or solar-powered options
  • Consider investing in a wood-burning stove and install a chimney, following safety precautions
  • Use thermal blankets or sleeping bags, layering them or combining them with sleeping bags for enhanced insulation

Insulate Your Camper

If you want to stay cozy in your pop-up camper even without electricity, it’s crucial to insulate it properly. Camper insulation is the key to retaining heat and keeping the cold air out.

One way to insulate your camper is by using thermal curtains or window coverings. These can help to reduce heat loss through the windows and keep the warmth inside.

Advertisement

Another option is to add insulation to the walls and ceiling of your camper. There are various materials available, such as foam board insulation or reflective insulation, that can be easily installed to increase the energy efficiency of your camper.

In addition to proper insulation, you may also want to consider energy efficient heating options. One popular choice is a portable propane heater. These heaters are easy to use and provide a reliable source of heat. They typically come with a built-in safety feature that shuts off the heater if it detects low oxygen levels or if it gets tipped over. Portable propane heaters are also compact and lightweight, making them perfect for use in a pop-up camper.

By insulating your camper and using a portable propane heater, you can ensure a warm and comfortable camping experience, even without electricity.

Now let’s move on to the next section about how to use a portable propane heater.

Use a Portable Propane Heater

To keep your cozy home on wheels toasty, simply grab a portable propane heater and bask in the warm glow it emits. Portable propane heaters are a great option for heating your pop-up camper when you don’t have access to electricity. Here’s why they’re a practical choice:

Advertisement
  • Convenience: Portable propane heaters are easy to use and require minimal setup. Just connect the propane tank, ignite the heater, and enjoy the heat.

  • Portability: These heaters are designed to be lightweight and compact, making them easy to carry and store in your camper.

  • Safety: Most portable propane heaters come with safety features such as automatic shut-off valves and built-in carbon monoxide detectors, ensuring your safety while using them.

If you’re looking for alternative heating options, there are also portable electric heaters and solar-powered heating options available. Portable electric heaters can be plugged into a generator or power source, providing heat without the need for propane. Solar-powered heating options utilize the sun’s energy to generate heat and can be a sustainable choice for off-grid camping.

Now that you know how to heat your pop-up camper with a portable propane heater, let’s explore another heating option: investing in a wood-burning stove.

Invest in a Wood-Burning Stove

Immerse yourself in the cozy atmosphere of your mobile home by investing in a wood-burning stove, a rustic and charming heating option that adds a touch of warmth and nostalgia to your travels.

When it comes to heating your pop-up camper without electricity, a wood-burning stove is a reliable and efficient choice.

To begin, you’ll need to install a chimney for your wood-burning stove. This involves drilling a hole through the roof of your camper and carefully fitting the chimney pipe. It’s important to follow the manufacturer’s instructions and ensure that the chimney is properly sealed to prevent any leaks or potential fire hazards.

Advertisement

While using a wood-burning stove, it’s crucial to take safety precautions. Make sure to place the stove on a fire-resistant surface and keep flammable materials away from it. Always monitor the stove while it’s in use and have a fire extinguisher nearby, just in case.

Now, let’s transition to the next section about using thermal blankets or sleeping bags to further enhance your warmth and comfort during cold nights.

Use Thermal Blankets or Sleeping Bags

Get cozy and stay warm during chilly nights in your mobile home by using thermal blankets or sleeping bags, which will provide extra insulation and ensure a comfortable and restful sleep. When it comes to heating a pop-up camper without electricity, these alternative solutions are essential. Thermal blankets and sleeping bags are designed to trap and retain body heat, keeping you warm even in the coldest temperatures.

To give you an idea of the effectiveness of thermal blankets and sleeping bags, take a look at the comparison table below:

Thermal Blankets Sleeping Bags
Lightweight and compact Insulated and thick
Reflective material retains heat Synthetic or down insulation
Can be used as a layering option Zipper closure for easy access
Durable and easy to clean Hooded for added warmth

These options allow you to choose the best fit for your needs, ensuring maximum comfort and warmth while camping. Additionally, layering thermal blankets or using them in combination with sleeping bags can enhance their insulation capabilities.

Advertisement

Next, let’s explore another practical method to stay warm in your pop-up camper: wearing layers and using thermal clothing. This will provide an additional barrier against the cold and help you retain body heat.

Wear Layers and Use Thermal Clothing

Bundling up in layers and donning cozy thermal clothing is like wrapping yourself in a toasty hug, ensuring you stay warm and snug inside your mobile home. Layering your clothing provides numerous benefits when it comes to staying warm without electricity. By wearing multiple layers, you trap warm air between each garment, creating an insulating barrier that helps retain body heat.

Start with a moisture-wicking base layer to keep sweat away from your skin. Then, add a mid-layer made of fleece or wool for extra insulation. Finally, top it off with a waterproof and windproof outer layer to shield yourself from the elements.

When it comes to thermal clothing options, there are plenty to choose from. Look for thermal underwear, socks, hats, gloves, and even thermal sleeping bag liners. These specialized garments are designed to provide maximum warmth and comfort in cold temperatures. They’re often made from materials like merino wool or synthetic fibers that have excellent insulation properties. Additionally, consider investing in heated clothing, such as heated jackets or gloves, which have built-in electric heating elements that can be powered by portable battery packs.

Now, let’s transition into the next section about using hot water bottles or heat packs to further enhance your warmth and comfort inside your pop-up camper.

Advertisement

Use Hot Water Bottles or Heat Packs

Cozy up with hot water bottles or heat packs to add an extra layer of warmth and comfort to your mobile home experience. When you’re camping in a pop-up camper without electricity, staying warm becomes a top priority. Here are some hot water bottle alternatives and the benefits of using heat packs:

  • Heat packs: These small, portable packs are filled with a gel or liquid that can be heated up and then used to warm your body. They’re easy to use and provide a long-lasting heat source.

  • Instant hand warmers: These disposable heat packs are perfect for keeping your hands warm during chilly nights. Simply activate them by shaking or breaking a small metal disc inside, and they’ll provide hours of warmth.

  • Electric heated blankets: While you may not have access to electricity, there are battery-powered heated blankets available that can provide warmth without needing an outlet.

  • Microwavable heating pads: These pads can be heated in a microwave and then used to warm your bed or provide targeted heat to specific areas of your body.

Using hot water bottles or heat packs is a great way to stay warm and comfortable in your pop-up camper. The benefits include portability, long-lasting heat, and the ability to target specific areas of your body. Now, let’s move on to the next section about cooking inside the camper to generate heat.

Cook Inside the Camper to Generate Heat

After exploring the option of using hot water bottles or heat packs to warm up your pop-up camper, let’s move on to another practical method: cooking inside the camper to generate heat. Not only will this help warm up the space, but it also serves the dual purpose of providing nourishment.

When cooking inside your camper, it’s crucial to prioritize safety. Ensure proper ventilation by cracking open a window or using the stove’s exhaust fan to prevent carbon monoxide buildup. Also, make sure to keep a fire extinguisher handy and never leave the stove unattended while it’s in use.

To generate heat, consider cooking with alternative fuel sources that can be used indoors, such as a propane stove or a portable camping stove. These options are safe and efficient, providing both warmth and a means to prepare meals. Additionally, using a cast iron skillet or pot can help retain heat and distribute it evenly throughout the camper.

Advertisement

Now that you know how to cook inside your pop-up camper for heat and sustenance, let’s move on to the next method: parking in sheltered areas or using windbreaks. This will further enhance your camping experience by minimizing the impact of cold winds and maximizing heat retention.

Park in Sheltered Areas or Use Windbreaks

One way to maximize warmth while camping is to park your camper in sheltered areas or use windbreaks, which can reduce heat loss by up to 50%. When choosing a parking spot for your pop-up camper, look for areas that are protected from strong winds and offer natural barriers, such as trees or hills, that can act as windbreaks. These barriers will help to block the cold air from reaching your camper and prevent heat loss.

If you don’t have access to natural windbreaks, you can also create your own using various materials. Some popular windbreak options include portable panels, tarps, or even large pieces of cardboard. These materials can be set up around your camper to provide an additional layer of protection against the wind. Just make sure to securely anchor them to prevent them from blowing away.

By parking in sheltered areas or using windbreaks, you can significantly reduce the amount of heat lost from your pop-up camper. This will help to keep the interior warmer and more comfortable, even without electricity.

In the next section, we will explore another method to heat your camper by using reflective window covers or insulated curtains.

Advertisement

Use Reflective Window Covers or Insulated Curtains

To make your camping experience more enjoyable and relatable, consider using reflective window covers or insulated curtains to keep the interior of your camper warm and comfortable. These simple additions can greatly improve the insulation of your camper and help retain heat during cold nights.

Here are three reasons why reflective window covers and insulated curtains are a great option:

  1. Reflective window covers: These covers are designed to reflect heat back into the camper, preventing it from escaping through the windows. They also provide privacy during the day while still allowing natural light to enter. However, it’s important to note that reflective window covers can limit your view outside, so consider this trade-off before using them.

  2. Insulated curtains: Installing insulated curtains can help prevent heat loss through the windows and provide an extra layer of insulation. Look for curtains made with thick, thermal materials such as fleece or quilted fabric. Be sure to measure your windows accurately to ensure a proper fit.

  3. Alternative options: If reflective window covers or insulated curtains don’t meet your needs, consider alternative heating methods such as a catalytic heater or portable fireplace. These options can provide additional warmth without the need for electricity.

By using reflective window covers or insulated curtains, you can effectively keep your pop-up camper warm and cozy during your camping adventures. However, if these options don’t suit your preferences, consider alternative heating methods for a comfortable camping experience.

Consider Alternative Heating Methods, such as a Catalytic Heater or Portable Fireplace

Consider using a catalytic heater or portable fireplace as an alternative method to keep your camper warm and cozy during your camping adventures, even if you’re concerned about the potential for carbon monoxide emissions. These heating options provide efficient and effective ways to heat your pop-up camper without relying on electricity.

A catalytic heater is a great choice for heating a pop-up camper as it operates on propane and doesn’t require any electricity. It uses a catalytic reaction to produce heat, making it safe and efficient. These heaters are portable and can be easily moved around your camper to provide heat wherever you need it. They also have built-in safety features, such as automatic shut-off mechanisms, to ensure peace of mind.

Advertisement

Another option is a portable fireplace, which can add a cozy ambiance to your camper while also providing heat. These fireplaces are typically fueled by propane or wood pellets and can be easily transported and set up in your pop-up camper. They offer the added benefit of a visible flame, creating a warm and inviting atmosphere.

When using either a catalytic heater or a portable fireplace, it’s important to follow the manufacturer’s instructions and safety guidelines. Proper ventilation is crucial to prevent the build-up of carbon monoxide, so make sure your camper has adequate airflow. Additionally, always have a carbon monoxide detector installed in your camper for added safety.

By considering alternative heating methods like a catalytic heater or portable fireplace, you can enjoy a warm and cozy camping experience in your pop-up camper, even without electricity.

Frequently Asked Questions

Can I use a portable propane heater inside my pop up camper?

Yes, you can use a portable propane heater inside your pop-up camper as an alternative heating method. It’s important to ensure proper ventilation and follow the manufacturer’s instructions to prevent any safety hazards. However, if you’re looking for an alternative to propane heaters, you can also consider using a portable electric heater. These heaters are convenient and can provide sufficient warmth, making them a great option for heating your pop-up camper without electricity.

How can I prevent condensation from building up inside my insulated camper?

To prevent condensation from building up inside my insulated camper, I follow a few key tips.

Advertisement

Firstly, I make sure to properly ventilate the space by cracking open windows or using vent fans. This helps to circulate the air and reduce moisture buildup.

Additionally, I use moisture-absorbing products like silica gel packs or dehumidifiers.

Finally, I insulate any cold surfaces such as windows or metal frames to prevent them from becoming dew points.

These insulation tips for pop up campers have proven effective in minimizing condensation.

Are there any safety precautions I should take when using a wood-burning stove in my pop up camper?

Safety precautions should always be taken when using a wood-burning stove in a pop-up camper. First, ensure that the stove is properly installed and meets all safety regulations.

Advertisement

It’s important to have proper ventilation to prevent carbon monoxide buildup, so make sure to open a window or use a vent while the stove is in use. Additionally, always keep a fire extinguisher nearby and never leave the stove unattended.

How effective are thermal blankets or sleeping bags at keeping the camper warm?

Thermal blankets and sleeping bags can be effective in keeping a pop-up camper warm, but their effectiveness may vary depending on the temperature and insulation of the camper. Electric heaters are generally more effective at providing consistent and reliable heat. However, if you’re looking for alternative heating methods for a pop-up camper without electricity, options like propane heaters or wood-burning stoves can be considered. It’s important to carefully follow safety precautions and ensure proper ventilation when using these alternative heating methods.

Can I use a catalytic heater or portable fireplace as the primary heating source for my pop up camper?

Yes, you can use a catalytic heater or portable fireplace as the primary heating source for your pop-up camper. However, it’s important to prioritize safety when using a catalytic heater. Make sure to choose a model specifically designed for indoor use and follow all safety guidelines provided by the manufacturer.

Additionally, there are alternative options to a portable fireplace, such as propane heaters or wood-burning stoves, that can also provide effective heating for your camper.

Conclusion

In conclusion, heating a pop-up camper without electricity is definitely possible with the right preparations and equipment. By insulating your camper, using portable propane heaters or wood-burning stoves, and utilizing thermal blankets or sleeping bags, you can stay warm and cozy even in chilly weather.

Advertisement

Don’t forget to dress in layers and invest in thermal clothing for added warmth. Additionally, cooking inside the camper and parking in sheltered areas can help generate heat.

Remember, with a little creativity and resourcefulness, you can turn your pop-up camper into a warm and inviting home away from home, even in the coldest of conditions.

Continue Reading

Beginners Guides

How Much Does A Kimbo Camper Cost

Published

on

By

An image showcasing a cozy Kimbo Camper, nestled amidst a picturesque mountain landscape at sunset

When it comes to discovering the wonders of nature, there’s truly nothing comparable to setting off on a journey in a camper. The liberty, adaptability, and ease it offers are unparalleled.

One camper that has been gaining popularity in recent years is the Kimbo camper. But before embarking on your camping adventure, it’s important to know how much a Kimbo camper will cost you.

The cost of a Kimbo camper can vary depending on several factors. Factors that influence the cost include the type of Kimbo camper you choose, whether you opt for a new or used camper, and where you decide to purchase it. Additionally, financing options are available for those who may not have the full amount upfront.

In this article, we will explore the different types of Kimbo campers available, discuss the factors that influence their cost, and provide you with tips on negotiating the price. We will also present alternative options for campers and help you make the best decision for your camping adventure.

So, let’s dive in and find out how much a Kimbo camper will cost you!

Advertisement

Key Takeaways

  • The cost of a Kimbo camper is influenced by factors such as type (Classic, Plus, Deluxe), new or used, and purchase location.
  • Financing options are available to make the purchase more affordable.
  • Additional costs of owning a Kimbo camper include insurance, maintenance, and upgrades.
  • DIY camper conversions offer customization options and potential cost savings.

Types of Kimbo Campers Available

If you’re interested in the different types of Kimbo Campers available, you’ll be amazed at the variety and options to choose from! When it comes to cost comparison, it’s important to consider the features and amenities that each type of Kimbo Camper offers.

First, let’s talk about the Kimbo Camper Classic. This model is known for its simplicity and functionality. It features a compact design, making it easy to tow and maneuver. With a starting price of around $20,000, it is the most affordable option in the Kimbo Camper lineup.

Next up is the Kimbo Camper Plus. This model offers a bit more space and comfort compared to the Classic. It includes additional features such as a kitchenette and a small bathroom. The starting price for the Kimbo Camper Plus is around $30,000.

Lastly, there’s the Kimbo Camper Deluxe. This is the top-of-the-line model, offering the most luxurious features and amenities. It includes a fully equipped kitchen, a spacious living area, and a comfortable sleeping area. The starting price for the Kimbo Camper Deluxe is around $40,000.

Factors that influence the cost of a Kimbo Camper include the size, features, and customization options. Now, let’s delve into these factors in more detail in the next section.

Factors That Influence the Cost of a Kimbo Camper

One of the key factors that determines the price you’ll pay for a Kimbo camper is the specific features and amenities it offers. The influencing factors that contribute to the cost breakdown of a Kimbo camper include:

Advertisement
  • Size: Larger campers typically come with more features and amenities, which can drive up the price.
  • Materials: The quality of materials used in the construction of the camper can greatly impact the cost. High-end materials may result in a higher price tag.
  • Customization Options: If you choose to customize your Kimbo camper with additional features or design elements, it’ll likely increase the overall cost.
  • Brand Reputation: Established brands with a strong reputation for quality and reliability may charge a premium for their campers.

Considering these influencing factors, it’s essential to carefully assess your needs and budget to determine the right balance between cost and features. Understanding the cost breakdown can help you make an informed decision when selecting a Kimbo camper.

Moving on to the subsequent section about the price range for Kimbo campers, it’s important to consider the overall value provided by each price point.

Price Range for Kimbo Campers

To determine the right Kimbo camper for you, consider the price range and the value offered at each point. Kimbo campers come in various types, each with its own price range.

The base models start at around $15,000 and go up to $40,000 for the more luxurious models. These prices may vary depending on the specific features and customization options you choose.

When considering the cost of a Kimbo camper, it’s important to also think about financing options. Many dealerships offer financing plans that can help make the purchase more affordable. This allows you to spread out the cost over time, making it easier to budget for your new camper. Some dealerships even offer special promotions or discounts on financing, so be sure to inquire about any current offers.

Transitioning into the next section about ‘new vs. used Kimbo campers,’ it’s worth noting that while new campers may come with a higher price tag, they also offer the latest features and technology. On the other hand, used campers may be more budget-friendly, but they may not have all the bells and whistles of a brand new model. Consider your budget and priorities when deciding between a new or used Kimbo camper.

Advertisement

New vs. Used Kimbo Campers

Consider whether a shiny, brand new Kimbo camper or a gently used one with a few miles and stories under its belt is the right fit for your adventurous spirit.

When it comes to choosing between a new or used Kimbo camper, there are several factors to consider. One of the main advantages of buying a new Kimbo camper is that you get to be the first owner, meaning you have the peace of mind knowing that it hasn’t been subjected to any wear and tear. Additionally, new campers often come with the latest features and technology, providing a more modern and comfortable camping experience.

On the other hand, opting for a used Kimbo camper can save you a significant amount of money. While it may have a few miles on it, a used camper can still offer the same level of functionality and enjoyment as a new one. Plus, buying used allows you to potentially get a higher-end model for a lower price. However, it’s important to thoroughly inspect a used camper and ensure that it is in good condition before making a purchase.

Ultimately, the decision between a new or used Kimbo camper depends on your budget, preferences, and priorities.

Now, let’s explore the financing options for Kimbo campers.

Advertisement

Financing Options for Kimbo Campers

Have you ever wondered how you can afford your dream adventure on wheels? When it comes to purchasing a Kimbo Camper, there are a few financing options available to help make your dream a reality.

RV financing is a popular choice for many, allowing you to spread out the cost of your camper over a set period of time. This can be a great option if you don’t have the full amount upfront but still want to start your adventures as soon as possible.

Additionally, leasing options are also available, which allow you to rent the camper for a specific period of time. This can be a good choice if you’re unsure about committing to a long-term purchase or if you want to try out the camper before making a final decision.

When considering financing or leasing, it’s important to carefully review the terms and conditions. Interest rates, monthly payments, and any additional fees should be taken into account to ensure that you’re getting the best deal possible. By understanding the financing options available, you can find a solution that fits your budget and allows you to embark on your dream adventure.

As you consider your financing options, it’s also important to keep in mind the additional costs to consider. These can include insurance, maintenance, and any upgrades or modifications you may want to make to your camper. By factoring in these costs, you can create a more accurate budget and ensure that you’re fully prepared for your adventure on wheels.

Advertisement

Additional Costs to Consider

Don’t forget about the extra expenses that come along with your dream adventure on wheels! When purchasing a Kimbo Camper, it’s important to consider the hidden fees and maintenance costs that may arise over time. These additional costs can vary depending on factors such as usage, location, and personal preferences.

To help you get a clearer picture, here is a breakdown of some potential expenses to keep in mind:

Expense Description Estimated Cost
Insurance Protect your investment and ensure peace of mind $500 – $1,500/year
Registration Registering your camper with the appropriate authorities $50 – $200/year
Storage If you don’t have space at home, consider storage options $50 – $200/month

In addition to these costs, it’s important to budget for regular maintenance and repairs. This includes routine check-ups, oil changes, tire rotations, and any unforeseen mechanical issues that may arise. These expenses can vary greatly depending on the age and condition of your camper, but it’s recommended to set aside around $1,000 – $2,000 per year for maintenance and repairs.

Now that you’re aware of the potential hidden fees and maintenance costs, let’s explore where you can buy a Kimbo Camper without breaking the bank.

Where to Buy a Kimbo Camper

Looking for the perfect place to get your hands on a Kimbo Camper without breaking the bank? Let’s explore where you can snag one of these adventure-filled vehicles!

Advertisement

When it comes to purchasing a Kimbo Camper, there are a few options to consider. The first option is buying one online. This can be convenient as you can easily browse through different models and compare prices from the comfort of your own home. However, there are some pros and cons to buying a Kimbo Camper online.

One of the biggest advantages is that you can often find better deals online. Many online retailers offer discounts and promotions that you may not find at physical stores. Additionally, buying online allows you to access a wider selection of models and features, giving you more options to choose from. On the downside, buying online means you won’t be able to physically inspect the camper before purchasing. This can be a drawback if you prefer to see the camper in person and test it out before making a decision.

If you decide to buy a Kimbo Camper online, it’s important to consider the best time to make your purchase. Keep an eye out for seasonal sales and promotions, as prices may be lower during certain times of the year. It’s also a good idea to read customer reviews and do thorough research on the seller to ensure you are buying from a reputable source.

Transitioning into the next section about tips for negotiating the price of a Kimbo Camper, it’s important to be prepared and knowledgeable about the market value of the camper you’re interested in.

Tips for Negotiating the Price of a Kimbo Camper

When it comes to purchasing a Kimbo Camper, it’s important to consider the price and how it fits into your budget. Now that you know where to buy a Kimbo Camper, let’s talk about some tips for negotiating the price. Negotiating tactics can help you get the best deal possible and save some money.

Advertisement
  1. Do your research: Before entering into negotiations, make sure you have a clear understanding of the market value of the Kimbo Camper model you’re interested in. This will give you a baseline for negotiations.

  2. Compare prices: Look for price comparisons from different sellers or dealerships. This will give you leverage when negotiating with a particular seller.

  3. Highlight any flaws: If you notice any imperfections or issues with the camper, use them as bargaining points to potentially lower the price.

  4. Be prepared to walk away: Sometimes, the best negotiation tactic is being willing to walk away if the price doesn’t meet your expectations. This can demonstrate to the seller that you’re serious about getting a fair deal.

By following these tactics, you can increase your chances of getting a better price on a Kimbo Camper.

Now, let’s explore some alternatives to Kimbo Campers.

Alternatives to Kimbo Campers

When considering alternatives to Kimbo Campers, there are several other compact camper brands to explore. These brands offer a range of options and features that may suit different needs and preferences.

Additionally, DIY camper conversions are another option to consider, allowing for customization and creativity in creating a compact camper that meets specific requirements.

Other Compact Camper Brands

If you’re in the market for a compact camper, you should definitely check out the prices of other brands apart from Kimbo. When considering other compact camper brands, it’s important to evaluate their features, pros, and cons.

Advertisement

Some popular alternatives to Kimbo Campers include brands like Airstream, Winnebago, and SylvanSport. Airstream offers sleek and stylish compact campers with durable construction and modern amenities. Winnebago provides a range of compact campers with versatile layouts and excellent fuel efficiency. SylvanSport specializes in lightweight and compact campers that are perfect for outdoor adventurers.

Each brand has its own unique features and advantages, so it’s crucial to carefully assess your needs and preferences before making a decision.

Moving on to the subsequent section about DIY camper conversions, there are alternative options for creating your own compact camper.

DIY Camper Conversions

Get ready to unleash your creativity and embark on a DIY adventure to transform your own compact camper. DIY camper van conversions are a popular option for those looking to customize their camping experience. With a DIY camper van, you have the freedom to design and build a space that suits your needs and preferences.

There are endless camper van conversion ideas to choose from, whether you want a cozy and rustic interior or a sleek and modern design. From installing a kitchenette and bathroom to adding comfortable sleeping arrangements and storage solutions, the possibilities are endless.

Advertisement

By taking on a DIY camper conversion, you can save money and create a unique space that reflects your personal style. So, start brainstorming your ideas and get ready to turn your compact camper into the perfect home away from home for your next camping adventure.

Making the Best Decision for Your Camping Adventure

Choose wisely and create unforgettable memories on your camping adventure by finding out the cost of a Kimbo camper. When it comes to alternative camping options, DIY camper conversions have become increasingly popular. However, before you embark on this journey, it’s essential to consider all factors and make an informed decision.

Comparing camper van rentals and the cost of a Kimbo camper is a crucial step in this process. DIY camper conversions can be a cost-effective solution for those who enjoy hands-on projects and have the necessary skills. However, it’s important to note that the cost of materials, tools, and labor can quickly add up.

On the other hand, renting a camper van provides a convenient option for those who prefer a ready-to-go solution without the commitment of ownership. While rental costs vary depending on the duration and location, it’s essential to compare these expenses with the cost of purchasing a Kimbo camper.

Considering the cost of a Kimbo camper involves more than just the upfront price. Factors such as maintenance, insurance, and depreciation should also be taken into account. Additionally, it’s important to evaluate the long-term value and potential resale value of a Kimbo camper.

Advertisement

Making the best decision for your camping adventure requires careful consideration of all options. By comparing alternative camping options, such as DIY camper conversions and camper van rentals, with the cost of a Kimbo camper, you can ensure that you choose wisely and create unforgettable memories on your camping adventure.

Frequently Asked Questions

What are the specific dimensions and weight specifications of a Kimbo camper?

Sure, let’s dive into the nitty-gritty of the specific dimensions and weight specifications of the Kimbo camper.

This technical analysis will leave no stone unturned. The Kimbo camper boasts precise dimensions, meticulously crafted to maximize space and functionality.

As for weight specifications, every ounce has been scrutinized to ensure optimal towing capabilities and fuel efficiency.

Now, let’s circle back to the financial aspect and explore the cost of this remarkable camper.

Advertisement

Are there any warranty options available for Kimbo campers?

Yes, there are warranty options available for Kimbo campers. The warranty coverage includes protection against manufacturing defects and faulty workmanship. The duration of the warranty varies depending on the specific model and components of the camper. It’s important to review the warranty terms and conditions provided by the manufacturer to understand the specific coverage and duration for your Kimbo camper.

Can I customize the interior layout and features of a Kimbo camper?

When it comes to the interior design of a Kimbo camper, you have the freedom to customize the layout and features to your exact specifications. From layout configurations to feature upgrades, the possibilities are endless. You can create a space that perfectly suits your needs and preferences. Whether you prefer a cozy, minimalist design or a more luxurious and spacious layout, Kimbo campers offer a range of choices. They will satisfy even the most discerning camper enthusiast.

Are there any additional maintenance costs associated with owning a Kimbo camper?

There are indeed additional expenses associated with owning a Kimbo camper. Apart from the initial purchase cost, owners should budget for regular maintenance fees.

These costs can include routine inspections, repairs, and replacements of components like tires, brakes, and electrical systems. Additionally, owners may need to account for the expenses of winterizing the camper, storing it when not in use, and obtaining insurance coverage.

Proper maintenance is essential to ensure the longevity and functionality of your Kimbo camper.

Advertisement

Can I rent or lease a Kimbo camper instead of purchasing one?

Yes, you can rent or lease a Kimbo camper instead of purchasing one. Kimbo offers flexible renting options for those who want to experience the camper without committing to ownership.

Additionally, they provide long-term leasing options for individuals who prefer an extended period of use. Renting or leasing a Kimbo camper allows you to enjoy the benefits and convenience of a camper without the upfront cost and long-term commitment of purchasing one.

What is the Price Range for Camper Shells?

When it comes to leer camper shell pricing, the price range can vary depending on factors like brand, size, and features. Generally, prices can start from around $500 and go up to $3000 or more for high-end models. It’s crucial to consider your budget and specific requirements when looking for a camper shell that fits your needs and preferences.

Conclusion

After carefully considering the various options, factors, and financing possibilities, it’s clear that purchasing a Kimbo camper is a practical and worthwhile investment for any camping enthusiast.

With a range of models available, the cost of a Kimbo camper can vary, but the benefits and features they offer make them a popular choice.

Advertisement

Whether you decide to buy new or used, there are options to fit any budget.

So, don’t hesitate to embark on your camping adventure with a Kimbo camper and create memories that’ll last a lifetime.

Continue Reading
Advertisement

Affiliate disclaimer

As an affiliate, we may earn a commission from qualifying purchases. We get commissions for purchases made through links on this website from Amazon and other third parties.

Advertisement

About us

Since 2012, Laienhaft has been your go-to source for all things camping and outdoor. With a carefully curated selection of top-quality gear, expert advice from our passionate team led by Olivia and Jason, and a thriving community of outdoor enthusiasts, we’re here to inspire and equip you for unforgettable adventures in the great outdoors. Explore https://laienhaft.com/ and join us on this exciting journey of embracing nature and creating lasting memories.

Trending