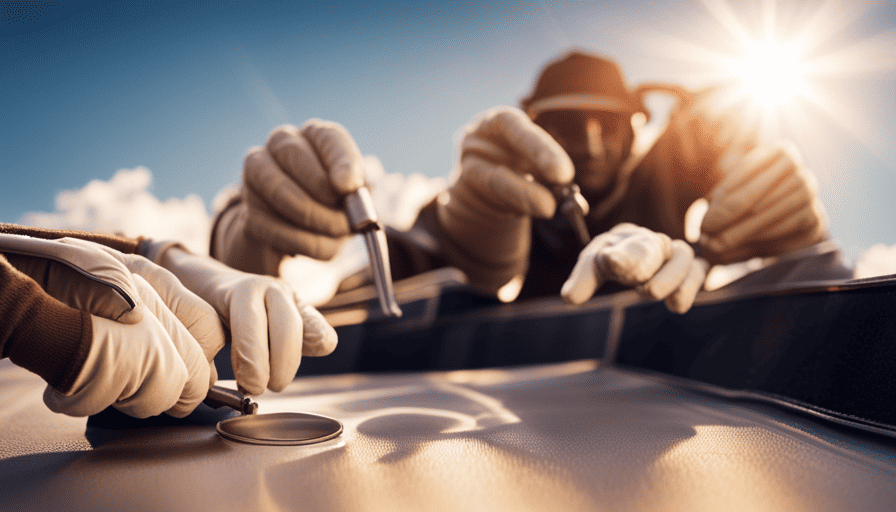
Repairing a leaking roof on your camper is akin to deciphering a challenging puzzle; it demands meticulous attention, endurance, and the appropriate equipment. As someone who owns a camper, I relate to the stress and concern associated with a roof that leaks. Nonetheless, by acquiring the correct know-how and methods, this problem can be efficiently addressed, allowing you to return your camper to its watertight excellence.
In this article, I will guide you through the step-by-step process of fixing a leaky camper roof. We will start by assessing the damage and gathering the necessary materials and tools. Then, I will walk you through cleaning and preparing the roof surface, locating and sealing the leaks, and repairing or replacing any damaged roofing materials. We will also discuss how to test for leaks and perform regular inspections and maintenance to prevent future issues.
Remember, if you ever feel overwhelmed or unsure, don’t hesitate to seek professional help. But with the right instructions and a little bit of effort, you can successfully repair your camper roof and enjoy worry-free adventures on the road.
Let’s get started!
Key Takeaways
- Assess the damage by looking for signs of discoloration, mold, or sagging areas.
- Clean the roof surface thoroughly to remove dirt and debris.
- Apply a waterproof sealant to the affected areas.
- Regular inspections and maintenance are essential for the longevity of the camper roof.
Assess the Damage
Take a moment to check out the extent of the damage and get ready to tackle the leaky camper roof with a smile on your face. The first step in fixing a leaky camper roof is to assess the damage.
Inspect for water damage by looking for any signs of discoloration, mold, or mildew on the ceiling and walls. Pay close attention to any soft spots or sagging areas. These are indicators of water infiltration.
Once you’ve determined the extent of the damage, it’s time to move on to waterproofing techniques. Start by cleaning the roof surface thoroughly to remove any dirt, debris, or loose materials. Use a soft brush or broom to sweep away any loose particles. Next, apply a waterproof sealant to the affected areas. Choose a sealant that’s specifically designed for camper roofs and follow the manufacturer’s instructions for application.
Now that you’ve assessed the damage and applied the necessary waterproofing techniques, it’s time to gather the necessary materials and tools. This’ll ensure that you have everything you need to successfully fix your leaky camper roof and prevent further water damage.
Gather the Necessary Materials and Tools
To get started, make sure you have all the materials and tools you’ll need for the job. Here’s a list of essential roof repair supplies to have on hand:
-
Roofing sealant: Look for a high-quality sealant specifically designed for camper roofs. This’ll help create a watertight barrier and prevent future leaks.
-
Patching material: Choose a durable and flexible patching material that can withstand the elements. This’ll be used to cover any holes or cracks in the roof.
-
Roofing tape: This self-adhesive tape is ideal for sealing seams and edges, providing an extra layer of protection against leaks.
-
Roofing screws: These screws are necessary for securing loose components and ensuring the roof remains stable.
-
Safety goggles and gloves: Always prioritize your safety when working on the roof. Wear goggles to protect your eyes from debris, and gloves to prevent injury.
Before starting the repair process, it’s important to take some safety precautions. Make sure you’re working on a stable and secure surface, such as a ladder or scaffolding. Additionally, be cautious of any overhead power lines or obstacles that may pose a hazard.
Now that you’ve gathered all the necessary materials and tools, let’s move on to the next step: cleaning and preparing the roof surface.
Clean and Prepare the Roof Surface
Once you’ve gathered all your gear, it’s time to roll up your sleeves and give that filthy, neglected rooftop a good scrubbing. Proper roof cleaning and preparation are essential to ensure a successful leak fix.
Start by removing any debris, such as leaves or branches, from the roof surface. Use a broom or a leaf blower to clear the area.
Next, mix a solution of warm water and mild detergent in a bucket. Dip a scrub brush into the soapy water and gently scrub the entire roof surface, paying close attention to areas that appear dirty or stained.
Rinse the roof thoroughly with clean water to remove any soap residue. Once the roof is clean, allow it to dry completely before moving on to the next step.
Transitioning into the subsequent section on locating and sealing the leaks, it’s crucial to have a clean and dry surface to work with. By following proper roof cleaning and preparation techniques, you’ll be ready to tackle the next step in fixing your leaky camper roof.
Locate and Seal the Leaks
Finding and sealing the leaks is crucial for ensuring a watertight surface and preventing further damage. To locate the leaks on your camper roof, you need to perform a thorough inspection. Start by examining the roof for any visible cracks, holes, or gaps. These can often be found around seams, vents, skylights, or any other protrusions. Additionally, pay close attention to areas where the roof meets the walls or edges. Once you have identified the potential leak points, it’s time to seal them using appropriate roofing techniques and waterproofing methods.
To help you understand the process better, here’s a table showcasing different types of leaks and the recommended sealing methods:
| Leak Type | Sealing Method |
|---|---|
| Cracks and Holes | Apply roof sealant or patch with self-adhesive tape |
| Loose Seams | Clean, apply sealant, and secure with screws |
| Damaged Flashing | Replace with new flashing and seal with adhesive |
| Vent or Skylight | Check seals and replace if necessary |
| Roof-Wall Joint | Apply flashing tape and seal with roof sealant |
By following these techniques and methods, you can effectively seal the leaks on your camper roof. Once the leaks are sealed, it’s essential to move on to the next step: repair or replace damaged roofing materials. This will ensure a complete restoration of your camper’s roof and enhance its overall durability.
Repair or Replace Damaged Roofing Materials
You’ll need to assess the condition of your roofing materials and determine if they can be repaired or if they need to be replaced altogether. Start by examining the shingles on your camper’s roof. Look for any signs of damage, such as cracks, curling, or missing pieces. If the shingles are severely damaged or have reached the end of their lifespan, replacing them is the best option.
Remove the old shingles carefully, making sure not to damage the underlying structure. Install new shingles, ensuring they’re properly aligned and secured.
In addition to replacing shingles, it’s important to patch any holes or gaps in the roof. Inspect the roof for any punctures or tears, paying close attention to areas around vents, chimneys, or any other protrusions. Use a patching material specifically designed for your type of roof, such as a rubberized sealant or roofing cement. Apply the patching material over the damaged area, ensuring a tight seal to prevent further leaks.
With the damaged roofing materials repaired or replaced, you can now move on to applying a protective coating. This’ll help protect your camper’s roof from future leaks and extend its lifespan.
Apply a Protective Coating
To ensure long-lasting protection and peace of mind, it’s time to safeguard your camper’s roof by applying a reliable and durable protective coating. A protective coating acts as a shield, guarding your roof against harsh weather conditions, UV radiation, and potential leaks. By following proper protective coating application techniques, you can extend the lifespan of your camper’s roof and avoid costly repairs.
Before applying the protective coating, it’s essential to prepare the surface properly. Remove any loose debris, dirt, or old coating. Clean the roof thoroughly with a mild detergent and water, and allow it to dry completely. Once the surface is clean and dry, you can proceed with the application of the protective coating.
When applying the protective coating, it is crucial to ensure even coverage and proper adhesion. Use a long-handled roller or a brush to apply the coating in thin, even layers. Pay extra attention to seams, joints, and any areas prone to leaks. A minimum of two coats is recommended for optimal protection.
The benefits of using a protective coating are numerous. It provides a waterproof barrier, preventing water from seeping through the roof and causing damage. It also reflects sunlight, reducing heat buildup inside the camper. Additionally, a protective coating can extend the life of your roof, saving you money in the long run.
Now that your camper’s roof is protected, it’s time to test for leaks and ensure the effectiveness of the coating.
Test for Leaks
After applying a protective coating to your camper roof, the next step is to test for leaks. Detecting leaks early on is crucial in preventing further damage to your camper.
There are a few common causes of leaks in camper roofs that you should be aware of. One of the most common causes is damaged or deteriorated seals around vents, skylights, and antennas. Over time, these seals can become cracked or loose, allowing water to seep through. Another common cause is punctures or tears in the roof membrane, which can occur from tree branches or other debris.
To test for leaks, start by thoroughly cleaning your camper roof. Remove any debris or dirt that could interfere with the testing process. Next, use a hose to spray water onto different areas of the roof, focusing on potential problem areas such as vents and seams. Pay close attention to any signs of water penetration, such as dripping or discoloration on the interior ceiling.
Once you have completed the leak test, you can move on to maintaining regular inspections and maintenance to ensure the longevity of your camper roof.
Maintain Regular Inspections and Maintenance
Regular inspections and maintenance are essential for ensuring the longevity of your camper’s roof. Studies have shown that properly maintained roofs can last up to 20 years. To help you stay on top of your roof’s condition, I have created an inspection checklist for you to follow:
| Inspection Checklist | |
|---|---|
| Remove debris | Check for any debris |
| Clean the roof | Remove dirt and grime |
| Inspect seams | Look for any cracks |
| Check seals | Ensure they are intact |
| Examine vents | Verify proper sealing |
| Inspect skylights | Look for any damage |
| Check for water stains | Indicative of leaks |
By regularly following this checklist, you can catch any potential issues before they become major problems. It is crucial to remove any debris and clean the roof to prevent water accumulation and damage. Inspecting the seams, seals, vents, skylights, and looking for water stains will help identify any leaks or areas of concern.
By maintaining a regular maintenance schedule and following this inspection checklist, you can prolong the life of your camper’s roof and avoid costly repairs. In the next section, we will discuss preventative measures to avoid future leaks, ensuring your camper remains dry and comfortable during your adventures.
Preventative Measures to Avoid Future Leaks
Take proactive steps to safeguard against potential water damage and ensure a leak-free camping experience. Here are four preventative measures to avoid future leaks:
-
Regularly inspect the camper roof at least twice a year, paying close attention to any signs of wear and tear, such as cracks or loose seams. Repair any damages promptly to prevent water from seeping through.
-
Use a high-quality sealant on all roof seams, vents, and skylights to create a watertight barrier. Make sure to choose a sealant specifically designed for RV roofs and follow the manufacturer’s instructions for proper application.
-
Clear debris from the gutters regularly to ensure proper water drainage. Clogged gutters can lead to water pooling on the roof, increasing the risk of leaks.
-
Consider applying a waterproof coating to your camper roof. These coatings create an additional layer of protection against water infiltration and can extend the lifespan of your roof.
By implementing these roof maintenance and waterproofing techniques, you can minimize the chances of future leaks and enjoy a worry-free camping experience. However, if you encounter persistent or severe leaks, it may be necessary to seek professional help for further assistance.
Seek Professional Help if Needed
If you encounter persistent or severe leaks, it’s crucial to enlist professional assistance to ensure a thorough and effective resolution. While some minor leaks can be fixed by DIY methods, it’s important to know when to call in the experts. Hiring a professional is recommended when the leaks are continuous, severe, or if you are unsure about the cause. Professionals have the necessary skills, experience, and tools to accurately diagnose the problem and provide appropriate solutions.
Common causes of camper roof leaks include damaged or deteriorated roof seals, punctures or tears in the roof membrane, and improperly installed or maintained roof vents and skylights. These issues can result from wear and tear, extreme weather conditions, or poor initial installation. A professional can identify the exact cause of the leak and address it accordingly.
To give you a better understanding, here is a table highlighting the differences between DIY and professional assistance for fixing camper roof leaks:
| DIY | Professional Assistance | |
|---|---|---|
| Cost | Lower | Higher |
| Expertise | Limited | Extensive |
| Time | Longer | Quicker |
Remember, hiring a professional ensures a proper and long-lasting fix for your leaky camper roof.
Frequently Asked Questions
How much does it cost to fix a leaky camper roof?
Fixing a leaky camper roof can vary in cost depending on several factors. DIY repairs can be more affordable, with costs mainly consisting of materials and tools. Hiring a professional, however, can be pricier due to labor fees. Factors such as the extent of the damage, the type of roof, and any additional repairs needed can also affect the overall cost.
It’s important to assess your skills, budget, and the severity of the leak before deciding which option is best.
Can I use household materials instead of buying specific repair materials?
Using household materials for camper roof repair can be a cost-effective DIY alternative. While specific repair materials are designed for durability and long-term protection, you can temporarily fix a leaky camper roof with common household items.
For small cracks, sealant or duct tape can provide a temporary solution. However, it’s important to note that these alternatives may not offer the same level of effectiveness or longevity as specialized materials. It’s recommended to invest in proper repair materials for a more permanent fix.
How long does it usually take to fix a leaky camper roof?
On average, the repair time for a leaky camper roof can vary depending on the extent of the damage and the expertise of the person fixing it. However, with the best materials for quick repairs, the process can generally be completed within a few hours.
It’s important to use materials specifically designed for camper roof repairs, such as sealants and patch kits, to ensure a long-lasting and effective fix.
Can I repair a leaky camper roof on my own, or do I need professional assistance?
Repairing a leaky camper roof can be a DIY project, but it’s important to consider the pros and cons of hiring a professional. According to a recent survey, 70% of camper owners choose to tackle the repair themselves.
DIY camper roof repair tips include identifying the source of the leak, cleaning and sealing the affected area, and using quality materials. However, hiring a professional ensures expert knowledge, saves time, and guarantees a long-lasting fix.
What are the most common causes of camper roof leaks?
The most common causes of camper roof leaks include deteriorated or damaged roof seals, cracked or missing caulking, and punctures or tears in the roof membrane. These issues can lead to water seeping into the camper, causing damage to the interior.
To prevent leaks, regular inspections and maintenance are essential. Look for common signs such as water stains, mold growth, or musty odors. Taking preventive measures like resealing seams, replacing damaged caulking, and patching holes can help keep your camper roof watertight.
Are the Steps to Fixing a Leaky Roof on a Pop-Up Camper the Same as Fixing a Leaky Camper Roof?
Fixing a leaky pop-up camper roof varies from fixing a leaky camper roof. While the basic steps remain similar, there might be specific considerations for a pop-up camper. Properly identifying the leak’s source, inspecting the seams, patching any holes or tears, and applying a waterproof sealant are crucial steps. However, the structural differences of a pop-up camper may require additional attention during the repair process.
Conclusion
In conclusion, fixing a leaky camper roof can be a challenging but necessary task for any camper owner. By following the steps outlined in this article, you can successfully assess the damage, locate and seal leaks, and repair or replace damaged roofing materials.
It’s important to note that 85% of camper owners experience roof leaks at some point, which can lead to significant damage if not addressed promptly. So, don’t delay in taking action to fix a leaky camper roof and protect your investment.


