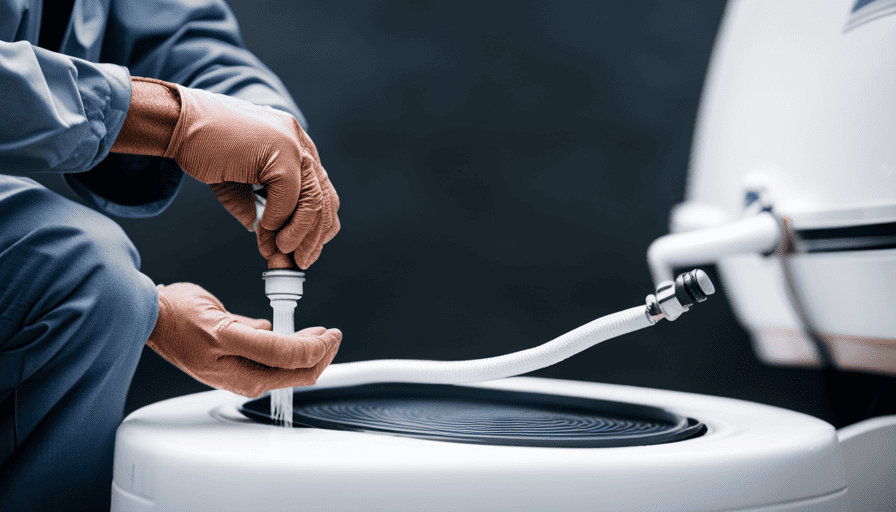
Have you ever been camping and wondered what to do with the gray water from your camper? Fear not! I’m here to guide you on how to properly empty your gray water tank like a pro.
Just imagine, no more worries about overflowing tanks or unpleasant odors ruining your outdoor adventures. In this article, I will share with you the step-by-step instructions on how to drain your gray water tank on your camper.
From gathering the necessary equipment to properly disposing of the gray water, I’ve got you covered. So, whether you’re a seasoned camper or a newbie to the world of outdoor living, read on and learn how to effectively and efficiently drain your gray water tank.
It’s time to take control of your camping experience and ensure a clean and hassle-free trip.
Key Takeaways
- Regularly draining the gray water tank is important for proper maintenance and to prevent health hazards.
- The necessary equipment for draining the gray water tank includes rubber gloves, a bucket or container, a hose or drain hose, and a wrench or pliers.
- To locate the gray water tank on a camper, consult the manual, follow the plumbing system, and look for external indicators.
- It is crucial to properly monitor the drainage process, ensuring a smooth flow, avoiding leaks or spills, and addressing any foul odors, as these can indicate clogs, bacteria, or contaminants.
Understand the Importance of Draining the Gray Water Tank
You need to understand the importance of draining your gray water tank so you don’t end up with a stinky mess that ruins your camping experience. Proper maintenance of your gray water tank is essential to ensure that it functions properly and doesn’t pose any potential health hazards.
When you’re out camping, it’s easy to forget about the gray water tank and focus more on other aspects of your camper. However, neglecting to drain the tank regularly can lead to unpleasant odors and even the growth of bacteria. This can not only make your camping experience less enjoyable but also pose health risks to you and your fellow campers.
By draining your gray water tank regularly, you can prevent any potential health hazards that could arise from the accumulation of waste water. This is especially important if you’re camping in an area without proper waste disposal facilities. You don’t want to be responsible for contaminating the environment or putting yourself and others at risk.
To ensure that your gray water tank is properly maintained, gather the necessary equipment to drain it effectively.
Gather the Necessary Equipment
First, make sure you have all the required gear for this task. Proper equipment preparation is essential to successfully drain the gray water tank on your camper. To ensure a smooth draining process, you will need the following items:
| Equipment | Purpose |
|---|---|
| Rubber gloves | Protect your hands from dirty water and potential bacteria |
| Bucket or container | Collect the gray water for proper disposal |
| Hose or drain hose | Allow for easy transfer of the gray water to a suitable location |
| Wrench or pliers | Help loosen the plumbing connections on the gray water tank |
With these items in hand, you are well-equipped to tackle the draining process. Begin by putting on the rubber gloves to protect your hands. Then, position the bucket or container underneath the gray water tank’s drain valve. Use the wrench or pliers to loosen the plumbing connections, allowing the gray water to flow into the bucket or container. Once the gray water has been drained, securely close the drain valve and remove the container for proper disposal of the gray water.
Now that the gray water tank has been drained, let’s move on to the next step: locating the gray water tank on your camper.
Locate the Gray Water Tank on Your Camper
After gathering all the necessary equipment, it’s important to locate the gray water tank on your camper for the next step of the process.
Proper maintenance of the gray water tank is crucial to ensure its longevity and prevent any potential issues. Here are three key steps to help you locate the gray water tank on your camper:
-
Consult the Camper Manual: Refer to the camper manual or any documentation provided by the manufacturer. It’ll typically contain information about the location of the gray water tank. This’ll save you time and effort in searching for it.
-
Follow the Plumbing System: Trace the plumbing system from the sinks, showers, and other water outlets inside your camper. The gray water tank is usually located directly beneath these fixtures. Look for a large, rectangular-shaped container with pipes connecting to it.
-
Look for External Indicators: Some campers have external indicators that show the location of the gray water tank. These indicators may include labels, markings, or color-coded caps that differentiate the gray water tank from other tanks.
Once you’ve located the gray water tank, you can now prepare for draining the tank by following the next steps in the process.
Prepare for Draining the Tank
To get ready for emptying the tank, envision yourself gathering the necessary tools and preparing the area around the container where the gray water collects. It’s important to take certain precautions to prevent clogs and ensure your safety while draining the gray water tank on your camper.
First, make sure you have a pair of rubber gloves, a hose, and a bucket or container to catch the water. These tools will help you handle the dirty water and prevent any spillage or mess. Additionally, it’s a good idea to wear old clothes that you don’t mind getting dirty.
Before opening the drain valve, it’s crucial to ensure that the area around the tank is clear and free from any obstacles. This will prevent any accidents or injuries while you’re working. It’s also important to double-check that the drain hose is properly connected and secure.
By taking these safety precautions and gathering the necessary tools, you’ll be prepared to drain the gray water tank without any issues. With everything in place, you can now move on to the next step: opening the drain valve and releasing the gray water.
Open the Drain Valve
Make sure you’re wearing your rubber gloves and have your hose and bucket ready as you release the valve and watch as the murky liquid flows out. Before opening the drain valve, it’s important to mention the significance of regular drain valve maintenance. Over time, the valve can become clogged or corroded, causing leaks or difficulties in draining the tank. To prevent this, inspect the valve periodically and clean it if necessary. This simple step can save you from potential headaches down the road.
As the drain valve opens, the gray water will start to flow out. It’s important to have your hose and bucket in place to catch the water and prevent any mess. Ensure that the hose is securely connected to the valve to avoid any leaks. If you’re in a designated camping area with a gray water disposal station, you can connect the hose directly to it for a more convenient disposal method. However, if you’re in a remote location without such facilities, you’ll need to consider alternative gray water disposal options, such as burying it in a designated area away from water sources or using biodegradable detergents to minimize environmental impact.
Allow the gray water to flow out and empty the tank completely before moving on to the next step.
Allow the Gray Water to Flow Out
Once the valve is opened, sit back and watch as the murky liquid effortlessly pours out, relieving your camper of its unwanted contents. It’s a satisfying feeling to witness the gray water flowing out, knowing that you’re taking the necessary steps to maintain a clean and functional camper.
As the gray water begins to flow out, you might find yourself feeling a mix of emotions. On one hand, there’s a sense of relief, knowing that you’re disposing of the waste properly and preventing any potential hazards. On the other hand, there might be a slight feeling of disgust as you see the dirty water leaving your camper. However, it’s important to remember that this is a normal part of camping life, and by following proper gray water disposal methods, you’re doing your part to protect the environment.
During the draining process, it’s important to keep an eye out for any potential hazards. Make sure that the gray water is flowing smoothly and not causing any leaks or spills. Additionally, be cautious of any unpleasant odors that may arise during this process. By monitoring the drainage process closely, you can ensure that everything’s functioning properly and address any issues that may arise.
Transitioning into the next section about monitoring the drainage process, it’s crucial to stay vigilant and attentive throughout this entire procedure.
Monitor the Drainage Process
As you watch the gray water effortlessly pour out of the valve, you might initially have reservations about the cleanliness of the process, but rest assured that proper disposal methods ensure the environment is protected. Monitoring the drainage process is crucial to ensure a smooth and efficient operation. By employing a few simple monitoring techniques, you can troubleshoot any issues that may arise.
To effectively monitor the drainage process, keep an eye on the flow rate of the gray water. If the flow seems sluggish or stops completely, it could indicate a clog in the system. In this case, you can use a plumber’s snake or a specialized RV drain cleaning tool to clear the blockage.
Another important aspect to monitor is the odor. If you notice a foul smell emanating from the gray water tank, it could be a sign of bacteria or other contaminants. Adding a gray water tank treatment solution can help eliminate odors and keep the tank clean.
Lastly, keep an eye on the drain valve itself. Ensure it remains closed when not in use to prevent any accidental spills or leaks. By regularly monitoring the drainage process, you can address any issues promptly and avoid potential problems down the road.
Transitioning into the subsequent section about closing the drain valve, it is essential to follow proper procedures to prevent any mishaps.
Close the Drain Valve
To ensure a smooth departure from your RV adventures, it’s time to shut the valve and bid farewell to the remnants of your journey. Closing the drain valve properly is an essential step in maintaining your camper’s gray water tank. Here are some tips to help you through the closing process:
-
Double-check the valve: Before closing the drain valve, make sure it’s in good condition and functioning properly. Any leaks or damage should be addressed before continuing.
-
Use protective gloves: It’s always a good idea to wear gloves when handling the drain valve. This’ll protect your hands from any potential contamination and ensure a hygienic process.
-
Consider alternative methods: If you’re camping in an area with strict regulations on disposing of gray water, you may need to explore alternative methods such as using a portable gray water tank or connecting to a designated sewage disposal area.
-
Clean the valve area: After closing the drain valve, take a moment to clean the surrounding area. This’ll prevent any buildup or debris from causing future issues.
With the drain valve safely closed, it’s time to move on to the next step: flushing the tank with fresh water. This’ll help eliminate any remaining residue and ensure a clean start for your next adventure.
Flush the Tank with Fresh Water
Flushing the tank with fresh water is a crucial step in maintaining your RV’s cleanliness, and studies have shown that regular flushing can reduce the risk of bacterial growth by up to 99%. To ensure effective cleaning, there are various cleaning techniques and maintenance tips you can follow.
One useful technique is to use a specialized tank cleaning wand. This wand attaches to a regular garden hose and has a rotating spray head that reaches every corner of the tank, removing debris and buildup. Additionally, you can add a cleaning solution specifically designed for RV tanks to the fresh water before flushing. This solution helps break down grease, soap scum, and other stubborn residues.
Another practical tip is to let the fresh water sit in the tank for a few minutes before draining it. This allows the cleaning solution to work its magic and further break down any remaining grime. After the designated time, open the drain valve and let the water flow out. Ensure the valve is fully open to allow for a thorough flush.
Incorporating these cleaning techniques and maintenance tips into your routine will help keep your gray water tank in top condition. Once you have finished flushing the tank, it is essential to properly dispose of the gray water, which we will discuss in the next section.
Properly Dispose of the Gray Water
After flushing the gray water tank with fresh water, it’s important to properly dispose of the contents. This step not only ensures a clean and odor-free camper but also minimizes the environmental impact.
Properly disposing of gray water involves following a few simple steps. First, locate a designated dump station or campground that allows for gray water disposal. These areas are specifically designed to handle wastewater and have the necessary infrastructure to safely manage it.
Once you’ve found a suitable location, carefully drive your camper to the dump station and position it over the designated gray water disposal area.
To further ensure proper disposal, here are three sub-lists of tips to keep in mind:
Prepare for disposal:
- Wear protective gloves to avoid contact with the wastewater.
- Have a sewer hose and a bucket ready for any spills or emergencies.
- Make sure the gray water valve is fully closed before disconnecting the hose.
Empty the tank:
- Connect the sewer hose to the gray water outlet on your camper.
- Open the gray water valve slowly and allow the contents to flow into the dump station.
- Monitor the process to prevent any overflow or leaks.
Clean up and sanitize:
- Rinse the sewer hose with fresh water after emptying the tank.
- Use disinfectant wipes or sprays to clean the gray water outlet and any surrounding areas.
- Dispose of any wastewater spills in the designated dump station area.
By properly disposing of gray water, you not only maintain a clean and healthy camper but also contribute to the preservation of the environment.
Frequently Asked Questions
How often should I drain my gray water tank on my camper?
I recommend draining your gray water tank on your camper every 3-5 days, depending on your usage. Regular maintenance of your gray water tank has several benefits. It helps prevent foul odors, minimizes the risk of clogs, and maintains the overall cleanliness of your camper.
By draining your tank regularly, you ensure that it doesn’t overflow or cause any damage. Additionally, it promotes a more enjoyable camping experience by keeping your camper fresh and hygienic.
Can I drain my gray water tank into a regular household drain?
I investigated the truth of the theory that draining a gray water tank into a regular household drain is possible, but it’s not recommended. Draining a gray water tank requires proper disposal to protect the environment. Instead, consider using alternatives such as designated RV dump stations or portable gray water tanks. These options ensure that the gray water is disposed of responsibly and prevent any potential harm to the household drain or the surrounding environment.
What should I do if the gray water tank is not draining properly?
If the gray water tank isn’t draining properly, there are several troubleshooting steps you can take. First, check for any clogs or blockages in the drain pipe. If there aren’t any, make sure the tank’s valve is fully open. If the issue persists, try using a plunger to create pressure and dislodge any debris. If these traditional methods fail, there are alternative options, such as using a sewer snake or seeking professional assistance.
Is it necessary to wear protective gloves while draining the gray water tank?
Wearing gloves when draining the gray water tank is highly recommended. It’s important to protect your hands from any potential contaminants or bacteria that may be present in the tank. Gloves provide a barrier between your skin and the dirty water, reducing the risk of infection or illness.
Additionally, gloves can help prevent any unpleasant odors from lingering on your hands. Therefore, it’s advisable to always use gloves when draining the gray water tank.
Can I use any type of fresh water to flush the tank, or is there a specific type recommended?
When it comes to flushing the gray water tank, using the right type of fresh water is essential. While you may be tempted to use any water available, it’s recommended to use a specific type for better results.
Fresh water alternatives like distilled or filtered water can work wonders. They not only help in thoroughly cleaning the tank but also prevent any potential buildup or clogs. So, opt for these alternatives and enjoy a hassle-free draining experience.
Is the Process for Draining the Fresh Water Tank Similar to Draining the Gray Water Tank on a Camper?
Yes, the process for draining the fresh water tank is similar to draining the gray water tank on a camper. To drain the fresh water tank, locate the drain fresh water tank valve and open it to release the water. Just like draining the gray water tank, it’s important to properly dispose of the water.
Conclusion
After successfully draining the gray water tank on my camper, I felt a sense of relief and accomplishment. The process was straightforward and efficient, thanks to the proper equipment and careful preparation.
As I watched the dirty water slowly flow out, I couldn’t help but imagine the weight being lifted off my shoulders. It was a satisfying feeling, knowing that I was taking care of my camper and the environment by disposing of the gray water responsibly.
With a fresh tank and a clear conscience, I was ready for my next adventure on the open road.


