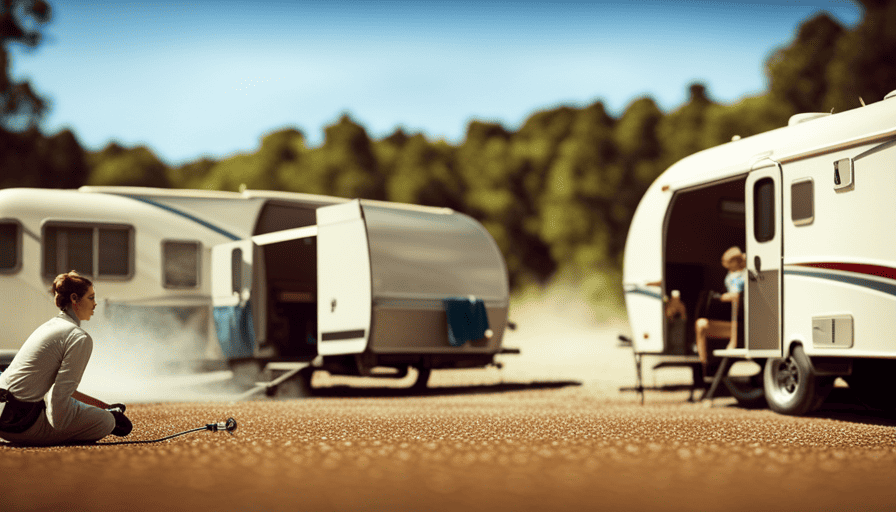
Maintaining the cleanliness of your camper’s exterior is a crucial task that shouldn’t be ignored. Being a fan of campers myself, I recognize the significance of keeping the outside of the camper neat and tidy.
Picture this: the sun shining down on a pristine camper, glistening with cleanliness, ready for your next adventure. Now, contrast that with a dirty, neglected exterior, covered in grime and dirt. Which image would you like your camper to portray?
In this article, I will guide you through the process of cleaning your camper’s exterior, step by step. From assessing the condition of your camper to applying a protective coating, I will provide you with thorough and meticulous instructions to ensure your camper shines like new.
By following the techniques and using the right cleaning products, you can easily remove dirt, stains, and even stubborn grime from your camper’s exterior. Regular maintenance will not only keep your camper looking great but also prolong its lifespan.
So, let’s roll up our sleeves and get started on giving your camper the clean and polished exterior it deserves!
Key Takeaways
- Assess the condition of the camper’s exterior before starting the cleaning process
- Gather necessary cleaning supplies and rinse the camper with water before scrubbing
- Use appropriate cleaning products and techniques based on the type of stain or grime
- Thoroughly rinse and dry the camper’s exterior, and consider applying a protective coating for maintenance and longevity.
Assess the Condition of Your Camper’s Exterior
Before diving into the cleaning process, take a moment to assess the condition of your camper’s exterior to ensure you give it the thorough care it deserves.
Inspecting the exterior is crucial to identify any damage or areas that need special attention. Start by carefully examining the entire surface of your camper, paying close attention to areas that are prone to wear and tear, such as the roof, windows, and doors. Look for any signs of cracks, dents, or peeling paint. Check the seals around windows and doors for any gaps or leaks. Additionally, inspect the tires for any signs of wear or damage.
Once you have thoroughly inspected the exterior, make a note of any areas that require repair or additional cleaning. This will help you prioritize your cleaning tasks and ensure that you address any issues before proceeding.
Now that you have assessed the condition of your camper’s exterior, it’s time to gather the necessary cleaning supplies.
Gather the Necessary Cleaning Supplies
First things first, what supplies do we need to make our camper shine like new? To effectively clean the exterior of our camper, we’ll need a few essential cleaning tools and techniques. Here’s a list to get us started:
- Soft-bristle brush: This will help remove dirt and grime from the surface without scratching it.
- Microfiber cloths: These are perfect for drying and polishing the camper, leaving a streak-free shine.
- Mild detergent: Choose a gentle, non-abrasive cleaner that won’t damage the paint or finish.
- Bucket: Fill it with water and detergent for easy access while cleaning.
- Hose or pressure washer: A hose with adjustable pressure or a pressure washer can help rinse off stubborn dirt and debris.
When it comes to cleaning techniques, start by rinsing the camper with water to remove loose dirt. Then, using the soft-bristle brush and mild detergent, scrub the surface in a circular motion. Rinse thoroughly and dry with a microfiber cloth to prevent water spots. Remember to clean all the nooks and crannies, including the windows, awnings, and wheels.
Now that we have our cleaning supplies ready, let’s move on to preparing the surface for cleaning by inspecting for any damages or repairs that may be needed.
Preparing the Surface for Cleaning
Now that you’ve gathered all the necessary cleaning supplies, let’s take a closer look at the surface of your beloved camper to see if there are any damages or repairs that need your attention. Surface preparation is a crucial step in cleaning your camper exterior. Before you start cleaning, it’s important to inspect the surface for any scratches, dents, or areas that may require repairs. This will ensure that you clean your camper effectively without causing further damage.
To help you assess the condition of your camper, here is a handy table that outlines common damages and repairs you may encounter:
| Damage | Repair |
|---|---|
| Scratches | Polish and buff |
| Dents | Dent removal |
| Fading paint | Repaint |
| Rust spots | Sand and repaint |
Once you’ve identified any necessary repairs, it’s time to move on to the cleaning techniques. Depending on the material of your camper’s exterior, you may need to use different cleaning methods. For example, fiberglass campers require gentle cleaning with mild soap and water, while aluminum campers can be cleaned with a non-abrasive cleaner.
In the next section, we will explore how to choose the right cleaning products for your camper’s specific needs.
Choose the Right Cleaning Products
To effectively bring out the shine and luster of your beloved camper, you’ll want to make sure you have the right cleaning products at your disposal. Choosing eco-friendly options isn’t only beneficial for the environment, but also for the longevity of your camper’s exterior.
Here are four key points to consider when selecting the right cleaning products:
-
Understand different types of cleaning agents: Before purchasing any cleaning product, it’s important to know the different types available. Some common options include all-purpose cleaners, specialized RV cleaners, and environmentally friendly alternatives. Each option has its pros and cons, so it’s essential to choose the one that suits your needs and preferences.
-
Check for eco-friendly options: Opting for eco-friendly cleaning products is a great way to minimize your environmental impact while still achieving excellent cleaning results. Look for products that are biodegradable, phosphate-free, and made with natural ingredients.
-
Consider the surface material: Different camper exterior materials require specific cleaning products. Whether your camper has fiberglass, aluminum, or vinyl siding, ensure that the cleaning product you choose is safe and suitable for that specific material.
-
Read product reviews and recommendations: Before making a purchase, take the time to read reviews and recommendations from other camper owners. Their experiences can provide valuable insights into the effectiveness and usability of different cleaning products.
By selecting the right cleaning products, you can ensure a thorough and effective cleaning process for your camper’s exterior. With that in mind, let’s move on to the next step: starting with a thorough rinse.
Start with a Thorough Rinse
As I unleash the refreshing stream of water onto my beloved camper, I watch as the grime and wear of the road are gently washed away, revealing a renewed sense of adventure and freedom. Starting with a thorough rinse is essential in preparing the surface for a deep clean. By removing dirt and debris, I ensure that the cleaning products I use will be more effective in restoring the camper’s exterior to its former glory.
I take my time during this step, making sure to rinse every nook and cranny. I pay special attention to areas that are prone to collecting dirt and grime, such as the wheel wells and the underside of the camper. Using a high-pressure hose or a power washer can help in dislodging stubborn dirt particles.
By thoroughly rinsing the camper, I create a clean canvas for the next step: scrubbing away stubborn stains and grime. This is where the real transformation happens, as I tackle any remaining dirt or discoloration. With the surface properly prepared, I can now focus on achieving that showroom shine that will make my camper look brand new.
Transitioning to the next section about scrubbing away stubborn stains and grime, I’m excited to dive deeper into the cleaning process and share my tips for tackling even the toughest dirt.
Scrub Away Stubborn Stains and Grime
Get ready to roll up your sleeves and tackle those tough stains and grime that’ve been clinging to your beloved camper. Cleaning the exterior of your camper can be a challenge, but with the right techniques, those stubborn stains and grime’ll be a thing of the past.
Here are three effective cleaning techniques to remove tough stains and grime from your camper:
-
Use a mixture of warm water and mild detergent: This gentle solution’s perfect for removing dirt, bird droppings, and other common stains. Simply apply the mixture to the stained area and scrub gently with a soft brush. Rinse thoroughly with water afterward.
-
Try a specialized camper cleaner: There’re many cleaners on the market specifically designed for campers. These products’re formulated to remove tough stains and grime without damaging the exterior. Follow the instructions on the cleaner and use a soft brush to scrub away the stains.
-
Use a pressure washer: If the stains and grime’re particularly stubborn, a pressure washer can be a powerful tool. Be cautious not to use too much pressure, as it can damage the camper’s exterior. Start with a low-pressure setting and gradually increase if needed.
By following these effective cleaning techniques, you’ll be able to remove tough stains and grime from your camper with ease. Now, let’s move on to the next section and pay attention to detail to achieve a sparkling clean exterior.
Pay Attention to Detail
After scrubbing away stubborn stains and grime from your camper’s exterior, it’s time to move on to the next step: paying attention to detail. This crucial step ensures that every nook and cranny of your camper is thoroughly cleaned and restored to its original shine. Attention to detail is the key to achieving a professional-looking finish.
To begin, focus on areas that are often overlooked, such as the window frames, door handles, and moldings. Use a soft brush or toothbrush to gently scrub away dirt and debris from these intricate areas. For tougher stains, a mixture of mild detergent and warm water can be used.
Additionally, don’t forget to clean the roof of your camper. Leaves, branches, and other debris can accumulate there over time. Use a ladder and a gentle cleaning solution to remove any dirt or stains. Be careful not to damage any vents or antennas.
When it comes to techniques for deep cleaning, consider using a power washer to effectively remove built-up grime and dirt from the exterior. However, be cautious and adjust the pressure accordingly to prevent any damage to the camper’s finish.
Now that you’ve paid attention to every detail, it’s time to move on to the next step: rinsing and drying your camper’s exterior.
Rinse and Dry Your Camper’s Exterior
Make sure you thoroughly rinse and dry your camper’s exterior to achieve a sparkling finish that’ll make heads turn at the campground. To ensure a thorough cleaning, follow these steps:
-
Power washing: Start by using a power washer to remove any dirt, grime, or debris from the surface of your camper. This’ll help loosen and wash away stubborn stains and buildup.
-
Using a soft brush: After power washing, grab a soft brush and gently scrub the surface of your camper. This’ll help remove any remaining dirt or residue that the power washer may have missed. Be sure to pay extra attention to areas with stubborn stains or hard-to-reach spots.
-
Rinse and dry: Once you’ve thoroughly cleaned the exterior of your camper, rinse off any soap or cleaning solution with a hose. Then, use a clean, dry cloth or towel to dry the surface. This’ll prevent water spots and ensure a streak-free finish.
By following these steps, you can achieve a clean and shiny camper exterior. Now, let’s move on to the next section and learn how to apply a protective coating to keep your camper looking its best.
Apply a Protective Coating
To keep your camper looking its best, it’s time to apply a protective coating. Applying a protective coating to your camper’s exterior is essential for maintaining its appearance and protecting it from the elements.
There are various protective coating application techniques that you can use, depending on the type of coating you choose. Before applying the coating, make sure to thoroughly clean and dry your camper’s exterior to ensure the best adhesion.
One of the benefits of using a protective coating is that it creates a barrier between your camper and environmental factors such as UV rays, dirt, and water. This barrier helps to prevent fading, oxidation, and damage caused by exposure to the sun and other elements.
Additionally, a protective coating can make it easier to clean your camper in the future, as it repels dirt and water, reducing the need for frequent washing.
Regularly applying a protective coating to your camper’s exterior is an important step in its maintenance routine. Not only does it enhance the appearance of your camper, but it also prolongs its lifespan.
In the next section, we will explore some regular maintenance tips for keeping your camper’s exterior clean and well-maintained without compromising the protective coating’s effectiveness.
Regular Maintenance Tips for Keeping Your Camper’s Exterior Clean
Now that you’ve applied a protective coating to your camper’s exterior, it’s important to keep up with regular maintenance to ensure it stays clean and in top condition. Taking care of your camper’s exterior not only enhances its appearance, but also extends its lifespan.
One of the common issues you may face is rust spots, which can be unsightly and cause damage if left untreated. To remove rust spots, start by scrubbing the affected area with a mixture of vinegar and baking soda. This combination helps to break down the rust and make it easier to remove. After scrubbing, rinse the area thoroughly with water and dry it completely.
Another important aspect of camper maintenance is preventing mold and mildew buildup. To avoid this, make sure to regularly clean your camper’s exterior with a mild detergent and water solution. Pay special attention to areas prone to moisture, such as around windows and doors. Additionally, ensure proper ventilation by opening windows or using a dehumidifier when necessary.
By following these regular maintenance tips, you can keep your camper’s exterior looking clean and well-maintained. Remember, a little effort goes a long way in preserving the beauty and longevity of your camper.
Frequently Asked Questions
How often should I clean my camper’s exterior?
I recommend cleaning my camper’s exterior regularly to ensure it stays in top condition. By doing so, I can protect the camper exterior and prolong its lifespan.
It’s important to use the best cleaning products for camper exterior, such as mild soap and water or specialized RV cleaners. Regularly washing and waxing the exterior will help remove dirt, grime, and protect against UV damage, keeping my camper looking pristine for years to come.
Can I use household cleaning products to clean my camper’s exterior?
Yes, you can use household cleaning products to clean your camper’s exterior. However, it’s important to use alternative cleaning methods for camper exteriors to ensure optimal results. For stubborn stains, I recommend using a specialized camper cleaner or a mixture of mild detergent and water. Scrub the affected area gently with a soft brush or sponge, and rinse thoroughly. This will effectively remove stubborn stains and leave your camper looking clean and refreshed.
What should I do if I notice any damage or cracks on my camper’s exterior?
If I notice any damage or cracks on my camper’s exterior, I’d take immediate action to repair them. First, I’d assess the severity of the damage and determine if it needs professional assistance. For minor cracks, I’d clean the area thoroughly and apply a suitable sealant or epoxy to prevent further damage.
Regular inspections and maintenance can help prevent future cracks and keep my camper in top condition.
Are there any specific areas of the camper’s exterior that require extra attention during cleaning?
When it comes to cleaning a camper’s exterior, there are a few areas that require extra attention. One common mistake to avoid is neglecting the roof, as it can accumulate dirt and debris.
Another key area is the windows, which can easily get streaks if they’re not cleaned properly.
As for cleaning products, I recommend using a gentle soap or detergent specifically designed for RVs, as well as a soft brush or sponge.
Taking the time to clean these areas thoroughly will keep your camper looking its best.
Is it necessary to wax or polish my camper’s exterior after cleaning?
Yes, it’s necessary to wax or polish your camper’s exterior after cleaning. Not only does it enhance the appearance of your camper, but it also provides a protective layer against dirt, UV rays, and oxidation.
To ensure eco-friendliness, it’s important to use environmentally friendly cleaning products.
Additionally, to prevent oxidation, regularly wash and wax your camper, keep it covered when not in use, and avoid parking it near salty or corrosive environments.
Can I Use the Same Cleaning Method for the Camper Roof and Exterior?
When it comes to cleaning a camper roof and exterior, it’s essential to use different methods. Gentle cleaning solutions are recommended for a camper roof to avoid damaging delicate materials. On the other hand, the camper exterior can tolerate stronger cleansers. Always use the appropriate products and techniques for each area to ensure optimal cleanliness and longevity.
Conclusion
In conclusion, cleaning the exterior of your camper is a task that requires thoroughness and attention to detail. By assessing the condition, gathering the necessary supplies, and using the right cleaning products, you can achieve a pristine finish.
Don’t forget to rinse and dry your camper properly, and apply a protective coating to keep it looking great for years to come. With regular maintenance, you can enjoy a clean and shiny camper on all your adventures.
So, why wait? Isn’t it time to give your camper the TLC it deserves?

