Imagine this scenario: an expansive road unfolding in front of you, the breeze flowing through your hair, and the liberty to travel wherever you wish. Now, envision owning a bespoke camper trailer, tailored precisely for your personal requirements and taste.
Building a camper trailer is not only a practical and cost-effective way to travel, but it also allows you to create a home on wheels that reflects your personality and taste.
In this article, I will guide you through the process of building your own camper trailer from start to finish. We will explore everything from determining your needs and budget, to designing and planning your trailer, to gathering the necessary materials and tools. I will share my knowledge and expertise, providing detailed instructions and tips along the way.
So, if you’re ready to embark on a thrilling journey of building your own camper trailer, join me as we dive into the world of DIY adventure and create a home on wheels that is as unique as you are.
Let’s get started!
Key Takeaways
- Determine needs and set a budget
- Utilize multifunctional furniture and maximize storage
- Plan electrical wiring carefully
- Insulate walls, ceiling, and floor
Determine Your Needs and Budget
Now that you’ve decided to embark on the adventure of building your own camper trailer, it’s time to determine your needs and set a budget that will make your dreams come to life.
Determining your requirements is the first step in creating a camper trailer that perfectly suits your needs and desires. Consider how many people will be using the trailer, what amenities are essential to you, and what type of camping you’ll be doing. Do you need a compact trailer for solo adventures or a larger one to accommodate a family? Will you be camping in remote locations without access to electricity and water? These are all important factors to consider when determining your requirements.
Next, establishing a budget is crucial to ensure that your camper trailer project stays within your financial means. Consider how much you’re willing to invest in the project and what features are most important to you. Research the costs of materials, tools, and any professional assistance you may need. It’s important to be realistic about your budget and prioritize what is necessary versus what would be nice to have.
Now that you’ve determined your needs and set a budget, it’s time to move on to the next exciting step: designing and planning your camper trailer.
Design and Plan Your Camper Trailer
To effectively design and strategize your camper trailer, start by envisioning the layout and features that’ll best suit your needs. Customizable camper designs offer endless possibilities, allowing you to create a space that’s uniquely yours. Here are some tips for optimizing space in a camper trailer:
-
Utilize multifunctional furniture: Choose pieces that can serve multiple purposes, such as a sofa that can be converted into a bed or a table that can be folded away when not in use.
-
Maximize storage: Look for creative storage solutions, such as under-bed compartments, overhead cabinets, and hanging organizers.
-
Think vertically: Make use of wall space by adding hooks, shelves, and magnetic strips to store items.
-
Use lightweight materials: Opt for lightweight materials for your camper trailer construction to minimize weight and maximize available space.
By considering these tips and tailoring the design to your specific needs, you can create a camper trailer that’s both functional and comfortable.
Once you’ve finalized the design, it’s time to gather the necessary materials and tools to bring your vision to life.
Gather the Necessary Materials and Tools
Once you’ve finalized the design, it’s time to gather all the materials and tools you’ll need for your camper trailer project, like a detective collecting clues to solve a mystery.
Choosing the right materials is crucial for building a sturdy and durable trailer that can withstand the rigors of the road. Consider factors like weight, strength, and weather resistance when selecting your materials. Opt for quality plywood for the walls and flooring, as it provides both strength and insulation. For the exterior, aluminum or fiberglass are excellent choices due to their lightweight nature and resistance to corrosion.
In addition to materials, selecting the necessary tools is equally important. A good set of tools will make your project much easier and efficient. You’ll need basic tools like a drill, saw, tape measure, and hammer. However, don’t forget about specialized tools like a jigsaw for cutting curves and angles, or a router for creating smooth edges. Investing in quality tools will ensure they last throughout the entire project and beyond.
With all the materials and tools gathered, you’re now ready to move on to the next exciting phase: building the frame and structure of your camper trailer. This involves constructing the foundation and skeleton that will support the entire trailer.
Build the Frame and Structure
Assembling the foundation and skeleton of your camper trailer is like constructing the sturdy backbone that’ll support your adventure on the open road. To build the frame and structure, you need to employ various building techniques and carefully choose the materials that’ll ensure durability and longevity.
Here are four key steps to consider when building the frame and structure of your camper trailer:
-
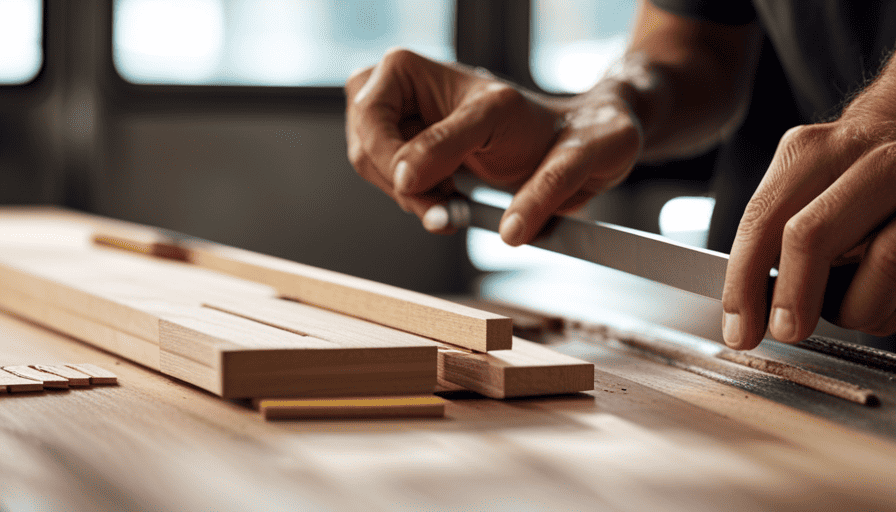
Start by measuring and cutting the steel or aluminum frame pieces according to the dimensions of your trailer design.
-
Weld or bolt the frame pieces together, making sure they’re securely fastened and aligned properly.
-
Install the cross beams and braces to provide additional support and stability to the structure.
-
Use weather-resistant plywood or composite materials for the walls and flooring to protect against the elements and provide insulation.
By following these steps and selecting high-quality materials, you can build a robust and reliable foundation for your camper trailer.
Now, it’s time to transition into the next section about installing the electrical and plumbing systems. These crucial components will transform your camper trailer into a comfortable and functional living space for your adventures on the road.
Install the Electrical and Plumbing Systems
Now that you’ve laid the foundation and structure, it’s time to bring your camper trailer to life by installing the electrical and plumbing systems, turning it into a fully functional home away from home.
When it comes to the electrical wiring, it’s important to plan it carefully to ensure safety and efficiency. Start by installing a breaker panel to distribute power throughout the trailer. From there, run wiring to outlets, lights, and appliances, making sure to follow the proper voltage and amperage requirements. Don’t forget to include a battery system for backup power when you’re off the grid.
Next, let’s talk about the water system installation. Begin by installing a freshwater tank and a water pump to ensure a constant water supply. Connect the tank to the pump, and then run plumbing lines to the sink, shower, and toilet. Consider installing a water heater for warm showers and a greywater tank to collect wastewater for easy disposal.
With the electrical and plumbing systems in place, your camper trailer is one step closer to being a cozy retreat on wheels. In the next section, we’ll dive into how to construct the interior layout and features, transforming your trailer into a comfortable living space.
Construct the Interior Layout and Features
To truly transform your travel haven, it’s crucial to carefully design and create the interior layout and features of your home away from home.
One of the most important aspects of a camper trailer is storage solutions. With limited space, it’s essential to maximize every inch. Consider utilizing overhead cabinets, under bed storage, and built-in shelves to efficiently organize your belongings. Additionally, installing hooks and racks can help keep items off the floor and ensure a clutter-free environment.
Another key element to consider when constructing the interior of your camper trailer is comfortable sleeping arrangements. After a long day of adventuring, having a cozy and inviting space to rest is essential. Consider investing in a quality mattress and bedding that will provide a good night’s sleep. Additionally, incorporating fold-down bunk beds or a convertible sofa can provide extra sleeping options without sacrificing valuable living space.
Now that you have expertly designed the interior layout and features of your camper trailer, it’s time to move on to the next step: installing insulation and flooring. By properly insulating your trailer, you can ensure you stay comfortable in any weather conditions. Adding a layer of insulation to the walls and ceiling will help regulate the temperature inside. Once the insulation is in place, you can then install the flooring of your choice, whether it be hardwood, laminate, or vinyl.
Install Insulation and Flooring
When it comes to creating a comfortable living space in your DIY camper, one important step is insulating the walls and ceiling to regulate the temperature inside.
For example, by adding foam insulation and reflective barriers, you can keep the interior cool during hot summer days and warm during chilly nights, ensuring a cozy environment no matter the weather.
To insulate the walls, you have several insulation types to choose from, such as fiberglass, spray foam, or rigid foam boards. Each has its advantages and disadvantages, so it’s essential to research and select the one that best suits your needs. Additionally, don’t forget to insulate the ceiling to prevent heat loss.
After insulating, it’s time to install the flooring. There are various flooring options available, including vinyl, laminate, or hardwood. Consider factors like durability, ease of installation, and maintenance requirements before making a decision. It’s important to choose a flooring material that can withstand the wear and tear of camping adventures while providing a comfortable surface.
Moving on to the next step, let’s discuss how to paint and decorate the exterior of your camper, adding your personal touch and making it stand out on the road.
Paint and Decorate the Exterior
Spruce up your DIY adventure mobile by adding a splash of personality and style to the exterior with a fresh coat of paint and some creative decorations. When it comes to choosing the perfect exterior color for your camper trailer, the options are endless.
You can go for a classic white, which gives a clean and timeless look, or you can opt for a bold and vibrant color that reflects your personality and sets your trailer apart from the rest. Whatever color you choose, make sure to use a high-quality exterior paint that can withstand the elements and provide long-lasting protection.
Once you’ve decided on the color, it’s time to get creative with the decorations. You can add decals, stickers, or even hand-painted designs to make your trailer truly unique. Consider incorporating elements that reflect your interests, such as mountains, waves, or your favorite outdoor activities. These decorations not only add personality but also serve as a conversation starter during your travels.
After painting and decorating the exterior, you can move on to the next step: installing essential appliances and furnishings. This is where your trailer becomes a home away from home, providing you with all the comforts and conveniences you need during your adventures.
Install Essential Appliances and Furnishings
Once you’ve given your adventure mobile a fresh coat of paint and added creative decorations to the exterior, it’s time to enhance its functionality and comfort by installing essential appliances and furnishings.
Choosing the right appliances is crucial to ensure a comfortable and convenient camping experience. Consider your needs and the available space in your camper trailer. A compact refrigerator is a must-have for storing food and beverages on your trips. A portable stove or cooktop will allow you to prepare hot meals wherever you go. Additionally, installing a small sink with a water tank and pump will provide you with a convenient way to clean dishes and maintain hygiene.
Arranging the furnishings in your camper trailer is another important step to create a cozy and functional living space. Start by choosing a comfortable bed that fits the available space. You can opt for a foldable sofa bed or a mattress that can be easily stored during the day. Don’t forget to add storage solutions such as cabinets or shelves to keep your belongings organized. Consider installing a small table and chairs for dining or working inside the trailer.
Now that you’ve installed essential appliances and arranged the furnishings, your camper trailer is ready to be tested and enjoyed. Get ready to embark on exciting adventures and create lasting memories in your DIY camper trailer.
Test and Enjoy Your DIY Camper Trailer
Now that you’ve completed all the necessary steps, it’s time to hit the road and experience the thrill of testing and enjoying your very own DIY adventure mobile. Testing your camper trailer is essential to ensure that everything is working properly and to make any necessary adjustments before embarking on your camping adventures. There are several testing methods you can use to ensure that your camper trailer is in top shape.
First, take your camper trailer for a test drive to ensure that it is towing smoothly and that all the lights and brakes are working properly. It’s also a good idea to test out the stability of the camper by setting it up at a campsite and checking for any wobbles or unevenness.
Next, test all the appliances and furnishings in your camper trailer. Check that the stove, refrigerator, air conditioner, and other appliances are working correctly. Test out the plumbing system to make sure there are no leaks and that the water flows properly.
Once you’ve tested everything, it’s time to plan your camping destinations. Whether you prefer scenic mountain views, peaceful lakeside retreats, or sandy beach getaways, there are endless possibilities for your camper trailer adventures. Research different camping destinations, make a list of places you want to visit, and start planning your trips.
With your DIY camper trailer ready to go and your camping destinations in mind, you’re all set to embark on memorable adventures. Enjoy the freedom and flexibility that your camper trailer provides, and make lifelong memories exploring the great outdoors. Happy camping!
| Testing Methods | Camping Destinations |
|---|---|
| Test drive | Scenic mountain views |
| Appliance testing | Peaceful lakeside retreats |
| Stability check | Sandy beach getaways |
| Plumbing inspection | Endless camping possibilities |
Frequently Asked Questions
How do I choose the best location to park my camper trailer?
Choosing the right location to park your camper trailer is crucial for an unforgettable camping experience. When considering safety, prioritize areas with good lighting, secure surroundings, and easy access to emergency services.
Additionally, seek locations with breathtaking scenic views and nearby amenities such as hiking trails or fishing spots. Research online resources, consult camping forums, and read reviews to find the perfect spot that combines safety, beauty, and convenience for your camping trip.
What are some common challenges or obstacles I might face when building a camper trailer?
Building a camper trailer can be an exciting and fulfilling endeavor. However, it’s important to be aware of the challenges that may arise along the way.
One common obstacle is finding suitable building materials that are both durable and lightweight. Additionally, budget constraints can limit your options and require careful planning.
Despite these challenges, with the right knowledge and passion, building your own camper trailer can be a rewarding experience.
Are there any legal requirements or regulations I should be aware of when using a camper trailer?
When it comes to using a camper trailer, there are indeed legal requirements and safety regulations that you should be aware of.
These regulations vary depending on your location, but common requirements include having a valid driver’s license, ensuring your trailer is properly registered and insured, and following specific weight and size restrictions.
It’s crucial to familiarize yourself with these rules to ensure a safe and legal journey with your camper trailer.
How do I properly maintain and care for my camper trailer to ensure its longevity?
Taking care of your camper trailer is essential for its longevity. Regular trailer maintenance and camper trailer care are key. Just like a well-oiled machine, your trailer needs attention.
From inspecting the tires and brakes to checking the electrical system, I’ll guide you through it all. Don’t worry, I’ve got you covered. Together, we’ll ensure your camper trailer remains in top-notch condition for years of unforgettable adventures.
Let’s get started!
What are some tips for maximizing storage space in a camper trailer?
To maximize storage space in a camper trailer, organizing belongings is key. I suggest utilizing every nook and cranny efficiently. Invest in collapsible storage bins and vacuum-sealed bags to save space.
Utilize vertical space by installing shelves or hooks. Opt for multi-functional furniture like a bed with storage underneath or a table that can be folded down when not in use.
Lastly, purge unnecessary items regularly to keep the space clutter-free and maximize storage potential.
Are the Steps to Build a Trailer Camper the Same as Building a Camper Trailer?
When it comes to building a trailer camper, it is important to understand if the steps are the same as building a camper trailer. While the wording may differ slightly, the process is generally similar. Both involve constructing the frame, installing walls and flooring, adding amenities, and ensuring functionality. The key lies in proper planning and careful execution to create a comfortable and functional space on wheels.
Conclusion
After weeks of hard work and dedication, I’ve finally finished building my very own camper trailer. The process was challenging but incredibly rewarding. From designing and planning to gathering materials and tools, every step was a labor of love.
Now, as I stand here in front of my creation, I can’t help but feel a surge of excitement. The anticipation builds as I think about all the adventures and memories that await me on the open road. This DIY camper trailer isn’t just a vehicle, it’s a passport to freedom and endless possibilities.
Let the journey begin!

