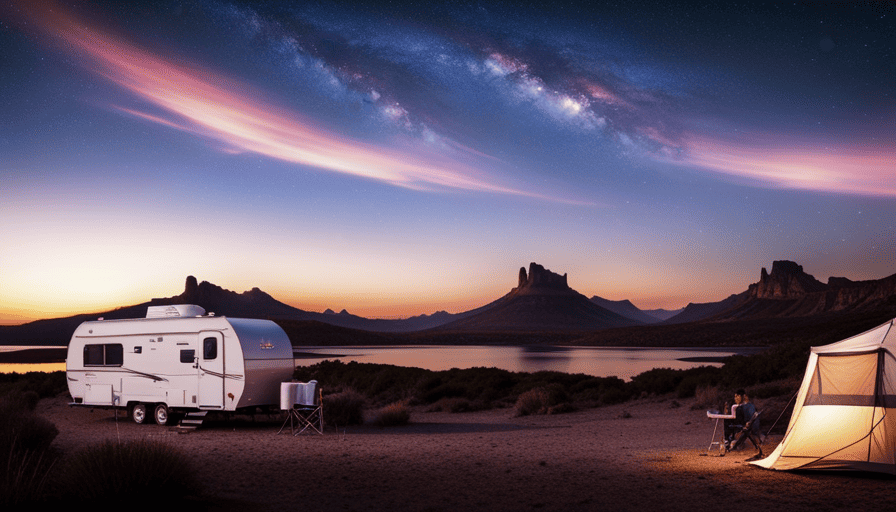
Are you prepared to dive into an exhilarating do-it-yourself journey? Follow along as I lead you through each phase of creating a teardrop camper that’s uniquely yours. Starting with crafting the ideal design to embarking on your inaugural teardrop camper journey, I’ll equip you with all the essential information, insights, and advice necessary to turn this vision into reality.
In this comprehensive guide, we’ll start by creating the perfect layout that suits your needs and preferences. Then, we’ll gather all the necessary materials and tools to ensure a smooth construction process. Building the trailer base, constructing the walls and roof, and installing the interior features will be our next steps.
Safety is paramount, so we’ll thoroughly test and ensure the camper’s safety before hitting the road. We’ll also discuss essential maintenance and upkeep to keep your teardrop camper in top shape for years to come.
Finally, I’ll share my own teardrop camper journey and encourage you to share yours as well.
Let’s dive in and create the teardrop camper of your dreams!
Key Takeaways
- Maximizing storage and optimizing space is crucial in building a teardrop camper.
- High-quality and durable materials should be chosen for construction.
- The trailer base should be built as a strong foundation, with a welded frame and crossbars for stability.
- The interior installation should include electrical and plumbing systems, insulation, and storage solutions.
Designing the Perfect Layout
Now that you’ve got all the necessary measurements, it’s time to start brainstorming and designing the perfect layout for your teardrop camper! When it comes to building a teardrop camper, maximizing storage and optimizing space are crucial factors to consider.
With limited square footage, every inch counts, so it’s important to plan your layout carefully.
One key aspect to focus on is storage. The interior of your teardrop camper should have plenty of cabinets, shelves, and compartments to keep your belongings organized and easily accessible. Consider using vertical space by installing overhead storage compartments or incorporating pull-out drawers under the bed. Additionally, you can utilize the space under the seats or benches for additional storage.
Another important consideration is optimizing space. Think about how you can make the most of every area in your teardrop camper. For example, you can install a foldable table that can be tucked away when not in use, or use multi-purpose furniture such as a sofa that can convert into a bed. Additionally, consider using space-saving appliances and fixtures, such as a compact stove or a foldable sink.
Now that you have a clear idea of how to maximize storage and optimize space, it’s time to move on to the next step: gathering the necessary materials and tools.
Gathering the Necessary Materials and Tools
First, you’ll need to gather all the essential materials and tools for your teardrop camper project, like a carpenter’s toolbox and a stack of sturdy wooden boards, which will be the building blocks of your adventure on wheels. When it comes to choosing the right materials, it’s crucial to opt for high-quality and durable options. The camper’s exterior should be constructed with weather-resistant materials such as marine-grade plywood or aluminum. For the interior, you’ll need insulation foam to regulate the temperature and reduce noise. Additionally, consider using lightweight materials for the frame to ensure easy towing.
In terms of tools, a carpenter’s toolbox is essential. It should include a circular saw, jigsaw, drill, and various hand tools like hammers, screwdrivers, and clamps. Don’t forget a tape measure and a level for accurate measurements and straight lines. Safety should be a priority, so make sure to have protective gear like safety glasses, gloves, and a dust mask.
Here’s a table summarizing the essential materials and tools for building a teardrop camper:
| Materials | Tools | Safety Gear |
|---|---|---|
| Marine-grade plywood | Circular saw | Safety glasses |
| Aluminum sheets | Jigsaw | Gloves |
| Insulation foam | Drill | Dust mask |
| Lightweight frame materials | Various hand tools | |
| Tape measure | ||
| Level |
Now that you have all the necessary materials and tools, you can move on to building the trailer base, laying the foundation for your teardrop camper’s construction.
Building the Trailer Base
To get started, you’ll need to lay the foundation for your adventure on wheels by constructing the trailer base, a crucial step in creating your own mobile haven.
Designing the trailer frame is the first task you’ll need to tackle. Start by determining the dimensions of your teardrop camper and sketching out a blueprint for the trailer frame. This will ensure that the base is sturdy and able to support the weight of the camper.
Next, it’s important to select the right materials for the trailer frame. Steel is a popular choice due to its strength and durability, but aluminum is also a viable option if you’re looking for a lighter weight frame. Whichever material you choose, make sure it is able to withstand the rigors of the road.
Once you have your design and materials in place, it’s time to start building the trailer base. Weld the frame together, ensuring all joints are secure. Add crossbars for additional stability and reinforce any weak points. This will provide a solid foundation for the rest of your teardrop camper build.
Now that the trailer base is complete, you’re ready to move on to constructing the walls and roof of your mobile haven.
Constructing the Walls and Roof
When it comes to building the walls of a teardrop camper, I prefer using plywood for its durability and ease of use. Installing windows and ventilation is crucial to ensure proper airflow and natural light inside the camper. I recommend choosing windows that are both functional and aesthetically pleasing.
Lastly, creating a stable and waterproof roof is essential for protecting the interior of the camper from elements such as rain and snow. I suggest using quality materials and proper sealing techniques to ensure a watertight roof that will last for years to come.
Building the Walls with Plywood or Other Suitable Materials
Now you’re ready to tackle building the walls using plywood or other suitable materials for your teardrop camper.
When it comes to choosing materials, plywood is a popular option due to its affordability and durability. However, if you prefer alternatives to plywood, you can consider using materials like aluminum or fiberglass. These options offer their own advantages such as being lightweight and resistant to moisture.
Another important consideration is insulation for your camper’s walls. You can choose from various insulation options like foam boards or spray foam insulation to ensure comfort inside the camper, regardless of the weather outside.
Once the walls are constructed, the next step is to install windows and ventilation, which will provide natural light and fresh air circulation within the camper.
Installing Windows and Ventilation
Once you’ve got the walls up, it’s time to let the sunshine in and let the cool breeze dance through by installing windows and ventilation.
Installing window screens is an essential step to keep insects and bugs out while enjoying the fresh air. You can choose from various window options, such as sliding or awning windows, depending on your preferences and camper design. Consider the size and placement of the windows to maximize natural light inside the camper.
Additionally, ventilation is crucial for a comfortable camping experience. You can opt for roof vents or side vents to ensure proper air circulation. Choose the right ventilation options based on the climate you’ll be camping in and the size of your teardrop camper.
With these windows and ventilation in place, you’re now ready to create a stable and waterproof roof for your camper.
Creating a Stable and Waterproof Roof
To ensure a secure and watertight shelter, it’s crucial to focus on constructing a stable and weather-resistant roof for your teardrop camper.
The first step in creating a stable roof is choosing the right roofing materials. Fiberglass and aluminum are popular choices due to their durability and resistance to the elements.
Once you’ve selected the appropriate material, it’s important to employ waterproofing techniques to prevent any leaks or water damage. Applying a sealant to the seams and edges of the roof can help create a watertight barrier.
Additionally, installing a vent or skylight with a waterproof seal can provide ventilation while maintaining the camper’s waterproof integrity.
With a stable and waterproof roof in place, you can now move on to installing the interior features, ensuring a comfortable and functional living space.
Installing the Interior Features
First, you’ll need to gather all the necessary materials and tools for installing the interior features of your teardrop camper. This includes electrical and plumbing components, such as wires, switches, outlets, and pipes. Additionally, you’ll need insulation materials, plywood, screws, and a variety of hand tools like drills, saws, and measuring tape.
To help you visualize the process, I’ve created a table below that outlines the steps involved in installing the interior features of your teardrop camper:
| Step | Description |
|---|---|
| 1 | Plan the layout of your interior, considering the placement of electrical outlets, lighting, and plumbing fixtures. |
| 2 | Install the electrical system, including wiring outlets and switches, and connecting them to a power source. |
| 3 | Set up the plumbing system, connecting pipes to a water source and installing a sink, toilet, or shower if desired. |
| 4 | Install insulation materials to ensure comfort and energy efficiency. |
| 5 | Build and install cabinets, shelves, and other storage solutions to maximize space utilization. |
Once you’ve completed the installation of the interior features, you’ll be ready to add the finishing touches to your teardrop camper. This includes adding decorative elements, such as curtains, cushions, and wall coverings, as well as personalizing the space with your own style and preferences.
Adding the Finishing Touches
When it comes to adding the finishing touches to your teardrop camper, there are a few key points to consider.
First, you’ll want to decide whether to paint or stain the exterior of your camper. This step not only adds a protective layer but also allows you to customize the look of your camper.
Next, installing exterior lights and accessories is essential for safety and functionality. From taillights to awnings, these additions will enhance your camping experience.
Lastly, personalizing your teardrop camper with decorative elements is a fun way to make it your own. Whether it’s adding decals, curtains, or unique trim, these small details can make a big impact on the overall appearance of your camper.
Painting or Staining the Exterior
Once you’ve finished sanding and priming the exterior, it’s time to add a pop of color or a rich stain to give your teardrop camper its unique personality. When it comes to painting or staining the exterior, there are a few important factors to consider. First, you’ll want to choose the right color that complements your personal style and enhances the overall look of the camper. Whether you opt for a bold and vibrant hue or a more subtle and natural tone, make sure to select a paint or stain that is specifically designed for outdoor use to ensure durability and protection against the elements. Additionally, consider using different painting techniques, such as brush strokes or spray painting, to achieve the desired finish.
Below is a table outlining some popular color options for teardrop campers:
| Color | Description |
|---|---|
| Vintage White | Classic and timeless |
| Forest Green | Nature-inspired and calming |
| Sky Blue | Fresh and relaxing |
| Canary Yellow | Bright and cheerful |
| Rustic Red | Bold and rustic |
Now that the exterior has been painted or stained, it’s time to move on to the next step of installing exterior lights and accessories to enhance both the functionality and aesthetics of your teardrop camper.
Installing Exterior Lights and Accessories
Now that you’ve added a pop of color or a rich stain to the exterior of your teardrop camper, it’s time to enhance its functionality and aesthetics by installing exterior lights and accessories.
One important addition is installing solar panels. These panels are a great investment as they provide a sustainable and renewable source of power for your camper. They can charge your batteries and power your lights, appliances, and other electrical devices.
Additionally, you can consider adding a rear storage rack. This will provide extra space to store camping gear, bicycles, or any other items you may need on your adventures.
With the installation of solar panels and a rear storage rack, your teardrop camper will be even more versatile and convenient for your outdoor experiences.
Now, let’s move on to personalizing your teardrop camper with decorative elements.
Personalizing Your Teardrop Camper with Decorative Elements
To truly make your teardrop camper feel like home, add your personal touch with decorative elements that reflect your unique style and personality. Choosing unique decorative elements is a fun and creative way to customize your camper and make it stand out from the rest.
One idea is to create a custom mural on the exterior inspired by nature, such as a beautiful sunrise or a serene mountain landscape. You can also add decorative decals or vinyl stickers that represent your favorite hobbies or interests.
Another DIY customization idea is to hang curtains or blinds that match your interior design theme. Additionally, you can incorporate decorative throw pillows, rugs, and wall art inside the camper to create a cozy and inviting atmosphere.
By personalizing your teardrop camper with these decorative elements, you’ll be able to showcase your individuality and create a space that truly feels like your own.
Now, let’s move on to testing and ensuring safety during the camper building process.
Testing and Ensuring Safety
When it comes to testing and ensuring the safety of a teardrop camper, there are several key points to consider.
First, it’s important to check for structural stability and proper weight distribution. This involves inspecting the frame, walls, and roof for any signs of weakness or damage. It also means ensuring that the weight is evenly distributed to prevent any potential issues on the road.
Additionally, testing the electrical systems and plumbing, if applicable, is crucial to ensure they’re functioning properly and safely.
Finally, ensuring proper ventilation and fire safety measures is essential to create a safe and comfortable camping experience. This includes checking for adequate airflow, installing smoke and carbon monoxide detectors, and having a fire extinguisher readily available.
Checking for Structural Stability and Proper Weight Distribution
Before proceeding, it’s crucial to ensure that the teardrop camper has structural stability and proper weight distribution. Here are four key steps to check for structural integrity and analyze weight distribution:
-
Inspect the frame: Start by examining the camper’s frame for any signs of rust, cracks, or weak spots. Look for any areas that may need reinforcement or repair.
-
Evaluate the suspension system: Check the suspension components, such as the springs, shocks, and axles. Make sure they’re in good condition and capable of supporting the camper’s weight.
-
Perform a weight distribution analysis: Measure the weight distribution on each axle using a weight scale. Adjust the load if necessary to ensure balanced weight distribution for safe towing.
-
Reinforce critical areas: Strengthen weak points, such as the corners and joints, using additional bracing or welding to enhance the camper’s overall stability.
Once you’ve completed these steps, you can move on to testing the electrical systems and plumbing, if applicable, to ensure a fully functional teardrop camper.
Testing Electrical Systems and Plumbing, if applicable
Once you’ve ensured the structural stability and weight distribution of your teardrop camper, it’s time to test the electrical systems and plumbing, if applicable, so you can embark on your adventures with confidence.
Testing the electrical systems is crucial to ensure everything is functioning properly and to avoid any potential issues during your trips. Start by checking all the lights, both interior and exterior, making sure they turn on and off as expected. Test the outlets to ensure they’re providing power and check all the switches and controls for proper functionality.
Additionally, troubleshooting the plumbing system, if your camper has one, is important to prevent any leaks or malfunctions. Run water through all the faucets and check for any leaks or unusual noises.
By testing the electrical systems and troubleshooting plumbing, you can ensure a comfortable and safe camping experience.
Moving on to the next section, it’s important to also ensure proper ventilation and fire safety measures are in place.
Ensuring Proper Ventilation and Fire Safety Measures
Make sure to prioritize the safety of your camping experience by ensuring proper ventilation and fire safety measures are in place. To create a safe and comfortable environment inside your teardrop camper, consider the following:
-
Install a fire extinguisher: Having a fire extinguisher readily accessible is crucial in case of emergencies. Choose one that’s appropriate for the size of your camper and make sure it’s easily accessible.
-
Design a ventilation system: Proper ventilation is essential to prevent condensation buildup and maintain fresh air circulation. Install vents that can be opened and closed as needed, allowing for airflow while keeping out rain and insects.
-
Use fire-resistant materials: When building your teardrop camper, opt for fire-resistant materials like fire-rated foam insulation and flame-resistant fabrics for curtains and upholstery.
-
Install a smoke and carbon monoxide detector: Keep yourself and your fellow campers safe by installing smoke and carbon monoxide detectors. Test them regularly to ensure they’re functioning properly.
By implementing these safety measures, you can enjoy your teardrop camper knowing that you’ve taken the necessary precautions. Moving forward, let’s discuss planning for maintenance and upkeep to keep your camper in top shape.
Planning for Maintenance and Upkeep
When it comes to maintaining my teardrop camper, regular cleaning and maintenance tasks are essential. I make sure to clean both the interior and exterior regularly to keep it looking its best.
Additionally, I inspect the camper for any repairs or replacements that may be needed, addressing them promptly to ensure its longevity.
Lastly, during the off-seasons, I take the necessary measures to store and protect my teardrop camper, such as covering it with a waterproof tarp and keeping it in a secure location.
Regular Cleaning and Maintenance Tasks
Regular cleaning and maintenance tasks for your teardrop camper are essential to keep it in top condition, ensuring that it’ll last for many years to come. Did you know that regular cleaning can help prevent mold and mildew from forming inside your camper? To maintain your teardrop camper, it’s important to establish a regular maintenance and cleaning schedule.
This includes tasks such as cleaning the exterior and interior surfaces, checking and cleaning the windows and screens, inspecting and cleaning the roof and awning, and cleaning and maintaining the plumbing system. Additionally, it’s important to regularly check and clean the electrical system, including lights, outlets, and wiring.
By following a regular cleaning and maintenance routine, you can ensure that your teardrop camper stays in great shape and is ready for your next adventure. Addressing any repairs or replacements as needed will further prolong its lifespan and keep it in optimal condition.
Addressing any Repairs or Replacements as Needed
If you notice any issues or damages, promptly address repairs or replacements to keep your teardrop camper in optimal condition for future adventures. Here’s how to do it while keeping budget considerations in mind:
-
Assess the damage: Thoroughly inspect your teardrop camper to identify areas that need repair or replacement.
-
Prioritize repairs: Determine which repairs are essential for safety and functionality, and address them first.
-
Research cost-effective options: Look for affordable replacement parts or consider DIY repairs to save money.
-
Consider professional assistance: If repairs are complex or you lack the necessary skills, hiring a professional can ensure the job is done correctly.
By promptly addressing repairs and replacements, you can ensure your teardrop camper remains in great condition.
Now, let’s move on to discussing how to store and protect your teardrop camper during off-seasons.
Storing and Protecting Your Teardrop Camper During Off-Seasons
During the off-season, it’s crucial to shield your teardrop gem from the harsh elements and store it in a safe haven. Winter storage is a priority for every teardrop camper owner to ensure their investment stays in top shape. One of the best ways to protect your teardrop camper is by using weatherproof covers. These covers are designed to withstand the harshest weather conditions and keep your camper safe from rain, snow, and UV rays. They provide an extra layer of protection against moisture and prevent any potential damage. When storing your teardrop camper, it’s important to find a dry and secure location, such as a garage or storage facility. This will help prevent any unwanted moisture or pests from getting inside.
Here is a visual representation of ideas for storing and protecting your teardrop camper during off-seasons:
| Tips for Storing and Protecting Your Teardrop Camper |
|---|
| 1. Use weatherproof covers to shield against harsh weather conditions |
| 2. Find a dry and secure location for storage |
| 3. Clean and dry your camper before storing |
| 4. Remove any perishable items |
| 5. Check for any repairs or maintenance needed before storing |
By properly storing and protecting your teardrop camper during off-seasons, you can ensure it stays in pristine condition for many adventures to come. Now, let’s transition into the subsequent section about going on your first teardrop camper adventure.
Going on Your First Teardrop Camper Adventure
When preparing for your first teardrop camper adventure, it’s important to make sure you have all the essential supplies on hand. This includes things like bedding, cooking utensils, and camping gear.
Familiarizing yourself with the camper’s features is also crucial, as it’ll make your trip much smoother and more enjoyable. Take the time to learn how everything works, from setting up the bed to using the kitchenette.
Once you hit the road, you’ll love the freedom and flexibility of traveling in your own camper. You can go wherever you want, whenever you want, and have all the comforts of home with you.
So pack your bags, get ready to explore, and embrace the adventure of teardrop camping.
Preparing for Your Trip with Essential Supplies
To ensure a successful trip, make sure you have all the necessary supplies ready before setting off on your teardrop camper adventure.
When it comes to packing essentials, there are a few items you shouldn’t leave behind. First, make sure you have enough bedding and pillows for a comfortable night’s sleep. Additionally, pack a first aid kit with basic medical supplies in case of any emergencies.
As for meal planning, bring non-perishable food items that are easy to prepare, such as canned goods and instant noodles. Don’t forget to pack cooking utensils, plates, and cutlery as well. Lastly, grab a cooler to keep your food fresh and drinks cold.
By having these essential supplies on hand, you’ll be well-prepared for your teardrop camper adventure.
Now, let’s move on to familiarizing yourself with the camper’s features.
Familiarizing Yourself with the Camper’s Features
Now that you’ve prepared for your trip with all the essential supplies, it’s time to familiarize yourself with the features of your teardrop camper. This step is crucial for ensuring camper safety and a smooth and enjoyable experience on the road.
Start by understanding the weight of your camper and how it affects towing and maneuvering. Familiarize yourself with the camper’s hitch system, electrical connections, and tire pressure.
Take the time to learn about the camper’s water and electrical systems, as well as how to operate the appliances and amenities. Knowing how to properly set up and secure your camper at campsites is also essential for a safe and comfortable stay.
Once you feel confident in operating your camper, you can start enjoying the freedom and flexibility of traveling in your own home on wheels.
Enjoying the Freedom and Flexibility of Traveling in Your Own Camper
Experience the unparalleled freedom and flexibility of hitting the open road in your very own cozy, mobile sanctuary. Traveling in a teardrop camper offers a unique and exciting way to explore the world around you. With all the essential amenities packed into a compact space, you’ll have everything you need right at your fingertips. From a comfortable bed to a kitchenette and storage, your camper becomes your home away from home. Imagine waking up to breathtaking views, cooking meals in the great outdoors, and setting up camp wherever your heart desires. The benefits of camper living are endless – no more expensive hotel stays, no more strict itineraries, and no more lugging around heavy suitcases. Embrace the freedom of the open road and embark on your own teardrop camper journey.
Sharing Your Teardrop Camper Journey
Share your teardrop camper journey with others and inspire fellow camping enthusiasts along the way. One of the joys of owning a teardrop camper is the ability to make modifications and customize it to fit your specific needs. Whether it’s adding extra storage compartments or installing solar panels for off-grid adventures, sharing these modifications with others can provide valuable insights and inspiration.
By documenting your journey and sharing it online through social media platforms or camping forums, you can connect with like-minded individuals and create a community of teardrop camper enthusiasts.
Additionally, if you enjoy camping with pets, sharing your experiences can be especially helpful for other pet owners. From tips on keeping your furry friends comfortable during road trips to finding pet-friendly campsites, there are many aspects to consider when bringing pets along on your teardrop camper adventures. By sharing your knowledge and firsthand experiences, you can help others navigate the challenges and enjoy the rewards of camping with pets.
Remember to include detailed descriptions and photos of your modifications and camping experiences. This way, you can paint a vivid picture for others and provide them with the necessary information to make informed decisions for their own teardrop camper journeys.
So, don’t hesitate to share your teardrop camper journey and inspire others to embark on their own camping adventures.
Frequently Asked Questions
How much does it cost to build a teardrop camper?
A teardrop camper can be built at a reasonable cost, depending on your budget and the materials you choose. A cost estimate for building a teardrop camper ranges from $2,000 to $10,000, depending on factors such as size, features, and the quality of materials used.
To get a better idea of the budget breakdown, you should consider expenses like the trailer chassis, insulation, wiring, plumbing, appliances, and finishing touches like paint and upholstery.
Can I customize the interior features to suit my needs?
Yes, you can absolutely customize the interior features of a teardrop camper to suit your needs. In fact, customization options are one of the main advantages of building your own teardrop camper. You can design the interior layout, choose the materials, and add features that align with your preferences and camping style.
From storage solutions to sleeping arrangements, the possibilities for interior design are endless, allowing you to create a personalized and functional space within your teardrop camper.
What type of maintenance does a teardrop camper require?
Teardrop camper maintenance is essential to keep it in top condition. Regularly inspect the exterior for any signs of damage, such as leaks or cracks, and repair them promptly.
Clean the camper regularly to prevent dirt and grime buildup. Check the tires for proper inflation and wear. Lubricate hinges and locks to ensure smooth operation.
Additionally, address common issues like electrical problems or plumbing leaks. Following these teardrop camper maintenance tips will help prolong its lifespan and ensure enjoyable camping experiences.
What kind of safety precautions should I take when towing a teardrop camper?
When towing a teardrop camper, it’s crucial to prioritize safety.
Before hitting the road, ensure that your trailer is securely attached to your vehicle and that all connections are properly fastened.
Pay attention to weight distribution, making sure that the majority of the weight is centered and balanced. This will help maintain stability and prevent swaying.
Additionally, always double-check your tire pressure and inspect your brakes and lights to ensure they’re in good working order.
Are there any legal requirements or permits needed for using a teardrop camper?
Legal requirements for using a teardrop camper vary depending on your location. In some states or countries, you may need a special permit or license to tow a camper.
Additionally, there could be restrictions on where you can park or camp with a teardrop camper. It’s important to research and comply with the regulations in your area to ensure a smooth and legal camping experience.
What are the Detailed Steps to Build a Teardrop Camper?
Whether you’re a seasoned DIY enthusiast or a novice, the teardrop camper building guide provides a comprehensive roadmap to create your own cozy haven on wheels. First, gather materials including plywood, insulation, and essentials like windows and doors. Next, construct the frame, attach the walls, and install the necessary electrical and plumbing systems. Finally, customize the interior with sleeping quarters, storage compartments, and a functional kitchenette.
Conclusion
In conclusion, building a teardrop camper step by step has been an incredible journey. It’s been a labor of love, from designing the perfect layout to gathering the necessary materials and tools. Every step has its challenges, but they are also rewarding tasks. Constructing the walls and roof, installing the interior features, and ensuring safety have all been part of this process. Planning for maintenance and upkeep is essential to keep your teardrop camper in top shape. Looking ahead, it’s important to have a clear teardrop camper blueprint in mind for any future modifications or upgrades. Having a solid plan in place will make any future projects go much more smoothly. Overall, the time and effort put into building a teardrop camper step by step has been well worth it, and I can’t wait to hit the road and start making memories in this custom-built beauty.
Finally, going on your first teardrop camper adventure is like spreading your wings and soaring into the great unknown. So, grab your keys and let the open road be your canvas as you paint your own teardrop camper journey.


