Were you aware that more than 10 million American households possess a camper?
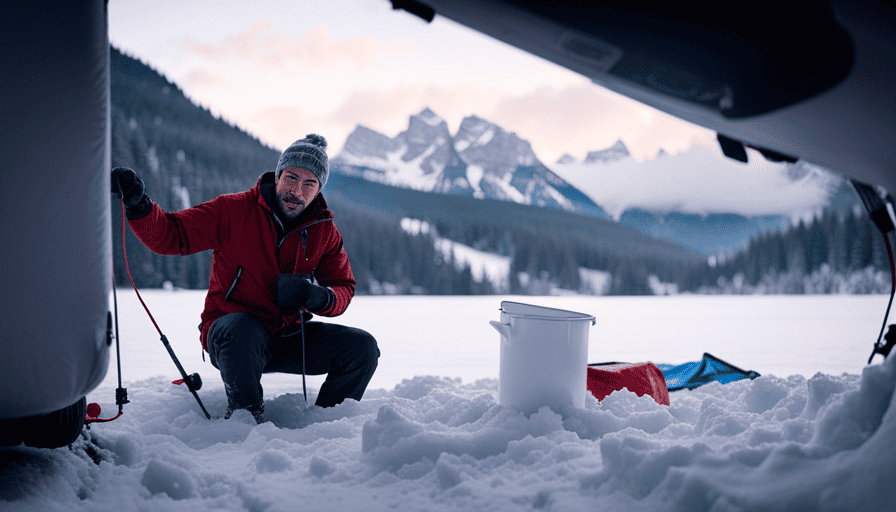
With winter fast approaching, it’s important to know how long it takes to properly winterize your camper to protect it from the harsh weather conditions.
Winterizing your camper is a necessary task to prevent damage and ensure it’s ready for your next adventure in the spring.
In this article, I will guide you through the step-by-step process of winterizing your camper, from gathering the necessary supplies to de-winterizing in the spring.
It’s crucial to follow these steps diligently to avoid costly repairs and keep your camper in optimal condition.
So, let’s dive in and learn how to winterize your camper effectively and efficiently.
Key Takeaways
- Winterizing a camper is essential to protect it from harsh weather and prevent damage.
- The process of winterizing involves draining the water systems, disconnecting and storing batteries, emptying and cleaning tanks, and inspecting and sealing any leaks or cracks.
- Gathering the necessary supplies, such as RV antifreeze and water pump converter kit, is crucial for the winterizing process.
- Adding antifreeze to the plumbing system is a vital step to ensure that the camper is fully winterized.
Gather the Necessary Supplies
You’ll need to gather all the necessary supplies to winterize your camper. Preparing for winter requires a few essential supplies that will ensure your camper stays protected during the cold months.
First, you’ll need antifreeze specifically designed for RVs. This is crucial for preventing your water systems from freezing and causing damage.
You’ll also need a water pump converter kit, which allows you to easily pump the antifreeze throughout your camper.
Additionally, you’ll need a water heater bypass kit to ensure the antifreeze doesn’t enter the water heater.
Other supplies include a water pressure regulator, a water filter, and a water hose. These items will help maintain the integrity of your water systems.
Lastly, don’t forget to have a water tank sanitizer and a tank cleaning wand to ensure your fresh water tank is clean and safe for use.
Now that you have gathered all the necessary supplies, you can move on to the next step of winterizing your camper: draining the water systems.
Drain the Water Systems
First, make sure to empty all the water systems in your camper. Failing to properly drain the water systems can lead to potential risks such as frozen pipes, cracks, and water damage. To effectively drain and winterize the water systems in your camper, follow these tips.
Start by turning off the water supply and opening all faucets, including the shower and outdoor hose connections. This will allow the water to drain completely from the pipes.
Next, locate the water heater and drain it by connecting a hose to the drain valve and directing the water outside. Don’t forget to also drain the freshwater tank and the wastewater tanks.
Once the water is drained, it’s important to remove any remaining water from the system. You can do this by using compressed air to blow out the lines. Begin by attaching an air compressor to the city water inlet and gradually increase the pressure until all the water is expelled. Be sure to do this for both the hot and cold water lines.
Properly draining the water systems in your camper is crucial to avoid potential damage. By following these tips, you can effectively winterize your camper’s water systems and prevent any issues.
Now, let’s move on to the next step and discuss how to disconnect and store the batteries.
Disconnect and Store the Batteries
After draining the water systems, it’s time to disconnect and safely store the batteries in your camper. Proper battery maintenance is essential to ensure they remain in good condition during winter storage. Here are some winter storage tips for your batteries:
| Maintenance Task | Frequency | Description |
|---|---|---|
| Check voltage | Monthly | Use a multimeter to measure the voltage and ensure it is within the manufacturer’s recommended range. |
| Clean terminals | Annually | Remove any corrosion or buildup on the battery terminals using a wire brush and a solution of baking soda and water. |
| Apply grease | Annually | Apply a thin coat of dielectric grease to the terminals to protect against corrosion. |
| Store in a cool, dry place | Winter | Remove the batteries from the camper and store them in a cool, dry location to prevent freezing and damage. |
By following these maintenance tasks, you can prolong the life of your batteries and ensure they are ready for use when spring arrives. Now, let’s move on to the next step: emptying and cleaning the tanks.
Empty and Clean the Tanks
To ensure a smooth transition into winter storage, it’s time to address the task of emptying and cleaning the tanks in your camper. This step is crucial to maintain the overall condition of your camper and prevent any damage during the colder months.
The cleaning process involves thorough and precise attention to detail, following a maintenance checklist to ensure every aspect is covered.
First, start by emptying all the tanks, including the fresh water, gray water, and black water tanks. Make sure to follow proper disposal procedures and guidelines to protect the environment. Once the tanks are emptied, it’s time to clean them thoroughly. Use a dedicated RV tank cleaner and follow the instructions carefully. Scrub the tanks using a long-handled brush, paying close attention to any stubborn stains or buildup.
After the tanks are cleaned, rinse them thoroughly to remove any remaining residue or cleaning solution. This is crucial to prevent any odors or contamination. Finally, let the tanks dry completely before closing them up for the winter.
Now that the tanks are empty and clean, it’s time to move on to the next step of the winterization process: inspecting and sealing any leaks or cracks. This will ensure that your camper is properly sealed and protected from any potential damage.
Inspect and Seal any Leaks or Cracks
Now that the tanks are empty and clean, it’s crucial to thoroughly inspect and seal any leaks or cracks in order to protect your camper from potential damage.
Inspecting for damage is an essential step in the winterization process, as even the smallest leak or crack can lead to significant problems down the line. Start by visually examining all exterior surfaces of your camper, paying close attention to areas where water may accumulate, such as around windows, vents, and seams. Look for any signs of wear, including discoloration, bubbling, or peeling.
Additionally, carefully inspect the roof for any damage, such as punctures or loose seals.
When it comes to repairing any issues found during the inspection, it’s important to use the appropriate materials and techniques. Begin by cleaning the area surrounding the leak or crack with a mild detergent and water solution. Once the area is clean and dry, apply a high-quality sealant that is specifically designed for RVs, ensuring that it completely covers the damaged area. Allow the sealant to dry thoroughly before moving on to the next step.
With the leaks and cracks properly sealed, you can now proceed to the next section: adding antifreeze to the plumbing system.
By taking the time to inspect for damage and repair any issues, you’re ensuring that your camper will be well-protected during the winter months.
Add Antifreeze to the Plumbing System
First things first, it’s time to safeguard your plumbing system by adding antifreeze. This crucial step in the winterizing process will help prevent freezing and potential damage to your camper’s pipes. Antifreeze acts as a protective barrier, ensuring that your plumbing system remains intact during the cold winter months.
To properly add antifreeze to your plumbing system, follow these steps:
-
Drain the water: Start by draining all the water from your camper’s plumbing system. This can be done by opening all faucets and letting the water flow out.
-
Prepare the antifreeze: Mix the appropriate amount of antifreeze with water according to the manufacturer’s instructions. This will ensure that the antifreeze is properly diluted for your specific camper.
-
Use a hand pump or air compressor: Connect a hand pump or an air compressor to the water inlet of your camper. Slowly pump the antifreeze mixture into the system, making sure it reaches all faucets, showers, and toilets.
-
Run the faucets: Turn on each faucet, one at a time, until you see the antifreeze flowing out. This will ensure that the entire plumbing system is filled with antifreeze.
By following these steps, you can effectively prevent freezing and protect your camper’s plumbing system during the winter months. Once the antifreeze has been added, it’s time to move on to the next section and cover and protect the exterior of your camper.
Cover and Protect the Exterior
Once you’ve successfully added antifreeze to your plumbing system, it’s time to give your camper’s exterior the ultimate protection it deserves. To ensure your camper withstands the harsh winter weather, it’s crucial to cover and protect the exterior using various weatherproofing techniques. Here are four essential steps to effectively safeguard your camper:
-
Protective Covers: Invest in high-quality protective covers designed specifically for your camper. These covers are made from durable materials that shield your camper from snow, rain, and UV rays. Make sure the cover fits snugly and is secured tightly to prevent any moisture from seeping in.
-
Weatherproofing Techniques: Apply a weatherproof sealant to all exterior seams and joints to create a watertight barrier. Pay special attention to areas prone to leaks, such as windows, vents, and doors. Additionally, use silicone-based lubricants to protect hinges and locks from freezing and corrosion.
-
Tire Protection: Inflate your camper’s tires to the recommended pressure and cover them with tire covers. This prevents cracking and prolongs tire life. Park your camper on a level surface or use leveling blocks to prevent the tires from bearing excessive weight.
-
Battery Maintenance: Remove the camper’s battery and store it in a safe, dry location. Clean the battery terminals and apply a corrosion inhibitor to prevent damage during storage.
By following these protective measures, you can ensure your camper remains in prime condition throughout the winter season. Now, let’s discuss how to store the camper in a safe location.
Store the Camper in a Safe Location
To ensure the safety and longevity of your camper, it’s crucial to find a secure location for storage during the winter months. Finding a reliable storage facility is essential to protect your camper from harsh weather conditions and potential theft. Look for a facility that offers secure fencing, surveillance cameras, and controlled access. Additionally, consider the proximity of the storage facility to your home, as it will make it more convenient for regular check-ups.
Before storing your camper, it’s important to prepare the storage space properly. Begin by cleaning the interior and exterior thoroughly to remove any dirt, debris, or moisture that could cause damage during storage. Empty all water tanks and ensure that the plumbing system is properly drained to prevent freezing and potential leaks. Disconnect the battery and store it in a cool, dry place to avoid corrosion.
To summarize, finding a secure storage facility and preparing the storage space are vital steps in winterizing your camper. By taking these precautions, you can ensure that your camper remains in top condition throughout the winter. In the next section, we will discuss the importance of regular maintenance throughout the winter months.
Regular Maintenance Throughout the Winter
After storing the camper in a safe location, it’s important to continue regular maintenance throughout the winter to ensure it remains in good condition. Winterizing precautions and winter maintenance tips are crucial in preventing any damage caused by the cold weather.
To properly maintain your camper during the winter, here are some important steps to follow:
-
Inspect the exterior for any cracks or gaps that may allow cold air or moisture to enter.
-
Check the tires regularly and make sure they’re properly inflated to prevent flat spots.
-
Keep the camper clean and free from any debris or snow buildup, as this can lead to damage or leaks.
-
Regularly inspect and clean the electrical and plumbing systems to prevent freezing or damage.
By following these winter maintenance tips, you can minimize the risk of any costly repairs or damage to your camper during the colder months.
In the subsequent section about ‘de-winterizing in the spring’, we’ll explore the necessary steps to prepare your camper for use again after the winter season.
De-winterize in the Spring
When spring arrives, it’s time for me to get my camper ready for use again by de-winterizing it. De-winterizing can be a bit challenging, but it’s an essential step in ensuring that my camper is in good working condition for the upcoming camping season.
One of the main challenges I face when de-winterizing is removing the antifreeze from the water system. I carefully follow the manufacturer’s instructions to flush out the antifreeze and sanitize the water tank and lines.
De-winterizing early has numerous benefits. First and foremost, it allows me to identify any potential issues or damages that may have occurred during the winter months. By addressing these issues early on, I can prevent them from turning into major problems later.
Additionally, de-winterizing early gives me ample time to complete any necessary repairs or maintenance tasks before my first camping trip.
Another benefit of de-winterizing early is that I can start enjoying my camper sooner. I can take advantage of the beautiful spring weather and plan camping trips without having to wait for the de-winterization process. It also gives me peace of mind knowing that my camper is ready to go whenever I want to hit the road.
De-winterizing my camper in the spring requires some technical know-how and attention to detail. However, the benefits of de-winterizing early outweigh the challenges, as it allows me to address any issues, complete necessary repairs, and start enjoying my camper sooner.
Frequently Asked Questions
How often should I winterize my camper?
To properly winterize your camper, it’s recommended to drain the water tanks at least once a month to prevent any damage from freezing. Additionally, it’s important to set the thermostat to a temperature above freezing, typically around 50 degrees Fahrenheit, to ensure the interior of the camper remains warm enough. By following these guidelines, you can effectively protect your camper from winter weather and prolong its lifespan.
Can I use regular antifreeze for my camper’s plumbing system?
Using RV antifreeze for camper winterization is recommended over regular antifreeze for the plumbing system. RV antifreeze is specifically designed to protect against freezing temperatures and is non-toxic, ensuring the safety of your water supply. Regular antifreeze may contain harmful chemicals that can contaminate the water system.
While regular antifreeze may be cheaper, it’s not worth the potential health risks. It’s best to use RV antifreeze to ensure the proper protection and functionality of your camper’s plumbing system.
Is it necessary to remove all furniture and appliances from the camper before winterizing?
When winterizing a camper, it’s not necessary to remove all furniture and appliances. However, it’s recommended to take certain precautions to protect the furniture during the winterization process.
This can include covering the furniture with protective materials or storing it in a secure location. By taking these steps, you can ensure that your furniture remains in good condition while you carry out the necessary winterization tasks.
What steps should I take to prevent rodents from entering my camper during winter storage?
To prevent rodents from entering my camper during winter storage, I take several steps.
First, I thoroughly inspect the camper for any openings or gaps and seal them with caulk or steel wool.
Next, I remove any food sources and clean the interior to eliminate any odors that may attract rodents.
I also place rodent repellent sachets or traps strategically throughout the camper.
Additionally, I make sure to store the camper in a location that isn’t easily accessible to rodents.
These winter storage tips help me effectively prevent rodents from entering my camper.
Should I keep the tires inflated or deflated when storing the camper for the winter?
When storing my camper for the winter, it’s important to keep the tires inflated to the recommended pressure. This helps prevent flat spots from forming on the tires.
Additionally, using tire covers can provide extra protection from the elements and UV rays.
Maintaining proper tire pressure and using covers will help ensure that the tires are in good condition when I’m ready to use the camper again.
What Is the Recommended Winterization Period for Campers?
Planning a winter getaway in your camper? Ensure its protection by winterizing a camper before temperatures drop. The recommended winterization period for campers typically begins in the late fall, around October or November, depending on your location. By properly winterizing a camper, you’ll prevent freezing pipes, protect the water system, and ensure your vehicle is ready to hit the road once the warmer weather arrives.
Conclusion
In conclusion, winterizing a camper is a vital step to ensure its longevity and functionality during the cold months. Taking the time to properly drain the water systems, store the batteries, and inspect for any leaks or cracks will prevent costly repairs in the future.
Just like a bear prepares its den for hibernation, we must prepare our campers for winter. By giving attention to every detail, we can ensure that our beloved campers will be safe and sound until the springtime thaw.

