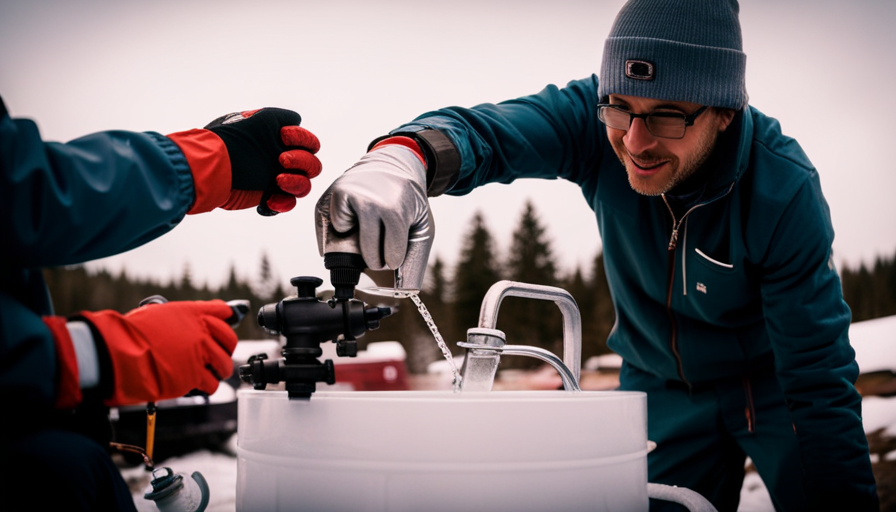
As winter approaches, it is important to protect your camper from harsh weather conditions. Winterizing your camper with antifreeze is a reliable method. By following a few simple steps, you can keep your camper in great condition throughout the winter.
First, gather the necessary tools and supplies, including antifreeze and a water pump bypass kit.
Then, drain the water system and prepare the water heater for winter storage. Bypassing the water pump will prevent antifreeze from flowing through it.
Next, add antifreeze to the plumbing system, ensuring that all pipes and fixtures are thoroughly protected.
In addition to the interior, it’s important to protect the exterior of your camper. Take the time to seal any potential entry points for pests, as they can cause extensive damage.
Lastly, clean and store the interior of the camper, removing any food or perishable items that may attract rodents or insects.
By regularly checking and maintaining the winterization process throughout the season, you can enjoy peace of mind knowing that your camper is protected. Follow these detailed and methodical steps to winterize your camper with antifreeze and keep it in top shape for your next adventure.
Key Takeaways
- Drain the water system to prevent freezing and potential damage.
- Bypass the water pump to prevent antifreeze from being pumped through the system.
- Add antifreeze to the plumbing system by connecting hose to water pump and opening each faucet.
- Regularly check and maintain the winterization process throughout the season.
Gather the necessary tools and supplies
Now that you know what needs to be done, it’s time to gather up all the tools and supplies you’ll need to winterize your camper like a pro.
First and foremost, you’ll need a tools and supplies checklist to ensure you have everything you need on hand. Some essential tools include a socket set, pliers, wrenches, and a screwdriver set. Additionally, you’ll need a water pump converter kit, a water heater bypass kit, and a water heater flush kit.
In terms of supplies, the most important item is antifreeze. Make sure to choose an RV-specific antifreeze that is safe for the plumbing system. It’s also crucial to wear protective gloves and eyewear when handling antifreeze to avoid any potential skin or eye irritation. When pouring antifreeze into your camper’s water system, be sure to follow the manufacturer’s instructions carefully.
Furthermore, it’s important to note that antifreeze is toxic and should be handled and disposed of properly. Avoid pouring antifreeze down drains or onto the ground, as it can harm the environment. Instead, dispose of it at a designated waste facility.
With all the necessary tools and supplies gathered, you’re now ready to move on to the next step: draining the water system.
Drain the water system
First, how can we ensure that all the water is completely drained from the system? To winterize a camper, it’s essential to remove all water to prevent freezing and potential damage to the plumbing.
Start by turning off the water supply and opening all faucets, including the outside shower and low point drains. Next, locate the drain valves for the fresh water tank and open them to allow any remaining water to flow out. Don’t forget to empty the water heater by removing the drain plug or opening the pressure relief valve.
Once all the water has been drained, it’s time to introduce antifreeze into the plumbing system. This step will protect the pipes and fixtures from freezing temperatures.
Begin by closing all faucets and drains. Then, connect a short length of hose to the inlet side of the water pump and place the other end into a container of RV antifreeze. Turn on the water pump and open each faucet, one at a time, until pink-colored antifreeze flows out. Repeat this process for all faucets, including the shower, toilet, and outside shower.
With the water system drained and protected with antifreeze, we can now move on to preparing the water heater.
Prepare the water heater
To get your water heater ready, you’ll want to make sure it’s empty and free of any remaining water. Here are some steps to follow for water heater maintenance and troubleshooting common water heater issues:
-
Turn off the electricity or gas supply to the water heater.
-
Locate the drain valve at the bottom of the water heater and connect a hose to it. Place the other end of the hose in a suitable drainage area.
-
Open the pressure relief valve to allow air into the tank and facilitate draining.
-
Open the drain valve and let all the water drain out completely.
After completing these steps, your water heater should be empty and ready for winterization.
Now, let’s move on to the next section about bypassing the water pump.
To bypass the water pump, you’ll need to follow a few more steps.
Bypass the water pump
In order to bypass the water pump, you’ll need to take a few extra steps that will ensure a smooth winterization process. This is an important part of preventing freezing and maintaining your camper during the winter months.
First, locate the water pump, which is typically found near the fresh water tank.
Next, locate the bypass valve, which is usually located on the side of the water pump. Turn the bypass valve to the ‘bypass’ position, which will redirect the water flow away from the pump. This step is crucial as it prevents any antifreeze from being pumped through the system.
Once the bypass valve is set, you can proceed with adding antifreeze to the plumbing system. By bypassing the water pump, you are ensuring that only the necessary parts of the plumbing system are treated with antifreeze, saving you time and money.
Add antifreeze to the plumbing system
Now, you’ll want to make sure your plumbing system is protected from freezing temperatures by adding a winter shield to keep things flowing smoothly like a river in springtime. Here’s how to flush the plumbing system and add antifreeze to ensure everything stays in top shape during the winter months.
-
Start by draining all the water from the system. Open all faucets, including hot and cold, and let the water flow out completely.
-
Next, locate the water pump and disconnect the inlet and outlet hoses. This will prevent the antifreeze from contaminating the pump.
-
Connect a hose to the inlet side of the water pump and place the other end into a container of antifreeze.
-
Turn on the water pump and open each faucet, one at a time, until you see the antifreeze flowing out. Repeat this process for the toilet and shower as well.
-
Once all the faucets have been flushed with antifreeze, it’s time to properly dispose of the used solution. Check with your local regulations to determine the proper disposal method for antifreeze.
Now that your plumbing system is protected with antifreeze, it’s time to move on to the next step: flush and drain the holding tanks.
Flush and drain the holding tanks
First, you’ll need to ensure that your holding tanks are flushed and drained properly to avoid any unpleasant surprises when the temperatures drop. Holding tank maintenance is a crucial step in winterizing your camper.
Start by emptying the tanks completely at a designated dump station. Use a hose to flush out any remaining waste and debris.
Next, add a tank cleaner to eliminate any residual odors and bacteria. Allow the cleaner to sit for the recommended amount of time, then flush the tanks again with clean water.
Once the tanks are clean, it’s important to drain them completely. Open the tank valves and let them empty completely, ensuring that no water is left inside. This step is essential to prevent any freezing or damage to the tanks during the winter months.
Following these winter camping tips for holding tank maintenance will help prevent any costly repairs or issues down the line. With the holding tanks properly flushed and drained, you can now move on to the next section about how to protect the exterior of the camper.
Protect the exterior of the camper
To keep your camper’s exterior in great shape during the winter months, it’s crucial to take steps to protect it from harsh weather conditions. One of the main concerns during winter is preventing ice damage. Ice can cause cracks and fractures in the exterior surfaces of the camper, leading to costly repairs.
To protect against this, start by thoroughly cleaning the exterior of the camper, removing any dirt or debris that could potentially cause damage. Next, apply a protective wax or sealant to create a barrier between the camper and the elements. This will help prevent ice from adhering to the surface and causing damage.
Another important aspect of protecting the exterior of your camper is preventing snow buildup. Heavy snow accumulation can put unnecessary weight and stress on the roof and other vulnerable areas. To minimize this risk, regularly remove snow from the top of the camper using a soft-bristle broom or a snow rake designed for this purpose.
Additionally, ensure that the gutters and downspouts are clear of any debris to allow for proper drainage and prevent ice dams from forming.
Taking the time to protect the exterior of your camper from harsh winter conditions is essential to preserve its longevity and appearance. By preventing ice damage and protecting against snow buildup, you can ensure that your camper remains in optimal condition throughout the winter season.
Next, we’ll discuss how to seal any potential entry points for pests, ensuring that your camper remains critter-free during the winter months.
Seal any potential entry points for pests
Make sure you seal any potential entry points for pests to keep them from finding their way into your camper during the winter months. Proper pest prevention is essential to protect your camper from damage and ensure a comfortable camping experience when spring comes.
Here are three weatherproofing techniques to effectively seal off any entry points:
-
Inspect and repair any damaged screens on windows and vents. Pests can easily squeeze through small holes or tears, so make sure to patch them up or replace the screens if necessary.
-
Seal gaps and cracks around doors, windows, and utility connections using weatherstripping or silicone caulk. This will prevent pests from entering through these openings and also help in maintaining the temperature inside the camper.
-
Install mesh or wire coverings on exterior vents, pipes, and other openings to block pests while still allowing for proper ventilation.
By following these pest prevention and weatherproofing techniques, you can keep unwanted critters out of your camper during the winter months.
Now, let’s move on to the next section and learn how to clean and store the interior of the camper.
Clean and store the interior of the camper
After sealing any potential entry points for pests, it’s now time to move on to the next step in winterizing your camper.
In this section, we’ll focus on cleaning and storing the interior of the camper to ensure that it remains in good condition during the off-season.
To begin, gather your cleaning supplies, including a vacuum cleaner, microfiber cloths, and all-purpose cleaner. Start by removing any personal items and clutter from the camper. This will make the cleaning process easier and allow for better organization when storing the camper.
Next, thoroughly clean all surfaces, including countertops, tables, and cabinets. Use the all-purpose cleaner and microfiber cloths to remove any dirt, dust, or stains. Don’t forget to clean the windows and mirrors as well.
Once the interior is clean, it’s time to organize. Take this opportunity to declutter and rearrange items to maximize space. Use storage containers or bins to neatly store smaller items and prevent them from rolling around during transport.
Make sure to properly store any bedding, linens, and curtains. Remove and wash them according to their specific care instructions, then fold and store them in a dry and clean area of the camper.
By following these cleaning and organizing tips, you can ensure that your camper will be ready for use when the winter season comes to an end. Regularly checking and maintaining the winterization process throughout the season will help to prevent any potential issues and ensure a smooth transition back to regular use.
Regularly check and maintain the winterization process throughout the season
Throughout the season, it’s important to regularly check and maintain the winterization process to ensure a hassle-free return to regular use. Proper maintenance of the winterization equipment is key to preventing damage from freezing temperatures.
Firstly, it’s crucial to inspect the antifreeze levels in the camper’s plumbing system. This can be done by checking the antifreeze reservoir and ensuring it’s filled to the recommended level. Additionally, it’s important to inspect all valves, faucets, and pipes for any signs of leaks or damage. Any leaks should be promptly repaired to prevent water from entering the system and freezing.
Furthermore, the propane system should be regularly checked and maintained. Inspect the propane lines for any signs of wear or damage, and ensure all connections are tight. It’s also important to check the propane tank for any signs of rust or corrosion.
Lastly, regularly check the exterior of the camper for any damage. Inspect the roof and windows for any cracks or leaks, and repair them as necessary. Additionally, check the seals around the doors and windows to ensure they’re intact and watertight.
By regularly checking and maintaining the winterization process throughout the season, you can prevent damage from freezing temperatures and ensure a smooth transition back to regular use when the weather warms up.
Frequently Asked Questions
How do I choose the right type of antifreeze for my camper?
When choosing antifreeze for your camper, there are a few important factors to consider. First, make sure to select an antifreeze that’s specifically formulated for recreational vehicles. This type of antifreeze is designed to protect the plumbing system and prevent freezing.
Additionally, consider alternative methods such as using non-toxic antifreeze made from propylene glycol, which is environmentally friendly.
Research and consult your camper’s manufacturer or a trusted RV professional to ensure you choose the right antifreeze for your specific camper model.
Can I use a different method to winterize my camper without using antifreeze?
When it comes to winterizing your camper, there are alternative methods available that don’t require the use of antifreeze. While antifreeze is commonly used, it’s important to consider the pros and cons.
On one hand, antifreeze provides effective protection against freezing temperatures. However, it can be harmful to the environment and requires thorough flushing come springtime.
Exploring alternative winterization methods, such as draining the water system and using compressed air, can be a viable option to avoid antifreeze usage.
Should I remove the batteries from my camper during winterization?
During winter storage, it’s recommended to remove the batteries from your camper to ensure proper battery maintenance. This will prevent the batteries from freezing and potentially getting damaged.
To remove the batteries, first disconnect the negative cable, followed by the positive cable. Clean the battery terminals and store the batteries in a cool, dry place. Remember to periodically check the battery charge and recharge as needed to maintain optimal battery life.
How often should I check the exterior of the camper for potential damage or leaks?
Like clockwork, we diligently check our camper’s exterior for potential damage or leaks. Regular inspections are vital to maintain the integrity of our home on wheels. We recommend conducting thorough checks every three months, ensuring we catch any issues before they escalate.
From inspecting seams and seals to examining windows and doors, we leave no stone unturned. This meticulous approach guarantees a worry-free adventure and protects our investment for years to come.
Is it necessary to clean the interior of the camper before storing it for the winter?
It’s necessary to thoroughly clean the interior of the camper before storing it for the winter. Cleaning methods may include vacuuming carpets, wiping down surfaces with a mild cleaner, and removing any food or debris. This helps prevent mold, mildew, and pests from causing damage during storage.
Additionally, if alternative storage options such as a climate-controlled facility aren’t available, a clean interior will help maintain the overall condition of the camper during the winter months.
Is the Process of Winterizing a Camper the Same with Antifreeze?
The process of winterizing a camper with antifreeze is slightly different from winterizing it without antifreeze. When using antifreeze, you need to ensure that all pipes, tanks, and water lines are thoroughly flushed and drained before introducing the antifreeze. Once drained, you can then use the antifreeze to fill the plumbing system, preventing any damage from freezing temperatures throughout the winter months.
Is Draining Antifreeze from the Camper Necessary Before Winterizing?
Yes, draining camper antifreeze fluid before winterizing is crucial. Failing to do so can lead to damage to the plumbing system and expensive repairs. Ensure all antifreeze is properly drained to avoid any issues when preparing your camper for storage during the winter months.
Can I Use Antifreeze to Winterize My Camper and Then Flush It Out?
Yes, you can use antifreeze to winterize your camper and then flush it out. To flush antifreeze from camper, simply connect a hose to the RV water system and run clean water through the lines until the antifreeze is completely removed. This will protect your camper from freezing temperatures.
Conclusion
In conclusion, winterizing our camper with antifreeze was a meticulous process that required careful attention to detail. By draining the water system, preparing the water heater, and adding antifreeze to the plumbing system, we ensured that our camper would be protected from freezing temperatures.
Additionally, by protecting the exterior and sealing potential entry points for pests, we created a barrier against any unwanted visitors. Lastly, regularly checking and maintaining the winterization process throughout the season was crucial in keeping our camper in optimal condition.
Like a well-oiled machine, our winterized camper will be ready for the cold months ahead.

