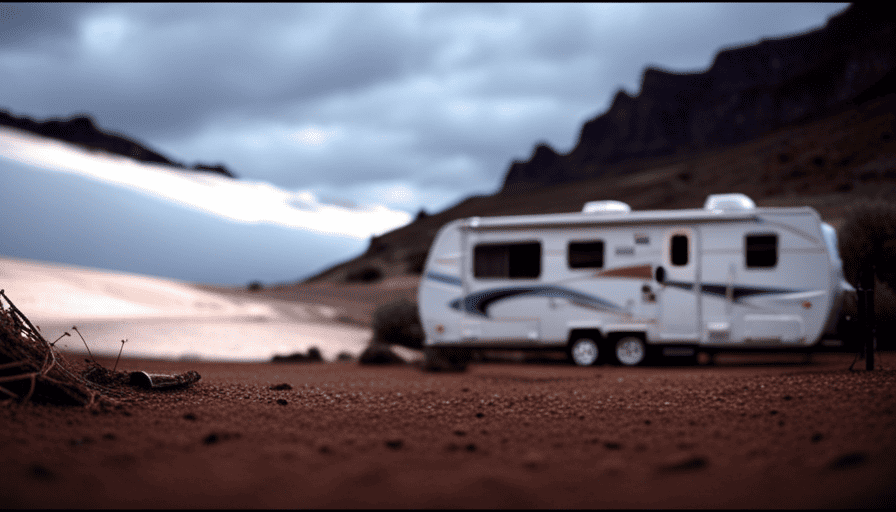
As the old saying goes, ‘Adventure awaits those who seek it.’ And what better way to embark on a thrilling journey into the great outdoors than with a pop-up camper? These versatile and compact campers are designed to provide comfort and convenience while allowing you to immerse yourself in nature.
In this article, I will guide you through the process of setting up your pop-up camper, ensuring a smooth and hassle-free experience. From finding a level surface to securing the camper in place, connecting utilities to setting up sleeping areas, and testing all systems, I will provide you with detailed instructions to ensure that everything is functioning properly before you embark on your camping adventure.
So, let’s dive in and learn how to pop up a pop-up camper, and get ready to create memories that will last a lifetime. Adventure awaits!
Key Takeaways
- Find a level and stable surface for setting up the pop-up camper.
- Follow the manufacturer’s instructions for unhooking, unfolding, and securing the camper in place.
- Level the camper using stabilizing jacks and a bubble level for comfort and proper operation.
- Set up beds and sleeping areas, considering space-saving options like bunk beds or foldable cots.
Familiarize Yourself with the Camper’s Manual and Instructions
Before you start, make sure you’ve thoroughly reviewed the camper’s manual and instructions so you can confidently navigate the process of popping up the pop-up camper. Familiarizing yourself with the manual is crucial as it provides important information on how to properly set up and operate the camper. Take the time to read through the manual and familiarize yourself with the different components and their functions. This will help you understand the step-by-step process of popping up the camper and ensure that you do it correctly.
Additionally, the manual may also provide troubleshooting tips for common issues that may arise during the setup process. By being aware of these potential problems and their solutions, you can troubleshoot any issues that may occur more efficiently.
Now that you are familiar with the camper’s manual and instructions, the next step is to find a level and stable surface for setup. This is important to ensure the stability and safety of the camper once it is popped up.
Find a Level and Stable Surface for Setup
To ensure a smooth setup, scout for a flat and solid ground that resembles a calm lake on a serene summer morning. Finding the right level and stable surface for setup is crucial in ensuring the camper’s stability and safety. Here are four key steps to follow:
-
Look for a spot that is free from any slopes or bumps. A level surface will prevent the camper from tipping or rocking during setup and use.
-
Check for any soft or muddy areas. These can cause the camper to sink or become unstable. Opt for a solid surface, such as concrete or packed gravel.
-
Avoid setting up near trees or other tall objects. These can pose a risk of falling branches or debris during inclement weather.
-
Consider the surroundings for potential hazards. Look out for things like large rocks, sharp objects, or uneven terrain that could cause damage to the camper or impede its stability.
By finding the right level and stable surface, you’re taking the necessary precautions to ensure a safe and secure setup for your pop-up camper. Once you’ve secured the perfect spot, the next step is to clear the area and remove any obstacles, allowing for a hassle-free setup.
Clear the Area and Remove any Obstacles
Clearing the area and removing obstacles ensures a smooth and obstacle-free setup, enhancing the overall camping experience. Before setting up a pop-up camper, it’s crucial to clear space and prepare the area where you plan to pop it up. Begin by removing any rocks, sticks, or other debris that could potentially damage the camper or create an uneven surface. This will help prevent any accidents or damage during the setup process.
Additionally, make sure there aren’t any low-hanging branches or overhead obstacles that could interfere with the camper’s height when it’s being raised.
Once the area is cleared, take a moment to assess the surroundings. Are there any potential hazards nearby, such as uneven ground, slopes, or sharp objects? It’s essential to address these issues before starting the setup process. This will not only ensure your safety but also prevent any damage to the camper.
After ensuring that the area is clear and safe, you can now move on to the next step of unhooking and unfolding the camper. By preparing the area first, you can proceed with confidence, knowing that you’ve taken the necessary precautions for a successful setup.
Unhook and Unfold the Camper
Now, get ready to unleash the beast of convenience as you unhook and unleash the camper, revealing its majestic unfoldment. The unhooking process is the first step in popping up a pop-up camper. Begin by disconnecting the electrical and water connections, ensuring that everything’s properly turned off and safely stowed away.
Next, release the stabilizer jacks, allowing the camper to be lifted off the ground. Be sure to double-check that the camper’s securely attached to the towing vehicle before proceeding.
Once the camper’s unhooked, it’s time to unfold it. Start by releasing any latches or locks that’re holding the camper closed. Carefully unfold the camper, making sure to follow the manufacturer’s instructions. As you unfold, be mindful of any obstacles in the surrounding area and make sure to clear them away.
Once the camper’s fully unfolded, it’s time to secure it in place. This’ll ensure that it stays upright and stable during your camping trip.
Transitioning into the next section, securing the camper in place’s an important step in ensuring a safe and enjoyable camping experience.
Secure the Camper in Place
After unfolding the camper, it’s crucial to secure it in place to ensure a safe and stable camping experience. One of the most important aspects of securing the camper is choosing the right anchoring method, especially in windy conditions.
There are several options available, such as using anchor stakes or screw-in anchors to secure the camper to the ground. Make sure to choose a method that’s suitable for the type of terrain you’re camping on.
In addition to anchoring, it’s also important to take precautions to prevent theft or unauthorized access to the camper. One simple tip is to lock all doors and windows when you’re not inside or sleeping. You can also invest in a hitch lock to prevent someone from hooking up your camper to their vehicle and driving off.
By taking these steps to secure your camper, you can relax and enjoy your camping experience knowing that your camper is stable and safe.
Now, let’s move on to the next step: extending the stabilizing jacks and leveling the camper.
Extend the Stabilizing Jacks and Level the Camper
To ensure a sturdy foundation, extend the stabilizing jacks and level your camper, allowing the wheels to firmly plant on the ground like roots of a mighty oak.
Extending the stabilizing jacks is crucial for a smooth setup and avoiding common setup mistakes. Begin by locating the jacks, usually located near the corners of the camper. Use a crank or an electric drill with a stabilizer bit to extend the jacks until they firmly touch the ground. Be sure to extend them evenly to ensure proper stability.
Once the jacks are extended, it’s time to level the camper. This step is important for both comfort and safety. Use a bubble level or a smartphone app to determine if the camper is level from front to back and side to side. Adjust the jacks as needed to achieve a level position. Keep in mind that it may take a few adjustments to get it just right.
Leveling the camper not only provides a more comfortable living space but also helps with proper operation of appliances, such as the refrigerator.
Once the camper is level, you can move on to the next step of setting up the beds and sleeping areas.
Set Up the Beds and Sleeping Areas
Get ready to experience ultimate comfort as you set up your cozy beds and sleeping areas in the camper. When it comes to bedding options, pop up campers offer versatility and convenience. Whether you prefer sleeping bags, air mattresses, or traditional bedding, there are plenty of choices to suit your needs. Maximizing space is key in a pop up camper, and this extends to the sleeping areas as well. To make the most of the available room, consider using bunk beds or foldable cots that can be easily stored during the day.
To give you an idea of the different bedding options and their benefits, take a look at the table below:
| Bedding Option | Benefits |
|---|---|
| Sleeping Bags | Easy to store and transport, no need for extra bedding |
| Air Mattresses | Provides additional comfort and support |
| Traditional Bedding | Offers a more home-like feel, customizable with pillows and blankets |
Now that you have your beds all set up, it’s time to connect utilities and prepare for camping. This next step will ensure you have everything you need for a comfortable and enjoyable trip.
Connect Utilities and Prepare for Camping
Once the beds are set up and ready for a restful night’s sleep, it’s time to connect the necessary utilities and prepare for a delightful camping experience.
The first step is to consult your camping checklist to ensure you have all the required equipment. This includes items such as water hoses, electrical cords, and propane tanks. Take the time to inspect these utilities for any damages or leaks before connecting them to your pop-up camper.
Next, carefully select your campsite. Look for a level area that is free of any potential hazards, such as branches or rocks. Ensure that there is enough space to extend your awning and set up a comfortable outdoor living area.
Once you have found the perfect spot, connect your water hose to the campground’s water supply and attach the other end to your camper. Similarly, connect your electrical cord to the power source and plug it into your pop-up camper.
After connecting the utilities, double-check all connections to make sure everything is secure. Test all systems, such as lights, appliances, and water fixtures, to ensure they are functioning properly. It’s essential to do this before settling in for the night to avoid any inconveniences.
With everything in order, you can now transition into the next section about testing all systems and making sure everything is functioning properly.
Test all Systems and Make Sure Everything is Functioning Properly
Now comes the fun part – let’s make sure all the systems are in tip-top shape and ready to make your camping experience a breeze! Testing all the systems in your pop-up camper is crucial to ensure everything’s functioning properly before you hit the road.
Here are a few steps you should take to test and troubleshoot any issues that may arise:
-
Electrical System: Check if all the lights, outlets, and appliances are working. Test the battery, both when connected to an external power source and when running solely on battery power.
-
Plumbing System: Turn on the water pump and check for any leaks or unusual noises. Test the faucets, toilet, and shower to make sure water flows smoothly and drains properly.
-
Gas System: Test the stove, oven, and refrigerator to ensure they’re functioning correctly. Check for any gas leaks using a soapy water solution on all connections.
-
Heating and Cooling System: Test the furnace and air conditioner to ensure they’re providing adequate heat and cool air.
-
Awning and Slide-Outs: Extend and retract the awning and slide-outs to ensure they’re working smoothly.
Once you’ve tested all the systems and addressed any issues that may have arisen, you can move on to the next step: enjoying your camping adventure!
Enjoy Your Camping Adventure!
Have a blast on your camping adventure and make unforgettable memories! As you embark on your journey, it’s important to have all the camping gear essentials to ensure a comfortable and enjoyable experience. Here are some tips to make the most of your time in the great outdoors.
First, let’s discuss camping gear essentials. Make sure you have a sturdy tent, sleeping bags, and camping chairs. Don’t forget to pack a camping stove, cooking utensils, and a cooler to keep your food fresh. It’s also essential to bring a first aid kit, insect repellent, and sunscreen to stay safe and protected.
When it comes to campfire cooking, it’s important to be prepared. Start by gathering dry wood for your fire and using a fire starter to get it going. Once the fire is roaring, use a grill grate or a tripod with a cooking pot to prepare delicious meals. Don’t forget to bring aluminum foil for easy clean-up and to cook veggies or fish in a foil packet.
To help you visualize these ideas, here is a table showcasing the camping gear essentials and tips for campfire cooking:
| Camping Gear Essentials | Tips for Campfire Cooking |
|---|---|
| Tent | Gather dry wood for fire |
| Sleeping bags | Use a fire starter |
| Camping chairs | Grill grate or tripod |
| Camping stove | Aluminum foil for easy clean-up |
With these tips and essentials, you’ll be well-prepared to enjoy your camping adventure to the fullest. So go out there, explore nature, and create lasting memories!
Frequently Asked Questions
What is the weight limit for the pop up camper?
The weight limit for a pop-up camper determines how much it can safely carry while being towed. It’s crucial to know this limit to ensure the safety of your vehicle and everyone on the road.
The weight limit is usually specified by the manufacturer and can vary depending on the model. Additionally, it’s important to consider your vehicle’s towing capacity, which is the maximum weight it can tow.
Always adhere to these limits for a worry-free and secure towing experience.
How long does it typically take to set up a pop up camper?
Setting up a pop-up camper can typically take around 30 minutes to an hour, depending on experience and familiarity with the process. It involves tasks like leveling the camper, extending the roof and walls, and securing the support poles. It’s important to follow the manufacturer’s instructions and take your time to ensure a safe and stable setup. Practice and familiarity with the process can greatly reduce the setup time.
Can I set up a pop up camper on uneven ground?
To set up a pop-up camper on uneven ground, it’s important to focus on leveling the camper on the uneven terrain. Start by finding the most level spot available and place leveling blocks under the wheels. Use a bubble level to ensure the camper is evenly balanced. Adjust the leveling blocks as needed to achieve stability.
This will help prevent any issues with the camper’s stability and ensure a comfortable camping experience.
Are there any specific safety precautions to follow when setting up a pop up camper?
When setting up a pop-up camper, it’s crucial to follow specific safety precautions. First, ensure the ground is level to provide stability. Use wheel chocks to prevent the camper from rolling.
Always secure the camper to the tow vehicle using safety chains or cables. Check that all electrical connections are properly plugged in and functioning.
Lastly, be mindful of overhead obstacles and avoid setting up under low-hanging branches or power lines.
How do I properly store and maintain a pop up camper when not in use?
Proper maintenance and winter storage are crucial for keeping a pop-up camper in top shape. First, clean the camper inside and out, making sure all surfaces are dry to prevent mold and mildew.
Next, inspect the roof, seams, and canvas for any signs of damage or wear, and repair or replace as needed. To protect against the cold, remove all water from the system and use antifreeze.
Finally, cover the camper with a breathable RV cover to shield it from the elements.
Is the Weight of a Pop Up Camper Relevant to How it’s Popped Up?
The pop up camper weight explanation is an essential factor to consider when setting up a pop up camper. A lighter weight camper is generally easier to pop up as it requires less effort to lift and secure. However, it is important to note that the weight alone is not the sole determining factor, as proper technique and hydraulic systems also contribute to the ease of popping up a camper.
Conclusion
In conclusion, popping up a pop-up camper is a straightforward process that can be easily mastered with a little practice. By following the camper’s manual and instructions, finding a level surface, and securing the camper in place, you can ensure a safe and stable setup.
Setting up the beds and connecting utilities will provide a comfortable camping experience. Before embarking on your adventure, it’s essential to test all systems and ensure everything is functioning properly.
So, get out there and enjoy the great outdoors with your pop-up camper! Remember, a well-prepared camper is a happy camper!

