Exploring the great outdoors through camping can offer an exciting adventure. Having your own camper allows you the freedom to travel to the places that call to you, witness breathtaking landscapes, and create lasting memories with loved ones.
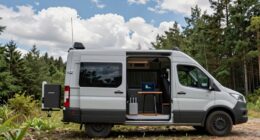
In this article, I will guide you through the process of making your own camper, from choosing the right vehicle to personalizing the interior. With a little bit of planning, some handy tools, and a dash of creativity, you can transform an ordinary vehicle into a comfortable and functional home on wheels.
Get ready to embark on a journey of DIY camper conversion, as we dive into the intricacies of insulation, furniture building, electrical systems, and more. So, let’s roll up our sleeves and get started on this exciting adventure of making your very own camper!
Key Takeaways
- Choosing the right vehicle is crucial for camper conversion
- Optimize space with multi-functional furniture and storage
- Install electrical and plumbing systems for convenience and comfort
- Personalize your camper for a cozy and enjoyable experience
Choose the Right Vehicle for Your Camper Conversion
Before you start converting your camper, it’s crucial to choose the right vehicle that will transport you to breathtaking destinations.
Choosing the right vehicle for your camper conversion involves considering vehicle modifications and budget considerations.
When it comes to vehicle modifications, it’s important to assess the vehicle’s size and weight capacity to ensure it can accommodate all the necessary components for your camper conversion. Look for a vehicle with a spacious interior and ample storage options. Additionally, consider any modifications or upgrades that may be needed, such as reinforcing the suspension or installing a roof rack for extra gear.
Budget considerations are also key when choosing a vehicle for your camper conversion. Determine how much you are willing to spend on both the vehicle itself and the conversion process. Keep in mind that older vehicles may require more maintenance and repairs, while newer models may come with a higher price tag. Consider your financial situation and choose a vehicle that fits within your budget while still meeting your needs.
Once you have chosen the right vehicle for your camper conversion, it’s time to plan your camper layout and design. Transitioning into the subsequent section, careful planning will ensure that your camper is functional and comfortable for your adventures ahead.
Plan Your Camper Layout and Design
Once you’ve envisioned your ideal home-on-wheels, start mapping out the layout and design, weaving together the threads of your nomadic tapestry.
Designing the interior of your camper is an exciting opportunity to create a space that is both functional and aesthetically pleasing. Here are three key considerations to keep in mind as you plan your camper layout and design:
-
Space Optimization: Think carefully about how you’ll use every inch of your camper. Consider multi-functional furniture, such as a dining table that can also serve as a work desk. Maximize storage space by incorporating overhead cabinets, under-bed storage, and vertical shelving.
-
Material Selection: When selecting materials for your camper, prioritize durability and weight. Opt for lightweight materials that can withstand the demands of life on the road. Consider using materials like plywood or laminate for cabinetry and countertops, as they’re lightweight and easy to clean.
-
Comfort and Style: Create a cozy and inviting atmosphere by choosing colors, fabrics, and finishes that reflect your personal style. Consider adding curtains or blinds for privacy and to control natural light. Don’t forget to include comfortable seating and bedding options for a good night’s sleep.
With your camper layout and design planned, it’s time to move onto the next step: insulate and install flooring.
Insulate and Install Flooring
To create a cozy and energy-efficient nomadic abode, it’s time for you to insulate your camper and lay down some stylish flooring.
Insulating your camper is crucial to maintain a comfortable temperature inside, whether you’re camping in cold or hot climates. There are a few insulation techniques you can consider. One option is using foam insulation boards, which are easy to install and provide excellent thermal efficiency. Another option is spray foam insulation, which expands to fill every nook and cranny, ensuring a tight seal. Additionally, reflective insulation can be used to prevent heat transfer.
Now that your camper is properly insulated, it’s time to choose the right flooring material. The ideal flooring for a camper should be durable, easy to clean, and visually appealing. Vinyl flooring is a popular choice as it is waterproof, low-maintenance, and comes in a wide range of styles. Another option is laminate flooring, which is also water-resistant and resistant to scratches. If you prefer a more natural look, hardwood or bamboo flooring can add warmth and charm to your camper.
With the insulation and flooring in place, you’re now ready to move on to the next step: building and installing furniture and storage. This will help you maximize space and create a functional and comfortable living area in your camper.
Build and Install Furniture and Storage
Now that you’ve mastered the art of insulation and flooring, it’s time to unleash your inner interior designer and create a space that will make even the most luxurious homes envious.
Building and installing furniture and storage in your camper requires careful planning and smart use of space. Here are some building techniques and ideas to help you maximize the available space in your camper.
When it comes to furniture, consider using modular pieces that can serve multiple purposes. For example, a convertible sofa bed can provide seating during the day and transform into a comfortable sleeping space at night. Built-in storage benches can also serve as seating while providing ample storage for items like bedding, clothes, and outdoor gear.
Utilize vertical space by installing overhead cabinets and shelves. This will help keep your camper organized and clutter-free. Additionally, consider incorporating pull-out drawers and sliding storage compartments under the bed or seating areas to make the most of every nook and cranny.
Remember to take measurements and create accurate plans before starting the construction. This will ensure that your furniture fits perfectly in the available space and allows for easy movement within the camper.
Now that you’ve built and installed your furniture and storage, it’s time to move on to the next step: installing electrical and plumbing systems.
Install Electrical and Plumbing Systems
Get ready to experience the convenience and comfort of your dream home on wheels as you install the essential electrical and plumbing systems in your camper. The electrical system installation is crucial for powering your appliances, lights, and other electrical devices. Start by planning the layout of your electrical system, determining where you want outlets, switches, and the main circuit breaker. Then, run the electrical wires and connect them to the appropriate outlets and switches. Don’t forget to install a battery and a power inverter to provide electricity when you’re not connected to a power source.
As for the plumbing system installation, it’s essential for having running water in your camper. Begin by mapping out the water supply lines and drain lines. Install a water tank and a water pump to ensure a steady water flow. Connect the water lines to the tank and pump, and don’t forget to add a water heater if you plan on having hot water. Additionally, install a sink, toilet, and shower to complete your plumbing system.
Now that your electrical and plumbing systems are installed, it’s time to move on to the next step – adding windows and ventilation to your camper.
Add Windows and Ventilation
Adding windows and ventilation to your camper will breathe new life into your mobile oasis, allowing fresh air to flow through and brightening up the space like a ray of sunshine.
When it comes to ventilation options, there are a few choices to consider. One popular option is installing a roof vent, which helps to circulate air and remove any unwanted odors or moisture. Additionally, you can also opt for side vents or windows with built-in screens to keep bugs out while still allowing air to circulate.
Window placement is another important aspect to consider. Ideally, you want to place windows strategically to maximize natural light and provide scenic views. This can make your camper feel more spacious and open. Consider placing windows near seating areas or beds, so you can enjoy the views from the comfort of your camper.
Once you have added windows and ventilation, it’s time to move on to designing and installing a kitchenette. This section will focus on creating a functional and compact kitchen space that meets your cooking and storage needs.
Design and Install a Kitchenette
To truly transform your mobile oasis, consider incorporating a functional and compact kitchenette that caters to your culinary and storage needs. A well-designed kitchenette can make your camping experience more enjoyable and convenient.
Here are four essential elements to consider when designing and installing your camper kitchenette.
-
Kitchenette Appliances: Choose compact appliances that fit well in your camper, such as a small refrigerator, a portable stove or cooktop, and a microwave or toaster oven. These appliances will allow you to prepare meals just like you would at home.
-
Kitchenette Storage Solutions: Utilize every inch of space by installing overhead cabinets, under-counter storage drawers, and a pantry. Consider using stackable containers and collapsible kitchenware to maximize storage efficiency.
-
Compact Sink and Faucet: Install a small sink with a foldable faucet to save space. Look for a sink that has a built-in cutting board or cover, providing you with additional countertop space when not in use.
-
Foldable Dining Area: Create a dining area that can be folded away when not in use. A drop-down table and foldable chairs will allow you to save space and optimize the functionality of your kitchenette.
With a well-designed kitchenette, you’ll be able to cook delicious meals and have ample storage for all your camping essentials. Now, let’s move on to creating a comfortable sleeping area for a complete camper transformation.
Create a Comfortable Sleeping Area
Designing a cozy and inviting sleeping area will ensure a restful night’s sleep during your camping adventures.
When it comes to creating a comfortable sleeping area in your camper, there are a few key elements to consider. First and foremost, invest in comfortable bedding. Opt for a high-quality mattress or air mattress that suits your personal preferences. Add a soft and cozy comforter, along with plush pillows, to create a luxurious feel.
In addition to comfortable bedding, lighting options play a crucial role in setting the mood and creating a peaceful atmosphere. Install LED lights with adjustable brightness settings, allowing you to customize the level of illumination to your liking. Consider adding reading lights near the bed for convenience.
To transition into the subsequent section about ‘decorate and personalize your camper,’ you can further enhance the sleeping area by incorporating decorative elements that reflect your personal style and preferences. By adding touches like decorative pillows, curtains, or artwork, you can transform your sleeping space into a cozy sanctuary that feels like home.
Decorate and Personalize Your Camper
After creating a comfortable sleeping area in your camper, it’s time to add some personal touches and make it truly your own. One of the best ways to do this is by decorating and personalizing your camper with artwork and fabrics.
Start by selecting artwork that reflects your personality and interests. Whether it’s a landscape painting, a collection of postcards, or even a gallery wall of your favorite photographs, these pieces will add a touch of home to your camper. You can hang them on the walls or use adhesive strips to avoid damaging the surface.
Next, focus on customizing your camper with fabrics. Consider adding curtains or blinds in your favorite colors or patterns to add a cozy and inviting atmosphere. You can also reupholster the cushions and seats with fabric that complements the overall aesthetic of your camper.
Remember to choose fabrics that are durable and easy to clean, as they’ll endure a lot of wear and tear during your adventures.
Now that you’ve personalized and customized your camper, it’s time to test and prepare for your first adventure. Get ready to hit the road and create lifelong memories in your newly transformed mobile home away from home.
Test and Prepare for Your First Adventure
Before embarking on your first adventure, it’s essential to thoroughly test and prepare your camper to ensure a smooth and enjoyable trip. Here are a few important steps to take:
-
Test all systems: Check the electrical, plumbing, and heating systems to make sure everything’s in working order. Run the water and test the appliances to ensure they’re functioning properly.
-
Pack the essentials: Create a checklist of all the necessary items for your trip, including bedding, cooking utensils, toiletries, and any other personal items you may need. Don’t forget to bring emergency supplies such as a first aid kit, flashlight, and extra batteries.
-
Plan for emergencies: It’s always better to be safe than sorry. Make sure you have a plan in case of emergencies, such as knowing the location of the nearest hospital or emergency services. Additionally, consider investing in a roadside assistance program to provide peace of mind in case of any breakdowns or mechanical issues.
-
Create a budget: Determine how much you’re willing to spend on your camper adventure and stick to it. Consider expenses such as campground fees, fuel costs, food, and entertainment. It’s also a good idea to set aside some extra money for unexpected expenses that may arise during your trip.
By following these steps and being well-prepared, you can ensure that your first camper adventure is a success. Happy travels!
Frequently Asked Questions
How much does it cost to convert a camper?
Converting a camper on a budget is possible with cost-effective materials. The overall cost of a camper conversion depends on various factors such as the size of the camper and the level of customization desired.
To keep costs low, consider using reclaimed or second-hand materials for insulation, flooring, and furniture. Additionally, opt for DIY solutions whenever possible.
By carefully planning and sourcing affordable materials, you can create a functional and cozy camper without breaking the bank.
What tools and materials do I need to convert a camper?
Now, let me walk you through the camper conversion process with a step-by-step guide.
To start, you’ll need a few essential tools and materials. Make sure you have a drill, screwdriver, jigsaw, and a good set of wrenches.
Additionally, gather insulation, plywood, electrical wiring, plumbing materials, and various fixtures. These items will be crucial in transforming your camper into a cozy and functional space.
Can I convert any type of vehicle into a camper?
Converting any type of vehicle into a camper has its pros and cons. On the positive side, it allows for customization and personalization, giving you the opportunity to create a camper that suits your specific needs. However, it can be a challenging process, requiring various tools and materials.
Common challenges include electrical and plumbing work, insulation, and creating functional living and storage spaces. Consider these factors before deciding between converting a camper or buying a pre-made one.
How long does it typically take to complete a camper conversion?
The timeline for completing a camper conversion can vary depending on the complexity of the project and the amount of work needed. However, with proper planning and efficient execution, it typically takes around 2-4 months to complete a camper conversion.
To ensure a smooth and timely conversion, it’s important to have a clear design plan, gather all necessary materials and tools, and work consistently on the project. Additionally, seeking advice from experienced camper converters can provide valuable tips for an efficient conversion process.
Are there any legal requirements or regulations for camper conversions?
When it comes to camper conversions, there are indeed legal requirements and regulations you need to consider. These regulations vary from country to country and even state to state. Before starting your conversion, it’s crucial to research and understand the specific requirements in your area.
By following these regulations, you can ensure your conversion is safe and legal. Failing to comply with these regulations can result in fines or even the inability to use your camper.
Conclusion
In conclusion, creating a camper from scratch requires careful planning, hard work, and attention to detail. It’s essential to choose the right vehicle and layout that suits your needs.
Insulating and installing flooring are crucial steps to ensure comfort during your adventures. Building furniture and storage, as well as installing electrical and plumbing systems, will enhance functionality. Don’t forget to design a practical kitchenette and a cozy sleeping area.
Lastly, personalize your camper to make it truly your own. Now, it’s time to hit the road and embark on unforgettable journeys. Remember, "A journey of a thousand miles begins with a single step."

