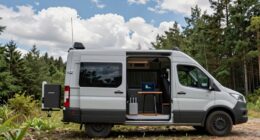
The saying goes, “Harness the power of the sun, and your camper will be transformed.” This holds true for those looking to explore the wilderness without depending on the grid or reduce their environmental footprint. Installing solar panels on your camper is the perfect solution.
In this article, I will guide you through the step-by-step process of hooking up solar panels to your camper, ensuring that you have a reliable and sustainable source of energy wherever you go. When it comes to hooking up solar panels to your camper, it’s important to carefully consider your solar power options. You’ll need to select the right size and type of panels to fit your camper’s energy needs. Additionally, you’ll need to choose between portable solar panels or a permanent installation, depending on your camping style and frequency.
First, we’ll assess your energy needs to determine the right solar panel setup for your camper.
Then, we’ll delve into choosing the right solar panels and finding the perfect mounting location.
With the basics covered, we’ll move on to installing the charge controller and batteries, followed by connecting the solar panels to the charge controller.
We’ll also discuss how to test the system and monitor its performance for optimal efficiency.
To keep your solar panels in top shape, we’ll cover maintenance tips, as well as additional energy-saving measures you can consider.
So, let’s dive in and unlock the benefits of solar power for your camper!
Key Takeaways
- Solar panels on campers provide reliable and sustainable energy, offering off-grid freedom and unlimited power options.
- To install solar panels on a camper, assess energy needs, calculate power consumption, choose panels, select a mounting location, install a charge controller and batteries, connect components, test and monitor the system, and follow maintenance tips.
- Considerations for panel installation include size and wattage, as well as choosing a location with maximum sun exposure.
- Additional measures for efficiency include using energy-efficient appliances, upgrading insulation, and reducing reliance on external power sources.
Assess Your Energy Needs
Before you jump into installing solar panels on your camper, take a moment to assess how much power you’ll need to keep the adventure going. Calculating power requirements and estimating energy consumption are crucial steps in ensuring that your solar panels can meet your energy needs while on the road.
To begin, you’ll need to determine the appliances and devices that will be powered by the solar panels. Make a comprehensive list, including items such as lights, refrigerator, water pump, and entertainment systems. Next, find the power ratings of these devices, which are typically listed in watts. This information will help you calculate the total power consumption of your camper.
Once you have the power ratings, estimate how many hours each device will be used per day. Multiply the power rating by the daily usage hours to get the energy consumption of each device. Add up all the energy consumption values to get an estimate of your daily energy needs.
With this information, you can now choose the right solar panels that can generate enough power to meet your requirements. Transitioning into the next section, choosing the right solar panels is essential to ensure efficient power generation for your camper.
Choose the Right Solar Panels
When choosing the right solar panels for my camper, I need to determine the wattage and size requirements. This will ensure that I have enough power to meet my energy needs while also considering the available space on my camper roof.
Additionally, I need to consider the type of solar panels, whether flexible or rigid, based on their durability, efficiency, and ease of installation.
Determine the Wattage and Size Requirements
To figure out the wattage and size requirements, all you gotta do is calculate the power needs and dimensions of your camper.
Calculating power requirements involves considering the appliances and devices you plan to use, as well as their power ratings and the number of hours they’ll be in use. Add up the total wattage needed for all these items to determine the minimum wattage your solar panels should generate.
Choosing panel size is also crucial, as it determines how many panels you’ll need to meet your power needs. Consider the available space on your camper’s roof for installation and the dimensions of the panels. Keep in mind that larger panels generally generate more power.
So, with the power needs and dimensions of your camper in mind, you can now move on to considering the type of solar panels (flexible or rigid).
Consider the Type of Solar Panels (Flexible or Rigid)
Now, you’ll want to explore the exciting world of solar panel options for your camper, and boy, are you in for a treat! When considering the type of solar panels to hook up, there are two main options: flexible and rigid panels.
Assessing the efficiency of these panels is crucial, as it determines how much power they can generate. Flexible panels are lightweight and can be bent to fit curved surfaces, making them a great option for irregularly shaped campers. On the other hand, rigid panels are more durable and have higher efficiency ratings.
When comparing costs, flexible panels tend to be more expensive due to their advanced technology. However, they offer the advantage of being easy to install.
Now that you have assessed the efficiency and costs of different solar panel options, it’s time to select the right mounting location for optimal energy production.
Select the Right Mounting Location
First, make sure you find the perfect spot on your camper to securely mount your solar panels. The location you choose should provide maximum sunlight exposure and be easily accessible for maintenance. When deciding on the mounting location, consider the angle at which the panels will receive the most sunlight throughout the day. Ideally, the panels should be tilted at an angle equal to your latitude to maximize energy generation. Additionally, ensure that the chosen spot is free from any shading caused by nearby objects such as trees or roof accessories.
To help you visualize the best mounting locations, refer to the table below:
| Pros | Cons |
|---|---|
| Roof – Provides easy access and protection from theft | Generates less energy if shaded |
| Ground – More flexibility in positioning and maintenance | Panels may be susceptible to theft |
To protect the panels from theft, consider installing them on the roof of your camper. This location provides easy access for maintenance and is less likely to be targeted by thieves. However, if shading is a concern, you may opt for ground installation. Although it offers more flexibility in panel positioning and maintenance, you should take precautions to secure the panels and prevent theft.
Once you have found the perfect mounting location, you can proceed to the next step of installing the charge controller and batteries.
Installing the charge controller and batteries is the next crucial step in setting up your solar panel system.
Install the Charge Controller and Batteries
Once you’ve found the perfect mounting location, it’s time to install the charge controller and batteries for your solar panel system. Choosing the right battery size is crucial to ensure optimal performance and longevity of your system. Consider factors such as the power consumption of your camper and the duration of your trips to determine the appropriate battery capacity.
Deep-cycle batteries, such as AGM or gel batteries, are commonly used in solar panel setups due to their ability to withstand repeated discharging and recharging cycles.
To connect the charge controller to the electrical system, start by identifying the positive and negative terminals of the batteries. Connect the positive terminal of the battery to the charge controller’s positive input and the negative terminal to the negative input. Make sure to use appropriate gauge wiring to handle the current flow.
Additionally, connect the charge controller’s output terminals to the camper’s electrical system, ensuring that the positive and negative connections match accordingly.
With the charge controller and batteries properly connected, you’re now ready to connect the solar panels to the charge controller. This will allow the panels to charge the batteries efficiently and power your camper’s electrical devices.
Connect the Solar Panels to the Charge Controller
To connect the solar panels to the charge controller, it’s crucial to use the correct wiring and connectors. This ensures that the electrical current flows efficiently and safely.
Additionally, it’s essential to ensure a secure and weatherproof connection to protect the system from any damage caused by moisture or environmental factors.
By following these guidelines, you can maximize the performance and longevity of your solar power setup.
Use the Correct Wiring and Connectors
Make sure you’re using the correct wiring and connectors to seamlessly connect your solar panels to your camper. Using the right wiring and connectors is crucial for a successful solar panel installation.
To begin, select wires that are suitable for outdoor use and can handle the current produced by your solar panels. It’s recommended to use stranded copper wire with a gauge appropriate for the distance between your panels and the charge controller.
Next, choose connectors that are compatible with your solar panels and charge controller. Common types include MC4 connectors and Anderson Powerpole connectors. These connectors ensure a secure and weatherproof connection, preventing any power loss or damage caused by moisture or other environmental factors.
By using the correct wiring and connectors, you can ensure a smooth and reliable connection for your solar panels, allowing you to power your camper efficiently and sustainably.
Ensure a Secure and Weatherproof Connection
Ensure your solar panel connection is as secure as a fortress and as weatherproof as a raincoat. To achieve this, follow these weatherproofing techniques and proper grounding techniques:
-
Use waterproof connectors: Opt for connectors specifically designed for outdoor use, such as MC4 connectors, which provide a tight seal against moisture.
-
Seal all entry points: Apply a generous amount of silicone sealant around any holes or gaps where wires enter the camper to prevent water infiltration.
-
Use waterproof junction boxes: Install waterproof junction boxes to house the connections between the solar panels and the camper’s electrical system, offering an extra layer of protection against the elements.
-
Properly ground the system: Grounding the solar panels ensures safety and protects against electrical faults. Use grounding lugs and copper grounding wire to establish a solid connection to the camper’s chassis.
With these weatherproofing techniques and proper grounding techniques in place, you can now confidently move on to the next section and install an inverter (if necessary).
Install an Inverter (if necessary)
Before installing an inverter in my camper, I needed to determine the power output and compatibility of the inverter with my electrical system. This involved calculating the total power consumption of my appliances and devices, and ensuring that the inverter could handle that load.
Once I had the right inverter, I connected it to the batteries and electrical system by following the manufacturer’s instructions and making sure to use the appropriate cables and connectors. It was important to double-check all connections and ensure they were secure to avoid any electrical issues.
Determine the Power Output and Compatibility
To accurately gauge the power output and ensure compatibility, it’s crucial to check the specifications of both the solar panels and the camper’s electrical system.
Start by calculating the energy consumption of your camper, taking into account all the appliances and devices you plan to power with the solar panels. This will help you determine the size and number of solar panels needed.
Additionally, estimate the solar panel efficiency, which is the amount of sunlight converted into electricity. This information will give you an idea of how much power the panels will generate under different conditions.
Once you have these figures, compare them with the electrical system of your camper to ensure compatibility. This includes checking the voltage and wattage requirements.
With this information, you can now move on to the next step of connecting the inverter to the batteries and electrical system, ensuring a seamless integration.
Connect the Inverter to the Batteries and Electrical System
After determining the power output and compatibility, the next step is connecting the inverter to the batteries and electrical system for a seamless integration.
To connect the inverter, start by ensuring that the batteries are fully charged and disconnected from any power source. Locate the positive and negative terminals on the batteries and the inverter. Use appropriate gauge cables to wire the positive terminal of the batteries to the positive terminal of the inverter, and the negative terminal of the batteries to the negative terminal of the inverter. Make sure the connections are secure and tight.
Once the inverter is connected to the batteries, connect the inverter to the camper’s electrical system following the manufacturer’s instructions. This will allow the electrical system to draw power from the batteries through the inverter.
After completing the connections, it is important to test the system and monitor its performance to ensure everything is functioning properly. This will help identify any potential issues or adjustments that may be needed.
Test the System and Monitor Performance
Now, let’s see how well your solar panel system is working and keep an eye on its performance. Monitoring the performance of your solar panel system is crucial to ensure it’s functioning optimally. Here are some performance monitoring techniques and troubleshooting tips to help you:
-
Performance Monitoring: Install a solar charge controller with a built-in monitoring system. This’ll provide real-time data on the energy produced, battery voltage, and system efficiency. Additionally, you can use a power meter to measure the energy consumption of your appliances and compare it to the energy generated by the solar panels.
-
Battery Monitoring: Regularly check the battery voltage using a voltmeter or a battery monitor. Ensure the voltage remains within the recommended range to avoid overcharging or undercharging.
-
Troubleshooting Techniques: If you notice a decrease in system performance, check the connections for any loose or corroded wires. Inspect the solar panels for any damage or dirt that may be affecting their efficiency. Clean the panels regularly to remove dust, pollen, or bird droppings.
-
Performance Optimization: If you find any issues, consult the manufacturer’s manual or contact a professional for assistance. They can help diagnose and resolve any problems, ensuring your solar panel system operates at its best.
Now that you know how to monitor and troubleshoot your solar panel system, let’s move on to the next section on maintaining your solar panels and system.
Maintain Your Solar Panels and System
After testing the solar panel system and monitoring its performance, it’s crucial to maintain your solar panels and system to ensure their optimal functioning. Solar panel maintenance is vital for long-term efficiency and longevity.
Regularly inspect the panels for any dirt, debris, or shading that may obstruct sunlight absorption. Clean the panels with a non-abrasive sponge or cloth and a mild detergent mixed with water. Rinse thoroughly and avoid using abrasive materials or harsh chemicals that could damage the panels.
Additionally, inspect the wiring connections and tighten any loose connections to prevent voltage drops or system failures.
If you encounter any issues with your solar panels, troubleshooting is essential. Start by checking the system’s fuse or breaker to ensure it isn’t tripped or blown. Inspect the charge controller for any error codes or fault indicators. If you notice any damaged components or wiring, replace them promptly. It’s also recommended to consult the manufacturer’s manual or contact a professional for assistance if necessary.
Maintaining and troubleshooting your solar panel system will help maximize its efficiency and extend its lifespan. By properly maintaining your solar panels, you can ensure they continue to generate clean, renewable energy for your camper.
In the next section, we’ll consider additional energy-saving measures to complement your solar panel system.
Consider Additional Energy-Saving Measures
In order to maximize energy efficiency, it’s worth considering additional measures that can help save power and prolong the lifespan of your solar panel system.
One way to do this is by using energy efficient appliances in your camper. These appliances are designed to consume less power without compromising functionality. Look for appliances that have an ENERGY STAR rating, as they meet strict energy efficiency guidelines set by the US Environmental Protection Agency.
Another measure to consider is upgrading the insulation in your camper. Proper insulation can greatly reduce heat loss in the winter and heat gain in the summer, which means your solar panels won’t have to work as hard to maintain a comfortable temperature inside. This can lead to significant energy savings over time.
By incorporating energy efficient appliances and upgrading insulation, you can further reduce your reliance on external power sources and make the most out of your solar panel system. These additional measures will not only save you money on energy bills but also help you minimize your environmental impact.
So, with these energy-saving measures in place, you can now move on to the next section and enjoy the benefits of solar power in your camper!
Enjoy the Benefits of Solar Power in Your Camper!
Now that we’ve discussed additional energy-saving measures, let’s move on to the exciting part – enjoying the benefits of solar power in your camper!
As an avid camper myself, I can attest to the numerous advantages of using solar power for your camper.
First and foremost, solar power allows you to harness the energy of the sun and convert it into electricity to power your camper. This means you can enjoy the freedom of going off-grid without worrying about running out of power. No more noisy generators or limited power options!
When it comes to installing solar panels on your camper, there are a few tips to keep in mind. Firstly, consider the size and wattage of the panels based on your power needs. Secondly, ensure that you have a suitable location on your camper’s roof to mount the panels, preferably in an area with maximum sun exposure. Additionally, invest in a good quality charge controller to regulate the flow of electricity from the panels to your camper’s battery.
By following these installation tips and taking advantage of solar power in your camper, you can enjoy the freedom, cost savings, and environmental benefits that come with it.
Happy camping!
Frequently Asked Questions
How do I determine the energy needs of my camper before installing solar panels?
Calculating power usage and sizing the solar system for your camper is crucial before installing solar panels.
To determine your energy needs, start by listing all the appliances and devices you plan to power. Determine their power consumption in watts and estimate their daily usage in hours.
Add up these values to calculate your daily energy consumption in watt-hours (Wh).
Divide this by the average daily sunlight hours to determine the size of the solar system needed to meet your camper’s energy requirements.
What factors should I consider when choosing the right solar panels for my camper?
When choosing solar panels for my camper, I consider the solar panel efficiency and my budget.
Solar panel efficiency is important because it determines how much energy the panels can generate. I want panels that are highly efficient to maximize power production.
However, I also need to consider my budget and find a balance between efficiency and cost. Finding the right combination ensures I get the most bang for my buck while saving the environment.
Are there any specific guidelines or requirements for selecting the mounting location for solar panels on a camper?
When selecting the mounting location for solar panels on a camper, there are a few guidelines to consider.
Firstly, you need to account for any mounting location challenges, such as obstructions or limited roof space.
Secondly, the solar panel tilt angle is crucial for maximizing energy production. Ideally, the panels should be tilted at an angle equal to the latitude of your location. This ensures optimal sun exposure and increases the efficiency of the panels.
How do I properly connect the solar panels to the charge controller?
To properly connect solar panels to the charge controller, follow these proper wiring techniques. First, make sure the panels are connected in parallel or series, depending on the system’s voltage requirements. Use appropriate wire sizes and connectors to minimize power loss. Also, ensure that the connections are secured tightly to prevent any loose connections. If you encounter common connection issues, such as low voltage or intermittent power, troubleshoot by checking the wiring for loose or damaged connections and making sure proper grounding is in place.
What are some additional energy-saving measures I can take to maximize the benefits of solar power in my camper?
To maximize the benefits of solar power in my camper, I can take additional energy-saving measures. One way is by using energy-efficient appliances, such as LED lights and low-power refrigerators.
Another measure is improving insulation techniques, like adding thermal curtains and sealing any gaps or cracks. These methods help reduce energy consumption, allowing the solar panels to provide more efficient and sustainable power for my camper.
Can Solar Panels Help Keep a Camper Cool?
Solar panels are an efficient solution for keeping camper cool during hot summer days. By harnessing the sun’s energy, these panels power the air conditioning unit, reducing reliance on traditional power sources. With the keyword keeping camper cool, solar panels offer an eco-friendly and cost-effective way to maintain a comfortable temperature inside the camper, ensuring a pleasant camping experience.
Can Solar Panels Be Used to Power a Tiny House Camper Conversion?
Yes, solar panels can definitely be used to power a tiny house camper conversion. By installing solar panels on the roof, you can harness the power of the sun to provide electricity for all your needs. This is a great way to turn camper into tiny house while being eco-friendly and self-sufficient.
Conclusion
In conclusion, I’d recommend taking the time to assess your energy needs before choosing the right solar panels for your camper. Selecting the right mounting location is crucial for optimal performance. Installing a charge controller and batteries is necessary to ensure efficient power storage. Once everything’s set up, connecting the solar panels to the charge controller is a breeze.
Testing the system and monitoring its performance will guarantee its success. Maintaining your solar panels and considering additional energy-saving measures will maximize their benefits. So, indulge in the beauty of solar power and bask in its brilliance in your camper!


