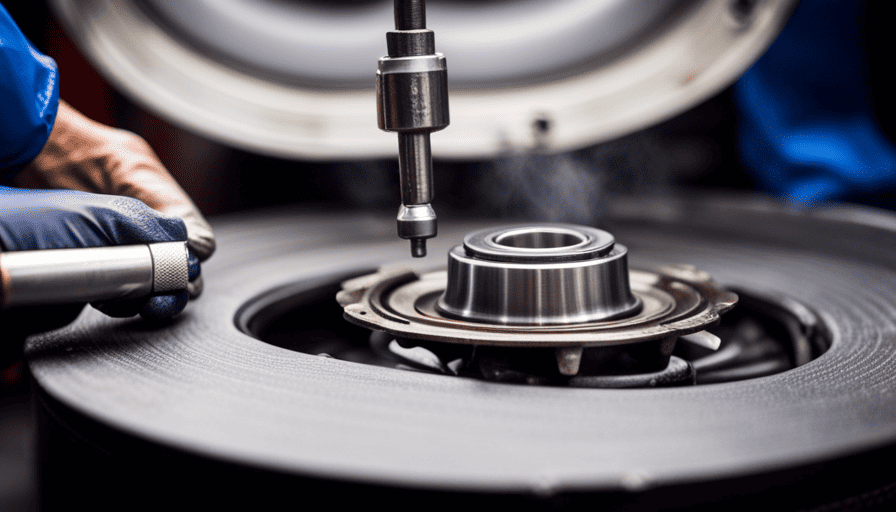
Were you aware that neglecting or incorrectly lubricating bearings causes more than 80% of camper breakdowns? Indeed, a fundamental maintenance activity such as applying grease to your camper’s bearings can avert expensive repairs and guarantee a seamless and secure trip.
In this article, I will guide you through the step-by-step process of greasing your camper bearings, so you can hit the road with confidence. We’ll start by gathering the necessary tools and supplies, then elevate the camper and remove the wheels.
Next, we’ll clean the bearings and spindle, inspect and replace any damaged parts, and finally apply the grease to the bearings. Once everything is reassembled, we’ll lower the camper and test the bearings for proper lubrication.
Remember, regular maintenance and greasing of your bearings is crucial for the longevity and performance of your camper. So, let’s get started and keep those wheels rolling smoothly!
Key Takeaways
- Regularly greasing camper bearings is crucial for preventing breakdowns and costly repairs.
- The step-by-step process for greasing camper bearings includes cleaning, inspecting, applying grease, packing bearings, and reinstalling.
- Using high-quality grease and following manufacturer’s guidelines is important for optimal performance.
- Neglecting regular maintenance and over-greasing can lead to damage and decreased lifespan of the bearings.
Gather the Necessary Tools and Supplies
Now that you know it’s time to get those camper bearings greased up, you’re gonna want to gather all the tools and supplies you’ll need.
To replace old bearings and ensure smooth operation, there are a few essential tools for greasing bearings that you’ll need to have on hand.
Firstly, you’ll need a jack to elevate the camper and remove the wheels. Make sure the jack is capable of lifting the weight of your camper safely.
Additionally, you’ll need a lug wrench to loosen and remove the lug nuts securing the wheels.
A socket set with appropriate sizes will be necessary to remove the hub cap, spindle nut, and retaining washer.
It’s also important to have a grease gun to apply fresh grease to the bearings. Make sure you have the correct type of grease recommended by the manufacturer.
Lastly, don’t forget to have a clean rag or paper towels to wipe off any excess grease.
With all these tools and supplies ready, you can now move on to the next step, which is to elevate the camper and remove the wheels.
Elevate the Camper and Remove the Wheels
First, elevate the camper by using a jack to raise it off the ground. This step is crucial to ensure easy access to the wheels and bearings. When choosing a jack, make sure it has a weight capacity that can support the weight of your camper. Begin by placing the jack in a stable location, such as under the frame or axle. Slowly pump the jack handle until the camper is lifted off the ground. Double-check that the camper is securely elevated by giving it a gentle shake.
Now that the camper is elevated, it’s time to remove the wheels. Start by loosening the lug nuts using a lug wrench. It’s important to loosen the lug nuts before lifting the camper to prevent the wheels from spinning. Once the lug nuts are loose, position a jack stand under the frame near each wheel for added stability. Carefully remove the lug nuts and set them aside. Gently pull the wheel off the axle, taking note of any resistance or difficulties encountered.
With the wheels removed, we can now move on to the next step: cleaning the bearings and spindle.
Clean the Bearings and Spindle
After elevating the camper and removing the wheels, it’s time to give attention to cleaning the bearings and spindle. This step is crucial to ensure optimal performance and longevity of the bearings.
To begin, use a clean cloth to remove any dirt or debris from the spindle and bearings. Next, inspect the bearings for any signs of wear or damage. If they appear to be in good condition, proceed with cleaning.
There are several cleaning techniques you can use, such as using a degreaser or solvent to remove old grease and grime. Make sure to thoroughly clean all surfaces, including the inner and outer races of the bearings.
Once the bearings are clean, it’s important to choose the best lubricant for your camper. Look for a high-quality, waterproof grease that’s specifically designed for wheel bearings. Apply a generous amount of grease to the bearings, ensuring that all surfaces are well-coated.
Finally, transition to the next section by mentioning the importance of inspecting and replacing damaged bearings or seals to complete the maintenance process.
Inspect and Replace Damaged Bearings or Seals
To ensure the safety of your journey, it’s essential to carefully inspect and promptly replace any damaged bearings or seals, as even a small defect can lead to a catastrophic failure on the road.
Did you know that a study found that 39% of accidents involving trailers are caused by wheel or tire failure?
When inspecting the bearings, start by removing the hub assembly from the axle spindle. Carefully examine each bearing for signs of wear, such as pitting, scoring, or discoloration. If any damage is detected, it’s crucial to replace the bearing immediately. Damaged bearings can lead to increased friction, heat buildup, and eventual failure.
Next, inspect the seals that are located on either side of the bearing. Look for any signs of damage, such as cracks, tears, or leaks. Damaged seals can allow dirt, water, and contaminants to enter the bearing, causing premature wear and failure. If any seal damage is found, it’s important to replace them to ensure proper protection for the bearings.
Remember, regular inspection and maintenance of your camper’s bearings and seals are key to preventing unexpected failures on the road.
Now, let’s move on to the next section and learn how to apply the grease to the bearings.
Apply the Grease to the Bearings
Now, let’s get the bearings properly lubricated to keep them running smoothly on your journey. Applying grease properly is crucial to ensure that the bearings are well protected and can withstand the rigors of travel. It is important to use high-quality grease that is specifically designed for camper bearings.
To apply the grease, follow these steps:
- Begin by cleaning the bearings thoroughly using a solvent to remove any dirt or old grease. This will ensure better adhesion of the new grease.
- Once the bearings are clean, apply a generous amount of grease to the palm of your hand. This will allow you to evenly distribute the grease onto the bearings.
- Take each bearing and roll it in your hand, ensuring that the grease is covering all surfaces. Make sure to get the grease into all the small crevices and gaps.
- After the bearings are adequately greased, place them back into their designated spots in the hub assembly.
- Finally, install the seals back onto the bearings to protect them from dirt and debris.
Properly applying grease to the bearings will greatly extend their lifespan and ensure optimal performance. Once the bearings are greased, we can move on to the next step of reinstalling the bearings and seals.
Reinstall the Bearings and Seals
Let’s get ready to reinstall the bearings and seals, ensuring a smooth and worry-free journey ahead! After applying the grease to the bearings, it’s time to carefully reinstall them.
Start by placing the inner bearing into the hub, making sure it fits snugly. Then, insert the seal into the hub, making sure it’s properly aligned. Gently tap it into place until it sits flush with the hub.
Next, carefully slide the hub back onto the spindle, making sure the bearings align with the spindle. Once aligned, push the hub all the way onto the spindle until it’s snug. Double-check that the bearings are properly seated and the hub is secure.
Now, it’s time to seal the hub to prevent any dirt or water from entering. Apply a thin layer of grease to the outer edge of the seal. This’ll help create a tight seal and ensure optimal performance. Once the seal’s greased, carefully press it into place, making sure it’s properly aligned with the hub.
With the bearings and seals securely in place, we can now move on to the next step: reattach the wheels and lower the camper, preparing for our next adventure.
Reattach the Wheels and Lower the Camper
Once the wheels are securely reattached and the camper is lowered, you’ll be ready to hit the road again, feeling as light as a feather and ready for your next adventure!
To reattach the wheels securely, begin by aligning the wheel studs with the holes on the hub. Slide the wheel onto the studs and tighten the lug nuts in a star pattern to ensure even tightening. Use a torque wrench to tighten the lug nuts to the manufacturer’s specifications. This will prevent over-tightening and potential damage to the wheel studs.
After reattaching the wheels, it’s crucial to ensure proper alignment. Check that the wheels are centered and not tilted. This can be done by observing the gap between the tires and the wheel well on each side.
Adjust the camper’s suspension as needed to achieve optimal performance. This may involve adjusting the suspension components such as leaf springs or torsion bars, depending on your camper’s setup.
With the wheels securely reattached and the camper’s suspension adjusted, you are now ready to test the bearings and check for proper lubrication. This step will ensure the smooth operation of your camper’s wheels while on the road.
Test the Bearings and Check for Proper Lubrication
To ensure smooth operation on the road, it’s crucial to test the bearings and make sure they’re properly lubricated. Start by checking the bearing wear and inspecting for signs of rust. Excessive wear or rust can lead to bearing failure and cause serious damage to your camper.
Carefully examine the bearings for any pitting, scoring, or discoloration, as these are signs of wear and may indicate the need for replacement.
Next, test the bearings by spinning the wheels. They should rotate freely and smoothly without any noise or resistance. If you hear grinding or feel any roughness, it’s a clear indication that the bearings need attention. Additionally, gently wiggle the wheels to check for any excessive play, which could also suggest worn bearings.
Once you’ve tested the bearings, it’s important to ensure proper lubrication. Apply a high-quality wheel bearing grease to the bearings, making sure to fill the entire cavity. This’ll help reduce friction and heat buildup, extending the life of your bearings. Be thorough in your application, ensuring that all areas are adequately lubricated.
Regularly maintain and grease the bearings to keep them in optimal condition and prevent future issues. By following these steps, you can ensure the longevity and performance of your camper’s bearings, providing a safe and enjoyable travel experience.
Regularly Maintain and Grease the Bearings
After testing the bearings and ensuring proper lubrication, the next step in maintaining camper bearings is to regularly grease them. Regular maintenance is crucial to prevent bearing wear and extend the lifespan of the bearings. Neglecting this task can lead to costly repairs and potential safety hazards.
To properly grease the bearings, follow the manufacturer’s guidelines regarding the type and quantity of grease to use. This information can usually be found in the camper’s owner manual. Additionally, it is important to clean the bearings thoroughly before applying new grease to remove any dirt or debris.
To help you visualize the process, refer to the table below, which outlines the steps involved in greasing camper bearings:
| Step | Procedure |
|---|---|
| 1 | Clean the bearings with solvent or degreaser. |
| 2 | Inspect for signs of bearing wear, such as pitting, rust, or excessive play. |
| 3 | Apply the recommended grease to the bearings using a grease gun. |
| 4 | Pack the bearings with grease by rotating them while applying pressure. |
| 5 | Reinstall the bearings, ensuring proper alignment and torque. |
Regularly maintaining and greasing the bearings is essential to ensure smooth and safe operation of your camper. It helps prevent premature wear and damage to the bearings, which can result in costly repairs and potential breakdowns on the road. Remember, if you are unsure about performing this maintenance yourself, it is always wise to seek professional help.
[Continue to the section on seeking professional help if needed.]Seek Professional Help if Needed
If you’re unsure about maintaining your bearings yourself, don’t hesitate to reach out to a professional for assistance. It’s important to know when to DIY and when to call a professional when it comes to greasing camper bearings.
While some tasks can be easily done by yourself, others require the expertise of a professional to ensure proper maintenance and avoid common mistakes.
Here are some common mistakes to avoid when greasing camper bearings:
-
Over-greasing: Applying too much grease can cause excessive heat and damage the bearings. It’s crucial to use the right amount of grease to prevent this issue.
-
Using the wrong type of grease: Different bearings require different types of grease. Using the wrong grease can lead to poor lubrication and potential damage to the bearings.
-
Neglecting regular maintenance: It’s essential to regularly inspect and grease the bearings to prevent wear and tear. Neglecting this maintenance can result in costly repairs down the line.
-
Incorrectly torquing the bearings: Properly torquing the bearings ensures they are secured in place. Failing to do so can lead to loose bearings and potential accidents.
-
Not following the manufacturer’s guidelines: Each camper may have specific guidelines for greasing the bearings. It’s crucial to follow these instructions to ensure the best performance and longevity of the bearings.
By avoiding these common mistakes and seeking professional help when needed, you can ensure your camper bearings are properly maintained and will provide a smooth and safe travel experience.
Frequently Asked Questions
How often should I grease my camper bearings?
I typically grease my camper bearings every 12 months or 12,000 miles, whichever comes first. When choosing the right grease for my camper bearings, I consider factors such as temperature range, load capacity, and water resistance. Before greasing, it’s crucial to properly clean the bearings to remove any dirt, debris, or old grease. This ensures optimal performance and extends the lifespan of the bearings.
Can I use any type of grease for my camper bearings?
Yes, it’s important to use the correct type of grease for your camper bearings. Using the wrong type of grease can lead to premature wear and damage. There are different types of grease available for camper bearings, such as lithium-based, synthetic, and marine-grade greases. Each type has its own pros and cons. For example, lithium-based grease is commonly used and provides good lubrication properties, but it may not perform well in extreme temperatures. On the other hand, synthetic grease offers excellent temperature resistance and longevity, but it can be more expensive.
What are the signs of damaged or worn-out bearings?
When it comes to damaged bearings, there are several signs of wear to look out for. One common indication is excessive noise or vibration coming from the wheel area.
Another sign is uneven tire wear or a pulling sensation while driving. Additionally, if you notice any play or looseness in the wheel, it may be a sign of damaged bearings.
It’s important to address these issues promptly to prevent further damage or potential accidents.
Can I replace the bearings myself or should I hire a professional?
Replacing bearings in a camper can be a daunting task, but with the right tools and knowledge, it can be done by yourself. However, I would highly recommend seeking professional help. They have the expertise and experience to ensure the job is done correctly.
Replacing bearings requires precision and attention to detail, so it’s best to leave it to the professionals to avoid any potential issues or safety hazards.
Are there any specific safety precautions I should take when greasing my camper bearings?
When greasing camper bearings, it’s essential to prioritize safety. Before starting the process, make sure to wear appropriate safety gear such as gloves and safety glasses to protect yourself.
Additionally, be aware of potential hazards such as hot grease, sharp edges, and moving parts. Take caution to avoid burns and cuts by handling tools and equipment carefully.
By following these safety precautions, you can ensure a safe and successful greasing of your camper bearings.
Conclusion
In conclusion, greasing camper bearings is an essential maintenance task that shouldn’t be overlooked. By following the steps outlined above, you can ensure the longevity and smooth operation of your camper’s wheels.
Just like a well-oiled machine, properly greased bearings will keep your camper rolling smoothly down the road, avoiding any unnecessary wear and tear. Remember to regularly maintain and grease the bearings to ensure their continued effectiveness.
If you’re unsure or encounter any issues, don’t hesitate to seek professional help. Happy camping!

