So, you’ve made the exciting choice to set off on a camping trip with your reliable camper. You have your equipment ready, your itinerary is set, and your enthusiasm is sky-high. However, have you considered your plan for replenishing the water tank in your camper? Ah, the delights of camping!
In this article, I’ll walk you through the simple and practical steps to fill your camper’s water tank. No need to stress or worry, my friend. With a reliable water source, a water hose, and a bit of patience, you’ll have that tank filled in no time. Next, make sure to connect the water hose to the camper’s water inlet and turn the water source on. As the tank fills, keep an eye on the level gauge to avoid overfilling. Once your tank is filled, disconnect the hose and secure the water inlet. If you’re unsure of how to empty holding tank, simply locate the drain valve and carefully release the water into a designated dump station. Remember to always properly dispose of your waste in a responsible manner.
We’ll start by locating the water fill port on your camper and gathering the necessary equipment. Then, we’ll connect the water hose to a reliable water source and open the valve. Slowly but surely, we’ll insert the hose into the camper’s water fill port and monitor the tank’s fill level.
Once the tank is full, we’ll close the water source valve, disconnect the hose, and test the water system for proper functioning. And just like that, you’ll be ready to enjoy your camping trip with a full water tank.
Get ready to quench your thirst for adventure and stay hydrated throughout your camping journey. Let’s dive in and fill that camper water tank together!
Key Takeaways
- Locate the water fill port on the camper and gather the necessary equipment for filling the tank.
- Use a reliable water source and connect a water hose securely to the camper’s water fill port.
- Monitor the tank’s fill level to avoid running out of water during the trip.
- Practice water conservation techniques while camping and regularly maintain the camper’s water tank to ensure clean and safe water supply.
Locate the Water Fill Port on Your Camper
Now, let’s find the water fill port on your camper so you can quench your thirst on your outdoor adventures. Finding alternative water sources is essential when you’re out in the wilderness. However, it’s important to have a clean and safe water supply. That’s where the water fill port comes in handy.
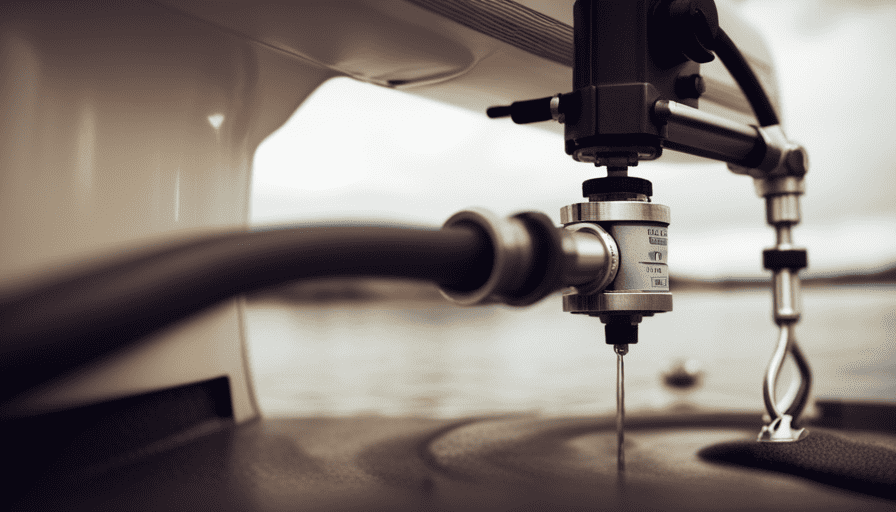
The water fill port is typically located on the side of your camper, near the rear. It may be labeled or have a cap that says ‘water.’ Look for a small opening where you can connect your water hose.
Before filling your camper’s water tank, consider using different types of water filters to ensure the water is clean and safe to drink. There are various options available, such as carbon filters or UV filters, which can remove impurities and kill bacteria. These filters can be easily attached to your water hose.
Now that you’ve located the water fill port and considered your water filter options, it’s time to gather your water hose and attachments.
Gather Your Water Hose and Attachments
First, make sure you’ve got your water hose and all the necessary attachments ready to go. Here are three important things to consider when gathering your water hose and attachments for filling your camper water tank:
-
Length: Make sure your water hose is long enough to reach from the water source to your camper’s water fill port. It’s better to have a slightly longer hose than a shorter one, as you can always coil up the excess length if needed.
-
Quality: Invest in a durable and high-quality water hose that’s specifically designed for drinking water. Look for hoses that are labeled as safe for potable water to ensure the water you’re filling your tank with is clean and safe for consumption.
-
Attachments: Check if you need any additional attachments, like a water pressure regulator or a water filter. A water pressure regulator helps protect your camper’s plumbing system from high water pressure, while a water filter can remove impurities and improve the taste of the water.
Now that you’ve gathered your water hose and attachments, you’re ready to connect the hose to a reliable water source and start filling your camper water tank.
Connect the Water Hose to a Reliable Water Source
Once you’ve gathered your water hose and attachments, it’s time to secure a connection to a trustworthy water source, ensuring a steady flow like a river winding through a forest.
The first step is to choose the right water hose for your camper. Look for a hose that’s specifically designed for drinking water, as it’ll be safe and free from any harmful chemicals. Additionally, consider the length of the hose and make sure it’s long enough to reach the water source without any tension or strain.
Next, it’s important to use a water filter to ensure the water you fill your camper tank with is clean and free from impurities. Connect the water filter to the end of your water hose, closest to the water source. This’ll help remove any sediment, bacteria, or other contaminants that may be present in the water.
Once the water filter is attached, carefully connect the other end of the hose to a reliable water source. This can be a campground water hookup, a spigot at a friend’s house, or any other source of potable water. Make sure the connection is secure and there are no leaks.
With the water hose connected to the water source, you’re now ready to move on to the next step: opening the water source valve. This’ll allow the water to flow through the hose and into your camper’s water tank, filling it up and providing you with a steady supply of clean water for your camping adventures.
Open the Water Source Valve
To ensure a steady flow of clean water for your camping adventures, go ahead and open the valve on your water source. This will allow the water to flow into your camper’s water tank. Before opening the valve, make sure you’ve properly connected the water hose to a reliable water source, as discussed in the previous subtopic.
Now, let’s go over some important tips and troubleshooting techniques for maintaining your camper water tank:
-
Regularly clean the tank: To prevent the build-up of bacteria and mold, it’s crucial to clean your water tank at least once a year. Use a mixture of water and bleach, and thoroughly rinse it afterwards.
-
Check for leaks: Inspect the tank and its connections regularly for any signs of leaks. Leaks can lead to water wastage and potential damage to your camper.
-
Use a water filter: Installing a water filter in your camper’s water system will help remove impurities and ensure the water you consume is clean and safe.
-
Empty the tank when not in use: Before storing your camper, make sure to drain the water tank completely. This will prevent any water from stagnating and causing unpleasant odors or bacteria growth.
By following these tips for maintaining a camper water tank, you can ensure a reliable supply of clean water during your camping trips.
Now, let’s move on to the next step: inserting the water hose into the camper’s water fill port.
Insert the Water Hose into the Camper’s Water Fill Port
Now let’s smoothly connect the water hose to the camper’s water fill port, ensuring a hassle-free water flow for your camping adventure!
Before we begin, it’s important to make sure the water hose is clean, as this’ll prevent any unwanted contaminants from entering the water tank. Start by rinsing the hose with clean water and then use a mild detergent to thoroughly clean both the inside and outside. Rinse it again to remove any soap residue.
Once the hose is clean, locate the camper’s water fill port. It’s usually located on the outside of the camper, near the water tank. Remove the cap from the fill port and attach the hose securely to it. Make sure it’s tight to avoid any leaks.
Now that the hose is connected, it’s time to think about water conservation. While camping, it’s important to be mindful of your water usage to conserve this precious resource. One tip is to take shorter showers or use wet wipes instead. Another tip is to collect rainwater for tasks like dishwashing or cleaning.
With the hose securely attached, it’s time to turn on the faucet to start filling the tank. This’ll allow water to flow from the water source, through the hose, and into the camper’s water tank. Remember to turn off the faucet once the tank is full to avoid any overflow.
Next, let’s move on to the next step of the process: "Turn on the faucet to start filling the tank."
Turn on the Faucet to Start Filling the Tank
Get ready for a refreshing camping experience by turning on the faucet and watch the water flow into the tank! Filling your camper’s water tank is a simple process that ensures you have access to water while on your outdoor adventures. To make it even easier, let’s explore some tips on how to conserve water while filling the camper tank and troubleshoot common issues that may arise.
| Conserving Water | Troubleshooting |
|---|---|
| – Use a water flow regulator to control the amount of water going into the tank. | – If the water is not flowing into the tank, check for any kinks or blockages in the hose. |
| – Avoid leaving the faucet unattended to prevent overflow and water wastage. | – Ensure that the water fill port is properly sealed to avoid leaks. |
| – Consider using a bucket to catch any excess water and reuse it for cleaning or other purposes. | – If the tank is not filling evenly, try adjusting the angle of the hose to distribute the water more evenly. |
By following these tips, you can conserve water and make the most out of your camping trip. Now, let’s move on to the next step and learn how to monitor the tank’s fill level.
Transition Sentence: Once you have successfully filled your camper’s water tank, it’s important to monitor the fill level to ensure you have enough water for your camping needs.
Monitor the Tank’s Fill Level
Make sure you keep an eye on how much water is in your tank to ensure you have enough for your camping adventure. Did you know that the average person uses 80-100 gallons of water per day? Monitoring the tank’s fill level is essential to avoid running out of water in the middle of your trip.
Here are some tips to help you keep track of your water usage and conserve water while camping:
-
Use water-saving techniques: Take shorter showers, turn off the faucet while brushing your teeth, and use a dishpan for washing dishes to minimize water waste.
-
Fix leaks promptly: Check for any leaks in your camper’s water system and repair them immediately. Even a small leak can waste a significant amount of water over time.
-
Be mindful of your water usage: Consider using disposable plates and utensils to minimize dishwashing, and collect rainwater for tasks like cleaning or watering plants.
Common problems with camper water tanks include leaks, contamination, and inadequate capacity. Regularly inspect your tank for any signs of damage or leaks. Also, ensure that you sanitize the tank before each trip to prevent bacterial growth. By being proactive and mindful of your water usage, you can conserve water and avoid common problems with camper water tanks.
Now, let’s move on to the next step: closing the water source valve and disconnecting the hose.
Close the Water Source Valve and Disconnect the Hose
To ensure a smooth disconnection process, it’s time to shut off the water source valve and detach the hose. Before doing so, make sure you’ve filled the camper water tank to the desired level and have monitored the fill level.
Now, let’s move on to closing the water source valve and disconnecting the hose.
Start by locating the water source valve, which is usually near the water hookup on the exterior of the camper. Turn the valve clockwise to shut off the water supply. This step is crucial to prevent any water from flowing into the camper while you disconnect the hose.
Once the valve is closed, it’s time to disconnect the hose. Unscrew the hose from the water hookup, making sure to hold onto the hose tightly to prevent any water from spraying out. Gently pull the hose away from the hookup until it is completely detached.
By properly closing the water source valve and disconnecting the hose, you’re taking important steps to maintain a clean water tank and prevent any water leaks or contamination.
Next, we’ll discuss how to properly sanitize your camper’s water system.
Now that the hose is disconnected, it’s time to test the water system for proper functioning.
Test the Water System for Proper Functioning
After closing the water source valve and disconnecting the hose, it’s time to move on to the next step: testing the water system for proper functioning. This is an essential part of the process to ensure that your camper’s water tank is ready to go.
To begin, turn on the water pump and open each faucet, one at a time. This will help remove any air bubbles trapped in the lines. Let the water run for a few minutes until it flows smoothly without sputtering or spurting. If you notice any issues, such as low water pressure or strange noises, it may indicate a problem with your water system.
To troubleshoot common water system issues, first check for any leaks or loose connections. Tighten any loose fittings and repair any leaks you find. If the water pressure is low, it could be due to a clogged filter or a malfunctioning pump. Clean or replace the filter as needed, and consider having a professional inspect your pump if the problem persists.
By following these water tank maintenance tips and troubleshooting common issues, you’ll ensure that your camper’s water system is in good working order. Now, you’re ready to enjoy your camping trip with a full water tank.
Enjoy Your Camping Trip with a Full Water Tank
Once your water system is up and running smoothly, you can fully immerse yourself in the wonders of nature on your camping trip, quenching your thirst for adventure with an endless flow of refreshing hydration.
To maximize water storage during your trip, it’s important to employ some water conservation tips.
Firstly, be mindful of your water usage. Take shorter showers and turn off the tap while brushing your teeth or washing dishes. Every drop counts when you’re relying on a limited water supply. Additionally, consider using biodegradable soap and shampoo to minimize the impact on the environment.
Another way to conserve water is by reusing it whenever possible. Collect rainwater in containers and use it for activities like washing dishes or rinsing off gear. You can also repurpose leftover water from cooking to clean utensils or water plants around your campsite.
Furthermore, packing a water filter or purifier can come in handy. This allows you to safely drink water from natural sources such as rivers or lakes, reducing the need for carrying large amounts of water with you.
Lastly, always remember to properly close all taps and valves to prevent any leaks or wastage.
By following these water conservation tips, you can ensure a full water tank throughout your camping trip, allowing you to fully enjoy the beauty of nature without worrying about running out of water.
Frequently Asked Questions
How do I find the water fill port on my specific camper model?
To find the water fill port on your specific camper model, start by examining the exterior of the camper. Look for a small hatch or door labeled ‘water fill’ or ‘fresh water.’ It’s typically located near the rear or side of the camper.
If you can’t find it, consult your camper’s manual or contact the manufacturer for assistance. Remember, locating the water fill port is crucial for troubleshooting and filling your camper’s water tank efficiently.
What type of water hose and attachments should I use for filling the camper water tank?
Choosing the right water hose for filling a camper water tank is crucial for efficient and hassle-free camping trips. Look for a hose specifically designed for drinking water and approved by the National Sanitation Foundation (NSF). It should be durable, flexible, and non-toxic, ensuring the water remains safe for consumption.
To maintain the hose for long-lasting use, always drain and store it properly after each trip, and periodically inspect it for any signs of wear or damage.
How do I properly connect the water hose to a reliable water source?
As I stand there, connecting the water hose to a reliable water source, I can’t help but feel a sense of anticipation. It’s like unlocking a door to a world of possibilities.
To ensure a proper connection, start by attaching the hose to the water source tightly, using a threaded connector if necessary. Then, turn on the water slowly, checking for any leaks.
With a reliable water source in place, you’re one step closer to filling your camper water tank.
Are there any specific precautions I should take when opening the water source valve?
When opening the water source valve to fill your camper water tank, it’s important to take a few precautions.
First, ensure that the valve is fully closed before connecting the hose to prevent any water leakage.
Next, slowly open the valve to allow a gradual flow of water into the tank. This’ll prevent any sudden surges that could damage the tank or plumbing system.
Finally, keep an eye on the tank’s fill level to avoid overfilling and potential water damage.
How long does it typically take to fill a camper water tank to its maximum capacity?
To efficiently fill a camper water tank and ensure it reaches maximum capacity, there are a few tips to keep in mind.
Firstly, make sure the water source valve is fully open.
Secondly, use a high-pressure hose or a funnel with a wide opening to facilitate a faster fill.
Lastly, monitor the tank’s level while filling to prevent overflow.
By following these tips, you can fill your camper water tank to its maximum capacity in a timely and efficient manner.
Can I Use the Same Method to Empty and Fill My Camper’s Water Tank?
When it comes to emptying and filling your camper’s water tank, it is advisable to use separate methods. Attempting to use the same method for emptying camper’s fresh water tank and filling it can lead to contamination issues. Proper maintenance includes draining the tank completely before refilling it with clean water for a safe and hygienic camping experience.
Conclusion
So there you have it, a step-by-step guide on how to fill your camper water tank. By following these instructions, you can ensure that your water tank is properly filled and ready for your camping trip.
Remember to always monitor the tank’s fill level and test the water system for proper functioning before setting off.
Now, let’s consider a hypothetical scenario. Imagine you’re on a week-long camping trip with your family and you mistakenly filled your water tank with contaminated water. This could lead to health issues and spoil your entire trip. By following the steps outlined in this article, you can avoid such mishaps and enjoy a worry-free camping experience.


