You’re out experiencing the joys of camping, making the most of nature and the comforts of your RV. However, the moment has arrived to conclude your trip and return home, requiring you to drain your fresh water tank. Fear not, for it’s an easy task, and I’m here to guide you through it meticulously.
First things first, you need to turn off the water supply to your camper. This will prevent any water from flowing into the tank while you’re trying to drain it.
Next, locate the drain valve, which is usually located on the underside of the camper near the tank.
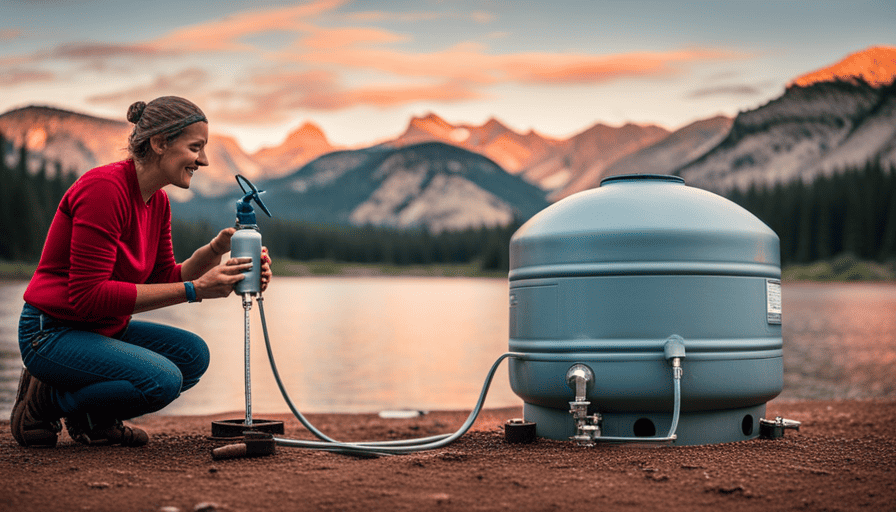
Now it’s time to prepare a hose for drainage. Make sure the hose is clean and free of any debris. Attach one end of the hose to the drain valve and the other end to a suitable drainage area, such as a sewer or a designated dumping station.
With everything set up, open the drain valve and let the water flow out of the tank. It’s important to let all the water drain out completely to prevent any buildup or contamination.
Once the tank is empty, it’s a good idea to flush it with clean water. This will help remove any lingering residue or odors. Simply fill the tank with clean water, let it sit for a few minutes, and then drain it out again through the same hose.
After the tank is flushed, close the drain valve and turn on the water supply to check for any leaks. If everything looks good, you’re ready to properly store the hose and secure the camper for storage until your next adventure.
Emptying the fresh water tank on your camper is an essential part of maintenance and proper care. By following these simple steps, you can ensure that your tank stays clean and ready for your next camping trip.
Key Takeaways
- Locate the drain valve for the fresh water tank, usually located on the underside of the camper.
- Prepare a clean hose for drainage and attach it securely to the drain valve.
- Open the drain valve to allow the water to flow out of the tank, ensuring it is completely emptied.
- Clean and sanitize the tank with a mild bleach solution, rinse thoroughly, and refill with clean, potable water before storing the camper.
Turn off the water supply
To avoid any potential water leaks and keep your camper dry, make sure to turn off the water supply before attempting to empty the fresh water tank. This is an essential step to prevent any unwanted water flow while draining the tank.
To turn off the water supply, you can follow similar steps to how you turn off the water supply in a house. Locate the main water valve, usually found near the water meter or in a utility room. Turn the valve clockwise until it’s fully closed. This will shut off the water supply to your camper, ensuring no more water enters the fresh water tank.
Additionally, if you’re familiar with how to drain a swimming pool, you can apply similar steps to turn off the water supply in your camper.
Once the water supply is turned off, you’re ready to move on to the next step, which is locating the drain valve for the fresh water tank.
Locate the drain valve
Locating the drain valve will give you a sense of relief as you prepare to rid your camper of its contents. The drain valve is usually located on the underside of the camper, near the fresh water tank. However, it’s important to note that some campers may have alternative drain locations, so be sure to consult your camper’s manual for specific instructions.
To help you with this process, here are some key tips to keep in mind:
- Check for any visible signs of the drain valve, such as a small lever or knob.
- If you can’t find the drain valve, try looking for any removable panels or access points that may conceal it.
- Some campers may have a separate drain valve for the water heater, so be sure to locate both valves if applicable.
- If you’re still having trouble finding the drain valve, consider reaching out to the manufacturer or a professional for assistance.
Common issues with drain valves include leaks, clogs, or difficulty in opening and closing. Troubleshooting these issues may involve tightening connections, clearing any obstructions, or replacing the valve altogether.
Now that you’ve successfully located the drain valve, it’s time to prepare a hose for drainage.
Prepare a hose for drainage
Now, it’s time to get a pipe for proper purging. When it comes to emptying the fresh water tank on your camper, having a hose ready is essential.
A hose allows for efficient drainage and ensures that the water flows smoothly out of the tank. Before using the hose, it’s important to check its condition and do any necessary maintenance. Look for signs of wear and tear, like cracks or leaks, and replace the hose if needed. Also, make sure the hose is clean and free from any debris that could clog the drain valve.
If you don’t have a hose or prefer an alternative method, there are other options to consider. One alternative is using a bucket or container to manually empty the water tank. While this method may take longer and require more effort, it can still effectively remove the water from the tank. Another option is using a portable pump to pump the water out of the tank. This method can be faster and more efficient, especially if you have a larger water tank.
Now that the hose is ready for use, the next step is to attach it to the drain valve.
Attach the hose to the drain valve
Secure the hose firmly onto the drain valve, ensuring a tight connection for efficient and uninterrupted drainage. When attaching the hose to the drain valve, it’s crucial to do it correctly to avoid any potential leaks or complications. Begin by selecting a hose that’s compatible with the camper’s drain valve. Check the size and type of the valve to ensure a proper fit.
Once you have the appropriate hose, slide it onto the drain valve, making sure it’s fully inserted. Then, tighten the hose clamp securely to hold it in place. This’ll prevent any water from escaping during the draining process.
Troubleshooting common issues with draining the fresh water tank is important to ensure a smooth and successful drainage. If you encounter any leaks around the hose connection, double-check the tightness of the hose clamp and reposition the hose if necessary. Another common issue is a slow or weak flow of water. In this case, check for any obstructions within the hose or drain valve, and clear them if needed.
With the hose securely attached to the drain valve, you’re now ready to move on to the next step: opening the drain valve. This’ll allow the water to flow out of the fresh water tank and begin the emptying process.
Open the drain valve
Ready to release the rushing river of liberation, twist the valve open and let the torrent of freedom cascade forth. When it comes to camper water tanks, regular maintenance is of utmost importance. Keeping your water tank clean and free from contamination is essential to ensure a safe and enjoyable camping experience.
To prevent water tank contamination, here are a few helpful tips. First, always use a food-grade hose when filling your tank to avoid any potential chemical leaching. Additionally, consider installing a water filter to remove any impurities or sediment. Regularly sanitize your water tank using a mixture of bleach and water, and flush it thoroughly before use.
Now, as the drain valve is opened, it’s crucial to allow the water to completely drain out. This helps remove any remaining debris or stagnant water that may have accumulated.
With a clean and empty water tank, you can confidently move on to the next step of preparing your camper for your next adventure.
Allow the water to completely drain out
To fully embrace the exhilarating rush of liberation, let the water flow freely from your vessel, allowing every last drop to escape and carry away any remnants of the past.
As the water drains from the fresh water tank, it’s important to take certain precautions to prevent water tank contamination and ensure its cleanliness for future use.
Here are three essential steps to follow when draining your fresh water tank:
-
Remove any debris: Before draining the tank, make sure to remove any debris or sediment that may have accumulated at the bottom. This can be done by opening the drain valve and allowing a small amount of water to flow out, which’ll help flush out any dirt or particles.
-
Clean the tank: Once the water has completely drained out, it’s crucial to clean and sanitize the water tank to eliminate any bacteria or impurities. This can be achieved by using a mixture of water and a mild bleach solution. Fill the tank with this solution, let it sit for a few hours, and then drain it completely.
-
Rinse thoroughly: After cleaning, it’s essential to rinse the tank thoroughly with clean water. This’ll remove any remaining bleach residue and ensure that the tank is ready for use again.
To transition into the next section about flushing the tank with clean water, it’s important to ensure that the tank is completely empty before proceeding.
Flush the tank with clean water
Once you’ve completed the draining and cleaning process, are you ready to refresh your system and ensure a pristine water supply for your next adventure? Let’s flush it with crystal-clear water. Flushing the tank with clean water is an essential step in maintaining the quality of your camper’s fresh water system.
To begin, fill reusable water containers with fresh, potable water. These containers allow for easy transportation and pouring into the tank. It’s important to use clean water to prevent any contaminants from entering the system. Also, consider using a water filter during the refilling process. A water filter helps remove impurities, ensuring a cleaner water supply.
Once the containers are filled, pour the water into the camper’s fresh water tank. Be sure to fill it to the appropriate level, taking into account the capacity of your tank. As the water flows into the tank, it’ll help flush out any remaining debris or residue from the cleaning process.
After the tank is full, close the drain valve to prevent any water from escaping. This’ll ensure that the water remains in the tank, ready for use during your next adventure. So, let’s move on to the next step of closing the drain valve and preparing your camper for the road ahead.
Close the drain valve
Close up the drain valve tightly to ensure that not a single drop of the precious liquid escapes from its confinement. This step is crucial in the process of emptying the fresh water tank on a camper. By closing the drain valve securely, you can prevent any leakage and ensure a successful drainage. However, it’s important to note that there are alternative drainage methods available if you encounter any issues with the drain valve.
If you find that the drain valve isn’t working properly or is damaged, there are a few troubleshooting steps you can take. First, check for any obstructions or debris that may be preventing the valve from closing completely. Clearing any blockages should allow the valve to function as intended. If the issue persists, you may need to consult a professional or consider using an alternative method to empty the tank.
Once the drain valve is closed tightly or an alternative drainage method is in place, it’s time to move on to the next step. In the subsequent section, we’ll discuss how to turn on the water supply and check for any leaks. This is an important step to ensure that the fresh water tank is properly emptied and ready for future use.
Turn on the water supply and check for leaks
After securing the drain valve tightly, I proceeded by activating the water supply and carefully inspecting for any signs of leakage. This step is crucial to ensure that the fresh water tank is completely empty and ready for storage.
To check for water pressure, I turned on the faucet and observed the water flow. A steady and strong stream indicated that the water pump was functioning properly. I also checked the connections and fittings for any leaks or drips, making sure to tighten them if necessary.
Next, I tested the water pump by turning on all the faucets and checking if the water pressure remained consistent. I listened for any unusual sounds or vibrations coming from the pump, which could indicate a problem. If everything seemed to be in order, I turned off the water supply and proceeded to the next step of properly storing the hose and securing the camper for storage.
To ensure the longevity of the hose, I drained any remaining water and coiled it neatly, avoiding any kinks or tangles. I then stored it in a dry and protected area to prevent damage. Finally, I secured the camper for storage by retracting the awning, locking all doors and windows, and ensuring that all appliances were turned off.
With these steps complete, the camper was ready to be safely stored until the next adventure.
Properly store the hose and secure the camper for storage
To ensure the hose’s longevity, you’ll want to drain any remaining water and neatly coil it before storing it in a dry area. But what about securing the camper for storage?
Properly cleaning the camper before storage is crucial to prevent mold and mildew growth. Start by emptying the fresh water tank completely. Open all faucets and flush the toilet to ensure all water is drained from the system.
Next, mix a solution of water and bleach, using a ratio of one cup of bleach to one gallon of water. Use this solution to thoroughly clean all surfaces in the camper, including the kitchen, bathroom, and sleeping areas. Pay special attention to areas that are prone to moisture, such as the shower and sink.
After cleaning, make sure to dry the camper thoroughly. Open all windows and vents to promote air circulation and remove any excess moisture. Consider using a dehumidifier to further prevent mold and mildew growth.
Once the camper is clean and dry, it’s time to secure it for storage. Remove any perishable items and empty the refrigerator. Close and lock all windows and doors, ensuring they’re tightly sealed. Check the tires and inflate them to the recommended pressure. Cover the camper with a breathable, waterproof cover to protect it from the elements.
By properly cleaning the camper before storage and taking necessary precautions, you can prevent the growth of mold and mildew and ensure that your camper is in great condition when you’re ready to use it again.
Frequently Asked Questions
How do I properly store the hose after emptying the fresh water tank on my camper?
To properly store the hose after emptying the fresh water tank on my camper, it’s important to prevent mold and mildew. First, make sure the hose is completely drained and dry.
Then, coil the hose neatly and secure it with a hose reel or a storage bag. Store the hose in a cool, dry place away from direct sunlight.
This will help prevent the growth of mold and mildew, ensuring a clean and functioning hose for future use.
What should I do if I can’t locate the drain valve on my camper?
If you can’t locate the drain valve on your camper, don’t worry, there are alternative drain methods you can try. First, check the owner’s manual or contact the manufacturer for specific instructions.
If that doesn’t work, you can try looking underneath the camper for any visible pipes or valves. If you’re still having trouble, consider reaching out to a professional for assistance.
It’s important to troubleshoot common issues like this to ensure proper maintenance of your camper’s fresh water tank.
Should I flush the tank with clean water every time I empty it?
I highly recommend flushing the tank with clean water every time you empty it. It’s like giving your tank a refreshing shower, washing away any lingering impurities and keeping it squeaky clean.
Regular flushing helps prevent the build-up of bacteria and contaminants, ensuring that your water stays fresh and safe to use. Plus, it helps maintain the overall quality and longevity of your camper’s fresh water system.
So, don’t skip this important step!
How long does it typically take for the fresh water tank to completely drain?
The draining time of a fresh water tank can vary depending on its size. Generally, larger tanks take longer to fully drain compared to smaller ones. Factors such as gravity, water pressure, and the location of the drain valve can also affect the draining time. However, it’s important to note that some common issues can cause the fresh water tank to not fully drain, such as clogs, faulty valves, or airlocks in the system.
Are there any specific steps I should follow to secure the camper for storage after emptying the fresh water tank?
To secure the camper for storage and begin the winterizing process, I follow these steps. First, I empty the fresh water tank completely.
Then, I turn off all water supply sources and drain the water lines.
Next, I add antifreeze to the plumbing system to prevent freezing during the winter months.
Finally, I clean and dry the camper thoroughly, making sure to remove any food or perishable items.
These steps ensure that my camper is properly prepared for storage.
Can I Use the Same Method to Fill and Empty the Fresh Water Tank on My Camper?
When it comes to filling and emptying the fresh water tank on your camper, can you use the same method? The answer is yes. To ensure a hassle-free experience, follow the recommended steps for filling the fresh water tank on your camper. Similarly, when it’s time to empty the tank, use the designated method to ensure proper drainage and maintenance. Overall, consistency in following the suggested procedures is key to maintaining your filling fresh water tank on camper effectively.
Conclusion
Well, that’s it folks! You won’t believe how simple it is to empty the fresh water tank on your camper. Just follow these easy steps and you’ll have that tank emptied in no time.
It’s like magic! And the best part is, you’ll feel like a pro camper, ready to take on any adventure. So go ahead, give it a try and experience the satisfaction of a clean, empty tank.
Your camper will thank you for it!

