Are you exhausted from the usual camping routine? Do you crave the liberty of traveling freely, while still enjoying homely comforts?
Well, my fellow adventurers, I have just the solution for you. Imagine transforming a simple enclosed trailer into your very own customized camper, tailored to fit your every need. It’s like turning a caterpillar into a beautiful butterfly, ready to take flight and explore the world.
In this article, I will guide you through the process of converting an enclosed trailer into a camper, step by step. From assessing the trailer’s suitability to adding personal touches and hitting the road, I will share my knowledge and experience to help you create the ultimate DIY camper.
So buckle up, my friends, and get ready for the ride of a lifetime!
Key Takeaways
- Assess the suitability of the enclosed trailer for conversion, considering weight capacity and leaks.
- Plan the layout and design of the camper, including furniture arrangement, materials, and fabrics.
- Install electrical and plumbing systems for functionality, including wiring, outlets, lights, appliances, fresh water supply, and waste disposal.
- Create functional and efficient spaces within the camper, such as sleeping and seating areas, and a well-organized and functional kitchen space.
Assess Your Trailer’s Suitability
Now, let’s take a moment to see if your trusty old enclosed trailer is up for the challenge of becoming your cozy camper. Before you start converting, there are a few key factors to consider.
Firstly, trailer weight is crucial in determining if it can handle the added weight of a camper conversion. Make sure to check the maximum weight capacity recommended by the manufacturer and compare it to the weight of your desired camper setup. This will prevent any stress or damage to the trailer’s structure and ensure safe travels on the road.
Another important aspect to assess is whether your trailer has any leaks. Inspect the walls, roof, and flooring for any signs of water damage or weak spots. Leaks can lead to mold, rot, and other potential issues down the line. It’s essential to fix any leaks before proceeding with the conversion to ensure a dry and comfortable camper.
Now that you have assessed your trailer’s suitability, it’s time to move on to planning your layout and design. This step will help you envision the final result and determine the best configuration for your needs and preferences.
Plan Your Layout and Design
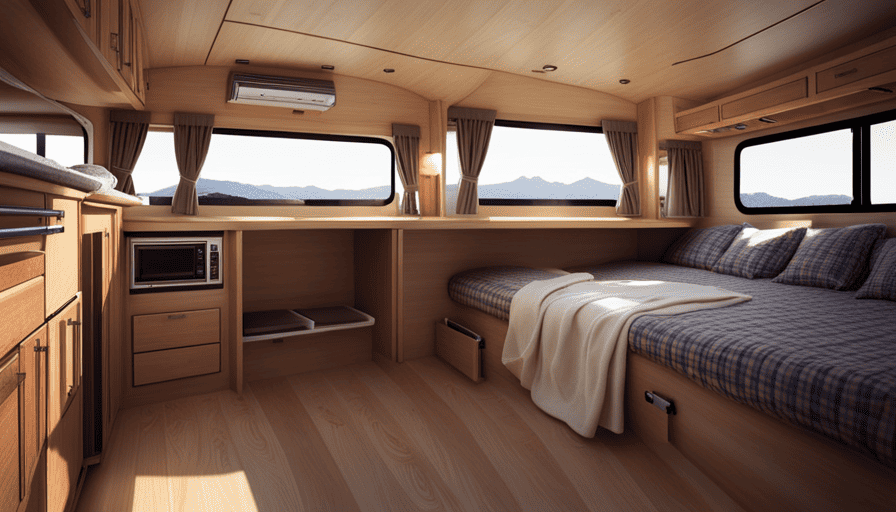
First, brainstorm the blueprint for your beautiful customized travel haven. Start by considering the layout and design of your camper. Think about how you want to arrange the furniture and create a functional space that meets your needs. Consider the size and weight of the furniture pieces you plan to use, as well as how they’ll fit into the trailer.
Take measurements and make a scale drawing to help visualize the layout.
Next, think about the materials you’ll use for the interior. Choose durable and lightweight materials that can withstand the rigors of travel. Consider using materials such as plywood or composite panels for the walls and ceiling, and vinyl or laminate flooring for easy cleaning. Don’t forget to choose fabrics for curtains, upholstery, and bedding that are both comfortable and easy to maintain.
Once you have a clear plan for your layout and design, you can move on to the next step of converting your trailer into a camper: insulating and weatherproofing the interior. This’ll ensure that your camper is comfortable and protected from the elements.
Insulate and Weatherproof the Interior
To make your camper cozy and protected, start by insulating and weatherproofing the interior. This step is crucial to ensure that you stay comfortable inside your enclosed trailer, regardless of the weather conditions outside.
When it comes to insulation materials, there are various options to choose from. One popular choice is foam board insulation, which provides excellent thermal resistance and is easy to install. Another option is fiberglass insulation, which is affordable and readily available. Take into consideration the R-value of the insulation material, as it indicates its effectiveness in resisting heat flow.
In addition to insulation, properly sealing windows and doors is essential to prevent drafts and water leaks. Use weatherstripping to seal any gaps around windows and doors, ensuring a tight seal. Caulking is also useful for sealing gaps or cracks in the walls and ceiling.
By insulating and weatherproofing the interior, you will create a barrier against extreme temperatures and external elements. This will make your camper more energy-efficient and comfortable.
Now that the interior is well-insulated and protected, the next step is to install electrical and plumbing systems.
Install Electrical and Plumbing Systems
Once you’ve completed the insulation and weatherproofing, it’s time to bring your camper to life by installing electrical and plumbing systems. This is a crucial step to ensure that your enclosed trailer turned camper is functional and comfortable for your camping adventures.
First, let’s talk about the electrical system installation. Start by planning where you want your electrical outlets, lights, and appliances to be located. This will help you determine the wiring layout. Install a breaker box to control the flow of electricity and protect your camper from overloading.
Next, run electrical wires through the walls and ceiling, connecting them to the outlets, lights, and appliances. Make sure to follow safety guidelines and consult an electrician if needed.
Moving on to the plumbing system installation, it’s important to have a fresh water supply and a way to dispose of waste. Install a fresh water tank and connect it to the sink and shower using appropriate plumbing fixtures. Consider installing a water heater for hot showers.
For waste disposal, install a black water tank and connect it to the toilet. Make sure to use proper ventilation and follow local regulations.
With the electrical and plumbing systems in place, your camper is starting to take shape. In the next section, we’ll discuss how to build sleeping and seating areas, creating a cozy and functional space for your camping adventures.
Build Sleeping and Seating Areas
Now that your camper is equipped with electrical and plumbing systems, it’s time to create comfortable sleeping and seating areas for your camping adventures. When converting a trailer into a camper, interior design plays a crucial role in maximizing space and ensuring a cozy atmosphere. Here are some key considerations to keep in mind:
-
Bedding and Sleeping Arrangements
- Optimize space by choosing a bed that can be folded or transformed into seating during the day.
- Consider using bunk beds or loft beds to accommodate multiple sleepers without taking up too much floor space.
-
Seating and Lounge Area
- Install comfortable seating options such as benches or reclining chairs to relax in during the day.
- Utilize built-in storage beneath the seating areas to keep your belongings organized and easily accessible.
Creating a functional and inviting sleeping and seating area is essential for a successful camper conversion. By carefully planning the layout and utilizing space-saving solutions, you can ensure a comfortable and enjoyable experience while on the road. With these considerations in mind, let’s move on to the next section and explore how to create a functional kitchen space.
[Transition Sentence]: Now that we have a cozy place to rest and relax, let’s dive into the next step of converting your trailer into a camper – creating a functional kitchen space.Create a Functional Kitchen Space
Get ready to cook up some delicious meals on the road with a kitchen space designed for convenience and functionality. When converting an enclosed trailer into a camper, having a functional kitchen is essential.
To start, consider the necessary kitchen appliances that you’ll need. A small refrigerator, a two-burner stove, and a microwave are popular choices for a compact camper kitchen. These appliances will allow you to prepare and store food easily during your travels.
Efficient storage is another crucial aspect of a camper kitchen. Utilize every inch of space by installing cabinets and shelves to store your cookware, utensils, and food supplies. Consider using stackable containers to maximize storage efficiency. Magnetic spice racks and hanging hooks can also help keep your kitchen organized and save valuable counter space.
When designing your kitchen, keep in mind the importance of functionality. Ensure that your appliances are easily accessible and that you have enough countertop space to prepare meals. Additionally, consider the layout and flow of your kitchen to create a comfortable cooking experience.
As you plan your kitchen space, it’s important to think ahead and consider the subsequent section about designing storage solutions. By incorporating efficient storage solutions into your kitchen design, you can create a well-organized and functional camper kitchen.
Design Storage Solutions
Maximize the functionality of your kitchen by cleverly designing storage solutions that’ll make you believe you have access to a magic pantry. When converting an enclosed trailer into a camper, it’s crucial to make the most out of the limited space available.
Here are some tips to help you maximize space and organize your belongings effectively:
-
Utilize vertical storage: Install shelves or wall-mounted storage units to take advantage of the vertical space in your kitchen area. This’ll allow you to store items such as spices, canned goods, and cooking utensils within easy reach.
-
Optimize cabinet space: Consider using stackable containers or adjustable shelf inserts to maximize the storage capacity of your cabinets. This’ll help you keep your pots, pans, and dishes organized and easily accessible.
-
Use clear containers: Transparent containers allow you to see the contents without opening each one, making it easier to locate items quickly.
-
Utilize under-cabinet space: Hang hooks or install small baskets underneath your cabinets to store items like mugs or small kitchen gadgets.
By implementing these storage solutions, you can effectively organize your kitchen belongings in a compact space and make the most of your converted trailer.
In the next section, we’ll discuss how to install lighting and ventilation to enhance the comfort and functionality of your camper kitchen.
Install Lighting and Ventilation
Enhance the comfort and functionality of your kitchen space by installing lighting and ventilation solutions that’ll make your camper feel like a home away from home. When it comes to ventilation options, there are a few choices to consider.
One popular option is to install roof vents that can be opened to let fresh air in and hot air out. These vents not only help regulate the temperature inside the camper but also improve air circulation.
Another option to consider is installing a vent fan, which can be especially helpful when cooking inside the enclosed trailer. Vent fans can quickly remove cooking odors and excess heat, making your kitchen space more comfortable.
In addition to ventilation, proper lighting is essential in your camper’s kitchen. LED lights are a popular choice due to their energy efficiency and long lifespan. Install overhead lighting fixtures to provide ample illumination for cooking and food preparation.
Additionally, consider under cabinet lighting to create a cozy ambiance and make it easier to see what’s inside your cabinets.
By installing ventilation options and lighting fixtures, you can create a comfortable and functional kitchen in your converted enclosed trailer. With fresh air circulating and plenty of light, your kitchen will truly feel like a home on wheels.
Next, let’s explore how to add comfort and personal touches to make your camper even more inviting.
Add Comfort and Personal Touches
Create a cozy and inviting atmosphere in your mobile kitchen by adding personal touches that reflect your unique style and make it feel like a home away from home. When converting an enclosed trailer into a camper, it’s important to prioritize comfort and create a space that feels comfortable and personalized.
Here are some ideas to help you achieve that:
-
Comfortable Bedding: Invest in a quality mattress or foam topper to ensure a good night’s sleep. Add soft bedding, pillows, and blankets in colors and patterns that match your style. Consider adding blackout curtains or blinds to block out light and create a peaceful sleeping environment.
-
Personalized Decorations: Make your camper feel like it’s truly yours by adding personal touches. Hang artwork or photographs that bring you joy. Use adhesive hooks to hang string lights or fairy lights for a cozy ambiance. Incorporate rugs or floor mats to add warmth and comfort to the space.
-
Functional Storage: Maximize storage space by using bins, baskets, and organizers to keep things tidy and easily accessible. Consider using multi-purpose furniture such as ottomans or benches with hidden storage compartments. Utilize wall space by installing hooks or hanging shelves for additional storage.
By incorporating comfortable bedding and personalized decorations, you can transform your enclosed trailer into a cozy and inviting camper that feels like a home away from home.
Now, it’s time to hit the road and enjoy your DIY camper experience, exploring new destinations and creating lasting memories.
Hit the Road and Enjoy Your DIY Camper Experience
Experience the freedom and adventure of life on the road as you embark on your DIY camper journey, ready to explore new destinations and create unforgettable memories.
Now that you’ve added comfort and personal touches to your enclosed trailer, it’s time to hit the road and enjoy your DIY camper experience to the fullest.
Before you set off, there are a few DIY camper tips and essential tools you should keep in mind. First, make sure you have a good set of leveling blocks or ramps to ensure your camper is stable and balanced. This will make a big difference in your overall comfort while parked at campsites.
Additionally, invest in a quality portable generator to power your camper’s electrical needs. This’ll allow you to enjoy modern conveniences even when you’re off the grid.
Another important tool to have is a reliable air compressor. This’ll come in handy for inflating tires, blowing up air mattresses, or even cleaning out hard-to-reach corners in your camper.
Additionally, a basic toolkit with essential tools such as screwdrivers, pliers, and wrenches will be invaluable for any on-the-go repairs or adjustments.
As you hit the road, be sure to take advantage of the flexibility and freedom that comes with a DIY camper. Explore new destinations, meet fellow travelers, and embrace the spontaneity of the open road.
Remember to document your journey through photos and journal entries to create lasting memories of your DIY camper experience.
So, pack your bags, hit the road, and enjoy the incredible adventure that’s waiting for you!
Frequently Asked Questions
How much will it cost to convert an enclosed trailer into a camper?
Well, let me tell you, converting an enclosed trailer into a camper can be quite the adventure, both in terms of creativity and budget planning. When it comes to cost estimation, it really depends on your preferences and the level of comfort you desire.
From my experience, it’s wise to set a budget and consider factors like insulation, electrical systems, plumbing, and furnishings. But hey, the end result is worth every penny!
What tools and materials will I need to convert the trailer?
To convert a trailer into a camper, you’ll need a few essential tools and materials.
For electrical wiring, you’ll need wire cutters, strippers, connectors, and a power source.
Insulation requires foam board, spray foam, adhesive, and a utility knife.
Additionally, you’ll need basic tools like a drill, screws, a saw, and a tape measure.
Having these tools and materials will ensure a smooth and successful conversion process.
Can I legally drive my converted trailer camper on the road?
I’m no legal expert, but I can share some insights on driving a converted trailer camper.
Legal requirements for driving a converted trailer camper can vary by jurisdiction, so it’s important to check your local laws. Factors such as weight, size, and modifications can impact whether it’s considered roadworthy. Additionally, you may need specific insurance coverage to protect your camper.
To ensure compliance and peace of mind, consult local authorities and insurance providers for accurate information.
How long does it typically take to complete a trailer camper conversion?
Factors affecting the time required for a trailer camper conversion can vary depending on a few key elements. Firstly, the size and complexity of the trailer will greatly impact the timeline. Additionally, the level of customization and personalization desired will also play a role.
To ensure an efficient and time-saving conversion, I recommend planning and mapping out your design beforehand, gathering all necessary materials and tools, and seeking assistance from experienced individuals or professionals when needed. These steps will help streamline the process and minimize any potential delays.
Are there any specific safety regulations I need to follow when converting a trailer into a camper?
When converting a trailer into a camper, it’s crucial to follow safety regulations to ensure roadworthiness.
Firstly, make sure all electrical work is done by a certified professional to prevent any hazards.
Additionally, check that the structural integrity of the trailer is sound, reinforcing any weak areas if necessary.
Install proper ventilation to prevent carbon monoxide buildup.
Don’t forget to properly secure and distribute the weight of any added features.
Lastly, equip your camper with functioning lights and reflectors for optimal visibility on the road.
Can I Use the Same Method to Open the Awning on a Converted Enclosed Trailer Camper?
Yes, you can use the same method for opening the camper awning on a converted enclosed trailer camper. It’s important to follow the manufacturer’s instructions to ensure a safe and efficient setup. By carefully deploying the opening camper awning, you can create a shaded outdoor space for relaxation and enjoyment during your camping adventures.
Conclusion
After weeks of hard work and countless trips to the hardware store, my enclosed trailer’s transformation into a cozy and functional camper is complete.
The interior is now a sanctuary, with insulation and weatherproofing ensuring comfort in any weather. The electrical and plumbing systems are in place, allowing me to enjoy modern conveniences on the road.
The sleeping and seating areas have been cleverly designed to maximize space, and storage solutions keep everything organized. The installed lighting creates a warm ambiance with its soft glow, while the ventilation system keeps the air fresh.
This DIY camper is truly a labor of love, and now it’s time to hit the open road and embark on unforgettable adventures.

