Tidying a recreational vehicle might appear challenging, but when tackled with the correct strategy and some effort, it turns out to be quite pleasing. As the popular adage goes, ‘A clean camper is a happy camper!’ And indeed, who wouldn’t appreciate being encased in neatness and freshness as they set off on their upcoming journey?
In this article, I will guide you through the step-by-step process of cleaning your camper from top to bottom. From the exterior to the interior, we will leave no surface untouched. I’ll share tips and tricks for tackling those hard-to-reach areas, as well as advice on how to handle odor control and maintain your camper’s cleanliness in the long run.
So, whether you’re a seasoned camper looking to spruce up your home away from home or a newbie eager to learn the ropes, this article is for you. Get ready to roll up your sleeves and dive into the world of camper cleaning. Trust me, the end result will be worth every ounce of effort.
Let’s get started!
Key Takeaways
- Gather all necessary cleaning supplies and equipment before starting the cleaning process.
- Start by cleaning the exterior of the camper, including rinsing off loose dirt and debris, scrubbing with a soft-bristle brush and mild soap, and using specialized camper cleaner or vinegar and water for tougher stains.
- Move on to cleaning the interior of the camper, using a vacuum cleaner and microfiber cloths for surfaces. Remove loose items, vacuum floors, and wipe down surfaces. Use storage bins and organizers to maximize space and label containers.
- Pay attention to maintaining cleanliness in the long run by regularly cleaning and maintaining floors, using air fresheners and odor absorbers, ventilating and airing out the camper, and regularly washing the exterior to maintain cleanliness.
Gather Cleaning Supplies and Equipment
Now that you’ve got all your cleaning supplies and equipment ready, it’s time to transform your camper into a sparkling sanctuary on wheels.
To ensure a successful cleaning session, it’s important to have a cleaning equipment checklist in hand. Start by gathering a broom or a vacuum cleaner to remove any loose dirt and debris from the floors. Don’t forget to grab a mop or a steam cleaner for a thorough floor cleaning. For the surfaces, you’ll need a microfiber cloth or a sponge, along with an all-purpose cleaner that’s safe for the materials in your camper. Additionally, have some window cleaner and paper towels handy to make the windows shine.
To keep everything organized during the cleaning process, here are a few tips for organizing your cleaning supplies. Use a caddy or a bucket to hold all your cleaning products, making it easy to transport them from one area to another. Consider using storage containers or bins to keep smaller items like brushes, scrubbers, and gloves in one place. Labeling them can also help you locate what you need quickly.
Now that you’ve gathered all your cleaning supplies and organized them, it’s time to start with the exterior.
Start with the Exterior
To begin sprucing up your camper’s exterior, you’ll want to focus on giving it a sparkling shine. Start by gathering the necessary cleaning tools and supplies. A soft-bristle brush, mild soap, a bucket, and a hose will be your best friends during this process.
First, rinse off any loose dirt or debris with the hose. Then, mix the mild soap with water in the bucket and use the soft-bristle brush to scrub the exterior of the camper. Pay special attention to any stubborn stains or dirt buildup. Rinse the camper thoroughly with the hose to remove any soap residue.
Now, let’s move on to some tips and tricks to make the cleaning process even more effective. For tougher stains, you can use a specialized camper cleaner or a diluted solution of vinegar and water. Just be sure to test it on a small, inconspicuous area first.
Don’t forget to clean the windows and wheels as well. To make your camper shine, you can apply a coat of wax using a clean cloth or sponge. This will not only protect the exterior from environmental damage but also give it a glossy finish.
With the exterior of your camper looking brand new, it’s time to move on to cleaning the interior.
Clean the Interior
Once you’ve spruced up the exterior of your camper, it’s time to delve into the interior and uncover its hidden secrets. Cleaning the interior of a camper requires a systematic approach to ensure every nook and cranny is spotless. Let me share with you some cleaning techniques and organizing tips to make this task a breeze.
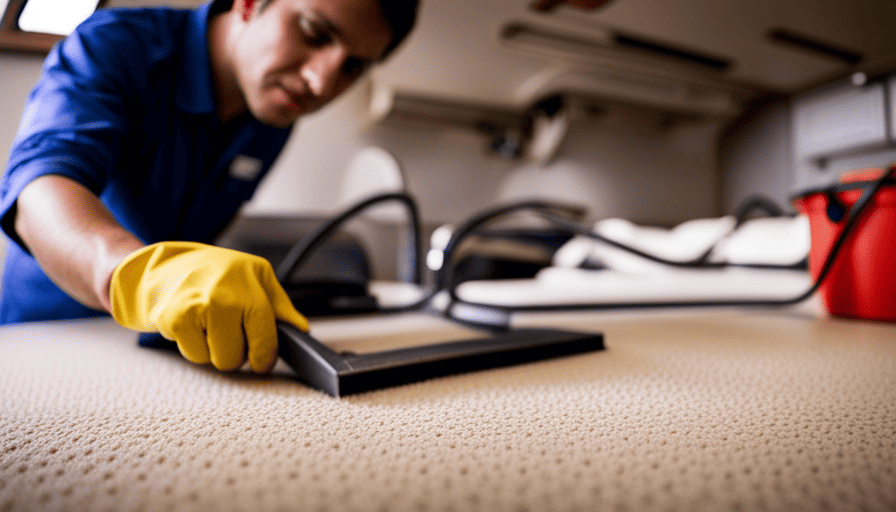
First, gather all the necessary cleaning supplies such as a vacuum cleaner, microfiber cloths, and cleaning solutions suitable for the different surfaces in your camper. Start by removing any loose items from the interior, including cushions, curtains, and rugs. Vacuum the floors, paying special attention to the corners and crevices where dirt tends to accumulate.
Next, wipe down all surfaces using the appropriate cleaning solution. Use a microfiber cloth to prevent streaks and damage. Don’t forget to clean the windows and mirrors to ensure a clear view. As you clean, take note of any repairs or replacements that may be needed.
To keep your camper organized, consider using storage bins or organizers to maximize space. Utilize every inch by using vertical storage solutions like hanging organizers or shelves. Label each container to easily find items when needed.
With the interior of your camper sparkling clean and organized, it’s time to move on to the next section and deep clean the kitchen area.
Deep Clean the Kitchen Area
With the kitchen area shining, it’s time to whip up some delicious meals and create memories on the road. When it comes to deep cleaning the kitchen area of your camper, there are a few tips and tricks that can help you achieve a spotless and organized space.
Start by emptying out all the cabinets and drawers, wiping them down with a mild cleaner, and organizing your kitchen supplies. This will not only make it easier to find what you need, but also prevent any unwanted spills or messes.
As you clean, pay close attention to the stove and oven, removing any grease or food residue that may have built up. Don’t forget to scrub the sink and sanitize the countertops, as these areas tend to collect bacteria.
Once everything is clean and in its place, you’ll be ready to cook up some amazing meals during your travels.
Now, let’s move on to freshening up the bathroom and ensuring a clean and comfortable space for your next adventure.
Freshen Up the Bathroom
Step into your personal oasis and give it a refresh to ensure a pleasant and inviting atmosphere for your next adventure. The bathroom may be a small space in your camper, but it plays a big role in your overall comfort. Let’s dive into some tips for freshening up this essential area.
-
Bathroom organization:
-
Utilize storage bins or baskets to keep toiletries and supplies neatly organized.
-
Install hooks or hanging organizers to maximize vertical space.
-
Bathroom decor:
-
Add a touch of personality with a colorful shower curtain or bath mat.
-
Incorporate small plants or faux greenery to bring a touch of nature indoors.
When it comes to cleaning the bathroom, attention to detail is key. Scrub the shower walls and floor to remove any soap scum or grime. Don’t forget to clean the toilet thoroughly, including the seat, bowl, and base. Wipe down the sink and countertop, making sure to clean any toothpaste residue or water spots.
As you freshen up the bathroom, be mindful of the transition into the subsequent section about paying attention to the bedroom and living areas.
Pay Attention to the Bedroom and Living Areas
Transform your bedroom and living areas into cozy retreats, ensuring your relaxation and comfort are prioritized throughout your camper adventure.
When it comes to the bedroom, organization is key. Start by decluttering any unnecessary items and finding creative storage solutions, such as under-bed bins or hanging organizers. Utilize hooks and shelves to keep your belongings within reach but off the floor. Consider investing in collapsible furniture or multipurpose pieces to maximize space. To add a touch of personal style, incorporate decorative pillows, cozy blankets, and curtains that complement the overall theme of your camper.
Moving on to the living area, decor plays a crucial role in creating a welcoming atmosphere. Choose furnishings that are both functional and aesthetically pleasing. Opt for comfortable seating options, such as plush chairs or a sofa bed, for lounging during the day and sleeping at night. Brighten up the space with cheerful throw pillows and decorative accents that reflect your personal taste. Don’t forget to include practical storage solutions, like ottomans or coffee tables with hidden compartments. By carefully curating your living area, you can create a space that is both stylish and functional for relaxing or entertaining.
As you transform your bedroom and living areas, don’t forget about the floors.
Don’t Forget About the Floors
Enhance your camper’s coziness and add a touch of luxury by pampering your feet with soft, plush rugs and warm, inviting flooring options. When it comes to cleaning techniques and floor maintenance, there are a few key strategies to keep in mind.
First and foremost, regular vacuuming is essential to remove dirt, dust, and debris from your camper’s floors. Be sure to use a vacuum cleaner with attachments that can easily reach every nook and cranny. Additionally, consider investing in a portable carpet cleaner for deep cleaning any carpeted areas. This will help to eliminate stains and odors, leaving your floors looking and smelling fresh.
Next, for hard floors such as laminate or vinyl, it’s important to sweep or mop regularly to remove any dirt or spills. Use a mild cleaner specifically designed for your type of flooring to avoid damaging the surface. Be sure to dry the floor thoroughly to prevent any water damage.
Lastly, don’t forget to pay attention to the floor mats and entrance rugs. These can quickly accumulate dirt and moisture from outside, so make sure to shake them out regularly and wash them when necessary.
By following these cleaning techniques and floor maintenance tips, you can keep your camper’s floors looking their best. Now, let’s transition into the next section about handling odor control.
Handle Odor Control
When it comes to handling odor control in my camper, I make sure to use air fresheners and odor absorbers to keep the air smelling fresh and clean. I also prioritize ventilating and airing out the camper regularly to remove any lingering odors.
Additionally, I take the time to clean and refresh the fabric upholstery to eliminate any trapped odors. By following these steps, I can ensure a pleasant and odor-free environment inside my camper.
Use Air Fresheners and Odor Absorbers
To tackle the stench, slap on some air fresheners and odor absorbers in your camper. These little wonders work wonders in eliminating odors and keeping your space smelling fresh and clean. Here are three options to consider:
-
Plug-in air fresheners: These are convenient and easy to use. Simply plug them into an outlet and let them work their magic.
-
Hanging air fresheners: Hang these in your camper, and they’ll release a pleasant fragrance that masks any unwanted odors.
-
Odor absorbers: These are great for neutralizing and absorbing odors. Place them in areas prone to smells, such as the bathroom or kitchen.
By using air fresheners and odor absorbers, you can enjoy a clean and fresh-smelling camper. But we’re not done yet! To ensure maximum freshness, let’s move on to the next step: ventilating and airing out the camper.
Ventilate and Air Out the Camper
After using air fresheners and odor absorbers to tackle any lingering smells, the next step in cleaning a camper is to ventilate and air it out. This is an essential part of removing any stale or musty odors that may have accumulated over time.
Start by opening all the windows and doors to allow fresh air to circulate throughout the space. If possible, set up fans or open vents to help facilitate airflow.
While the camper is airing out, take the opportunity to deodorize any fabric upholstery by sprinkling baking soda on the surfaces and letting it sit for at least 15 minutes before vacuuming it up. This will help absorb any odors trapped in the fabric.
With the camper now fresh and well-ventilated, it’s time to move on to the next step: cleaning and refreshing the fabric upholstery.
Clean and Refresh Fabric Upholstery
Now it’s time for you to give your fabric upholstery a refreshing makeover in your camper! To effectively clean and refresh your upholstery, here are some cleaning tips to help you remove stains and keep your fabric looking its best.
-
Start by vacuuming the upholstery thoroughly to remove any loose dirt and debris. This will ensure a more thorough clean.
-
For regular maintenance, spot clean any spills or stains as soon as they happen using a mild detergent or upholstery cleaner.
-
To remove tougher stains, consider using a fabric stain remover specifically designed for the type of fabric in your camper. Always follow the instructions on the product for best results.
-
For a more thorough deep clean, you can rent or purchase a steam cleaner. This will help remove deep-seated dirt and leave your upholstery looking fresh and clean.
With these cleaning tips, you’ll be able to remove stains and keep your fabric upholstery looking brand new.
In the next section, we’ll discuss final touches and maintenance to complete your camper cleaning routine.
Final Touches and Maintenance
Once you’ve polished up the interior of your camper, it’s time to give the exterior a little TLC. Final touches and maintenance are crucial to keeping your camper looking clean and fresh. Start by thoroughly cleaning the exterior with a mild soap and water solution, and rinse it off with a hose. Make sure to pay extra attention to any stubborn stains or dirt buildup. After cleaning, it’s time to protect and maintain the exterior surfaces. Apply a coat of wax to protect the paint and keep it shiny. Don’t forget to clean and polish the windows for a crystal-clear view.
To make your camper truly shine, pay attention to the details. Give the tires a good scrub and apply a tire dressing to make them look like new. Clean the exterior lights and ensure they are working properly. Check the roof for any signs of damage or leaks and repair as needed. Lastly, maintain the cleanliness by regularly washing the exterior and removing any dirt or debris that may accumulate during your travels.
With the final touches and ongoing maintenance, your camper will continue to look its best and be ready for your next adventure. Enjoy your clean and fresh camper!
Enjoy Your Clean and Fresh Camper!
To truly appreciate the pristine condition of your freshly maintained camper, take a moment to bask in the satisfaction of a job well done. Cleaning and organizing your camper not only ensures a fresh and inviting living space, but also helps to maintain its value and functionality.
When it comes to cleaning, start by giving the interior a thorough vacuuming. Use a handheld vacuum with various attachments to reach all the nooks and crannies. Don’t forget to clean the vents and air conditioning filters as well. Wipe down all surfaces with a mild cleaner, paying special attention to the countertops, tables, and bathroom fixtures. For stubborn stains, a mixture of baking soda and water can do wonders.
Next, tackle the exterior of your camper. Start by giving it a good wash with a gentle soap and water solution. Pay attention to the roof and awnings, as these areas tend to accumulate dirt and debris. Don’t forget to clean the windows and polish any chrome or metal accents.
Lastly, organizing your camper is key to maintaining a clutter-free environment. Utilize storage bins and baskets to keep items neatly organized. Use hooks and hanging organizers to maximize vertical space. Consider investing in collapsible furniture and space-saving gadgets to optimize your storage options.
By following these cleaning and organizing tips, you can enjoy your clean and fresh camper to the fullest. Happy camping!
Frequently Asked Questions
How often should I clean my camper?
To keep your camper in top shape, it’s important to clean it regularly. A good rule of thumb is to give it a thorough cleaning at least once a month. As for waxing, it’s recommended to do it every three to six months, depending on the condition of the camper.
When it comes to cleaning tools, the best ones include a soft brush, microfiber cloths, a gentle cleaner, and a good quality wax.
What cleaning products are safe to use on the exterior of my camper?
When it comes to cleaning the exterior of my camper, I always rely on RV cleaning hacks and eco-friendly camper cleaning products. These products are specifically designed to effectively remove dirt, grime, and other outdoor elements without causing any damage to the camper’s exterior.
Some safe options include biodegradable cleaners, gentle detergents, and eco-friendly pressure washers. These products not only ensure a thorough clean, but also help to preserve the longevity and appearance of my camper.
Can I use regular household cleaning products to clean the interior of my camper?
Yes, you can use regular household cleaning products to clean the interior of your camper. However, it’s important to choose products that are safe for the materials in your camper. For general cleaning, I recommend using a multi-surface cleaner that’s safe for fabrics, countertops, and flooring. Additionally, be sure to have a good supply of microfiber cloths, scrub brushes, and a vacuum cleaner to effectively clean all areas of your camper.
How can I remove stubborn stains from the kitchen countertops in my camper?
To remove stubborn stains from kitchen countertops in my camper, I’ve found that a mixture of baking soda and water works wonders. The abrasive nature of baking soda helps to lift and scrub away tough stains, while the water creates a paste-like consistency for easy application.
I simply apply the mixture to the stains, let it sit for a few minutes, then gently scrub with a sponge or cloth. The results are impressive, leaving my countertops looking clean and refreshed.
Are there any specific steps I should follow to clean the air vents in my camper?
To clean the air vents in your camper, start by turning off the air conditioning system.
Remove the vent covers and wash them with warm, soapy water.
Use a soft brush or vacuum to remove dust and debris from the vents.
Don’t forget to clean the air filters as well, as they can accumulate dirt and hinder airflow.
Regularly cleaning the vents and filters will help prevent mold growth and ensure a healthy breathing environment inside your camper.
Conclusion
After following these steps, your camper will be sparkling clean and fresh, ready for your next adventure. It’s like a breath of fresh air, as if you’ve just stepped into a field of blooming flowers after a rain shower.
The attention to detail and thoroughness in cleaning will ensure that your camper feels like a home away from home. So go ahead, pack your bags, and enjoy the comfort and cleanliness of your camper as you embark on new and exciting journeys. Happy camping!


