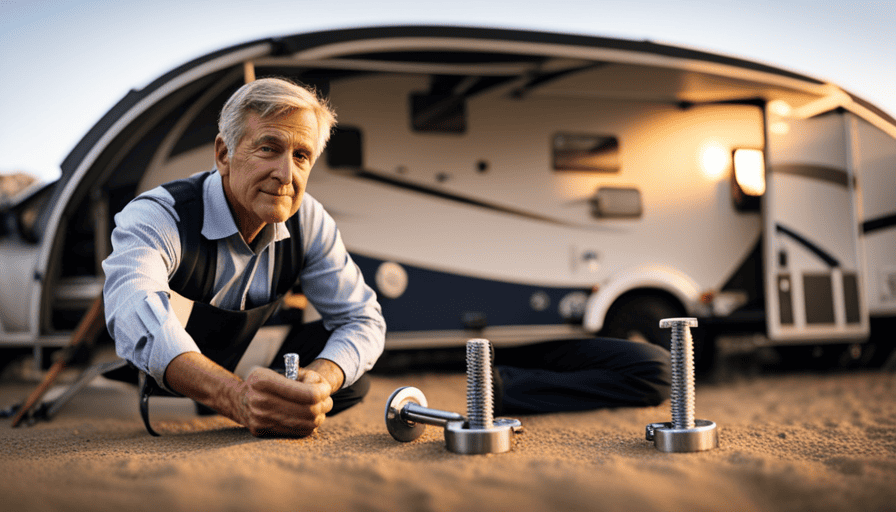
In the United States, did you know that there are over 11 million households that own a recreational vehicle (RV)? With camping gaining popularity, more and more people are enjoying the freedom and flexibility that RVs provide.
One essential feature of an RV is the slide out, which expands the living space when parked. However, sometimes adjustments need to be made to ensure the slide out operates smoothly.
In this article, I will guide you through the process of adjusting your camper slide out up and down. By understanding the mechanism, gathering the necessary tools, and following a step-by-step approach, you can easily make the necessary adjustments to keep your slide out in optimal condition.
So, let’s dive in and learn how to fine-tune your camper slide out for a comfortable and hassle-free camping experience.
Key Takeaways
- Adjustments may be needed for smooth slide out operation
- Understanding the mechanism is important for troubleshooting
- Necessary tools: wrenches, lubricant, level
- Check for proper alignment and leveling after adjustment
Understand the Mechanism of Your Camper Slide Out
Now that you’re ready to adjust your camper slide out, let’s dive into understanding the mechanism behind it.
When it comes to camper slide out troubleshooting, it’s essential to grasp how the mechanism works. The slide out is typically operated by an electric motor that extends or retracts the slide room. It is guided by a series of rails and gears, allowing for smooth movement.
Common slide out problems include misalignment, uneven extension, and difficulty retracting. Misalignment can occur due to loose or damaged rails, causing the slide out to become crooked. Uneven extension may happen when one side of the slide room extends further than the other. Difficulty retracting can be caused by a variety of issues, such as a faulty motor or debris obstructing the mechanism.
To address these problems, gather the necessary tools and equipment. This will typically include a wrench, lubricant, and a level. By understanding the mechanism and having the right tools at hand, you’ll be well-prepared to tackle any issues that may arise with your camper slide out.
Gather the Necessary Tools and Equipment
To successfully complete this task, you’ll need to gather the essential tools and equipment required. Adjusting a camper slide out may seem like a daunting task, but with the right tools and techniques, it can be done easily.
First and foremost, you’ll need a good set of wrenches, both standard and metric sizes, as well as a socket set. These tools will allow you to loosen and tighten the necessary bolts and screws during the adjustment process. You may also need a pry bar or crowbar to help with any stubborn parts that need to be moved. Additionally, having a level and measuring tape on hand will be crucial to ensure proper adjustment.
When it comes to adjustment techniques, it’s important to follow the manufacturer’s instructions specific to your camper model. However, some common mistakes to avoid include over-tightening or under-tightening the adjustment bolts, as this can cause damage to the slide out mechanism. It’s also important to make small adjustments at a time and test the slide out after each adjustment to ensure it’s working properly.
Gathering the necessary tools and equipment is the first step in adjusting your camper slide out. By using the right tools and techniques and avoiding common mistakes, you can ensure a successful adjustment.
Now, let’s move on to the next section where we discuss how to park your camper on a level surface.
Park Your Camper on a Level Surface
Finding a flat surface for your camper is like discovering a tranquil oasis in the midst of a chaotic world. Leveling techniques play a crucial role in ensuring the proper functioning of your camper’s slide-out. It’s important to park your camper on a level surface to prevent any unnecessary stress on the slide-out mechanism.
Uneven ground can cause the slide-out to become misaligned, leading to potential damage and costly repairs.
To level your camper, start by using a bubble level to check the levelness of the surface. If the ground isn’t level, you can use leveling blocks or ramps to raise or lower the camper until it’s perfectly level. These leveling tools can be easily purchased at any camping or RV store.
Once your camper is level, it’s time to release the slide-out locks or brakes. These locks or brakes are designed to secure the slide-out in place during travel. To release them, simply locate the locking mechanisms on either side of the slide-out and disengage them according to the manufacturer’s instructions.
With your camper parked on a level surface and the slide-out locks released, you’re now ready to move on to the next step of adjusting your camper’s slide-out.
Release the Slide Out Locks or Brakes
Ensure that your camper’s slide-out is securely in place by releasing the locks or brakes located on either side of it. These locks or brakes serve as a safety mechanism to prevent the slide-out from moving while in transit. To release them, simply locate the release mechanism, usually a lever or button, and disengage it.
Once the locks or brakes are released, you can now proceed with adjusting the slide-out up or down as needed.
Troubleshooting tips:
- If you’re having difficulty releasing the locks or brakes, check for any obstructions or debris that may be preventing them from disengaging properly. Clearing any blockages should allow for smooth and easy release.
- Make sure to inspect the locks or brakes regularly for any signs of wear or damage. If you notice any issues, it’s important to address them promptly to ensure the safety and functionality of your camper’s slide-out.
- If you’re unsure about the release mechanism or encounter any problems, consult your camper’s manual or contact the manufacturer for assistance.
To adjust the slide-out, you can use either the manual crank or electric motor, depending on your camper’s design. With the locks or brakes released, you can now proceed to the next step of adjusting the slide-out to your desired height or position.
Use the Manual Crank or Electric Motor to Adjust the Slide Out
Get ready to effortlessly modify the position of your slide-out using either the manual crank or electric motor. The manual crank is a traditional method of adjusting the slide-out, requiring physical effort to turn the crank in order to extend or retract the slide. On the other hand, the electric motor provides a more convenient and effortless option, where a simple push of a button engages the motor to move the slide in the desired direction.
To better understand the differences between the manual crank and electric motor, refer to the table below:
| Manual Crank | Electric Motor |
|---|---|
| Requires physical effort to operate | Effortless operation with a push of a button |
| May take longer to adjust the slide | Quick and easy adjustments |
| Can be used in case of power failure | Requires power source to operate |
Both methods have their advantages and it ultimately comes down to personal preference. Once you have adjusted the slide-out using either the manual crank or electric motor, it is important to check for proper alignment and leveling to ensure that everything is in place before continuing your camping adventure.
Now, let’s move on to the next step and check for proper alignment and leveling to ensure a smooth and stable slide-out operation.
Check for Proper Alignment and Leveling
Now, let’s dive into checking if everything is properly aligned and level for a smooth and stable slide-out operation.
Proper alignment is crucial to ensure that the slide out moves smoothly and doesn’t get stuck or jammed. Start by visually inspecting the slide out to see if it’s parallel to the camper’s body. If it appears misaligned, you may need to adjust the slide out’s mounting brackets.
Use a level to check if the slide out is level both horizontally and vertically. If it isn’t, you can adjust the leveling jacks or hydraulic system to achieve the proper level.
Additionally, check the slide out’s seals and gaskets to make sure they’re properly aligned and not obstructing the slide out’s movement.
Once you’ve ensured proper alignment and leveling, you can move on to testing the slide out for smooth operation. This’ll ensure that everything’s working correctly and there are no issues with the slide out’s movement.
Test the Slide Out for Smooth Operation
Once you’ve confirmed proper alignment and leveling, it’s time to put the slide out to the test and see how smoothly it operates. Testing the slide out is an important step in ensuring that it functions properly and avoids any potential issues down the road. By troubleshooting any issues and identifying common mistakes, you can address them before they become bigger problems.
To help you understand the process and potential pitfalls, let’s take a look at a table that outlines some troubleshooting issues and common mistakes that you may encounter while testing the slide out:
| Troubleshooting Issues | Common Mistakes |
|---|---|
| Slide out gets stuck halfway | Incorrect lubrication |
| Slide out operates unevenly | Misalignment of gears |
| Slide out makes strange noises | Loose or damaged components |
By being aware of these potential issues and common mistakes, you can take the necessary steps to address them and ensure that your slide out operates smoothly. Once you’ve identified any problems, you can make any necessary fine-tuning adjustments to correct them and ensure optimal performance.
In the next section, we will discuss how to make any necessary fine-tuning adjustments to your camper slide out, ensuring that it operates flawlessly.
Make Any Necessary Fine-tuning Adjustments
After testing the slide out for smooth operation, it’s time to make any necessary fine-tuning adjustments. This step is crucial to ensure that the slide out is aligned properly and operates smoothly without any issues.
Fine-tuning techniques allow you to make small adjustments to various components of the slide out, ensuring it functions optimally.
One common issue that may require fine-tuning is if the slide out isn’t extending or retracting smoothly. In such cases, you may need to adjust the alignment of the slide out’s tracks or lubricate the moving parts to reduce friction.
Additionally, if the slide out isn’t sitting level when extended, you may need to adjust the leveling jacks or the slide out’s alignment.
Troubleshooting common issues during the fine-tuning process is essential. For example, if you notice any unusual sounds, excessive shaking, or uneven movement, it’s important to identify the cause and address it promptly. This may involve inspecting the motor, gears, or cables for any signs of damage or wear.
By fine-tuning and troubleshooting, you can ensure that your camper slide out operates smoothly and without any hiccups. Once you’ve made the necessary adjustments, it’s time to secure the slide out in place for a stable and secure fit.
Secure the Slide Out in Place
To ensure a stable and secure fit, you’ll want to make sure you securely lock the slide out in place. This is an important step in slide out maintenance and can help prevent any potential issues down the line.
One common troubleshooting slide out issue is when the slide out moves while driving, causing damage to the camper and potentially posing a safety risk. To avoid this, you need to ensure that the slide out is locked in place before hitting the road.
Start by checking the slide out mechanism for any signs of wear or damage. Make sure all the locks and latches are functioning properly. Then, firmly push the slide out all the way in until it’s snug against the camper.
Engage the locks and latches to secure it in place. Give it a gentle tug to ensure it’s locked securely.
By taking the time to properly secure the slide out, you can avoid any unnecessary slide out issues and keep your camper in top condition.
Regularly inspecting and maintaining your camper slide out is essential for its longevity and performance.
Regularly Inspect and Maintain Your Camper Slide Out
Regularly inspecting and maintaining your camper’s slide out is crucial for ensuring its longevity and optimal performance. By inspecting the seals and lubricating the moving parts, you can prevent potential issues and keep your slide out in excellent condition.
When inspecting the seals, carefully examine them for any signs of wear or damage. Look for cracks, tears, or gaps that could allow water or pests to enter. If you notice any issues, promptly replace the seals to maintain a tight and secure fit.
Lubricating the moving parts is another essential step in maintaining your camper’s slide out. Apply a lubricant specifically designed for RV slide outs to the tracks, gears, and rollers. This will reduce friction and ensure smooth operation. Be sure to clean off any dirt or debris before applying the lubricant.
In addition to inspecting the seals and lubricating the moving parts, it’s important to check the overall condition of the slide out. Look for any loose or damaged components, such as bolts or brackets, and tighten or replace them as needed.
By following these maintenance steps, you can prolong the life of your camper’s slide out and enjoy trouble-free operation for years to come.
Frequently Asked Questions
How do I know if my camper slide out is properly aligned and leveled?
When it comes to determining if your camper slide out is properly aligned and leveled, there are some common issues to look out for. Keep an eye out for signs of misalignment or improper leveling, such as uneven gaps, difficulty in sliding in or out smoothly, or excessive noise during operation. These indicators can suggest that adjustments may be needed to ensure your camper slide out is functioning optimally.
Can I adjust the slide out without using the manual crank or electric motor?
Yes, it’s possible to manually adjust the slide out without using the manual crank or electric motor. However, it requires troubleshooting the slide out adjustment and understanding the mechanism involved. By carefully inspecting the slide out mechanism and identifying any issues, such as loose bolts or misalignment, adjustments can be made to ensure proper alignment and leveling. It’s important to follow the manufacturer’s guidelines and recommendations when manually adjusting the slide out to avoid any damage or injury.
What should I do if I encounter any resistance or difficulty while adjusting the slide out?
If you encounter resistance or difficulty while adjusting the slide out, it’s crucial to proceed with caution. Remember the adage ‘When in doubt, seek professional help.’
Troubleshooting issues during slide out adjustments can be tricky and potentially dangerous if not handled correctly. If you’re unsure about how to proceed, it’s best to consult a professional who has the expertise to safely troubleshoot and resolve any problems that may arise.
How often should I inspect and maintain my camper slide out?
To keep my camper slide out in proper working condition, I make sure to inspect and maintain it regularly. I recommend inspecting the slide out at least once every season or before any long trips.
Look for any signs of wear, damage, or debris that may hinder its operation. For maintenance, lubricate the moving parts with a suitable lubricant and clean the tracks and seals.
Regular upkeep will help ensure smooth and trouble-free operation of the camper slide out.
Are there any specific cleaning or lubrication requirements for the slide out mechanism?
Cleaning and lubrication are essential for maintaining the slide out mechanism of your camper. To keep it in top shape, regular cleaning is necessary to remove dirt and debris that can cause friction and damage. Use a mild detergent and water to clean the mechanism, making sure to avoid abrasive cleaners.
Additionally, lubricating the moving parts with a silicone spray or lubricant will help to reduce friction and keep everything running smoothly.
Conclusion
In conclusion, adjusting your camper slide out can be a straightforward process when you understand the mechanism and have the right tools. By following the steps outlined in this article, you can ensure that your slide out operates smoothly and securely.
Remember to regularly inspect and maintain your slide out to prevent any issues down the road. With these tips, you’ll be able to effortlessly slide in and out of your camper like a well-oiled machine, making your camping experience even more enjoyable!


