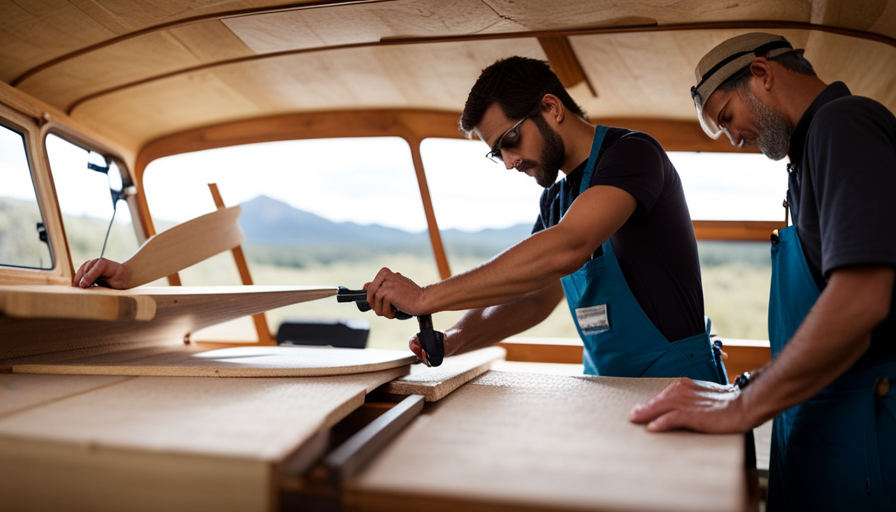
Here I am, surrounded by all sorts of tools and materials, feeling a surge of excitement bubbling up within me. Dive into the world of creativity with me!
Today, I embark on a journey that combines my love for adventure and craftsmanship – the creation of a teardrop camper.
With each cut, each screw driven into place, I am building not just a shelter on wheels, but a home that will take me to the farthest corners of the world.
In this article, I will guide you through the intricate process of designing and constructing your very own teardrop camper.
From gathering the necessary materials and tools to installing the electrical and plumbing systems, we will leave no stone unturned.
Whether you’re a seasoned DIY enthusiast or a novice looking for a new challenge, this step-by-step guide will equip you with the knowledge and skills to bring your dream camper to life.
So, roll up your sleeves, grab your tools, and let’s embark on this unforgettable journey of building a teardrop camper – a home on wheels that will inspire endless adventures and create memories that will last a lifetime.
Key Takeaways
- Lightweight and durable materials are essential for building a teardrop camper.
- Designing the layout with modern features and space efficiency is important.
- Consideration of safety features and popular design trends is necessary.
- The construction process involves selecting frame and wall materials, installing the roof and flooring, and adding interior and exterior features.
Gather the Necessary Materials and Tools
Now that I’ve gathered all the necessary materials and tools, I’m ready to embark on the exciting journey of building my very own teardrop camper. Choosing the right materials and tools is crucial for a successful build, and it’s important to consider both quality and budget-friendly options.
When it comes to materials, I recommend using lightweight yet durable materials like plywood for the camper body, aluminum for the frame, and fiberglass for the exterior. These materials are not only strong, but they also offer good insulation and weather resistance.
As for tools, having the right ones will make the construction process much easier. Some essential tools include a circular saw for cutting plywood, a drill for creating holes, a sander for smoothing surfaces, and a rivet gun for securing aluminum parts. It’s also helpful to have measuring tools like a tape measure and a level to ensure accuracy throughout the build.
When looking for budget-friendly options, consider checking out local hardware stores, online marketplaces, or even salvage yards for discounted materials and used tools. Don’t be afraid to ask for advice from experienced builders or join online communities dedicated to teardrop camper construction. Remember, building a teardrop camper is all about creativity and personalization, so have fun with it!
Now that you have all the necessary materials and tools, it’s time to move on to the next step: designing and planning your teardrop camper.
Design and Plan Your Teardrop Camper
First, visualize and sketch out the design and layout of your compact and cozy camping trailer. When designing a teardrop camper, it’s important to stay up-to-date with the latest teardrop camper design trends. This will ensure that your camper is not only functional but also stylish. Consider incorporating modern features such as sleek lines, large windows, and a streamlined exterior. Additionally, think about the interior layout and how you can maximize space efficiency.
To help you get started, here is a table that outlines some popular teardrop camper design trends and essential safety features:
| Design Trends | Safety Features |
|---|---|
| Lightweight | LED exterior lighting |
| Aerodynamic shape | Fire extinguisher |
| Pop-up roof | Smoke and carbon monoxide detectors |
| Sliding galley | Emergency exit window |
These features will not only enhance the overall look of your camper but also prioritize safety during your camping adventures. Now that you have a clear vision of your teardrop camper design, you can move on to the next step of building the frame and walls. Let’s dive into the construction process and bring your dream camper to life.
Build the Frame and Walls
Once you’ve visualized your ideal design, it’s time to start constructing the sturdy frame and walls of your teardrop camper. Building techniques and choosing the right materials are crucial for ensuring a durable and reliable camper that will stand the test of time and the great outdoors.
When it comes to building the frame, you have a few options. Many builders prefer using steel or aluminum for their frames due to their strength and durability. However, if weight is a concern for you, you can also opt for a wooden frame. Just make sure to choose high-quality lumber and treat it properly to prevent rot and damage.
For the walls, you can choose between traditional wood paneling or lightweight alternatives like aluminum or fiberglass. Wood paneling provides a classic look and is relatively easy to work with, while aluminum and fiberglass offer better insulation and are resistant to moisture and pests.
In terms of construction techniques, there are various methods you can use, such as butt joint, lap joint, or tongue and groove. It’s essential to do thorough research and choose the technique that best suits your skills and preferences.
Once the frame and walls are complete, you can move on to the next step: installing the roof and flooring.
Install the Roof and Flooring
After constructing the frame and walls, it’s time to move on to the next step: installing the roof and flooring. The roof installation is a crucial part of building a teardrop camper, as it not only provides protection from the elements but also adds to the overall aesthetic appeal.
There are various options for teardrop camper roofs, including fiberglass, aluminum, or even a DIY approach using marine-grade plywood and waterproofing materials. Whichever option you choose, make sure to follow the manufacturer’s instructions and take all necessary precautions for a secure and watertight installation.
Next up is the flooring for your teardrop camper. This is an important aspect as it provides a solid foundation for the interior and needs to withstand the weight of all the amenities you plan to include. Common choices for teardrop camper flooring include plywood or vinyl flooring, both of which are durable and easy to clean.
Ensure that the flooring is cut to the correct size and securely attached to the frame to prevent any shifting or sagging.
With the roof and flooring in place, you’ve laid the groundwork for the interior and exterior features. Now it’s time to let your creativity shine as you build out the rest of your teardrop camper.
Build the Interior and Exterior Features
Now that the roof and flooring are in place, it’s time to focus on the interior and exterior features of our teardrop camper.
First, we will install cabinets and storage spaces to maximize the functionality and organization of our tiny living space.
Next, we will create a cozy sleeping area that ensures a good night’s sleep during our camping adventures.
Lastly, we will add kitchen and bathroom facilities to make our teardrop camper truly self-contained and convenient.
With these key features in place, our teardrop camper will provide us with the comforts of home while exploring the great outdoors.
Install Cabinets and Storage Spaces
First, you’ll need to grab your trusty toolbox and get to work installing the cabinets and storage spaces in your teardrop camper, making it feel like a cozy home on wheels.
Here are four key steps to maximize space and organize your essentials:
-
Measure and plan: Before installing cabinets, measure the available space and plan the layout accordingly. Consider the height, width, and depth of the cabinets to ensure they fit perfectly.
-
Choose the right materials: Opt for lightweight yet durable materials like plywood or MDF for the cabinets. Use screws or brackets to secure them to the camper’s frame, ensuring stability on the road.
-
Design smart storage solutions: Incorporate shelves, drawers, and hanging organizers to maximize storage capacity. Utilize vertical space and create compartments for different items to keep everything organized.
-
Add finishing touches: Install cabinet doors, handles, and locks for a polished look and secure storage. Consider adding hooks or racks on the interior walls for additional storage options.
With the cabinets and storage spaces in place, it’s time to create a comfortable sleeping area for a good night’s rest.
Create a Sleeping Area
To transform your tiny travel oasis into a cozy haven, it’s time to craft a dreamy sleeping area that will whisk you away to peaceful slumber. Creating a cozy atmosphere is essential, and maximizing space utilization is key. By carefully designing the sleeping area, you can create a comfortable and inviting space to rest after a long day of adventure. One way to maximize space is by incorporating a 3 column and 3 row table. In the first column, you can place a foldable bed frame that can be easily stored during the day. In the second column, a plush mattress will provide a comfortable sleep surface. And in the third column, you can add storage compartments for your belongings. By combining functionality and comfort, you can create the perfect sleeping area in your teardrop camper. As you drift off into a peaceful slumber, you’ll wake up refreshed and ready for the next day’s journey. Now, let’s move on to adding kitchen and bathroom facilities to complete your teardrop camper’s transformation.
Add Kitchen and Bathroom Facilities
To complete your cozy oasis, it’s time to bring in the essential elements of a kitchen and bathroom, so you can enjoy all the comforts of home while on your adventures. Designing layouts for these spaces is crucial to maximize functionality and make the most of the limited space available.
Consider using compact appliances that are specifically designed for small campers. A mini-fridge, a stove, and a small sink are must-haves for the kitchen area, while a portable toilet and a shower can be incorporated into the bathroom. Choosing appliances that are energy-efficient and lightweight will ensure that your teardrop camper remains practical and easy to tow.
With a well-thought-out kitchen and bathroom, you’ll be able to cook delicious meals and freshen up after a long day of exploring.
Now, let’s dive into the next section and learn how to paint and decorate your teardrop camper to make it truly your own.
Paint and Decorate Your Teardrop Camper
When it comes to painting and decorating my teardrop camper, I’m passionate about choosing a color scheme that reflects my personal style and makes a statement on the road. I love the idea of using bold and vibrant colors to create a unique and eye-catching look.
Additionally, I enjoy adding decals or graphics to personalize my camper and make it truly my own. Whether it’s a favorite quote, a nature-inspired design, or a logo of my favorite outdoor brand, these small touches can really make a big difference in the overall aesthetic of my teardrop camper.
Choose a Color Scheme
Once you’ve chosen a color scheme, you’ll be able to give your teardrop camper a unique and personalized look. Choosing a color scheme for your teardrop camper is an exciting and important decision. It sets the tone for the overall aesthetic and can greatly enhance your camping experience.
To decide on the perfect color combination, consider the style and theme you want to achieve. Bright and vibrant colors can create a fun and energetic atmosphere, while earthy tones can provide a more calming and natural feel. Take into account the surroundings where you’ll be camping as well, as colors that complement the environment can make your camper blend harmoniously with nature.
Once you’ve chosen your color scheme, you can then move on to personalizing your teardrop camper with decals or graphics, adding the finishing touches to make it truly unique.
Personalize with Decals or Graphics
Get ready to unleash your creativity and show off your unique style with decals or graphics that’ll make your teardrop camper truly one-of-a-kind! When it comes to personalizing your camper, you’ve got two options: decals or graphics.
Decals are adhesive stickers that can easily be applied to the exterior of your camper. They come in a variety of designs, patterns, and colors, allowing you to choose the perfect one that suits your taste.
On the other hand, graphics are custom designs that are professionally applied to your camper using high-quality vinyl material. They offer a more polished and professional look, and you can even get them custom-made to reflect your personality and interests.
The benefits of personalization are endless – it adds a touch of personality, makes your camper stand out from the crowd, and creates a memorable experience for anyone who sees it.
So, let your imagination run wild and turn your teardrop camper into a work of art!
Next, we’ll dive into how to install electrical and plumbing systems.
Install Electrical and Plumbing Systems
When it comes to installing electrical and plumbing systems in my teardrop camper, I’m filled with excitement and determination.
First, I’ll wire the interior for electricity, ensuring that I have all the necessary outlets and lighting fixtures to make my camping experience comfortable and convenient.
Next, I’ll tackle the installation of plumbing for water and waste, providing me with the essential amenities for a fully functional camper.
With these key points in mind, I’m ready to dive into this project and create a teardrop camper that’s not only visually appealing but also equipped with all the necessary utilities for an unforgettable adventure.
Wire the Interior for Electricity
To wire the interior for electricity in your teardrop camper, it’s essential to ensure a smooth and efficient power supply throughout. Proper electrical wiring installation is crucial for a safe and functional camper experience. There are various power source options to consider, such as connecting to an external power source or utilizing a battery system.
To give you an idea of what the electrical system in a teardrop camper might look like, here’s a simple table:
| Component | Description | Function |
|---|---|---|
| Battery | Stores power | Provides DC electricity |
| Converter | Converts AC to DC | Charges the battery |
| Fuse Box | Protects electrical circuits | Prevents overloading |
By understanding the components and their functions, you can wire your camper accordingly. Now, let’s move on to the next step: installing plumbing for water and waste, ensuring a comfortable and convenient camping experience.
Install Plumbing for Water and Waste
Start by installing plumbing for water and waste to create a comfortable and convenient camping experience. One essential component to consider is installing a water heater, which’ll provide hot water for cooking, cleaning, and showering. Choose a compact and efficient water heater that’s suitable for your camper’s size and needs.
Additionally, set up a composting toilet, which is a great way to minimize waste and ensure environmental sustainability. These toilets use natural processes to break down waste, eliminating the need for water and chemicals. Look for a compact and easy-to-use composting toilet that fits well in your camper.
With proper plumbing in place, you can enjoy the convenience of running water and a functional waste disposal system during your camping adventures.
Now, let’s move on to adding the finishing touches to complete your teardrop camper.
Add Finishing Touches
One way to add the finishing touches to your teardrop camper is by personalizing the interior with cozy furnishings and decorative accents. These details can make your camper feel like a home away from home.
When it comes to lighting options, there are plenty of choices to consider. LED lights are a popular option because they’re energy-efficient and provide bright, long-lasting illumination. You can also install dimmable lights to create the perfect ambiance for different occasions. Additionally, adding string lights or fairy lights can give your camper a whimsical and cozy feel.
Another important aspect of the finishing touches is exterior storage solutions. Having enough storage space is essential for a comfortable camping experience. You can install roof racks or cargo boxes to store larger items such as bikes, kayaks, or camping gear. Adding a cargo carrier to the back of your camper can also provide extra storage space for items like coolers or folding chairs.
Now that the interior is cozy and the exterior has ample storage, it’s time to test and inspect your teardrop camper to make sure everything’s in working order.
Test and Inspect Your Teardrop Camper
Make sure you thoroughly check and evaluate every aspect of your teardrop camper before embarking on your adventure, ensuring a worry-free and exhilarating journey. Testing and inspecting your teardrop camper is crucial to guarantee its safety and functionality.
Following a set of test procedures and an inspection checklist will help you identify any potential issues and address them before hitting the road. Start by testing the electrical system. Ensure that all the lights, outlets, and appliances are working properly. Check the battery voltage and make sure it’s fully charged. Test the plumbing system by running water through all the faucets and checking for any leaks.
Inspect the tires for any signs of wear and tear and ensure they’re properly inflated. Check the brakes and make sure they’re functioning correctly.
Next, thoroughly inspect the interior and exterior of your teardrop camper. Look for any signs of damage, such as cracks, dents, or loose fittings. Check all the doors, windows, and locks to ensure they’re secure. Inspect the roof for any leaks or damage.
Once you’ve completed the test procedures and inspection checklist, you can confidently hit the road and enjoy your DIY teardrop camper. It’s time to embark on your adventure and create unforgettable memories.
Hit the Road and Enjoy Your DIY Teardrop Camper
Get ready to hit the road and experience the thrill of your DIY teardrop camper like never before – it’s a journey filled with endless adventure and boundless joy!
Maintaining your teardrop camper is essential to ensure a smooth and enjoyable trip. Here are some tips for traveling in a teardrop camper:
-
Regular maintenance: Before hitting the road, make sure to check the tires, brakes, lights, and electrical systems. Keep a toolkit handy for any minor repairs that may be needed along the way.
-
Pack smart: Since space is limited in a teardrop camper, it’s important to pack efficiently. Prioritize the essentials and avoid overpacking. Utilize storage compartments and organizers to maximize the available space.
-
Plan your route: Research and plan your route in advance to avoid any unexpected obstacles or challenges. Look for campgrounds or RV parks that accommodate teardrop campers, as they often have specific size restrictions.
Traveling in a teardrop camper allows you to immerse yourself in nature and create lifelong memories. Embrace the freedom of the open road and explore new destinations at your own pace. Whether it’s a weekend getaway or a cross-country adventure, your DIY teardrop camper will be your cozy home on wheels, providing comfort and convenience throughout your journey. So, buckle up, embrace the spirit of adventure, and get ready to embark on an unforgettable road trip with your beloved teardrop camper!
Frequently Asked Questions
How long does it typically take to build a teardrop camper from start to finish?
Building a teardrop camper is an exciting and rewarding project. The building timeline can vary depending on your experience and the complexity of the design, but on average, it takes around 2-3 months to complete.
It’s important to have basic woodworking skills, as well as knowledge of electrical and plumbing systems. However, don’t let that deter you! With dedication and a passion for DIY projects, anyone can learn these necessary skills and create their own teardrop camper.
What is the average cost of building a teardrop camper?
The average cost of building a teardrop camper can vary depending on factors such as materials, customization, and location.
On average, it can cost anywhere from $3,000 to $10,000 to build a teardrop camper. The construction timeline also varies, but with careful planning and dedication, it can take around 200-300 hours to complete.
Building a teardrop camper is not only a cost-effective option, but it’s also a rewarding and fulfilling project that allows for personalization and adventure.
Are there any specific safety regulations or guidelines to follow when building a teardrop camper?
When building a teardrop camper, it’s essential to prioritize safety by following specific regulations and guidelines. Safety regulations ensure that your camper is structurally sound and secure. It’s crucial to avoid common mistakes, such as inadequate insulation or improper wiring, which can lead to accidents or injuries. By adhering to safety regulations and avoiding common pitfalls, you can create a teardrop camper that provides a safe and enjoyable camping experience for you and your loved ones.
Can I customize the size and layout of my teardrop camper?
Yes, you can absolutely customize the size and layout of your teardrop camper! The customization options are endless, allowing you to design the camper of your dreams. From choosing the perfect dimensions to creating a layout that suits your needs, the design flexibility of teardrop campers is truly remarkable. Whether you prefer a cozy and compact space or a more spacious layout, you have the freedom to create a teardrop camper that’s uniquely yours.
Are there any recommended resources or websites for finding teardrop camper plans or design ideas?
Oh, boy, do I have a surprise for you! If you’re looking for teardrop camper plans or design ideas, you’re in for a treat.
There are some fantastic resources out there that showcase the latest teardrop camper design trends. From sleek and modern to cozy and rustic, you’ll find it all.
And let’s not forget about the popular teardrop camper modifications that can make your little home on wheels even more functional and stylish.
Get ready to be inspired!
Can the Process of Making a Camper Van Be Applied to Making a Teardrop Camper?
Yes, the process of making a camper van can be applied to making a teardrop camper. Understanding “how to build camper van” can provide valuable insights into construction methods, layout design, and essential features – all of which can be adapted and incorporated into the production of a teardrop camper.
Conclusion
Well, there you have it, folks! You now possess the incredible power to create your very own teardrop camper! Get ready to embark on the ultimate adventure with this DIY masterpiece.
With just a few materials and tools, a dash of creativity, and a sprinkle of determination, you can build the camper of your dreams. From the sturdy frame to the luxurious interior, this project is sure to ignite your passion for craftsmanship.
So, what are you waiting for? Let’s hit the road and experience the thrill of your personalized teardrop camper!

